engine Oldsmobile Achieva 1995 s Repair Manual
[x] Cancel search | Manufacturer: OLDSMOBILE, Model Year: 1995, Model line: Achieva, Model: Oldsmobile Achieva 1995Pages: 340, PDF Size: 16.99 MB
Page 230 of 340
Check the fluid level only when your engine is off, the
vehicle
is parked on a level place and the transaxle is
cool enough for you to rest your fingers on the transaxle
case.
Then, follow these steps:
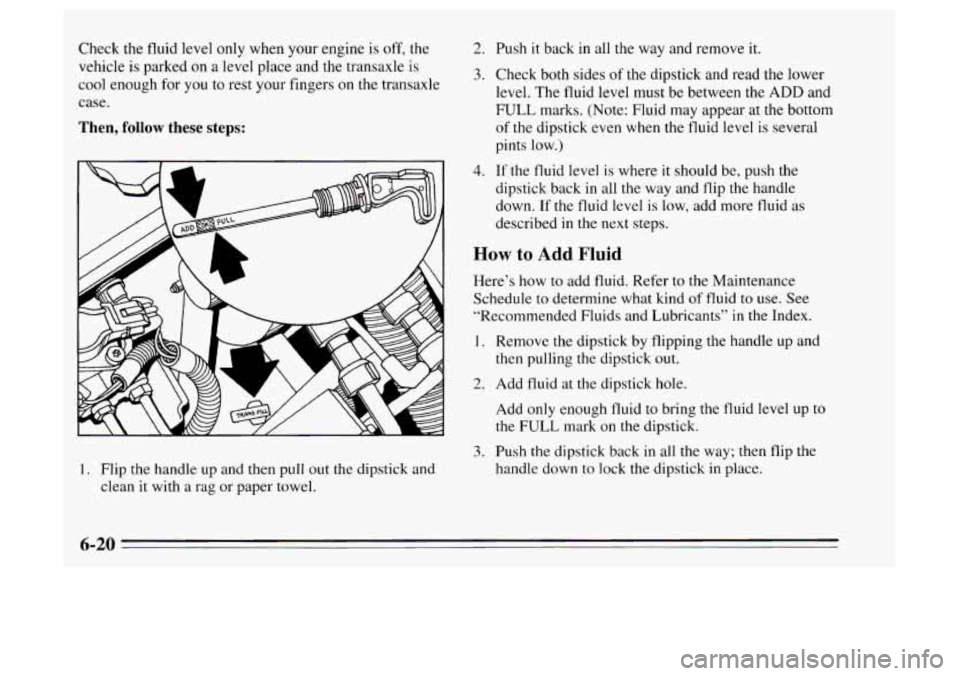
1. Flip the handle up and then pull out the dipstick and
clean
it with a rag or paper towel.
2. Push it back in all the way and remove it.
3. Check both sides of the dipstick and read the lower
level. The fluid level must be between the ADD and
FULL marks. (Note: Fluid may appear at the bottom
of the dipstick even when the fluid level is several
pints low.)
4. If the fluid level is where it should be, push the
dipstick back in all the way and flip the handle
down.
If the fluid level is low, add more fluid as
described
in the next steps.
How to Add Fluid
Here’s how to add fluid. Refer to the Maintenance
Schedule
to determine what kind of fluid to use. See
“Recommended Fluids and Lubricants’’
in the Index.
1. Remove the dipstick by flipping the handle up and
then pulling the dipstick out.
2. Add fluid at the dipstick hole.
Add only enough fluid
to bring the fluid level up to
the FULL mark
on the dipstick.
3. Push the dipstick back in all the way; then flip the
handle down to lock the dipstick
in place.
Page 231 of 340
Hydraulic Clutch
The hydraulic clutch linkage in your vehicle is
self-adjusting. The clutch master cylinder reservoir
is
filled with hydraulic clutch fluid.
It isn’t a good idea to “top off’ your clutch fluid. Adding
fluid won’t correct
a leak.
A fluid loss in this system could indicate a problem.
Have the system inspected and repaired.
When to Check and What to Use
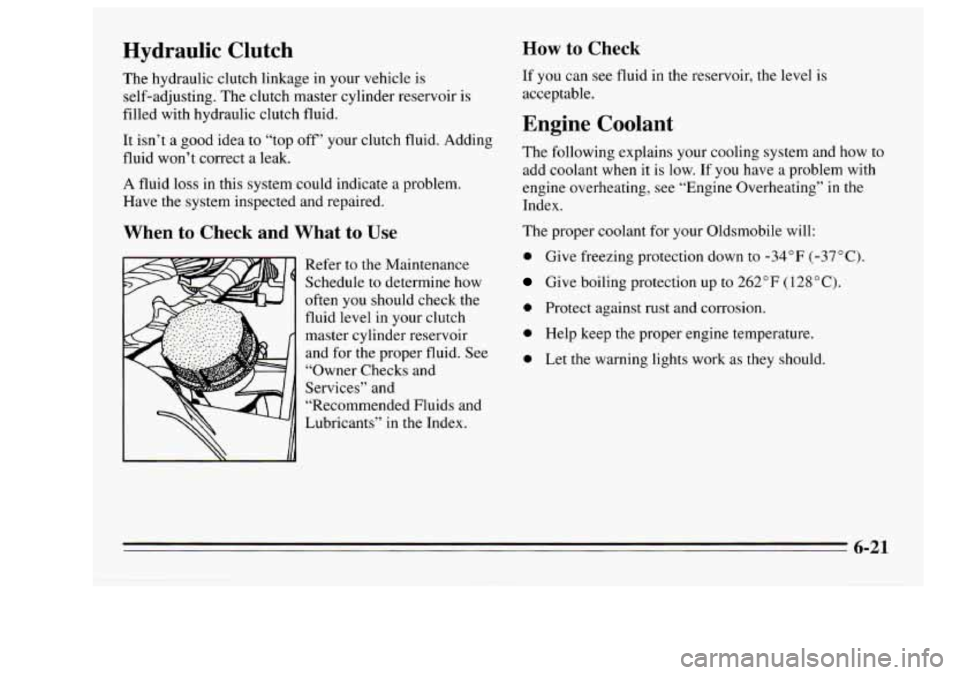
Refer to the Maintenance
Schedule to determine how
often you should check the
fluid level in your clutch
master cylinder reservoir
and for the proper fluid. See
“Owner Checks and
Services” and
“Recommended Fluids and
Lubricants” in the Index.
How to Check
If you can see fluid in the reservoir, the level is
acceptable.
Engine Coolant
The following explains your cooling system and how to
add coolant when it is low.
If you have a problem with
engine overheating, see “Engine Overheating”
in the
Index.
The proper coolant for your Oldsmobile will:
0 Give freezing protection down to -34°F (-37°C).
Give boiling protection up to 262°F ( 128 O C).
0 Protect against rust and corrosion.
0 Help keep the proper engine temperature.
0 Let the warning lights work as they should.
6-21
Page 232 of 340

What to Use
Use a mixture of one-half clearz water (preferably
distilled) and one-half antifreeze that meets
“GM
Specification 182SM,” which won’t damage aluminum
parts. You can also use a recycled coolant conforming to
GM Specification 1825M with a complete coolant flush
and refill. Use
GM Engine Coolant Supplement (sealer)
with any complete coolant flush and refill.
If you use
this mixture, you don’t need to add anything else.
I
I NOTICE:
If you use an improper coolant mix, your engine
could overheat and be badly damaged. The
repair cast wouldn’t be covered by your
warranty.
Too much water in the mix can freeze
and crack the engine, radiator, heater core and
other parts.
6-22
Page 233 of 340
To Check Coolant
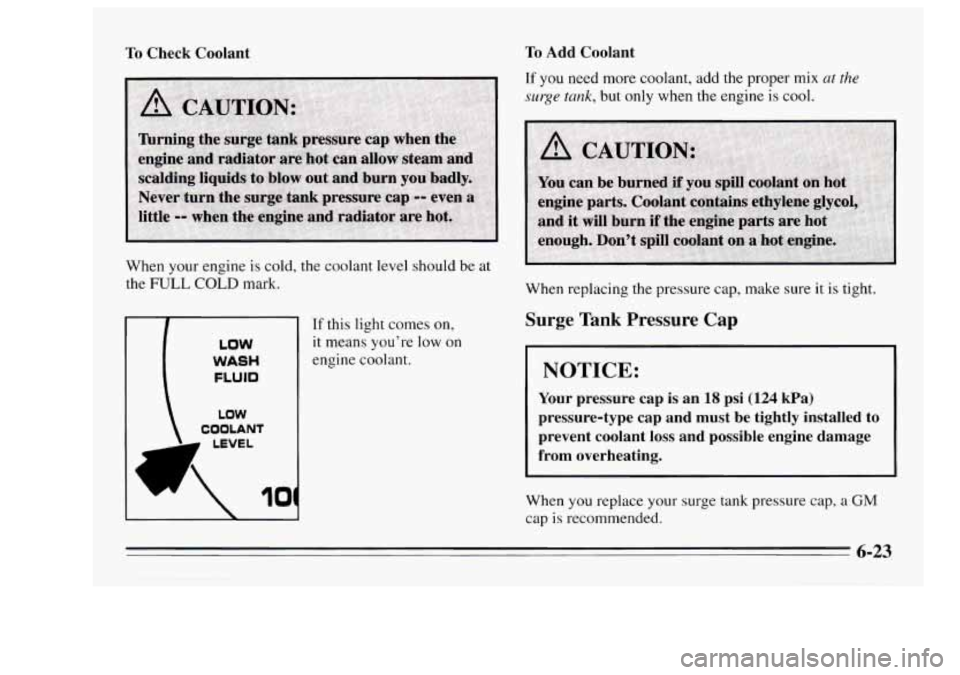
When your engine is cold, the coolant level should be at
the FULL COLD mark,
LOW
COOLANT
LOW
WASH
FLUID
LEVEL
10
If this light comes on,
it means you’re low on
engine coolant.
To Add Coolant
If you need more coolant, add the proper mix at the
surge tank, but only when the engine is cool.
When replacing the pressure cap, make sure it is tight.
Surge Tank Pressure Cap
NOTICE:
Your pressure cap is an 18 psi (124 kPa)
pressure-type cap and must be tightly installed to
prevent coolant loss and possible engine damage
from overheating.
%%en you replace your surge tank pressure cap, a GM
cap is recommended.
6-23
Page 234 of 340
Thermostat
Engine coolant temperature is controlled by a thermostat
in the engine coolant system. The thermostat stops the
flow
of coolant through the radiator until the coolant
reaches
a preset temperature.
When you replace your thermostat, an AC@ thermostat
is recommended.
Power Steering Fluid
p .w ii
How To Check Power Steering Fluid
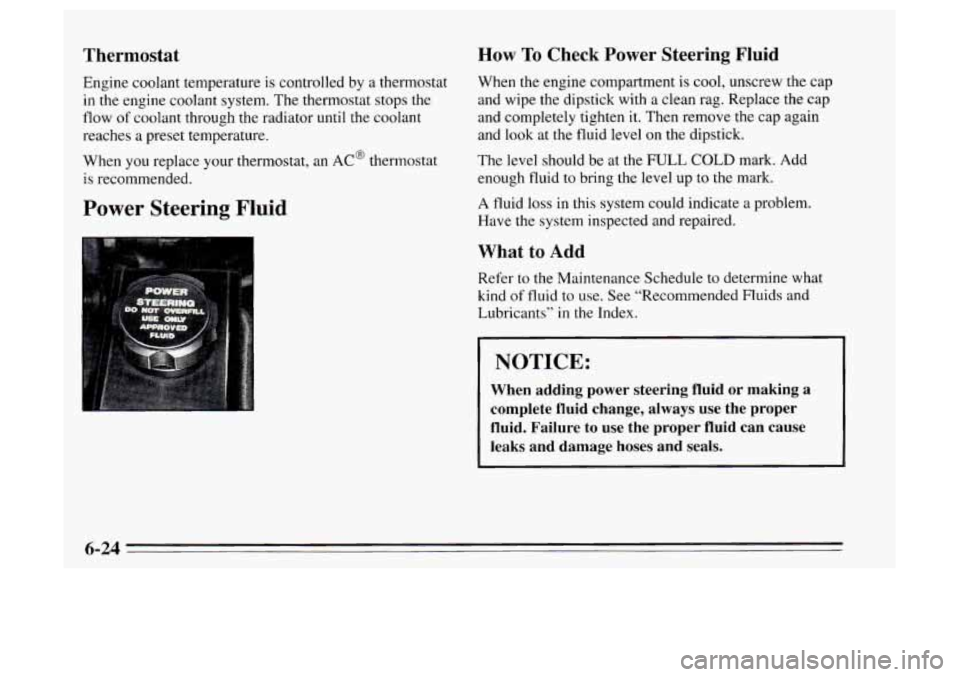
When the engine compartment is cool, unscrew the cap
and wipe the dipstick with
a clean rag. Replace the cap
and completely tighten it. Then remove the cap again
and look at the fluid level on the dipstick.
The level should be at the FULL COLD mark. Add
enough fluid to bring the level up to the mark.
A fluid loss in this system could indicate a problem.
Have the system inspected and repaired.
What to Add
Refer to the Maintenance Schedule to determine what
kind
of fluid to use. See “Recommended Fluids and
Lubricants”
in the Index.
I NOTICE:
When adding power steering fluid or making a
complete fluid change, always use the proper
fluid. Failure to use the proper fluid can cause
leaks and damage hoses and seals.
6-24
Page 237 of 340
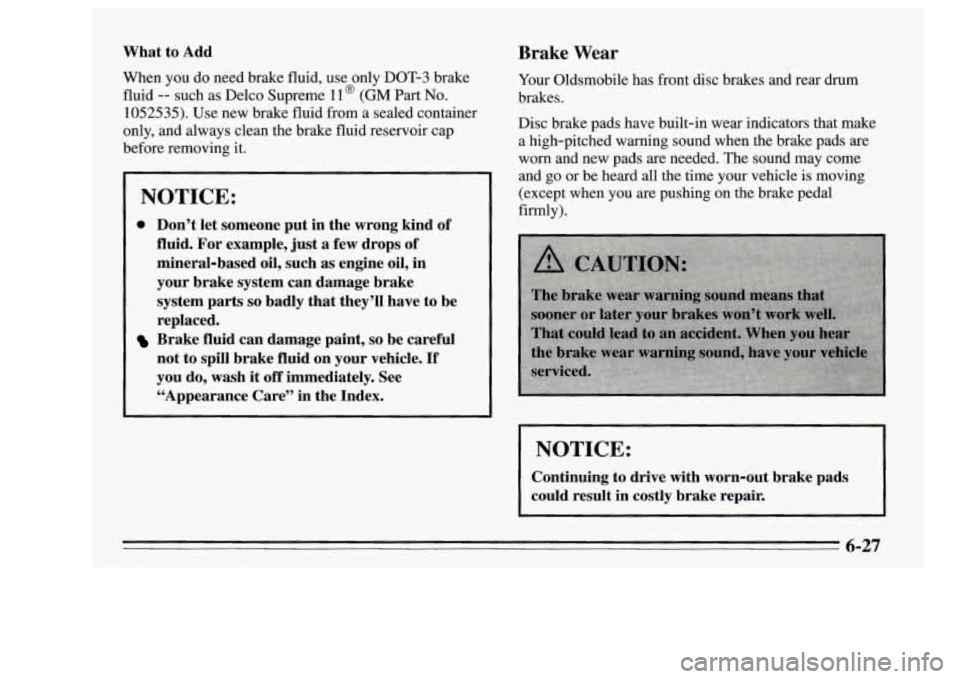
What to Add
When you do need brake fluid, use only DOT-3 brake
fluid
-- such as Delco Supreme 11 @ (GM Part No.
1052535). Use new brake fluid from a sealed container
only, and always clean the brake fluid reservoir cap
before removing it.
Brake Wear
Your Oldsmobile has front disc brakes and rear drum
brakes.
Disc brake pads have built-in wear indicators that make a high-pitched warning sound when the brake pads
are
worn and new pads are needed. The sound may come
and
go or be heard all the time your vehicle is moving
(except when you are pushing on the brake pedal
firmly). NOTICE:
0 Don’t let someone put in the wrong kind of
fluid. For example, just a few drops of
mineral-based oil, such as engine oil, in
your brake system can damage brake
system parts
so badly that they’ll have to be
replaced.
Brake fluid can damage paint, so be careful
not to spill brake fluid on your vehicle.
If
you do, wash it off immediately. See
“Appearance Care” in the Index.
I NOTICE:
Continuing to drive with worn-out brake pads
could result in costly brake repair.
6-27
Page 260 of 340

Vehicle Identification Number (VIN)
b!l SAMPLE4UXSM072675
ENGINE / 1&5 IfSElBLY
CODE MODEL YEAR
This is the legal identifier for your Oldsmobile. It
appears on a plate in the front corner
of the instrument
panel, on the driver’s side.
You can see it if you look
through
the windshield from outside your vehicle. The
VIN also appears on the Vehicle Certification and
Service Parts labels and the certificates of title and
registration.
Engine Identification
The eighth character in your VIN is the engine code.
This code will help you identify your engine,
specifications, and replacement parts.
Service Parts Identification Label
You’ll find this label on the bottom of your spare tire
cover. It’s very helpful if you ever need to order parts.
On this label is:
your VIN,
0 the model designation,
paint information, and
0 a list of all production options and special equipment.
Be sure that this label is not removed from the vehicle.
Add-on Electrical Equipment
1 NOTICE:
Don’t add anything electrical to your Oldsmobile
unless you check with your retailer
fmt. Some
electrical equipment can damage your vehicle and
the damage wouldn’t be covered by your warranty.
Some add-on electrical equipment can keep other
components from working
as they should.
Your vehicle has an air bag system. Before attempting to
add anything electrical
to your Oldsmobile, see “Servicing
Your Air Bag-Equipped Oldsmobile” in the Index.
6-50
-
Page 262 of 340
-L- El
F/P IN.1 e,
iNST LPS GAUGES
I I
H3LP CIRCUIT BREAKER
~ CIRCUIT PWR WDO
BREAKER
PWA ACC
BREAKEI? - CIRCUIT
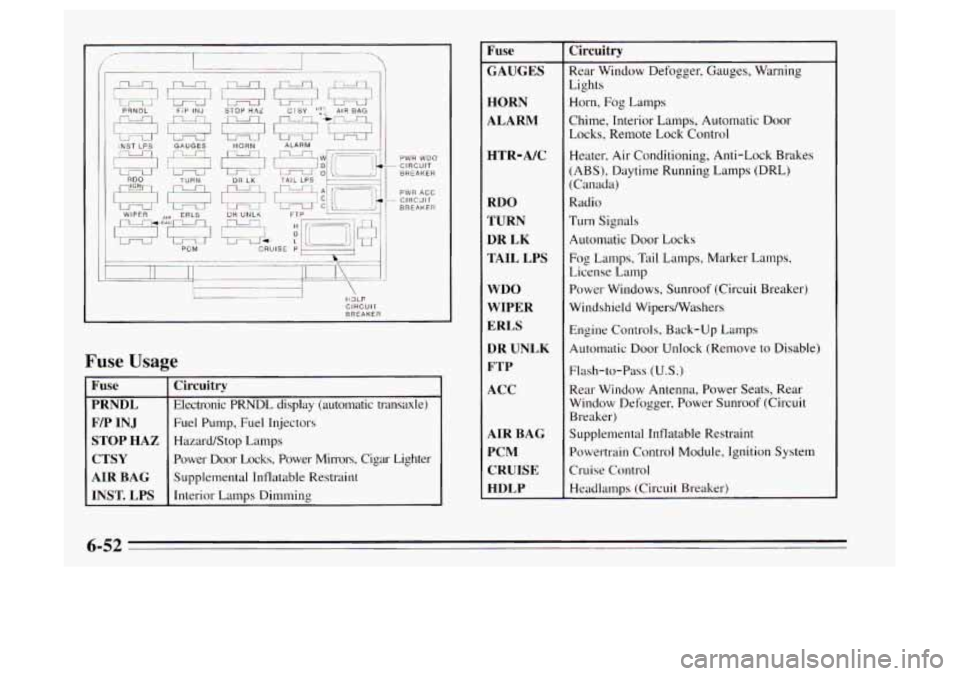
Fuse Usage
PRNDL
F/P INJ
STOP HAZ
AIR BAG
INST. LPS Circuitry
Electronic PRNDL display (automatic transaxle)
Fuel
Pump, Fuel Injectors
Hazard/Stop Lamps
Power Door Locks, Power Mirrors, Cigar Lighter
Supplemental Inflatable Restraint
Interior Lamps Dimming
Fuse
GAUGES
HORN
ALARM
HTR-A/C
RDO
TURN DR
LK
TAIL LPS
WDO
WIPER
ERLS DR UNLK
FTP
ACC
AIR BAG PCM CRUISE
HDLP Circuitry
Rear Window Defogger,
Gauges, Warning
Lights
Horn, Fog Lamps
Chime, Interior Lamps, Automatic Door
Locks, Remote Lock Control
Heater, Air Conditioning, Anti-Lock Brakes
(ABS), Daytime Running Lamps (DRL)
(Canada)
Radio
Turn Signals
Automatic Door Locks
Fog Lamps, Tail Lamps, Marker Lamps,
License Lamp
Power Windows, Sunroof (Circuit Breaker)
Windshield Wipersmashers
Engine Controls, Back-up Lamps
Automatic Door Unlock (Remove
to Disable)
Flash-to-Pass
(U.S.)
Rear Window Antenna, Power Seats, Rear
Window Defogger, Power Sunroof (Circuit
Breaker)
Supplemental Inflatable Restraint
Powertrain Control Module, Ignition System
Cruise Control
Headlamps (Circuit Breaker)
6-52
Page 264 of 340
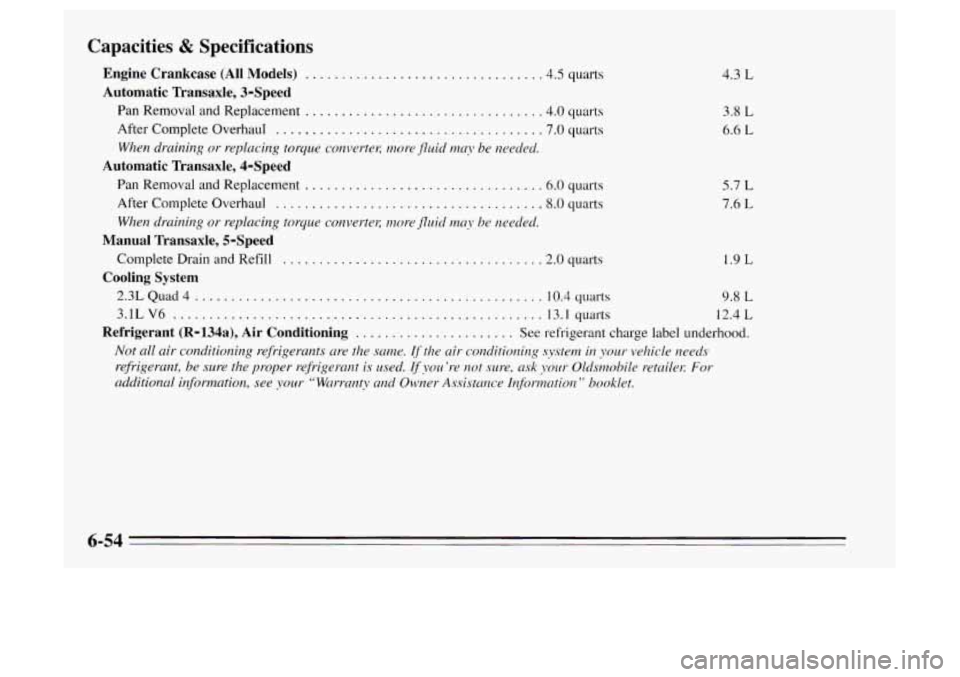
Capacities & Specifications
Engine Crankcase (All Models) ................................ .4.5 quarts
Pan Removal and Replacement
................................ .4.0 quarts
After Complete Overhaul
..................................... 7.0 quarts
Automatic Transaxle, 3-Speed
When draining or replacing torque con.wrteu; Inore jluid may be merlecl.
Automatic Transaxle, 4-Speed
Pan Removal and Replacement ................................. 6.0 quarts
After Complete Overhaul
.................................... .8.0 quarts
When draining or replacing torque convertel; more JZuid ma): he needed.
ManuaI Transaxle, 5-Speed
Cooling System
Complete Drain and Refill .................................... 2.0 quarts
2.3L Quad 4 ................................................ 10.4 quarts 9.8 L
3.1L V6 ................................................... 13.1 quarts 12.4 L
Not all air conditioning refrigerants are the SLIMZ~. If the air conditioning syrtetn in your vehicle needs
refrigerant, be sure the proper refrigerant is ~lsed. If you ’re not sure, ask yo~u Olchnohile retailet: For
additional information, see your “Wnrranty and Owner Assistance Information ’’ hooklet.
Refrigerant (R-l34a), Air Conditioning ...................... See refrigerant charge label underhood. 4.3
L
3.8 L
6.6 L
5.7 L
7.6 L
1.9 L
6-54
Page 267 of 340
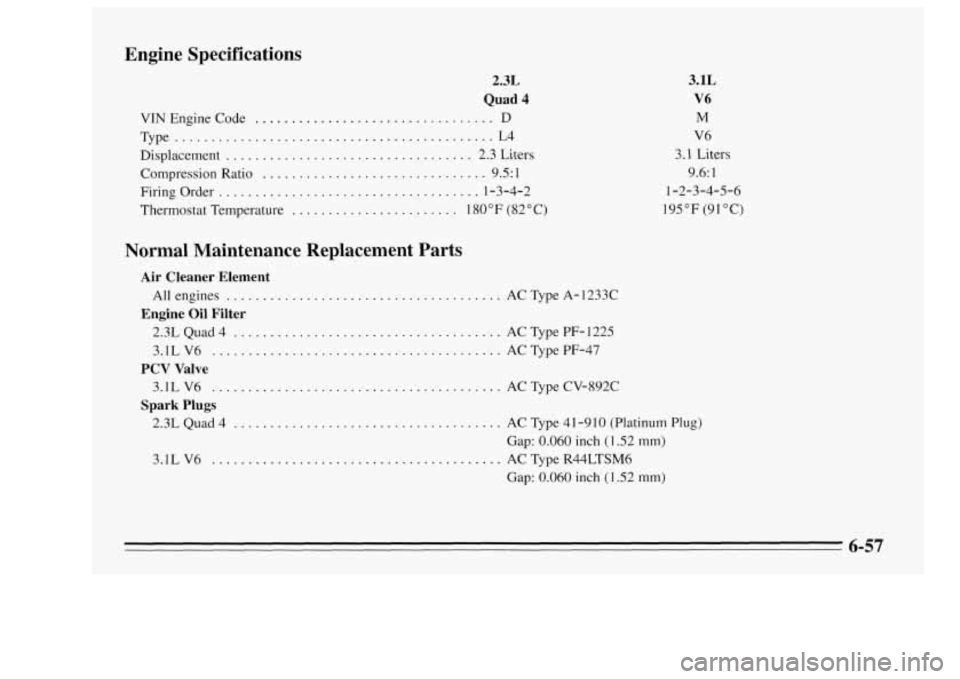
Engine Specifications
2.3L
Quad 4
VINEngineCode ................................. D
Type ............................................ L4
Displacement
.................................. 2.3 Liters
Compression Ratio
............................... 9.5: 1
Firingorder
.................................... 1-3-4-2
Thermostat Temperature
....................... 180°F (82°C)
3.1L
V6
M
V6
3.1 Liters 9.6:
1
1-2-3-4-5-6
195
OF (91 "C)
Normal Maintenance Replacement Parts
Air Cleaner Element
Engine
Oil Filter
All engines ...................................... AC Type A- 1233C
2.3L Quad 4
..................................... AC Type PF- 1225
3.1LV6
........................................ ACTypePF-47
3.1L V6
........................................ AC Type CV-892C
2.3L Quad 4
..................................... AC Type 41 -9 10 (Platinum Plug)
3.1L V6 ........................ ........... AC Type R44LTSM6
PCV Valve
Spark
Plugs
Gap: 0.060 inch (1.52 mm)
Gap: 0.060 inch (1.52 mm)
6-57