lock Oldsmobile Aurora 1997 s Repair Manual
[x] Cancel search | Manufacturer: OLDSMOBILE, Model Year: 1997, Model line: Aurora, Model: Oldsmobile Aurora 1997Pages: 404, PDF Size: 20.75 MB
Page 191 of 404
Loss of Control
Let’s review what driving experts say about what
happens when the three control systems (brakes, steering
and acceleration) don’t have enough friction where the
tires meet the road to do what the driver has asked.
In any emergency, don’t give up. Keep trying
to
steer and constantly seek an escape route or area of
less danger.
Skidding
In a skid, a driver can lose control of the vehicle.
Defensive drivers avoid most skids by taking reasonable
care suited to existing conditions, and by not
“overdriving” those conditions. But skids are
always possible.
The
three types of skids correspond to your Aurora’s
three control systems. In the braking skid, your wheels
aren’t rolling. In
the steering or cornering skid, too
much speed or steering in a curve causes tires
to slip and
lose cornering force. And in the acceleration skid, too
much throttle causes the driving wheels to spin.
A cornering skid is best handled by easing your foot off
the accelerator pedal.
Remember: Any traction control system helps avoid
only the acceleration skid. If
your traction control system is off, then an
acceleration skid is also best handled by easing your
foot off the accelerator pedal.
If your vehicle starts to slide, ease your foot off the
accelerator pedal and quickly steer the way you want the
vehicle to go. If you start steering quickly enough, your
vehicle may straighten out. Always
be ready for a
second skid if it occurs.
Of course, traction is reduced when water, snow, Ice,
gravel or other material is on the road. For safety, you’ll
want
to slow down and adjust your driving to these
conditions. It is important to slow down on slippery
surfaces because stopping distance will be longer and
vehicle control more limited.
While driving on a surface with reduced traction, try
your best to avoid sudden steering, acceleration or
braking (including engine braking by shifting to a lower
gear).
Any sudden changes could cause the tires to slide.
You may not realize the surface is slippery until your
vehicle is skidding. Learn to recognize warning
clues
-- such as enough water, ice or packed snow on
the road to make a “mirrored surface’’
-- and slow down
when you have any doubt.
Remember: Any anti-lock brake system (ABS) helps
avoid only the braking skid.
4-15
Page 203 of 404

Driving on Snow or Ice
Most of the time, those places where your tires meet the
road probably have good traction.
However, if there is snow or ice between your tires and the
road, you can have a very slippery situation. You’ll have a
lot less traction or “grip” and will need to be very careful.
A
What’s the worst time for this? “Wet ice.” Very cold snow
or ice can be slick and hard
to drive on. But wet ice can be
even more trouble because it may offer the least traction of all.
You can get wet ice when
it’s about freezing
(32 OF; 0 “C) and freezing rain begins to fall. Try to avoid
driving on wet ice until salt and sand crews can get there.
Whatever the condition
-- smooth ice, packed, blowing
or loose snow
-- drive with caution.
Keep your traction control system on. It improves your
ability to accelerate when driving on a slippery road. Even
though your vehicle has a traction control system, you’ll
want to slow down and adjust your driving to the road
conditions. See “Traction Control System” in the Index.
Your anti-lock brakes improve your vehicle’s stability
when you make a hard stop on a slippery road. Even
though you have the anti-lock braking system, you’ll
want to begin stopping sooner than you would
on dry
pavement. See “Anti-Lock”
in the Index.
Allow greater following distance on any slippery road.
Watch for slippery spots. The road might be fine until
you hit a spot that’s covered with ice. On
an otherwise
clear road, ice patches may appear
in shaded areas
where the sun can’t reach: around clumps
of trees,
behind buildings or under bridges. Sometimes the
surface
of a curve or an overpass may remain icy when
the surrounding roads are clear.
If you see a patch of
ice ahead
of you, brake before you are on it. Try not to
brake while you’re actually on the ice, and avoid
sudden steering maneuvers.
Page 205 of 404
Snow can trap exhaust gases under your vehicle.
This can cause deadly CO (carbon monoxide) gas
to get inside. CO could overcome you and kill
you.
You can’t see it or smell it, so you might not
know it is in your vehicle. Clear away snow from
around the base of your vehicle, especially any
~ that is blocking your exhaust pipe. And check
around again from time to time to be sure snow
doesn’t collect there.
Open
a window just a little on the side of the
vehicle that’s away from the wind. This will help
keep
CO out. Run your
engine only as long as you must. This saves
fuel. When you run
the engine, make it go a little faster
than just idle. That is, push the accelerator slightly. This
uses less fuel for the heat that you get and it keeps the
battery charged. You will need a well-charged battery to
restart the vehicle, and possibly for signaling later on
with your headlamps. Let the heater run for awhile.
Then, shut the engine
off and close the window almost
all the way to preserve the heat. Start the engine again
and repeat this only when you feel really uncomfortable
from the cold. But do it as little as possible. Preserve the
fuel as long
as you can. To help keep warm, you can get
out of the vehicle and do some fairly vigorous exercises
every half hour or
so until help comes.
Page 212 of 404

Trailer Brakes
Does your trailer have its own brakes?
Be sure to read and follow the instructions for the trailer
brakes
so you’ll be able to install, adjust and maintain
them properly.
Because you have anti-lock brakes, do not try
to tap into
your vehicle’s brake system. If you do, both brake
systems won’t work well, or at all.
Driving with a Trailer
Towing a trailer requires a certain amount of experience.
Before setting out for the open road, you’ll want to get
to know your rig. Acquaint yourself with the feel of
handling and braking with the added weight of the
trailer. And always keep in mind that the vehicle you are
driving is now a good deal longer and not nearly as
responsive as your vehicle is by itself.
Before you start, check the trailer hitch and platform
(and attachments), safety chains, electrical connector,
lamps, tires and mirror adjustment. If the trailer has
electric brakes, start your vehicle and trailer moving and
then apply the trailer brake controller by hand
to be sure
the brakes are working. This lets
you check your
electrical connection at the same time. During your trip, check occasionally
to be sure that the
load is secure, and that the lamps and any trailer brakes
are still working.
Following Distance
Stay at least twice as far behind the vehicle ahead as you
would when driving your vehicle without a trailer. This
can help you avoid situations that require heavy braking
and sudden turns.
You’ll need more passing distance up ahead when
you’re towing a trailer. And, because you’re a good deal
longer, you’ll need to go much farther beyond the
passed vehicle before you can return to your lane.
Backing Up
Hold the bottom of the steenng wheel with one hand.
Then, to move the trailer to the left, just move that hand
to the left. To move the trailer to the right, move your
hand to the right. Always back up slowly and, if
possible, have someone guide you.
4-36
Page 226 of 404

A vehicle can fall from a car carrier if it isn’t
adequately secured. This can cause
a collision,
serious personal injury and vehicle damage. The
vehicle should be tightly secured with chains or
steel cables before it is transported.
Don’t use substitutes (ropes, leather straps,
canvas webbing, etc.) that can be cut by sharp
edges underneath the towed vehicle. Always use
T-hooks inserted in the T-hook slots. Never use
J-hooks. They will damage drivetrain and
suspension components. When
your vehicle
is being towed, have the ignition key
turned to
OFF. The steering wheel should be clamped in
a straight-ahead position, with a clamping device
designed for towing service. Do not use the vehicle’s
steering column lock for this. The transaxle should be in
NEUTRAL (N) and the parking brake released.
Don’t have your vehicle towed on the drive wheels, unless you must.
If the vehicle must be towed on the
drive wheels, be sure to follow the speed and distance
restrictions later in this section or your transaxle will be
damaged.
If these limitations must be exceeded, then the
drive wheels have
to be supported on a dolly.
5-10
Page 240 of 404
Ckanging a Flat Tire
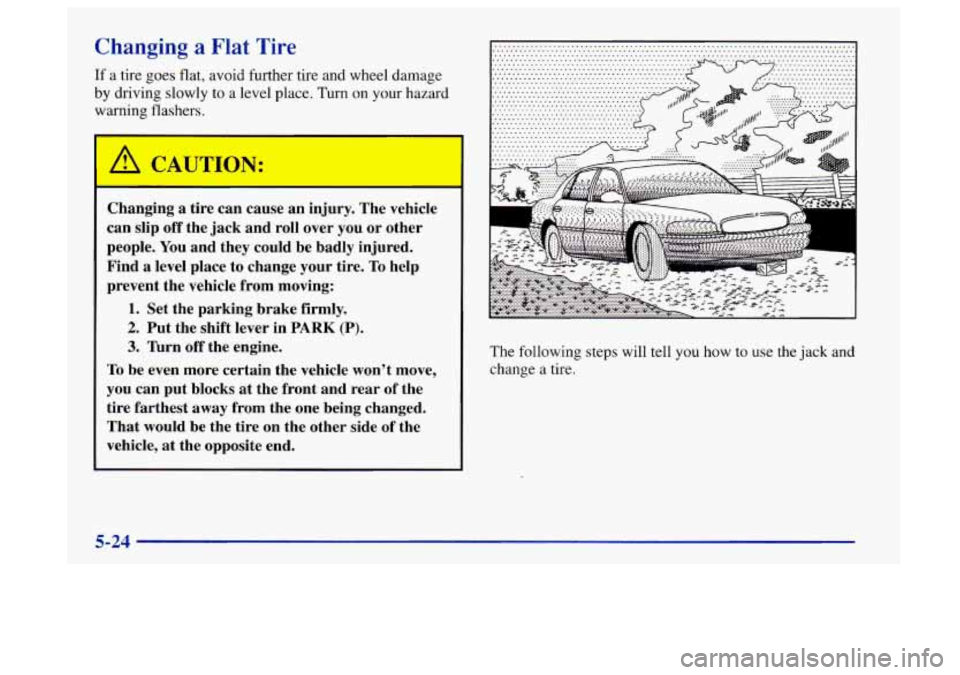
If a tire goes flat, avoid further tire and wheel damage
by driving slowly to a level place. Turn on your hazard
warning flashers.
Changing
a tire can cause an injury. The vehicle
can slip
off the jack and roll over you or other
people. You and they could be badly injured.
Find
a level place to change your tire. To help
prevent the vehicle from moving:
1. Set the parking brake firmly.
2. Put the shift lever in PARK (P).
3. Turn off the engine.
To be even more certain the vehicle won't move,
you can put blocks
at the front and rear of the
tire farthest
away from the one being changed.
That would be the tire on the other side of the
vehicle, at the opposite end.
........................................................................\
....... ........................................................................\
....... ........................................................................\
....... ................. ................. .......................................... ...........................................
The following steps will tell you how to use the jack and
change a tire.
5-24
Page 243 of 404
Removing the Flat Tire and Installing the Spare Tire
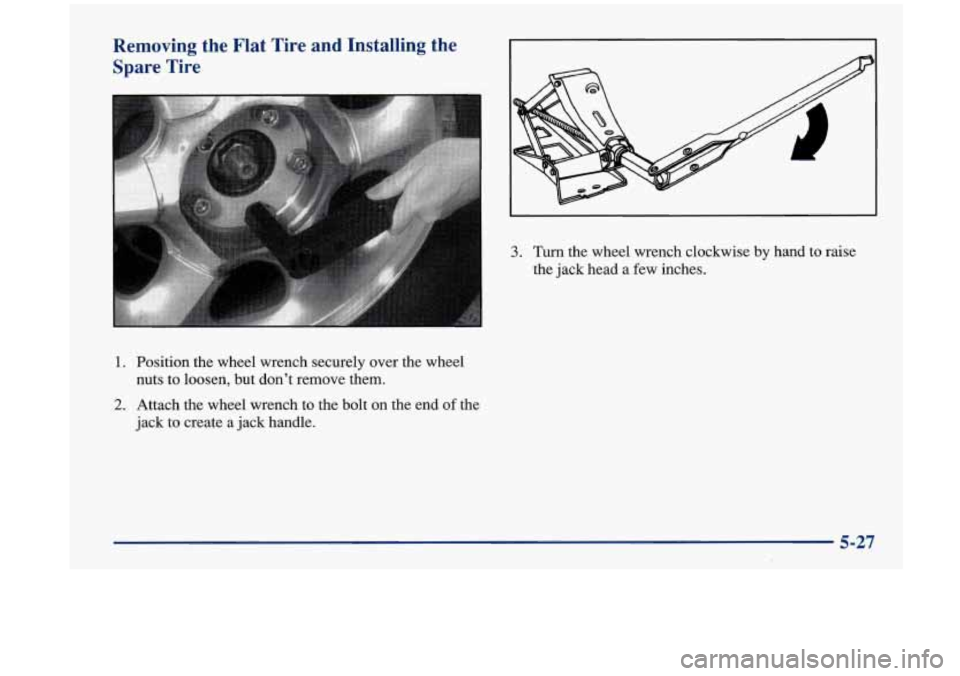
1. Position the wheel wrench securely over the wheel
nuts to loosen, but don’t remove them.
2. Attach the wheel wrench to the bolt on the end of the
jack to create a jack handle.
3. Turn the wheel wrench clockwise by hand to raise
the jack head a few inches.
5-27
Page 245 of 404
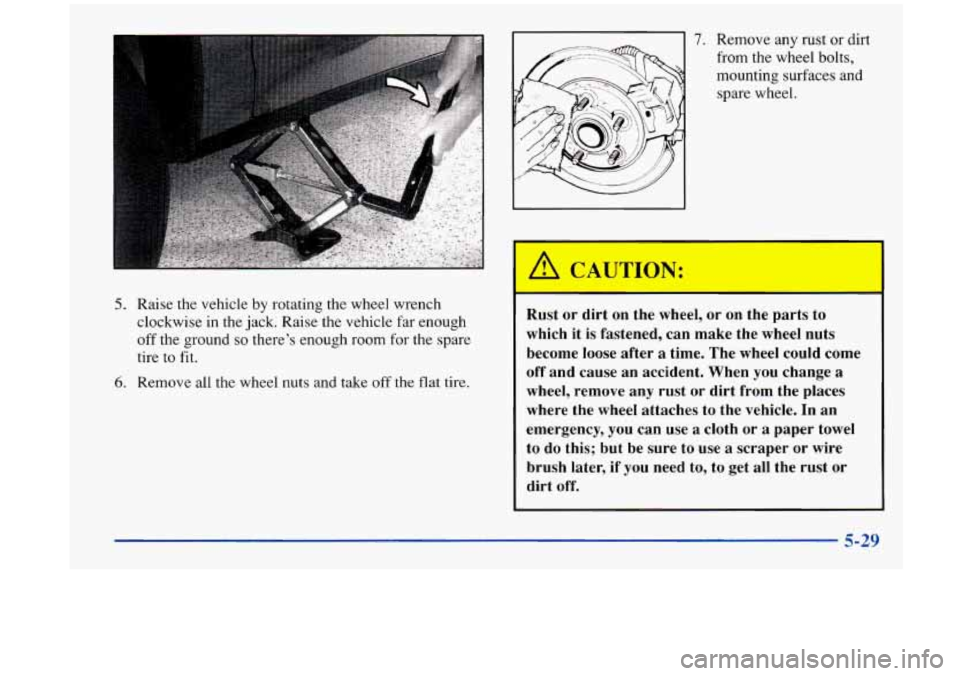
5. Raise the vehicle by rotating the wheel wrench
clockwise in the jack. Raise the vehicle far enough
off the ground so there’s enough room for the spare
tire
to fit.
6. Remove all the wheel nuts and take off the flat tire.
7. Remove any rust or dirt
from the wheel bolts,
mounting surfaces and
spare wheel.
Rust or dirt on the wheel, or on the parts to
which it is fastened, can make the wheel nuts
become loose after
a time. The wheel could come
off and cause an accident. When you change
a
wheel, remove any rust or dirt from the places
where the wheel attaches to the vehicle. In an
emergency,
you can use a cloth or a paper towel
to do this; but be sure to use
a scraper or wire
brush later, if you need to, to get all the rust or
dirt off.
5-29
Page 246 of 404

Never use oil or grease on studs or nuts. If you
do, the nuts might come loose. Your wheel could
fall
off, causing a serious accident.
~ ~~
8. Place the spare tire on the wheel mounting surface.
9. Replace the wheel nuts
with the rounded end
of
the nuts toward the
wheel. Tighten each nut
by hand until
the wheel
is held against the hub.
If a nut cannot be
tightened by hand, use
the wrench, and see
your retailer right away.
10. Lower the vehicle by rotating the wheel wrench counterclockwise on the jack. Lower the
jack completely.
5-30
Page 258 of 404
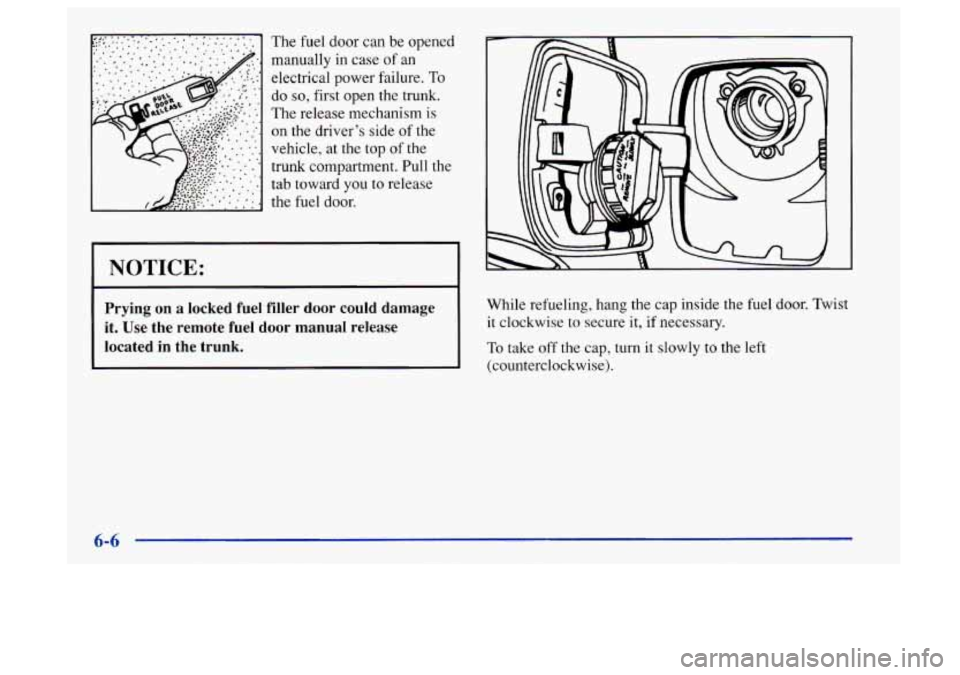
The fuel door can be opened
manually in case
of an
electrical power failure. To
do
so, first open the trunk.
The release mechanism
is
on the driver’s side of the
vehicle, at the top of
the
trunk compartment. Pull the
tab toward you to release
the fuel door.
I NOTICE:
Prying on a locked fuel filler door could damage
it. Use the remote fuel
door manual release
located in the trunk.
While refueling, hang the cap inside the fuel door. Twist
it clockwise to secure
it, if necessary.
To take
off the cap, turn it slowly to the left
(counterclockwise).
6-6