Maintenance schedule Oldsmobile Bravada 2003 Owner's Manuals
[x] Cancel search | Manufacturer: OLDSMOBILE, Model Year: 2003, Model line: Bravada, Model: Oldsmobile Bravada 2003Pages: 410, PDF Size: 20.1 MB
Page 158 of 410
Fuel Range Instant Fuel Economy
Press the fuel information button until RANGE appears
to display the remaining distance you can drive
without refueling. It’s based on fuel economy and the
fuel remaining in the tank. The display will show
LOW if
the fuel level is low.
The fuel economy data used to determine fuel range is
an average of recent driving conditions.
As your
driving conditions change, this data is gradually updated.
Fuel range cannot be reset.
Average Fuel Economy
Press the fuel information button until AVG appears in
the display. Average fuel economy is how many
miles per gallon your vehicle is getting based on current
and past driving conditions.
Press and hold the select button while AVG. ECON is
displayed to reset the average fuel economy. Average
fuel economy will then be calculated starting from
that point. If the average fuel economy is not reset, it
will be continually updated each time you drive. Press the fuel information button until INST appears
in
the display. Instant fuel economy is how many miles
per gallon your vehicle is at the particular moment
in time. The instant fuel economy cannot be reset.
GM Oil Life System
Press the fuel information button until ENGINE OIL LIFE
appears in the display. The GM Oil Life SystemTM
shows an estimate of the oil’s remaining useful life. It
will show
100% when the system is reset after an
oil change. It will alert you to change your oil on a
schedule consistent with your driving conditions.
Always reset the engine oil life after an
oil change. To
reset the Oil Life System press and hold the select
button while ENGINE
OIL LIFE is displayed.
The DIC does not replace the need to maintain your
vehicle as recommended in the Maintenance Schedule
in this manual. Also, the oil change reminder will not
detect dusty conditions or engine malfunctions that may
affect the oil. Also, the oil change reminder does not
measure how much oil you have in your engine.
So, be
sure to check your oil level often. See
Engine Oil on
page 5-13.
3-45
Page 231 of 410
Driving in Water
Heavy rain can mean flash flooding, and flood waters
demand extreme caution.
Find out how deep the water is before you drive through
it.
If it’s deep enough to cover your wheel hubs, axles
or exhaust pipe, don’t try
it - you probably won’t
get through. Also, water that deep can damage your
axle and other vehicle parts.
If the water isn’t too deep, drive slowly through it. At
faster speeds, water splashes on your ignition system
and your vehicle can stall. Stalling can also occur
if you
get your tailpipe under water. And, as long as your
tailpipe
is under water, you’ll never be able to start your
engine. When you go through water, remember that
when your brakes get wet, it may take you longer
to stop.
Driving through rushing water can be
dangerous. Deep water can sweep your vehicle
downstream and you and your passengers
CAUTION: (Continued)
1
coula arowr r it’s y snallo‘ Mater, can
still wash away the ground from under your
tires, and you could lose traction and roll the
vehicle over. Don’t drive through rushing
water.
See Driving in Rain and on Wet Roads on page 4-28 for
more information on driving through water.
After Off-Road Driving
Remove any brush or debris that has collected on the
underbody, chassis or under the hood. These
accumulations can be a fire hazard.
After operation in mud or sand, have the brake linings
cleaned and checked. Theses substances can cause
glazing and uneven braking. Check the body structure,
steering, suspension, wheels, tires and exhaust
system for damage.
Also, check the fuel lines and
cooling system for any leakage.
Your vehicle will require more frequent service due
to
off-road use. Refer to the Maintenance Schedule
for additional information.
4-26
Page 250 of 410
Towing a Trailer
If you don’t use the correct equipment and
drive properly, you can lose control when you
pull
a trailer. For example, if the trailer is too
heavy, the brakes may not work well
-- or even
at all. You and your passengers could be
seriously injured. Pull a trailer only if you have
followed all the steps in this section. Ask your
dealer for advice and information about towing
a trailer with your vehicle.
Notice: Pulling a trailer improperly can damage
your vehicle and result
in costly repairs not covered
by your warranty.
To pull a trailer correctly, follow
the advice in
this part, and see your dealer for
important information about towing a trailer with
your vehicle. Additional rear axle maintenance
is required for a vehicle used to tow a trailer. See
“Scheduled Maintenance Services’’
in the Index.
To identify the trailering capacity of your vehicle,
you should read the information in “Weight of the Trailer’’
that appears later in this section.
Trailering is different than just driving your vehicle by
itself. Trailering means changes in handling, durability
and fuel economy. Successful, safe trailering takes
correct equipment, and
it has to be used properly.
That’s the reason for this part. In
it are many time-testea,
important trailering
tips and safety rules. Many of
these are important for your safety and that of your
passengers.
So please read this section carefully before
you pull a trailer.
4-45
Page 257 of 410
Par1 . on Hills
You really should not park your vehicle, with a
trailer attached,
on a hill. If something goes
wrong, your
rig could start to move. People
can be injured, and both your vehicle and the
trailer can be damaged.
When You Are Ready to Leave After
Parking on a
Hill
1. Apply your regular brakes and hold the pedal down
while you:
But
if you ever have to park your rig on a hill, here’s
how to do it:
1. Apply your regular brakes, but don’t shift into
PARK (P) yet. When parking uphill, turn your wheels
away from the curb. When parking downhill, turn
your wheels into the curb.
2. Have someone place chocks under the trailer
wheels.
3. When the wheel chocks are in place, release the
4. Reapply the regular brakes. Then apply your
regular brakes until
the chocks absorb the load.
parking brake, and then shift into PARK
(P).
5. Release the regular brakes.
start your engine,
shift into a gear, and
release the parking brake.
2. Let up on the brake pedal.
3. Drive slowly until the trailer is clear of the chocks.
4. Stop and have someone pick up and store the
chocks.
Maintenance When Trailer Towing
Your vehicle will need service more often when you’re
pulling a trailer. See the Maintenance Schedule for more
on this. Things that are especially important in trailer
operation are automatic transmission fluid (don’t overfill),
engine oil, axle lubricant, belt, cooling system and
brake system. Each
of these is covered in this manual,
and the Index will help you find them quickly.
If
you’re trailering, it’s a good idea to review these sections
before you start your trip.
Check periodically
to see that all hitch nuts and bolts
are tight.
4-52
Page 278 of 410
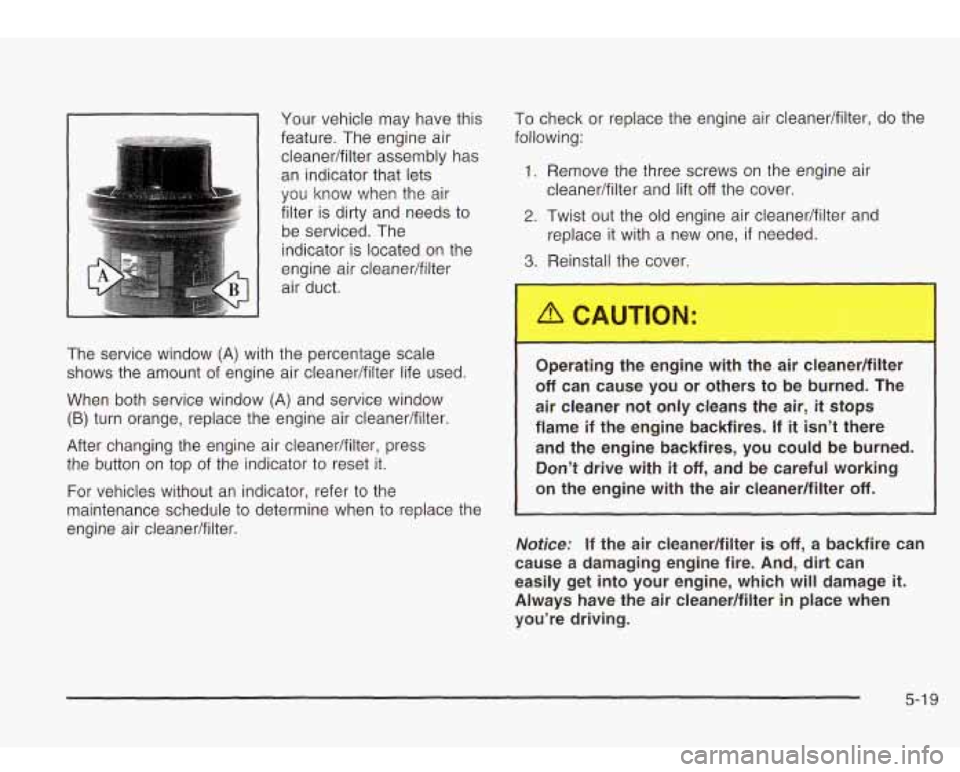
1-1 Your vehicle may have this
feature. The engine air cleanedfilter assembly has
an indicator that lets
you know when the air
filter is dirty and needs to
be serviced. The
indicator is located on the
engine air cleaner/filter
air duct.
The service window
(A) with the percentage scale
shows the amount of engine air cieanedfilter life used.
When both service window
(A) and service window
(B) turn orange, replace the engine air cleanedfilter
After changing the engine air cleaner/filter, press
the button on top of the indicator to reset it.
For vehicles without an indicator, refer
to the
maintenance schedule to determine when
to replace the
engine air cleaner/filter. To
check or replace the engine air cleaner/filter, do the
following:
1. Remove the three screws on the engine air
2. Twist out the old engine air cleaner/filter and
3. Reinstall the cover.
cleanedfilter and lift
off the cover.
replace it with a new one,
if needed.
per
______ ~ ---e eng.--> with the air cleaner/filter
off can cause you or others to be burned. The
air cleaner not only cleans the air,
it stops
flame if the engine backfires.
If it isn’t there
and the engine backfires, you could be burned. Don’t drive with
it off, and be careful working
on the engine with the air cleanedfilter
off.
Notice: If the air cleaner/filter is off, a backfire can
cause a damaging engine fire.
And, dirt can
easily get into your engine, which will damage
it.
Always have the air cleaner/filter in place when
you’re driving.
5-1 9
Page 281 of 410
How to Add Fluid
Refer to the Maintenance Schedule to determine what
kind of transmission fluid
to use. See Part D:
Recommended Fluids and Lubricants on page 6- 17.
Add fluid only after checking the transmission fluid while
it is hot.
(A cold check is used only as a reference.) If
the fluid level is low, add only enough of the proper fluid
to bring the level up
to the HOT area for a hot check.
It doesn’t take much fluid, generally less than one
pint (0.5 L).
Don’t overfill.
Notice: We recommend you use only fluid labeled
DEXRON@
-111, because fluid with that label is
made especially for your automatic transmission.
Damage caused by fluid other than DEXRON@
-111 is
not covered by your new vehicle warranty.
After adding fluid, recheck the fluid level as
described under “How
to Check”.
When the correct fluid level is obtained, push the
dipstick back
in all the way; then flip the handle
down
to lock the dipstick in place.
Engine Coolant
The cooling system in your vehicle is filled with
DEX-COOL@ engine coolant. This coolant is designed
to remain in your vehicle for 5 years or 150,000 miles
(240 000 km), whichever occurs first, if you add
only DEX-COOL@ extended life coolant. The following explains
your cooling system and how
to
add coolant when it is low. If you have a problem
with engine overheating, see
Engine Overheating on
page 5-24.
A 50/50 mixture of clean, drinkable water and
DEX-COOL@ coolant will:
Give freezing protection down to -34°F (-37°C).
Give boiling protection up to 265°F (129°C).
Protect against rust and corrosion.
Help keep the proper engine temperature.
Let the warning lights and gages work as they
should.
Notice: When adding coolant, it is important that
you use only
DEX-COOL@ (silicate-free) coolant.
If coolant other than DEX-COOL@ is added to
the system, premature engine, heater core or
radiator corrosion may result. In addition, the engine
coolant will require change sooner
-- at 30,000 miles
(50,000 km) or 24 months, whichever occurs first.
Damage caused by the
use of coolant other
than DEX-COOL@
is not covered by your new
vehicle warranty.
5-22
Page 294 of 410
If it is, you should have your brake system fixed, since a
leak means that sooner or later your brakes won’t
work well, or won’t work at all.
So, it isn’t a good idea to “top off’ your brake fluid.
Adding brake fluid won’t correct a leak. If you add fluid
when your linings are worn, then you’ll have too
much fluid when you get new brake linings. You should
add (or remove) brake fluid, as necessary, only when
work is done on the brake hydraulic sys+-n.
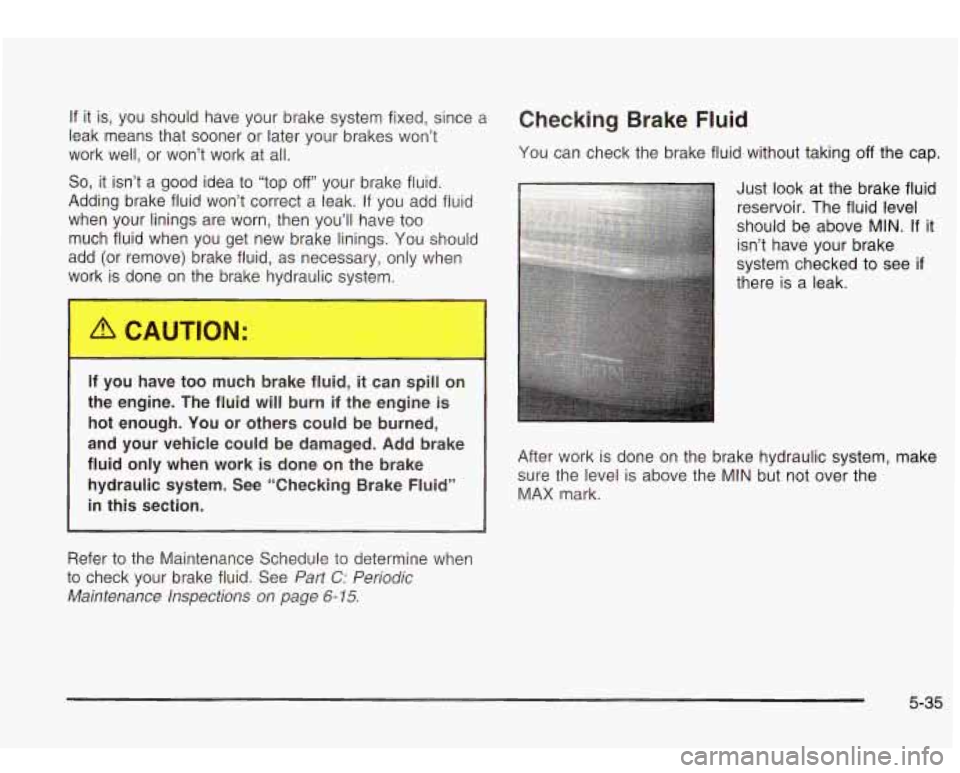
Checking Brake Fluid
You can check the brake fluid without taking off the cap.
If you have too much brake fluid, it can spill on
the engine. The fluid will burn if the engine is
hot enough. You or others could be burned,
and your vehicle could be damaged. Add brake
fluid only when work is done
on the brake
hydraulic system. See “Checking Brake Fluid”
in this section.
Refer to the Maintenance Schedule to determine when
to check your brake fluid. See
farf C: Periodic
Maintenance Inspections on
page 6- 15.
After work is done on the brake hydraulic system, make
sure the level is above the MIN but not
over the
MAX mark.
5-35
Page 303 of 410

All-Wheel Drive
Lubricant checks in this section also apply to these
vehicles. However, there are
two additional systems that
need lubrication.
Transfer Case
When to Check Lubricant
Refer to the Maintenance Schedule to determine how
often to check the lubricant. See
Part C: Periodic
Maintenance Inspections on page
6- 15.
How to Check Lubricant
To get an accurate
reading, the vehicle should
be on a level surface.
If the level is below the bottom of the filler plug hole,
you’ll need
to add some lubricant. Add enough lubricant
to raise the level
to the bottom of the filler plug hole.
Use care not to overtighten the plug.
What to Use
Refer to the Maintenance Schedule to determine what
kind
of lubricant to use. See Part D: Recommended
Fluids and Lubricants on page
6- 17.
Front Axle
When to Check and Change Lubricant
Refer to the Maintenance Schedule to determine how
often to check the lubricant and when to change it.
5-44
Page 304 of 410

How to Check Lubricant
To get an accurate reading, the vehicle should be on a
level surface. If
the level is below the bottom of the filler plug hole,
you may need to add some lubricant.
When the differential is cold, add enough lubricant to
raise the level to
1/2 inch (12 mm) below the filler plug
hole.
When the differential is at operating temperature
(warm), add enough lubricant to raise the level to the
bottom
of the filler plug hole.
What to Use
Refer to the Maintenance Schedule to determine what
kind
of lubricant to use. See Part D: Recommended
Fluids
and Lubricants on page 6-1 7.
5-45
Page 305 of 410

Rear Axle
When to Check Lubricant
Refer to the Maintenance Schedule to determine how
often to check the lubricant.
How to Check Lubricant
To get an accurate reading, the vehicle should be on a
level surface.
The proper level is from
0 to 3/8 inch (0 to 10 mm)
below the
bottom of the filler plug hole.
What to Use
Refer to the Maintenance Schedule to determine what
kind of lubricant
to use. See Part D: Recommended
Fluids and Lubricants on page
6-17.
5-46