change wheel OLDSMOBILE SILHOUETTE 1994 Owners Manual
[x] Cancel search | Manufacturer: OLDSMOBILE, Model Year: 1994, Model line: SILHOUETTE, Model: OLDSMOBILE SILHOUETTE 1994Pages: 276, PDF Size: 15.82 MB
Page 45 of 276
Here you can learn about the many standard and optional features on
your Oldsmobile. and information on
starting. shifting and braking
. Also
explained are the instrument panel
and the warning systems that tell you
if everything is working properly -
and what to do if you have a
problem
.
Part 2
Features & Controls
Keys ........................................................................\
................................................... 44
Front Doors
........................................................................\
....................................... 45
Remote Lock Control
........................................................................\
........................ 48
Liftgate
........................................................................\
............................................... 56
Starting Your Engine
........................................................................\
........................ 58
Engine Coolant Heater ........................................................................\
...................... 61
Loclts
........................................................................\
.................................................. 45
Sliding Door
........................................................................\
...................................... 51
Ignition ........................................................................\
.............................................. 58
Shifting the Transaxle
........................................................................\
....................... 62
Parking Brake
........................................................................\
.................................... 65
Shifting into Park
........................................................................\
.............................. 66
Horn ........................................................................\
................................................... 69
Tilt Steering Wheel
........................................................................\
............................ 69
Windows
........................................................................\
............................................ 69
Turn Signal and Lane Change Indicator
.................................................................. 71
Cruise Control ........................................................................\
................................... 72
Headlights
........................................................................\
.......................................... 74
Interior Lights
........................................................................\
................................... 76
Windshield Wipers
........................................................................\
............................ 77
Windshield Washer
........................................................................\
........................... 78
Mirrors
........................................................................\
............................................... 86
Glove
Box and Storage Compartments .................................................................... 88
Luggage Carrier ........................................................................\
................................. 92
Instrument Panel
........................................................................\
............................... 96
Warning Lights, Gages and Indicators
................................................................... 100 43
ProCarManuals.com
Page 52 of 276

Features & Controls
50
Battery Replacement
Under normal use, the batteries in your
key chain transmitter should last about
two years.
You can tell the batteries are weak if the
transmitter won‘t work at the normal
range in any location.
If you have to get
close to your vehicle before the
transmitter works, it’s probably time
to
change the batteries.
To Replace Batteries in the Remote
Lock Control:
1. Insert a coin into the slot in the back
of the transmitter, and turn
counterclockwise to open the cover.
2. Remove the cover.
3. Remove and replace the two 3-volt
batteries
(DL 20 16).
4. Reassemble the transmitter.
5. Check the transmitter operation.
I Illuminated Entry System
(OPTION)
This option comes with the optional
remote lock control system.
When you open the driver’s door, by
itself or in combination with any
passenger door or the liftgate, the
interior lights will come on and then
gradually dim to off
10 seconds after the
kt door is closed.
(If the driver’s door
has not been opened, the interior lights
will immediately dim to off.)
When you press
a on your remote
transmitter, the lights inside your
vehicle will go on, then gradually dim to
off after about
40 seconds, unless a
door or the liftgate is opened.
When you turn on the ignition, the
interior lights will immediately dim to
off. Vehicle
theft is big business, especially
in some cities. Although your
Oldsmobile has a number of theft
deterrent features, we know that
nothing we put
on it can make it
impossible to steal. However, there are
ways you can help.
Key in the Ignition
If you walk away from your vehicle with
the keys inside, it’s an easy target for
joy riders or professional thieves
- so
don’t do it.
When you park your Oldsmobile and
open the driver’s door, you’ll hear a
chime reminding you to remove your
key from the ignition and take it with
you. Always do this. Your steering
wheel will be locked, and
so will your
ignition and transaxle. And remember
to lock the doors.
ProCarManuals.com
Page 138 of 276
Your Driving and the Road
* x1000
136
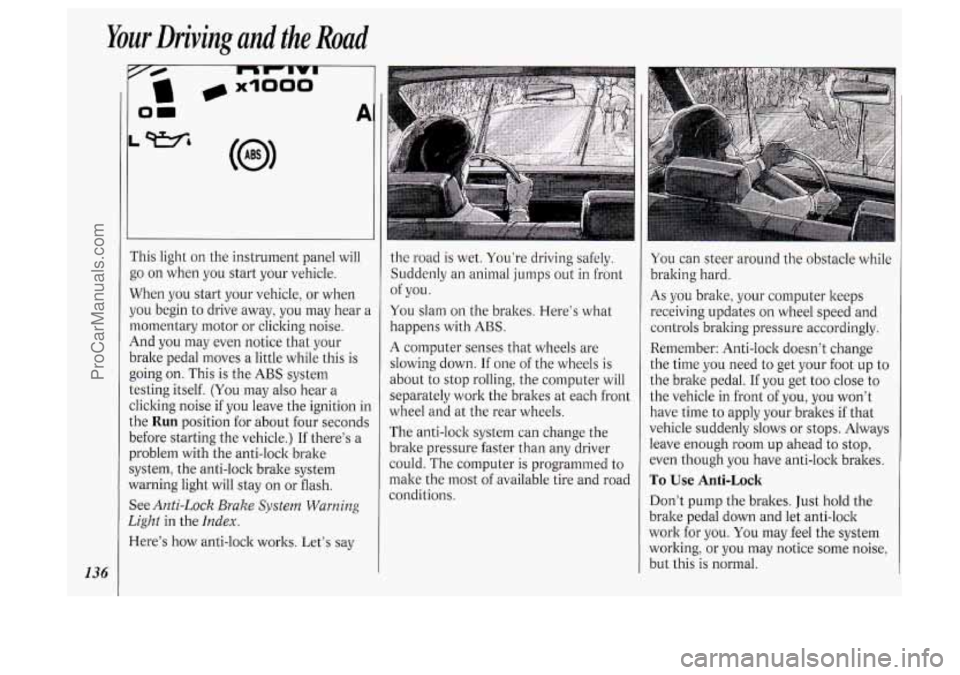
i‘his light on the instrument panel will
go on when you start your vehicle.
When you start your vehicle, or when
jou begin to drive away, you may hear a
nomentary motor or clicking noise.
4nd you may even notice that your
)rake pedal moves
a little while this is
going on. This is the
ABS system
:esting itself.
(You may also hear a
:licking noise if you leave the ignition in
.he
Run position for about four seconds
Iefore starting the vehicle.) If there’s a
Jroblem with the anti-lock brake
iystem, the anti-lock brake system
Yarning light will stay on or flash.
See
Anti-Lock Brake System Warning
2ight
in the Index.
lere’s how anti-lock works. Let’s say
1
the road is wet. You’re driving safely.
Suddenly an animal jumps out
in front
You slam on the brakes. Here’s what
happens with
ABS.
A computer senses that wheels are
slowing down.
If one of the wheels is
about to stop rolling, the computer will
separately work the brakes at each front
wheel and at the rear wheels.
The anti-lock system can change the
brake pressure faster than any driver
could. The computer is programmed to
make the most of available tire and road
conditions. of
you.
You can steer around the obstacle while
braking hard.
As you brake, your computer keeps
receiving updates on wheel speed and
controls braking pressure accordingly.
Remember: Anti-lock doesn’t change
the time you need
to get your foot up to
the brake pedal.
If you get too close to
the vehicle in front of you, you won’t
have time to apply your brakes if that
vehicle suddenly slows or stops. Always
leave enough room up ahead to stop,
even though you have anti-lock brakes.
To Use Anti-Lock
Don’t pump the brakes. Just hold the
brake pedal down and let anti-lock
work for you. You may feel the system
working, or you may notice some noise,
but this is normal.
ProCarManuals.com
Page 140 of 276

Your Driving and the Road
138
I’he traction control system
mtomatically comes
on whenever you
start your vehicle.
To limit wheel spin, especially in
slippery road conditions, you should
dways leave the system on. But you can
:urn the traction control system off if
IOU ever need to. (You should turn the
;ystem off
if your vehicle ever gets stuck
n sand, mud, ice or snow. See Rocking
Your Vehicle in the Index.)
To turn the system off, press the switch
ocated on the center instrument panel
:onsole.
The light on the switch will go
off. If the
Lraction control system is limiting wheel
;pin when you press the switch, the
;ystem won’t turn
off right away. It will wait until
there’s
no longer a current
need to limit wheel spin.
You can turn the system back on at any
time by pressing the switch again. The
light
on the switch should come on.
Braking in Emergencies
Use your anti-lock braking system when
you need to. With anti-lock, you can
steer and brake at the same time.
In
many emergencies, steering can help
you more than even the very best
braking.
Steering
Power Steering
If you lose power steering assist
because the engine stops or the system
is not functioning, you can steer but it
will take much more effort.
Steering Tips
Driving on Curves
It’s important to take curves at a
reasonable speed.
A lot of the “driver lost control”
accidents mentioned on the news
happen
on curves. Here’s why:
Experienced driver or beginner, each of
us is subject to the same laws of physics
when driving
on curves. The traction of
the tires against the road surface makes
it possible for the vehicle to change its
path when you turn the front wheels. If
there’s
no traction, inertia will keep the
vehicle going in the same direction.
If
you’ve ever tried to steer a vehicle on
wet ice, you’ll understand this.
The traction you can get in a curve
depends
on the condition of your tires
and the road surface, the angle at which
the curve is banked, and your speed.
While you’re in a curve, speed
is the one
factor you can control.
Suppose you’re steering through a
sharp curve. Then you suddenly
accelerate. Both control systems
-
steering and acceleration - have to do
their work where the tires meet the
road. Unless you have traction control
and the system is on, adding the sudden
acceleration can demand too much
of
those places. You can lose control.
ProCarManuals.com
Page 143 of 276

drop back again and wait for another
opportunity.
slow vehicle, wait your turn. But take
care that someone isn’t trying to pass
you as you pull out to pass the slow
vehicle. Remember to glance over
your shoulder and check the blind
spot.
Check your mirrors, glance over your
shoulder, and start your left lane
change signal before moving out
of
the right lane to pass. When you are
far enough ahead of the passed
vehicle to see its front in your inside
mirror, activate your right lane change
signal and move back into the right
lane. (Remember that your right
outside mirror
is convex. The vehicle
you just passed may seem to be
farther away from you than it really
is.)
Try not to pass more than one vehicle
at a time on two-lane roads. Reconsider before passing the next
vehicle.
vehicle
too rapidly. Even though the
If other cars are lined up to pass a
Don’t overtake a slowly moving brake
lights are not flashing, it may be
slowing down or starting to turn.
If you’re being passed, make it easy
for the following driver to get ahead of
you. Perhaps you can ease a little to
the right.
Loss of Control
Let’s review what driving experts say
about what happens when the three
control systems (brakes, steering and
acceleration) don’t have enough friction
where the tires meet the road to do
what the driver has asked.
In any emergency, don’t give up. Keep
trying to steer and constantly seek
an
escape route or area of less danger.
In a skid, a driver can lose control of
the vehicle. Defensive drivers avoid
most skids by taking reasonable care
suited to existing conditions, and by not
“overdriving” those conditions. But
skids are always possible.
The three types of skids correspond to
your Oldsmobile’s three control systems.
In the braking skid your
wheels aren’t rolling. In the steering or
cornering skid, too much speed or
steering in
a curve causes tires to slip
and lose cornering force. And in the
acceleration skid
too much throttle
causes the driving wheels to spin.
A cornering skid is best handled by
easing your foot
off the accelerator
pedal.
If you have the traction control
system, remember: It helps avoid only
the acceleration skid. If you do not have
traction control, or
if the system is off,
then an acceleration skid is also best
handled by easing your foot
off the
accelerator pedal.
If your vehicle starts to slide, ease your
foot off the accelerator pedal and
quicltly steer the way you want the
vehicle to go.
If you start steering
quickly enough, your vehicle may
straighten out. Always be ready for a
second skid
if it occurs.
Of course, traction is reduced when
water, snow, ice, gravel, or other
material is on the road. For safety,
you’ll want to slow down and adjust
your driving to these conditions. It is
important to slow down on slippery
141
ProCarManuals.com
Page 153 of 276
Towinga Trailer
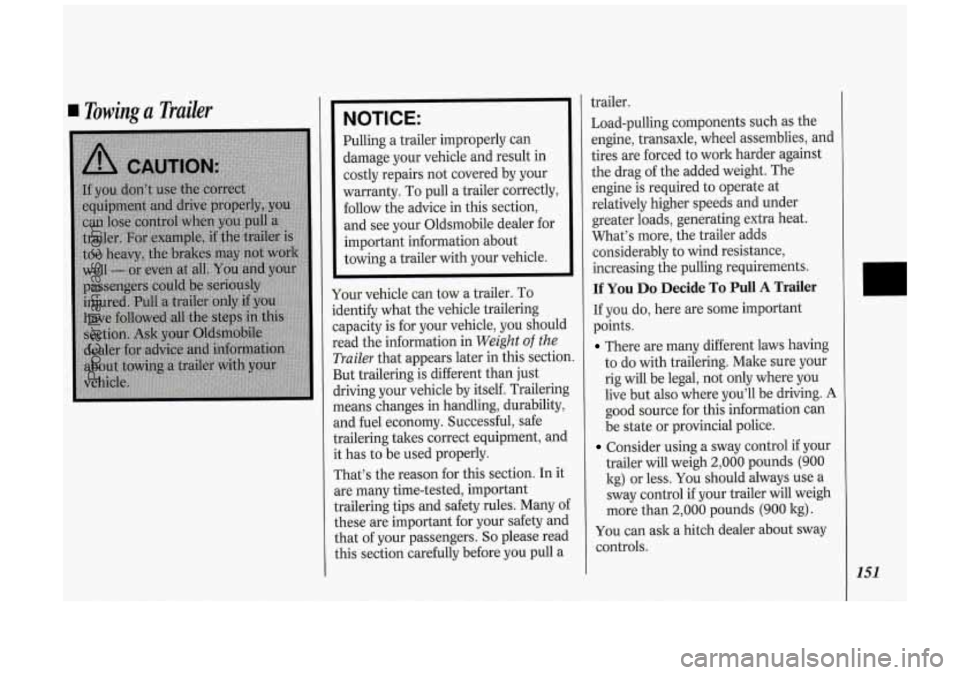
L
NOTICE:
Pulling a trailer improperly can
damage your vehicle and result in
costly repairs not covered by your
warranty. To pull a trailer correctly,
follow the advice in this section,
and see your Oldsmobile dealer for
important information about
towing a trailer with your vehicle.
Your vehicle can tow a trailer. To
identify what the vehicle trailering
capacity is for your vehicle, you should
read the information in
Weight of the
Trailer that appears later in this section.
But trailering is different than just
driving your vehicle by itself. Trailering
means changes in handling, durability,
and fuel economy. Successful, safe
trailering takes correct equipment, and
it has to be used properly.
That’s the reason for this section. In it
are many time-tested, important
trailering tips and safety rules. Many of
these are important for your safety and
that of your passengers.
So please read
this section carefully before you pull a trailer.
Load-pulling components such as the
engine, transaxle, wheel assemblies, and
tires are forced to work harder against
the drag of the added weight. The
engine is required to operate at
relatively higher speeds and under
greater loads, generating extra heat.
What’s more, the trailer adds
considerably to wind resistance,
increasing the pulling requirements.
If You Do Decide To Pull A Trailer
If you do, here are some important
points.
There are many different laws having
to do with trailering. Make sure your
rig will be legal, not only where you
live but
also where you’ll be driving. A
good source for this information can
be state or provincial police.
Consider using a sway control if your
trailer will weigh
2,000 pounds (900
kg) or less. You should always use a
sway control if your trailer will weigh
more than
2,000 pounds (900 kg).
You can ask a hitch dealer about sway
controls.
151
ProCarManuals.com
Page 157 of 276
During your trip, check occasionally to
be sure that the load is secure, and that
the lights and
any trailer brakes are still
working.
Following Distance
Stay at least twice as far behind the
vehicle ahead as you would when
driving your vehicle without a trailer.
This can help you avoid situations that
require heavy braking and sudden
turns.
Passing
You’ll need more passing distance up
ahead when you’re towing a trailer.
And, because you’re a good deal longer,
you’ll need to go much farther beyond
the passed vehicle before you can return
to your lane.
Backing Up
Hold the bottom of the steering wheel
with one hand. Then, to move the
trailer to the left, just move that hand to
the left.
To move the trailer to the right,
move your hand to the right. Always back up
slowly and, if possible, have
someone guide you.
Making Turns
When you’re turning with a trailer,
make wider turns than normal. Do this
so your trailer won’t strike soft
shoulders, curbs, road signs, trees, or
other objects. Avoid jerky or sudden
maneuvers. Signal well in advance.
Turn Signals When Towing a
Trailer
When you tow a trailer, your vehicle has
to have a different turn signal flasher
and extra wiring. The green arrows on
your instrument panel will flash
whenever you signal a turn or lane
change. Properly hooked up, the trailer
lights will
also flash, telling other
drivers you’re about to turn, change
lanes or stop.
When towing a trailer, the green arrows
on your instrument panel will flash for
turns even
if the bulbs on the trailer are
burned out. Thus, you may think
drivers behind you are seeing your signal
when they are not.
It’s important
to check occasionally to be sure the
trailer bulbs are still working.
Driving On Grades
Reduce speed and shift to a lower gear
before you start down a long or steep
downgrade. If you don’t
shift down, you
might have to use your brakes
so much
that they would get hot and
no longer
work well.
On a long uphill grade, shift down and
reduce your speed to around
45 mph
(70 lwh) to reduce the possibility of
engine and transaxle overheating.
If you are towing a trailer that weighs
more than
1,000 pounds (454 kg), and
you have an automatic transaxle with
Overdrive, you may prefer to drive in
D
instead of Overdrive (or, as you need to,
a lower gear). This will minimize heat
build-up and extend the life of your
transaxle.
n
ProCarManuals.com
Page 164 of 276
Problems on the Road
I62
10. Now start the vehicle with the good
battery and run the engine for a
while.
11. Try to start the vehicle with the
dead battery. If it won’t start after a
few tries,
it probably needs service. w I
12. Remove the cables in reverse order
to prevent electrical shorting. Take
care that they don’t touch each
other or any other metal.
A
8
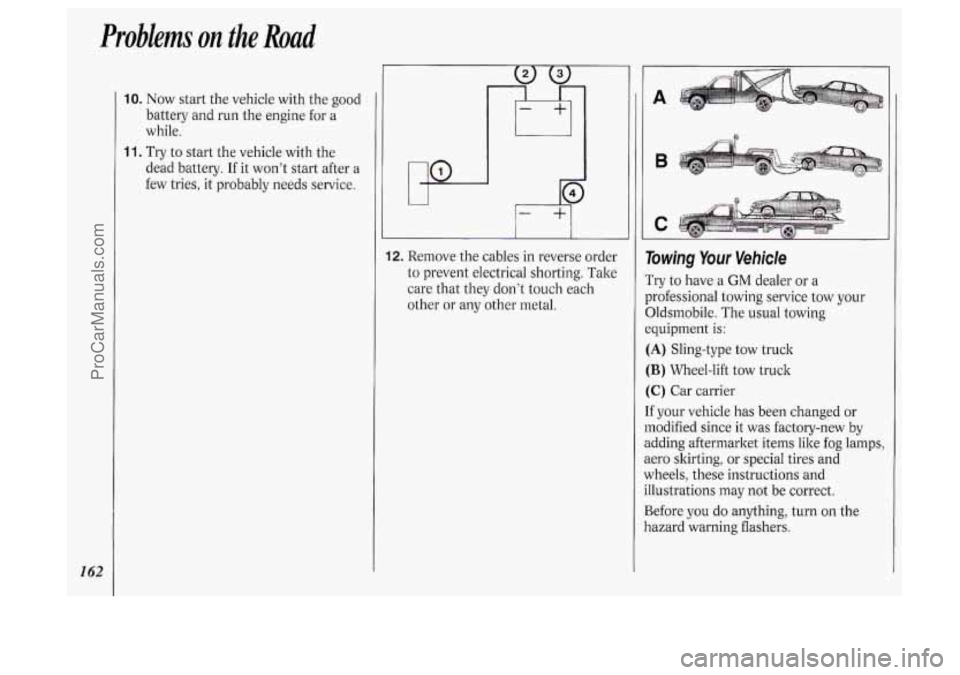
liowing Your Vehicle
Try to have a GM dealer or a
xofessional towing service tow your
3ldsmobile. The usual towing
:quipment
is:
[A) Sling-type tow truck
[B) Wheel-lift tow truck
:C) Car carrier
f your vehicle has been changed or
nodified since it was factory-new by
idding aftermarket items like fog lamps,
tero skirting, or special tires and
vheels, these instructions and
llustrations may not be correct.
3efore you do anything, turn on the
lazard warning flashers.
ProCarManuals.com
Page 174 of 276
Problems on the Road
1 72
Ifa Tire Goes Flat
It’s unusual for a tire to “blow out”
while you’re driving, especially if
you
maintain your tires properly. If air goes
out of a tire, it’s much more likely to
leak out slowly. But
if you should ever
have a “blowout,” here are a few tips
about what to expect and what to do:
If a front tire fails, the flat tire will
create a drag that pulls the vehicle
toward that side. Take your foot
off the
accelerator pedal and grip the steering
wheel firmly. Steer
to maintain lane
position, then gently brake to a stop
well
out of the traffic lane.
A rear blowout, particularly on a curve,
acts much like a skid and may require
the same correction you’d use in a skid.
In any rear blowout, remove your foot
from the accelerator pedal. Get the
vehicle under control by steering the
way
you want the vehicle to go. It may
be very bumpy and noisy, but you can
still steer. Gently brake to a stop, well
off the road if possible.
If a tire goes flat, the next section shows
how to
use your jacking equipment to
change a flat tire safely.
Air Inflator
Your vehicle may have an air inflator
for use in bringing tires up to the proper
pressure.
To learn about it, see the
Index under Air Inflator System.
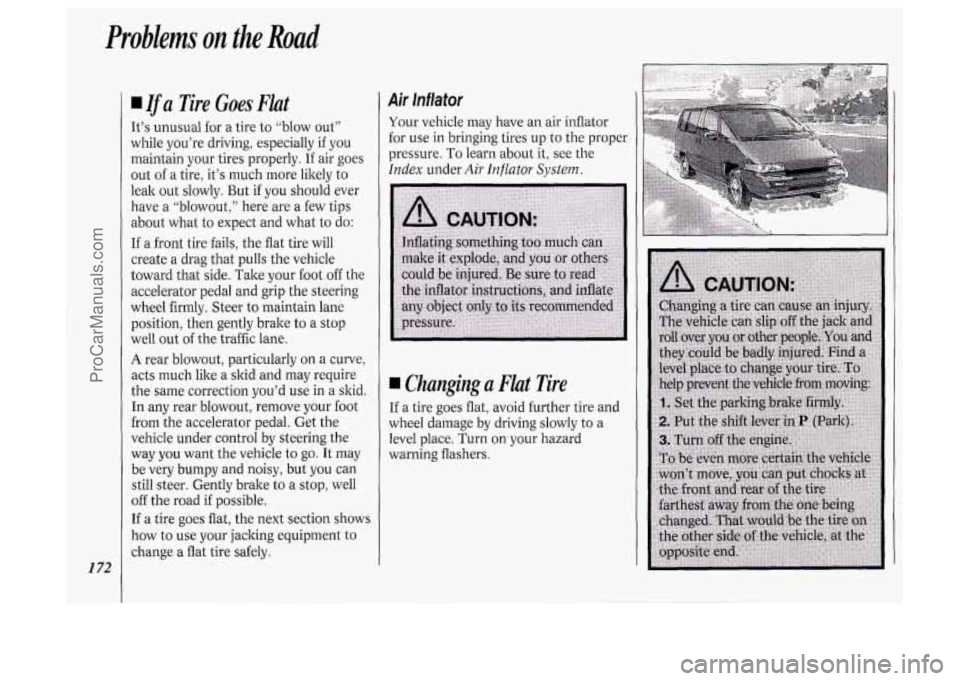
Changing a Flat Tire
If a tire goes flat, avoid further tire and
wheel damage by driving slowly to a
level place. Turn on your hazard
warning flashers.
ProCarManuals.com
Page 240 of 276
Maintenance Schedule
238
Explanation of Scheduled
Maintenance Services
Following are explanations of the
services listed in Schedule I and
Schedule 11.
The proper fluids and lubricants to use
are listed in Section D. Make sure
whoever services your vehicle uses
these. All parts should be replaced and
all necessary repairs done before you or
anyone else drives the vehicle.
ITEM
NO. SERVICE
1. Engine Oil and Filter Change* -
Always use SH or SG Energy
Conserving
I1 oils of proper viscosity.
The
“SH” or “SG” designation may
be shown alone
or in combination
with others, such as “SH/CD,”
“SH,
SG, CD,” “SG/CD,” etc. To
determine the preferred viscosity for
your vehicle’s engine (e.g.,
SAE 5W-
30 or SAE 10W-30), see
Engine Oil
in the Index.
2. Chassis Lubrication - Lubricate
suspension and steering linkage.
Lubricate the transaxle shift linkage,
and parking brake cable guides,
underbody contact points and
linkage.
3. Tire and Wheel Rotation and
Inspection
- For proper wear and
maximum tire life, rotate your tires
following the instructions in this
manual. See
Tires, Inspection E.
Rotation in the Index. Check the
tires for uneven wear
or damage. If
you see irregular or premature wear,
check the wheel alignment. Check for
damaged wheels also.
Engine Accessory Drive Inspection
- Inspect the drive belt for cracks,
fraying, wear and proper tension.
Replace as needed.
I
Cooling System Servicee - Drain,
flush and refill the system with new
or approved recycled coolant
conforming to GM Specification
I
1825M. Keep coolant at the proper 1
mixture as specified. See Coolant in
the
Index. This provides proper
freeze and boil protection, corrosion
I
inhibitor level and maintains proper ’
engine operating temperature.
Inspect hoses
and replace if they are
cracked, swollen or deteriorated.
Tighten screw-type hose clamps.
Clean the outside of the radiator and
air conditioning condenser. Wash tht
pressure cap and neck.
To help ensure proper operation, we
recommend
a pressure test of both the
cooling system and the pressure cap.
ProCarManuals.com