service OLDSMOBILE SILHOUETTE 1996 Owners Manual
[x] Cancel search | Manufacturer: OLDSMOBILE, Model Year: 1996, Model line: SILHOUETTE, Model: OLDSMOBILE SILHOUETTE 1996Pages: 372, PDF Size: 19.39 MB
Page 3 of 372
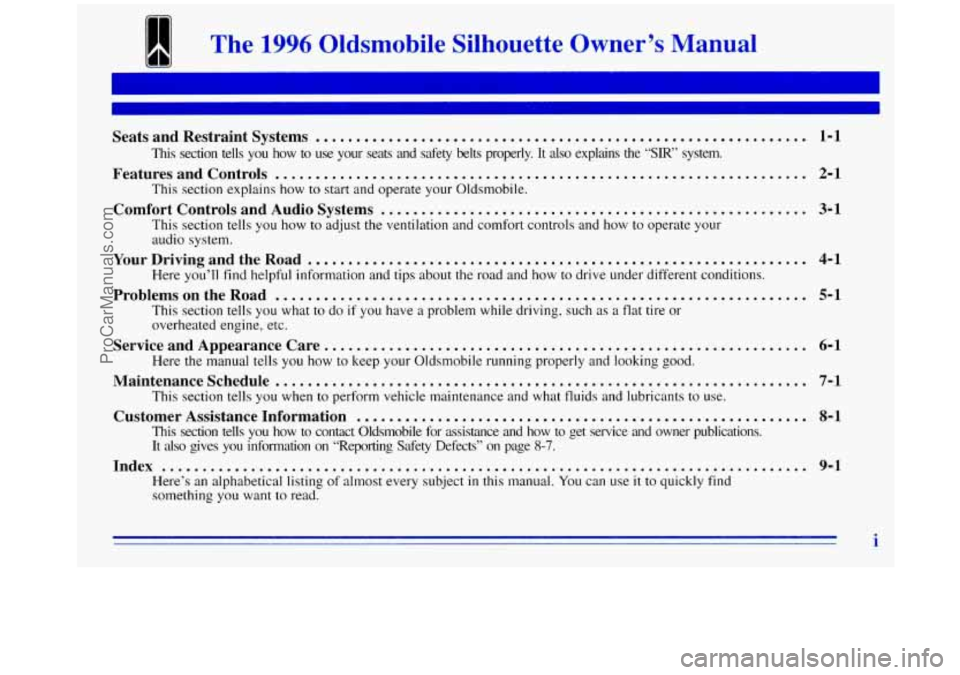
The 1996 Oldsrnobile Silhouette Owner’s Manual
Seats and Restraint Systems ............................................................. 1-1
Features and Controls .................................................................. 2-1
Comfort Controls and Audio Systems ..................................................... 3-1
This section tells you how to use your seats and safety belts properly. It also explains the “SIR” system.
This section explains how to start and operate your Oldsmobile.
This section tells you how to adjust the ventilation and comfort controls and how to operate your
audio system.
YourDrivingandtheRoad .............................................................. 4-1
Here you’ll find helpful information and tips about the road and how to drive under different conditions.
ProblemsontheRoad .................................................................. 5-1
This section tells you what to do if you have a problem while driving, such as a flat tire or
overheated engine, etc.
Here the manual tells you how to keep your Oldsmobile running properly and looking good.
This section tells you when to perform vehicle maintenance and what fluids and lubricants to use.
This section tells you how to contact Oldsmobile for assistance\
and how to
get service and owner publications.
It also gives you information on “Reporting Safety Defects”\
on page
8-7.
Here’s an alphabetical listing of almost every subject in this manual. You can use it to quickly find
something you want to read.
ServiceandAppearanceCare ............................................................ 6-1
Maintenanceschedule............ ...................................................... 7-1
Customer Assistance Information ........................................................ 8-1
Index ........................................................................\
........ 9-1
i
ProCarManuals.com
Page 4 of 372
GENERAL MOTORS, GM, the GM Emblem,
OLDSMOBILE, the OLDSMOBILE Rocket Emblem
and the name SILHOUETTE are registered trademarks
of General Motors Corporation.
This manual includes the latest information at the time it
was printed. We reserve the right to make changes in the
product after that time without further notice.
Please keep this manual in your Oldsmobile,
so it will
be there if you ever need it when you’re on the road. If
you sell the vehicle, please leave this manual
in it so the
new owner can use it.
Litho in U.S.A.
Part No. 22639051
B First Edition
WE SUPPORT VOLUNTARY TECHNICIAN
CERTIFICATION THROUGH
National Institute for
AUTOMOTIVE SERVICE EXCELLENCE
We support voluntary
technician certification.
@Copyright General Motors Corporation 1996 All Rights Reserved
ii
ProCarManuals.com
Page 37 of 372

What will you see after an air bag inflates?
After the air bag inflates, it quickly deflates. This occurs
so quickly that some people may not even realize the air
bag inflated. Some components of the air bag module
in
the steering wheel hub will be hot for a short time. The
part
of the bag that comes into contact with you may be
warm, but it will never be too hot to touch. There will be
some smoke and dust coming from vents in the deflated
air bag. Air bag inflation will not prevent the driver
from seeing or from being able to steer the vehicle,
nor will
it stop people from leaving the vehicle.
0
0
0
I
When an air bag inflates, there is dust in the air.
This dust could cause breathing problems for
people with a history of asthma or other
breathing trouble.
To avoid this, everyone in the
vehicle should get out as soon as it
is safe to do so.
If you have breathing problems but can’t get out
of the vehicle after an air bag inflates, then get
fresh air by opening
a window or door.
The air bag is designed to inflate only once. After it
inflates, you’ll need some new parts for your air bag
system. If you don’t get them, the air bag system
won’t be there to help protect you in another crash.
A new system will include the air bag module and
possibly other parts. The service manual for your
vehicle covers the need to replace other parts.
Your vehicle is equipped with
a diagnostic module,
which records information about
the air bag system.
The module records information about the readiness
of the system, when the sensors are activated and
driver’s safety belt usage at deployment.
Let only qualified technicians work on your air
bag system. Improper service can mean that your air
bag system won’t work properly. See your retailer
for service.
NOTICE:
If you damage the cover for the driver’s air bag,
it may not work properly. You may have
to
replace the air bag module. Do not open or break
the air bag cover.
1-29
ProCarManuals.com
Page 38 of 372

Safety Belt Use During Pregnancy Servicing Your Air Bag-Equipped Oldsmobile
The air bag affects how your Oldsmobile should be
Safety belts work for everyone, including pregnant
serviced. There
are Parts of the air bag system in several
women. Like all occupants, they are more likely to be
places around your vehicle. You don’t want the system
seriously injured if they don’t wear safety belts.
I to inflate while someone is working on your vehicle.
I Your Oldsmoblle retailer and the Silhouette Service
1 Manual have information about servicing your vehicle
1 and the air bag system. To purchase a service manual,
see “Service and Owner Publications” in the Index.
For up to two minutes after the ignition key is
turned off and the battery is disconnected, an air
bag can still inflate during improper service. You
can be injured
if you are close to an air bag when
it inflates. Avoid wires wrapped with yellow tape,
or yellow connectors. They are probably part
of
the air bag system. Be sure to follow proper
service procedures, and make sure the person
performing work for you
is qualified to do so.
The air bag system does not need regular maintenance.
A pregnant woman should wear a lap-shoulder belt, and
the lap portion should be
worn as low as possible, below
the rounding, throughout the pregnancy.
1-30 ~
ProCarManuals.com
Page 51 of 372
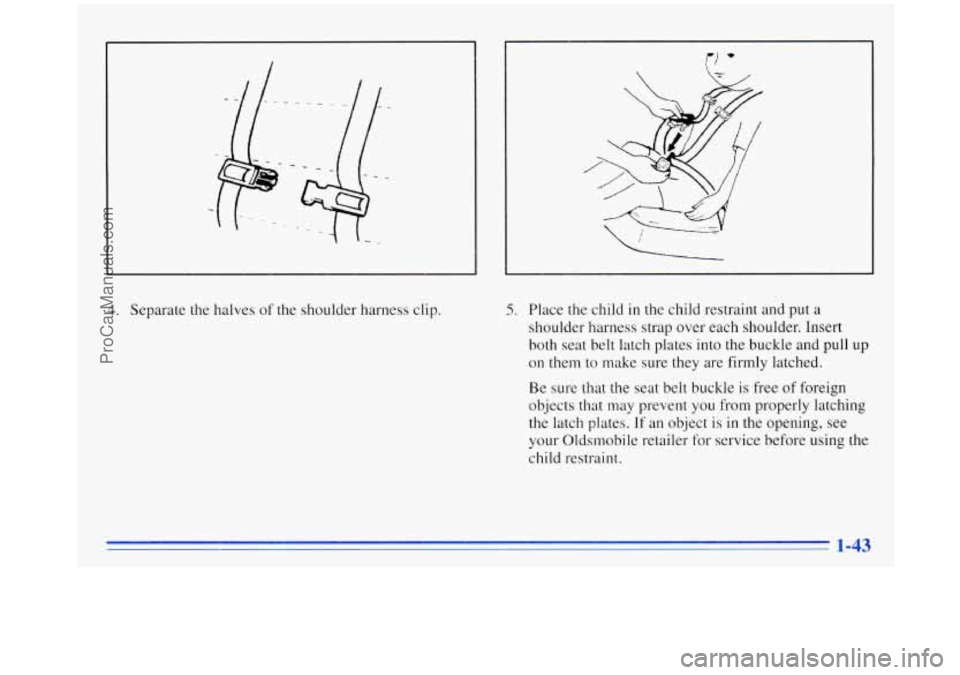
4. Separate the halves of the shoulder harness clip. 5. Place the child in the child restraint and put a
shoulder harness strap over each shoulder. Insert
both seat belt latch plates into the buckle and pull up
on them to make sure they are firmly latched.
Be sure that the seat belt buckle is free of foreign
objects that may prevent you from properly latching
the latch plates.
If an object is in the opening, see
your Oldmobile retailer for service before using the
child restraint.
ProCarManuals.com
Page 72 of 372

Remote Lock Control (Option)
If your Oldsmobile has this option, you can lock and unlock
your doors and liftgate from up to
30 feet (9 m) away using
the key chain transmitter supplied with your vehicle. Your
Remote Lock Control operates
on a radio
frequency subject to Federal Communications
Commission (FCC) Rules.
This device complies with
Part 15 of the FCC Rules.
Operation
is subject to the following two conditions:
(1) This device may not cause harmful interference, and
(2) This device must accept any interference received,
including interference that may cause undesired operation.
Should interference to this system occur, try this:
Check to determine if battery replacement is necessary.
See the instructions
on battery replacement.
Check the distance. You may be too far from your
vehicle. This product has a maximum range.
blocking the signal.
Check the location. Other vehicles or objects may be
See your Oldsmobile retailer or a qualified
technician for service.
Changes
or modifications to this system by other than an
authorized service facility could void authorization
to
use this equipment.
2-8
ProCarManuals.com
Page 82 of 372
7. Push either of the PWR DOOR buttons to open the
power sliding door.
8. Wait five seconds and close the door by pushing
either PWR DOOR button.
9. Wait five seconds and repeat Steps 7 and 8.
If the door does not rest in the fully open position after
repeating Step
7, repeat Steps 7 and 8 again. If the door
still does not operate correctly, see your retailer for service.
Sliding Door Security Lock
Your Oldsmobile is equipped with a sliding door
security lock that helps prevent passengers from opening
the sliding door from the inside.
If you have the optional power sliding door, you can
override the security lock by pressing the PWR DOOR
switch when
the power sliding door ON/OFF switch is
in the ON position. See “Power Sliding Door” earlier in
this section.
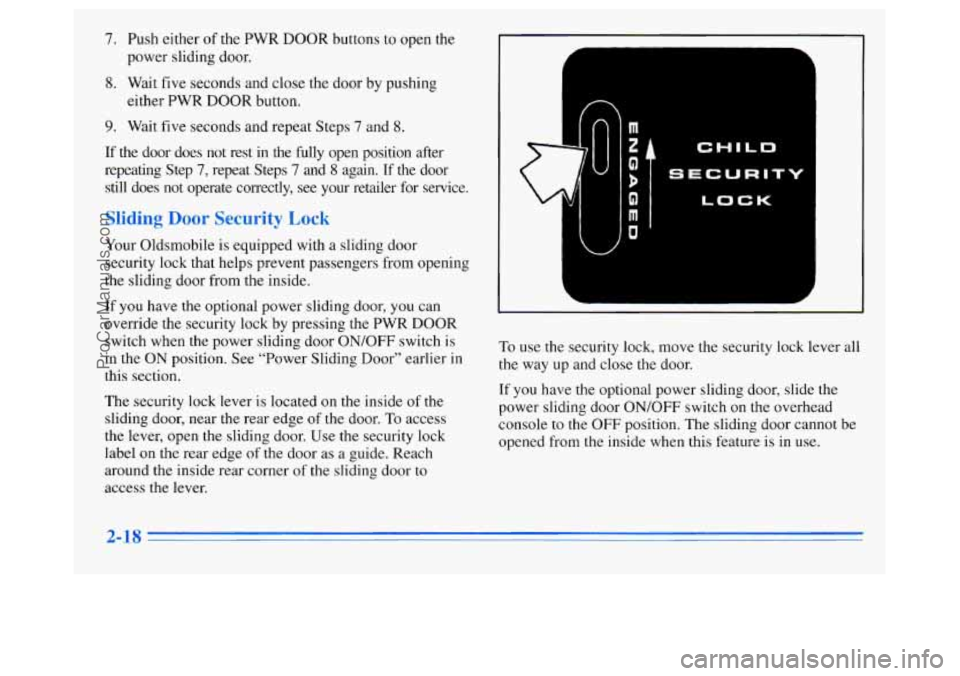
The security lock lever is located on the inside
of the
sliding door, near the rear edge of the door. To access
the lever, open the sliding door. Use the security lock
label on the rear edge
of the door as a guide. Reach
around the inside rear corner
of the sliding door to
access the lever.
1
I
7
1
n
I CHILD
SECURITY
J! I
LOCK
L A
To use the security lock, move the security lock lever all
the way up and close the door.
If you have the optional power sliding door, slide the
power sliding door ON/OFF switch on the overhead
console
to the OFF position. The sliding door cannot be
opened from the inside when this feature is in use.
2-18
ProCarManuals.com
Page 88 of 372

Note that even if the engine is not running, the positions
ACCESSORY and RUN are on positions that allow you
to operate your electrical accessories, such as the radio.
NOTICE:
If your key seems stuck in LOCK and you can’t
turn it, be sure it is
all the way in. If it is, then
turn the steering wheel left and right while you
turn the key hard. But turn the key only with
your hand. Using
a tool to force it could break
the key or the ignition switch. If none of this
works, then your vehicle needs service.
Starting Your Engine
Move your shift lever to PARK (P) or NEUTRAL (N).
Your engine won’t start in any other position -- that’s a
safety feature.
To restart when you’re already moving,
use NEUTRAL
(N) only.
I NOTICE:
Don’t try to shift to PARK (P) if your Oldsmobile
is moving. If you do, you could damage the
transaxle. Shift
to PARK (P) only when your
vehicle is stopped.
1. Without pushing the accelerator pedal, turn your
ignition key to START. When the engine starts, let
go
of the key. The idle speed will go down as your
engine gets warm.
2-24
ProCarManuals.com
Page 94 of 372

SECOND (2): This position gives you more power, but
lower fuel economy. You can use
SECOND (2) on hills.
It can help control
your speed as you go down steep
mountain roads, but then
you would also want to use
your
brakes off and on.
NOTICE:
~ ~~ ~~~ ~~~~
Don’t drive in SECOND (2) for more than 25 miles
(41 km), or at speeds over 55 mph (88 km/h), or
you
can damage your transaxle. Use THIRD (D) or
AUTOMATIC OVERDRIVE
(0) as much as
possible. Don’t shift into SECOND (2) unless you
are going slower than
65 mph (105 km/h) or you
can damage your engine.
NOTICE:
If your vehicle seems to start up rather slowly,
or if it seems not to shift gears as you go faster,
something may be wrong with a transaxle system
sensor.
If you drive very far that way, your
vehicle can be damaged.
So, if this happens, have
your vehicle serviced right away. Until then, you
can use SECOND
(2) when you are driving less
than
35 mph (55 kmh) and THIRD (D) for
higher speeds.
ProCarManuals.com
Page 131 of 372
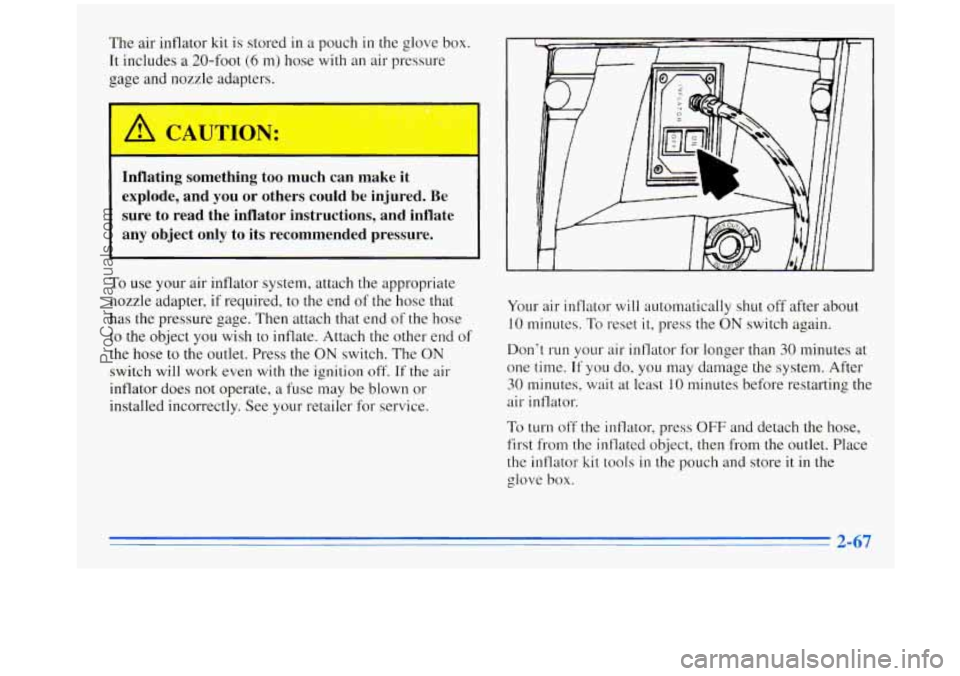
The air inflator kit is stored in a pouch in the glove box.
It includes
a 20-foot (6 m) hose with an air pressure
gage and nozzle adapters.
I
.. - ... . - -L .. .. ,. .- 0 - .. ..
I
Inflating something too much can make it
explode, and you or others could be injured. Be
sure to read the inflator instructions, and inflate
any object only to its recommended pressure.
To use your air inflator system, attach the appropriate
nozzle adapter,
if required, to the end of the hose that
has the pressure gage. Then attach that end of the hose
to the object you wish to inflate. Attach the other end of
the hose to the outlet. Press the
ON switch. The ON
switch will work even with the ignition off. If the air
inflator does not operate,
a fuse may be blown or
installed incorrectly. See your retailer for service. Your
air inflator
will automatically shut off after about
10 minutes. To reset it, press the ON switch again.
Don’t run your air inflator for longer than 30 minutes at
one time. If
you do, you may damage the system. After
30 minutes, wait at least 10 minutes before restarting the
air inflator.
To turn off the inflator, press OFF and detach the hose,
first from the inflated object, then from the outlet. Place
the inflator kit tools
in the pouch and store it in the
glove
box.
ProCarManuals.com