lock OLDSMOBILE SILHOUETTE 1998 Repair Manual
[x] Cancel search | Manufacturer: OLDSMOBILE, Model Year: 1998, Model line: SILHOUETTE, Model: OLDSMOBILE SILHOUETTE 1998Pages: 444, PDF Size: 23.2 MB
Page 163 of 444
Interior Lamps
Instrument Panel Intensity Control
Turn the control, located below the headlamps switch, to
the right to increase the brightness of the instrument
panel lights, and to the left to decrease the brightness.
Turn the control all the way to the left to turn them off.
Interior Lamps Control
Turn the dial all the way to the right to turn on the
interior lamps,
if the interior lamps override switch is
off. Turn the dial to the left to turn the lamps off.
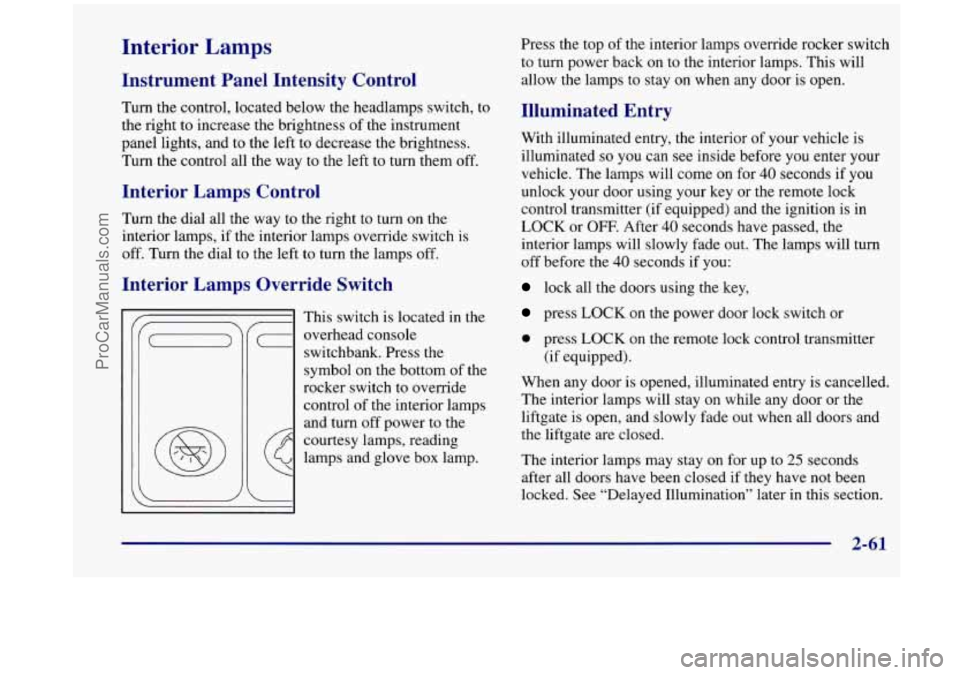
Interior Lamps Override Switch
--
I This switch is located in the
c- overhead console
switchbank. Press the
symbol on the bottom
of the
rocker switch to override control of the interior lamps
and turn off power to the
courtesy lamps, reading
lamps and glove box lamp. Press the top
of the interior
lamps override rocker switch
to turn power back on to the interior lamps. This will
allow the lamps to
stay on when any door is open.
Illuminated Entry
With illuminated entry, the interior of your vehicle is
illuminated
so you can see inside before you enter your
vehicle. The lamps will come on for
40 seconds if you
unlock your door using your key or the remote lock
control transmitter (if equipped) and the ignition is in
LOCK
or OFF. After 40 seconds have passed, the
interior lamps will slowly fade out. The lamps will turn
off before the 40 seconds if you:
lock all the doors using the key,
press LOCK on the power door lock switch or
0 press LOCK on the remote lock control transmmer
(if equipped).
When any door is opened, illuminated entry is cancelled.
The interior lamps will stay on while any door or the
liftgate
is open, and slowly fade out when all doors and
the liftgate are closed.
The interior lamps may stay on for up to
25 seconds
after all doors have been closed if they have not been
locked. See “Delayed Illumination’’ later
in this section.
ProCarManuals.com
Page 164 of 444

Delayed Illumination
The delayed illumination feature will continue to
illuminate the interior for
25 seconds after all doors have
been closed
so that you can find your ignition and
buckle your safety belt at night. Delayed illumination
will not occur while the ignition
is in RUN or
ACCESSORY. After 25 seconds have passed, the
interior lamps will slowly fade out. The lights will fade
out before the
25 seconds have passed if you:
0 turn the ignition to RUN or ACCESSORY,
lock all doors using the remote lock control
0 lock all the doors using the power door lock switch
transmitter
(if equipped) or
or the key.
Exit Lighting
With exit lighting, the interior lamps will come on for
about
25 seconds whenever you remove the key from
the ignition switch. If you turn the ignition switch
to
RUN or ACCESSORY, the lamps will fade out. The
lamps will also fade out if you lock the doors with the
power door lock switch or the remote lock control
transmitter (if equipped).
To turn the Delayed Illumination feature off or on, see
“Locks and Lighting Choices’’ in the Index. When
any door is opened, exit lighting is cancelled. The
interior lamps will stay on while any door
or liftgate is
open, and slowly fade out when all doors and the liftgate
are closed.
The interior lamps may stay on for up
to 25 seconds
after all doors have been closed if they have not been
locked, see “Delayed Illumination” earlier in
this section.
To turn the Exit Lighting feature off or on, see “Locks
and Lighting Choices” in the Index.
2-62
ProCarManuals.com
Page 166 of 444

Battery Saver Power Remote Control Mirrors
Your
vehicle has a feature to help prevent you from
draining the battery,
in case you accidentally leave the
interior
or underhood lamps on. If you leave any of
these lamps on while the ignition is in
LOCK or OFF,
they will automatically turn off after 10 minutes. The
lamps won’t come back on again until you:
turn the ignition to RUN or ACCESSORY,
turn the interior lamps dial all the way to the right,
open (or close and reopen) a door that is closed.
then slightly back
to the left; or
Note that if your vehicle has less than
15 miles (25 km)
on the odometer, the battery saver will turn off the lamps
after only three minutes.
Mirrors
Inside Daymight Rearview Mirror
To reduce glare from lights behind you, pull the lever
toward you (to the night position).
To return the mirror
to the day position, push the lever away from you. The
control on the driver’s
door controls both outside
rearview mirrors.
Turn the control
to the left to select the driver’s side
rearview mirror, or to the right to select the passenger’s
side rearview mirror. Then use the control to adjust each
mirror so that you can just see the side of your vehicle
when
you are sitting in a comfortable driving position.
If you are not adjusting either mirror, leave the control
in the center off position. This prevents moving the
mirrors accidentally once you have them adjusted.
2-64
ProCarManuals.com
Page 167 of 444
Both outside mirrors can be folded forward or rearward.
In the rearward position, they will fold almost flush with
the vehicle. This feature is particularly useful in
automatic car washes.
Your mirrors have a blue tint to reduce glare while
driving at night.
Convex Outside Mirror
Your passenger’s side mirror is convex. A convex
mirror’s surface is curved
so you can see more from the
driver’s seat.
A convex mirror can make things (like other
vehicles) look farther away than they really are.
If you cut too sharply into the right lane, you
could hit a vehicle on your right. Check your
inside mirror or glance over
your shoulder before
changing lanes.
Storage Compartments
Your vehicle’s large carrying capacity can store many
items.
If you have the extended wheelbase version, you
can carry things as large as a
4‘ x 8’ piece of plywood.
You can
also use the floor pins that are used to attach the
seats, to secure larger loads. This section
also describes
storage areas for specific items like sunglasses and cups.
Glove Box
Your vehicle has a glove box below the
instrument panel.
To open the glove box, lift the latch release. Use the key
to lock or unlock the glove box.
The glove box door has a detent to prevent the door
from lowering too far. Open the glove box until the door
is partway open, then pull the door down if you need it
fully open. To close the glove box, the door must be
pushed up past the detent.
In the door of the glove box, you will find a tissue pack
holder and clip for a pen
or pencil.
2-65
ProCarManuals.com
Page 171 of 444

Cupholders Storage Bin
There are cupholders on the inboard side of the front
passenger’s seat and the right side
of the second row
bench seat.
To use the cupholders, simply pull down the tray. Keep
the trays up when not in use.
Your vehicle has storage compartments and cupholders
on either side of the vehicle, next to the third row seats.
The seatbacks have cupholders that can be used when
the seatbacks are folded down. At
the base
of the center instrument panel console, there
is a storage bin. To open the bin, lift the latch release
and the door will fold down.
Inside the bin, you will find a tray that slides out. Slide
the tray all the way toward the rear of the vehicle until
the tray locks onto the plastic tabs at the end of the guide
rails. The tray holds
CDs or cassettes in the center area.
You can also store cassettes in the left side area. The
right side area can hold either the coinholder, which lifts
out, or another cassette. The tray can be removed for
cleaning or when you want to replace the selection
of
CDs or cassettes. Slide the tray back into the storage bin
before closing the bin door. The tray can also be placed
in the glove box for locked storage if desired.
2-69
ProCarManuals.com
Page 172 of 444
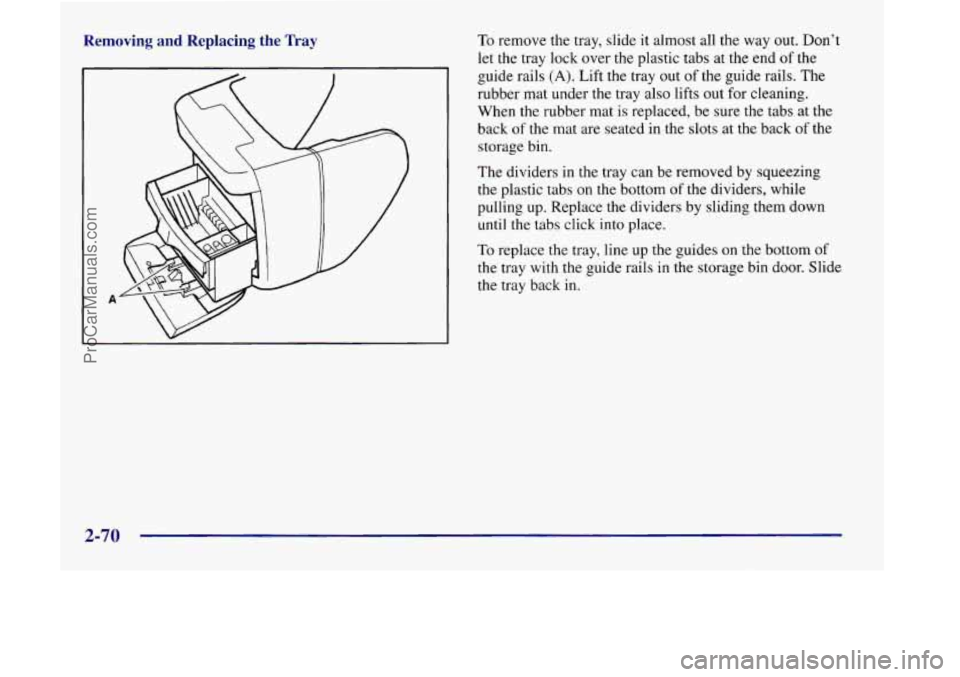
Removing and Replacing the Tray To remove the tray, slide it almost all the way out. Don’t
let the tray lock over the plastic tabs at the end of the
guide rails
(A). Lift the tray out of the guide rails. The
rubber mat under the tray also lifts out for cleaning.
When the rubber mat
is replaced, be sure the tabs at the
back
of the mat are seated in the slots at the back of the
storage
bin.
The dividers in the tray can be removed by squeezing
the plastic tabs
on the bottom of the dividers, while
pulling
up. Replace the dividers by sliding them down
until the tabs click into place.
To replace the tray, line up the guides on the bottom of
the tray with the guide rails in the storage bin door. Slide
the tray back in.
2-70
ProCarManuals.com
Page 177 of 444
NOTICE:
Loading cargo that weighs more than 150 lbs.
(68 kg) on the luggage carrier may damage
your vehicle.
When you carry cargo
on the luggage carrier of a
proper size and weight, put
it on the slats, as far
forward
as you can. Then slide the crossrail up
against the rear of the load, to help keep
it from
moving. You can then tie
it down.
Don’t exceed the maximum vehicle capacity when
loading your vehicle. For more information on vehicle
capacity and loading, see “Loading Your Vehicle” in
the Index.
To prevent damage or loss of cargo as you’re driving,
check now and then to make sure the luggage carrier and
cargo are still securely fastened.
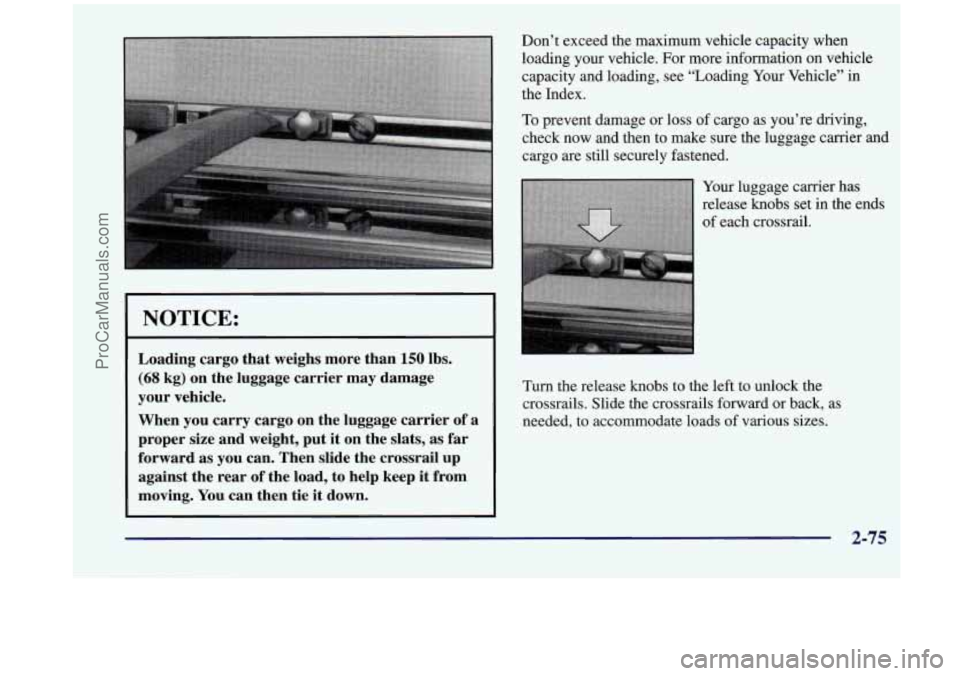
Turn the release knobs to the left to unlock the
crossrails. Slide the crossrails forward or back, as
needed, to accommodate loads of various sizes.
ProCarManuals.com
Page 178 of 444
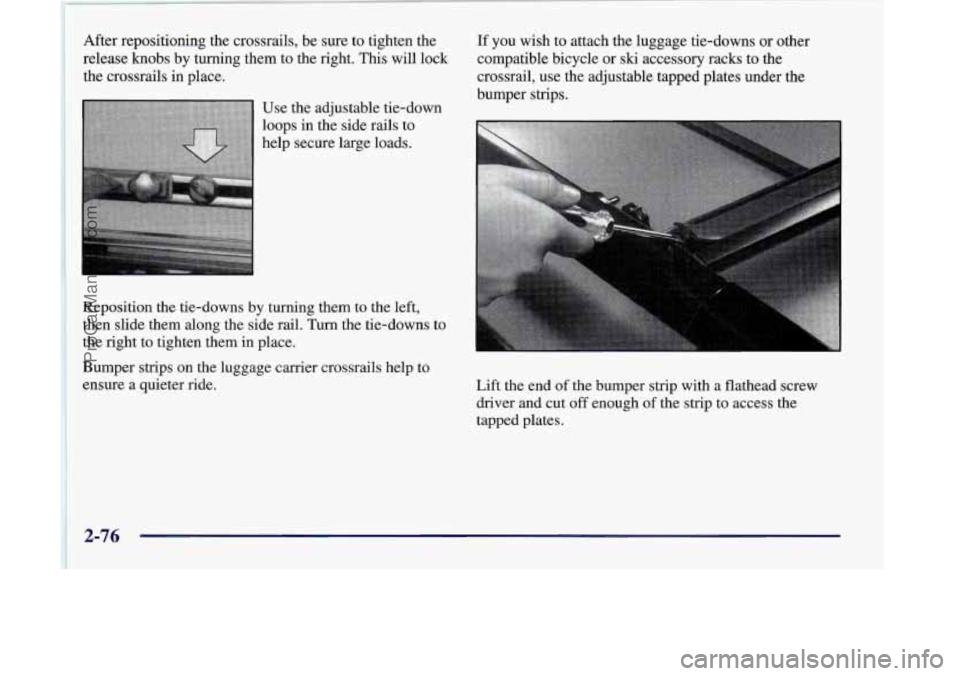
After repositioning the crossrails, be sure to tighten the
release
knobs by turning them to the right. This will lock
the crossrails in place.
If you wish to attach the luggage tie-downs or other
compatible bicycle or
ski accessory racks to the
crossrail, use the adjustable tapped plates under the
Use the adjustable tie-down
loops in the side rails
to
help secure large loads.
Reposition the tie-downs
by turning them to the left,
then slide them along the side rail. Turn the tie-downs to
the right to tighten them in place.
Bumper strips on the luggage carrier crossrails help to
ensure a quieter ride.
Lift the end of the bumper strip with a flathead screw
driver and cut
off enough of the strip to access the
tapped plates.
2-76
ProCarManuals.com
Page 180 of 444
NOTICE:
-
Don’t put papers and other things that burn into
your ashtrays.
If you do, cigarettes or other
smoking materials could set them on fire,
causing damage.
Side Ashtrays
To open the ashtray, press the left side and turn it open.
To remove the ashtray for cleaning, press the snuffer as
you lift up the bottom of the ashtray.
Sun Visors
To block out glare, you can swing down the visors. You
can also remove them from the center mount and swing
them to the side.
Visor Vanity Mirrors
Pull down the sun visor. Flip up the cover to expose the
vanity mirror.
Illuminated Visor Vanity Mirrors
(If Equipped)
Pull down the sun visor. Flip up the cover to expose the
vanity mirror. The lamps will come
on when you open
the cover.
Accessory Inflator System (Option)
Your vehicle may be equipped with an air inflator. With
it, you can inflate things like air mattresses and
basketballs, and
you can also use it to bring your tires up
to the proper pressure.
The air inflator is located in the rear compartment on
the
driver’s side. To remove the cover, pull the tab on the
cover and pull it
off.
2-78
ProCarManuals.com
Page 191 of 444

If the light comes on while you are driving, pull off the
road and stop carefully. You may notice that the pedal is
harder to push. Or, the pedal may go closer to the floor.
It may take longer to stop. If the light is still on, or if the
anti-lock brake system warning light is flashing, have
the vehicle towed for service. (See “Anti-Lock Brake
System Warning Light” and “Towing Your Vehicle” in
the Index
.)
I A CAUTION:
Your brake system may not be working properly
if the brake system warning light
is on. Driving
with the brake system warning light on can lead
to an accident.
If the light is still on or if the
anti-lock brake system warning light
is flashing
after you’ve pulled
off the road and stopped
carefully, have the vehicle towed for service.
Anti-Lock Brake System Warning Light
With the anti-lock brake
system, this light will come
on when you start your
engine and it will stay on
for three seconds.
That’s normal.
If the light flashes when you’re driving, you don’t have
anti-lock brakes and there could be a problem with
your
regular brakes. Pull off the road and stop carefully. You
may notice that the pedal is harder to push. Or, the pedal
may go closer to the floor. It may take longer to stop.
Have the vehicle towed for service. (See “Towing Your
Vehicle” in the Index.)
2-89
ProCarManuals.com