ESP OLDSMOBILE SILHOUETTE 2003 User Guide
[x] Cancel search | Manufacturer: OLDSMOBILE, Model Year: 2003, Model line: SILHOUETTE, Model: OLDSMOBILE SILHOUETTE 2003Pages: 466, PDF Size: 21.55 MB
Page 156 of 466
Before your vehicle was shipped from the factory,
it was programmed in Mode
1. The mode to which the
vehicle was programmed may have been changed since
it left the factory. To determine the mode to which
your vehicle is programmed or to program your vehicle
to a different mode, do the following:
1. Follow the instructions for Entering Programming
Mode on page
2-63.
2. Insert your spare key fully into any door key
cylinder and turn it to the unlock position.
This step is necessary to prevent accidental
programming of this feature to Mode
2. Do not
program this feature to Mode
2 without first
reading Mode
2 entirely. The door key cylinder
must remain in the unlock position during
Steps
2 through 4.
3. Press the button with the horn symbol on the
remote keyless entry transmitter.
4. Count the number of chimes you hear.
The number of chimes indicates the vehicle's
curreni programmed mode.
(ii you ao not wish io
change the current mode, you can either exit
the programming mode by following the instructions
later in this section or program the next feature
available on your vehicle.)
5. Press the panic button to change the current mode.
6. Press the panic button until you hear the number
of chimes corresponding to the mode selection
you want.
7. Remove your key from the door key cylinder.
The mode you selected is now set. You can either exit
the programming mode by following the instructions
next in this section or program the next feature available
on your vehicle.
Exiting Programming Mode
To exit programming mode, turn the key from
ACCESSORY to
OFF and put the BCM PRGRM fuse
back into the instrument panel fuse block.
After programming a feature, you can exit the
programming mode at anytime.
Also, if your vehicle
is equipped with the content theft-deterrent system,
remember to arm the svstem before exitinq.
2-71
Page 157 of 466
Memory Seat
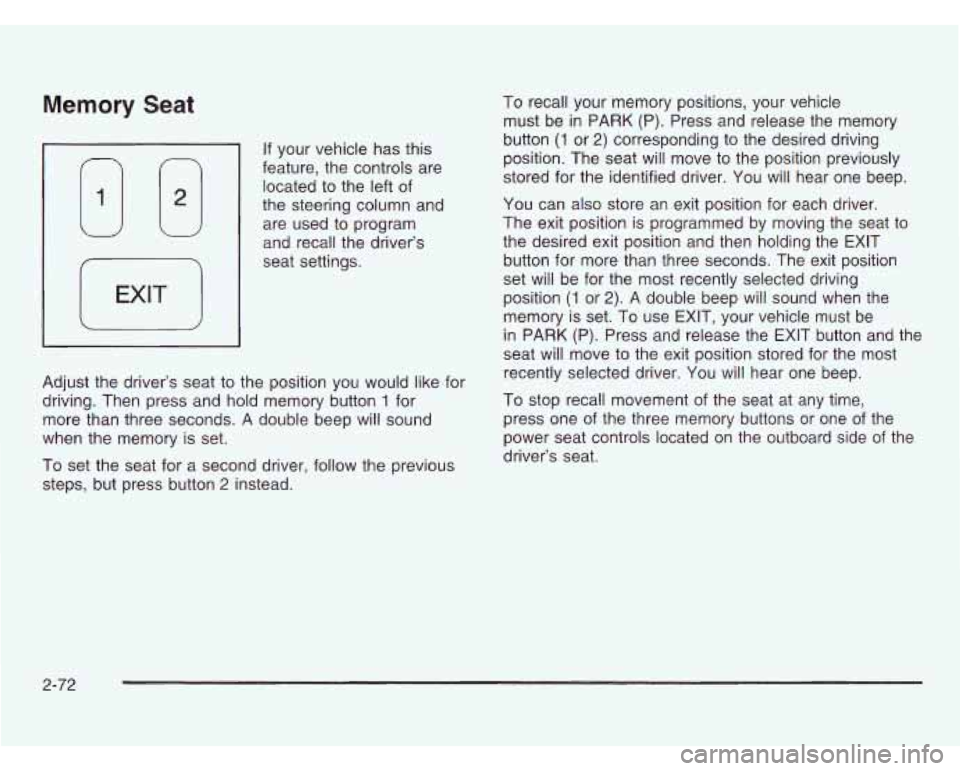
If your vehicle has this
feature, the controls are
located to the left of
the steering column and
are used to program
and recall the driver’s
seat settings.
Adjust the driver’s seat to the position you would like for
driving. Then press and hold memory button
1 for
more than three seconds.
A double beep will sound
when the memory is set.
To set the seat for a second driver, follow the previous
steps, but press button
2 instead. To
recall your memory positions, your vehicle
must be in PARK
(P). Press and release the memory
button
(1 or 2) corresponding to the desired driving
position. The seat will move to the position previously
stored for the identified driver.
You will hear one beep.
You can also store an exit position for each driver.
The exit position is programmed by moving the seat to
the desired exit position and then holding the EXIT
button for more than three seconds. The exit position
set will be for the most recently selected driving
position
(1 or 2). A double beep will sound when the
memory is set. To use EXIT, your vehicle must be
in PARK (P). Press and release the EXIT button and the
seat will move to the exit position stored for the most
recently selected driver. You will hear one beep.
To stop recall movement of the seat at any time,
press one of the three memory buttons or one of the
power seat controls located on the outboard side of the
driver’s seat.
2-72
Page 172 of 466
Daytime Running Lamps/Automatic
Headlamp System
Daytime Running Lamps (DRL) can make it easier for
others to see the front of your vehicle during the
day. DRL can be helpful in many different driving
conditions, but they can be especially helpful
in the short
periods after dawn and before sunset. Fully functional
daytime running lamps are required on all vehicles
first sold in Canada.
A light sensor on top of the instrument panel makes
the
DRL work, so be sure it isn’t covered. The DRL
system will make your front parking and turn signal
lamps come on in daylight when:
The ignition is on,
the exterior lamps control is off, and
the parking brake is released.
When the DRL are on, only your front parking and turn
signal lamps will be on. Your instrument panel won’t
Le I:+ . .- ue 111 up.
When it’s dark enough outside, the exterior lamps will
come on automatically. When it’s bright enough outside,
the exterior lamps will turn
off and the DRL will turn
on. Of course, you may still turn on the headlamps any
time you need to.
If you start your vehicle in a dark garage, the automatic
headlamp system will come on immediately. Once
you leave the garage, it will take approximately
one minute for the automatic headlamp system to
change to DRL
if it is light outside. During that delay,
your instrument panel cluster may not be as bright
as usual. Make sure your instrument panel brightness
control is in the full bright position. See “Instrument
Panel Brightness Control’’ under
lnterior Lamps
on page
3-17.
To idle your vehicle with the DRL and automatic
headlamp control
off, set the parking brake while the
ignition is in OFF or LOCK. Then start the vehicle.
The DRL and automatic headlamp control will stay
off
until you release the parking brake.
As with any vehicle. you should turn on the reuular
headlamp system when you need
it.
3-1 5
Page 244 of 466
Playing a Specific Loaded
Compact Disc
For every CD loaded, a number will appear on the radio
display. To play a specific CD, first press the CD AUX
button to start playing a CD. Then press the numbered
pushbutton that corresponds to the CD you want to
play. A small bar will appear under the CD number that
is playing, and the track number will appear.
If an error appears on the radio display, see “Compact
Disc Messages’’ later in this section.
LOAD CD A (Eject): Pressing the CD eject side of
this button will eject a single disc or multiple discs.
To eject the disc that is currently playing, press
and release this button. To eject multiple discs, press
and hold this button for two seconds. You will hear
a beep and the light will flash to let you know when a
disc is being ejected.
REMOVE CD will be displayed. You can now remove
the disc. If the disc is not removed, after 25 seconds, the
disc
will be automatically pulled back into the receiver.
If you try to push the disc back into the receiver,
before the 25 second time period
is complete, the
receiver will sense an error and will try to eject the disc
several times before stopping.
Do not repeatedly press the CD eject side of the
LOAD CD eject button to eject a disc after you have
tried to push
it in manually. The receivers 25-second
eject timer will reset at each press
of eject, which
will cause the receiver to not eject the disc until the
25-second time period has elapsed.
Once the player stops and the disc is ejected, remove the
disc. After removing the disc, press the PWR knob
off and
then on again. This will clear the disc-sensing feature and
enable discs to be loaded into the player again.
< REV (Reverse): Press and hold this button to
reverse quickly within a track. You will hear sound at a
reduced volume. Release it to play the passage.
The display will show elapsed time.
FWD >> (Forward): Press and hold this button to
advance quickly within a track. You will hear sound
a reduced volume. Release it to play the passage.
The display will show elapsed time. at
RPT (Repeat): With repeat, you can repeat one track
or
an entire disc. To use repeat, do the following:
@ To repeat the track you are listening to, press and
release the RPT button. RPT will appear on the
display. Press RPT again to turn it
off.
@ To repeat the disc you are listening to, press and
hold the RPT button for two seconds. RPT will
appear on the display. Press RPT again to turn it
off.
3-87
Page 260 of 466
DVD Distortion
You may experience video distortion when operating
cellular phones, scanners, CB radios, Global Position
Systems (GPS)*, two-way radios, mobile fax, or
wal kie talkies.
It may be necessary to turn
off the DVD player when
operating one of these devices in or near the vehicle.
*Excludes the Onstar@ System.
Understanding Radio Reception
AM
The range for most AM stations is greater than for FM,
especially at night. The longer range, however, can
cause stations to interfere with each other. AM can pick
up noise from things like storms and power lines. Try
reducing the treble to reduce this noise
if you ever get it.
FM
FM stereo will give you the best sound, but FM signals
will reach only about
10 to 40 miles (16 to 65 km).
Tall buildings or hills can interfere with
FM signals,
causing the sound to come and go.
Care of Your Cassette Tape Player
A tape player that is not cleaned regularly can cause
reduced sound quality, ruined cassettes or a damaged
mechanism. Cassette tapes should be stored
in their
cases away from contaminants, direct sunlight and
extreme heat. If they aren’t, they may not operate
properly or may cause failure
of the tape player.
Your tape player should be cleaned regularly after
every
50 hours of use. Your radio may display CLEAN
to indicate that you have used your tape player for
50 hours without resetting the tape clean timer.
If this message appears on the display, your cassette
tape player needs to be cleaned. It will still play
tapes, but you should clean it as soon as possible
to prevent damage to your tapes and player. If you
notice a reduction in sound quality, try a known good
cassette to see
if the tape or the tape player is at fault.
If this other cassette has no improvement in sound
quality, clean the tape player.
For best results, use a scrubbing action, non-abrasive
cieaning casseiie wirn pads wnicn scrub tne tape
head as the hubs of the cleaner cassette turn.
The recommended cleaning cassette is available
through your dealership.
3-1 03
Page 268 of 466
But the ability to drive is affected well below a BAC of
0.10 percent. Research shows that the driving skills
of many people are impaired at a BAC approaching
0.05 percent, and that the effects are worse at night. All
drivers are impaired at BAC levels above 0.05 percent.
Statistics show that the chance
of being in a collision
increases sharply for drivers who have a BAC of
0.05 percent or above.
A driver with a BAC level of
0.06 percent has doubled his or her chance of having a
collision. At a BAC level of 0.10 percent, the chance
of this driver having a collision is 12 times greater; at a
level of 0.15 percent, the chance is 25 times greater!
The body takes about an hour to rid itself of the alcohol
in one drink.
No amount of coffee or number of cold
showers will speed that up.
“1’11 be careful” isn’t the
right answer. What if there’s an emergency, a need to
take sudden action, as when a child darts into the
street?
A person with even a moderate BAC might not
be able to react quickly enough to avoid the collision. rhere’s
something else about drinking and driving that
many people don’t know. Medical research shows
that alcohol in a person’s system can make crash
injuries worse, especially injuries to the brain, spinal
cord or heart. This means that when anyone who
has been drinking
- driver or passenger - is in
a crash, that person’s chance of being killed or
permanently disabled is higher than if the person
had not been drinking.
Drir ng and the1 ing is very dangerous.
Your reflexes, perceptions, attentiveness and
judgement can be affected by even a small
amount of alcohol. You can have a serious
- or
even fatal -collision
if you drive after drinking.
Please don’t drink and drive or ride with a driver
who has been drinking. Ride home in a cab; or
if
not drink.
.PA~I’Y- ..,;+cI n N- elm-;~mn+n n 4wL.n~ ..#he ...:I1 ywu 1\;5 UUILII a ymuup, uGaIy’larG a UllVtl VUiIW VYiiI
4-5
Page 272 of 466
Remember: Anti-lock doesn’t change the time you need
to get your foot up to the brake pedal or always
decrease stopping distance.
If you get too close to the
vehicle in front of you, you won’t have time to apply
your brakes
if that vehicle suddenly slows or stops.
Always leave enough room up ahead to stop, even
though you have anti-lock brakes.
Using Anti-Lock
Don’t pump the brakes. Just hold the brake pedal down
firmly and let anti-lock work for you. You may feel a
slight brake pedal pulsation or notice some noise,
but this is normal.
Braking in Emergencies
At some time, nearly every driver gets into a situation
that requires hard braking.
If you have anti-lock, you can steer and brake at the
same time. However,
if you don’t have anti-lock,
your first reaction
- to hit the brake pedal hard
and hold it down
- mav be the wronq thina to do. Your
wheels can stop rolling. Once they do, the vehicle
can’t respond to your steering. Momentum will carry
it in whatever direction it was headed when the wheels
stopped rolling. That could be off the road, into the
very thing you were trying to avoid, or into traffic.
If you don’t have anti-lock, use a “squeeze” braking
technique. This will give you maximum braking while
maintaining steering control. You can do this by pushing
on the brake pedal with steadily increasing pressure.
In an emergency, you will probably want to squeeze
the brakes hard without locking the wheels. If you hear
or feel the wheels sliding, ease
off the brake pedal.
This will help you retain steering control.
If you do have
anti-lock, it’s different. See “Anti-Lock Brakes.”
In many emergencies, steering can help you more than
even the very best braking.
4-9
Page 273 of 466
Traction Control System (TCS)
Your vehicle may have a traction control system that
limits wheel spin. This is especially useful
in slippery
road conditions. The system operates only
if it senses
that one or both of the front wheels are spinning or
beginning to lose traction. When this happens,
the system works the front brakes and reduces engine
power to limit wheel spin.
The TRACTION ACTIVE message will come on when
the traction control system is limiting wheel spin.
See
Traction Active Message on page 3-53. You may
feel or hear the system working, but this is normal.
If your vehicle is in cruise control when the traction
control system begins to limit wheel spin, the cruise
control will automatically disengage. When road
conditions allow you to safely use it again, you may
reengage the cruise control. See “Cruise Control’’ under
Turn SignaVMultifunction Lever on page 3-7.
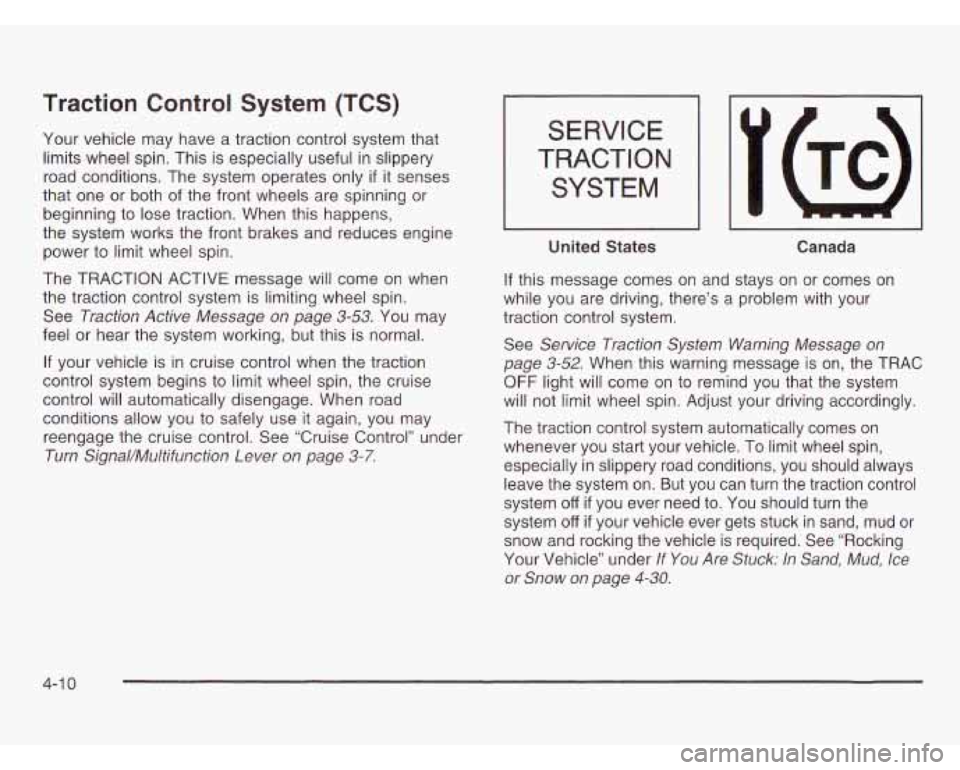
SERVICE
TRACTION
SYSTEM
United States
Canada
If this message comes on and stays on or comes on
while you are driving, there’s
a problem with your
traction control system.
See
Service Traction System Warning Message on
page
3-52. When this warning message is on, the TRAC
OFF light will come on to remind you that the system
will not limit wheel spin. Adjust your driving accordingly.
The traction control system automatically comes on
whenever you start your vehicle.
To limit wheel spin,
especially in slippery road conditions, you should always
leave the system on. But you can turn the traction control
system
off if you ever need to. You should turn the
system
off if your vehicle ever gets stuck in sand, mud or
snow and rocking the vehicle is required. See “Rocking
Your Vehicle” under
If You Are Stuck: In Sand, Mud, Ice
or Snow on page
4-30.
4-1 0
Page 278 of 466
Do not get too close to the vehicle you want to
pass while you’re awaiting an opportunity.
For one thing, following too closely reduces your
area of vision, especially
if you’re following a larger
vehicle. Also, you won’t have adequate space
if
the vehicle ahead suddenly slows or stops.
Keep back a reasonable distance.
When it looks like a chance to pass is coming up,
start to accelerate but stay in the right lane and
don’t get too close. Time your move
so you will be
increasing speed as the time comes to move
into the other lane. If the way is clear to pass, you
will have a “running start” that more than makes
up for the distance you would lose by dropping
back. And
if something happens to cause you to
cancel your pass, you need only slow down
and drop back again and wait for another
opportunity.
If other vehicles are lined up to pass a slow vehicle,
wait your turn. But take care that someone isn’t
trying to pass you as you pull out to pass the slow
venicie.
Fiemember io yiance over your sirouicjer
and check the blind spot.
Check your mirrors, glance over your shoulder, and
start your left lane change signal before moving
out of the right lane to pass. When you are
far enough ahead of the passed vehicle to see its
front
in your inside mirror, activate your right
lane change signal and move back into the right
lane. (Remember that your right outside mirror
is convex. The vehicle you just passed may seem
to be farther away from you than it really is.)
0 Try not to pass more than one vehicle at a time
on two-lane roads. Reconsider before passing
the next vehicle.
0 Don’t overtake a slowly moving vehicle too rapidly.
Even though the brake lamps are not flashing,
it may be slowing down or starting to turn.
0 If you’re being passed, make it easy for the
following driver to get ahead of you. Perhaps
you can ease a little to the right.
4-1 5
Page 279 of 466
Loss of Control
Let’s review what driving experts say about what happens
when the three control systems (brakes, steering and
acceleration) don’t have enough friction where the tires
meet the road to do what the driver has asked.
In any emergency, don’t give up. Keep trying to steer
and constantly seek an escape route or area
of
less danger.
Skidding
In a skid, a driver can lose control of the vehicle.
Defensive drivers avoid most skids by taking reasonable
care suited to existing conditions, and by not “overdriving”
those conditions. But skids are always possible.
The three types of skids correspond to your vehicle’s
three control systems. In the braking skid, your wheels
aren’t rolling. In the steering or cornering skid, too much
speed or steering in a curve causes tires to slip and lose
cornering force. And in the acceleration skid, too much
throttle causes the driving wheels to spin.
A cornering skid is best handled by easing your foot
off
the accelerator pedal.
If you have the Traction Control System, remember:
It helps avoid only the acceleration skid.
If you do not
have this system, or
if the system is off, then an
acceleration skid is also best handled by easing your
foot
off the accelerator pedal.
If your vehicle starts to slide, ease your foot off the
accelerator pedal and quickly steer the way you want
the vehicle to go. If you start steering quickly enough,
your vehicle may straighten out. Always be ready
for a second skid
if it occurs.
Of course, traction is reduced when water, snow, ice,
gravel or other material
is on the road. For safety, you’ll
want to slow down and adjust your driving to these
conditions. It is important to slow down on slippery
surfaces because stopping distance will be longer and
vehicle control more limited.
While driving on a surface with reduced traction,
try your best
to avoid sudden steering, acceleration or
braking (including engine braking by shifting to a
lower gear). Any sudden changes could cause the tires
to slide. You may not realize the surface is slippery
until your vehicle
is skidding. Learn to recognize warning
clues
- such as enough water, ice or packed snow
on the road to make
a “mirrored surface” - and slow
down when you have any doubt.
If you have the anti-lock braking system, remember:
It helps avoid only the braking skid.
if you do not have
anti-lock, then in a braking skid (where the wheels
are no longer rolling), release enough pressure on the
brakes to get the wheels rolling again. This restores
steering control. Push the brake pedal down steadily
when you have to stop suddenly.
As long as the wheels
are rolling, you will have steering control.
4-1 6