tow OLDSMOBILE SILHOUETTE 2003 Owner's Guide
[x] Cancel search | Manufacturer: OLDSMOBILE, Model Year: 2003, Model line: SILHOUETTE, Model: OLDSMOBILE SILHOUETTE 2003Pages: 466, PDF Size: 21.55 MB
Page 165 of 466
Turn and Lane-Change Signals
The turn signal has two upward (for right) and two
downward (for left) positions. These positions allow you
to signal a turn or a lane change.
To signal a turn, move the lever all the way up or
down. When the turn is finished, the lever will return
automatically.
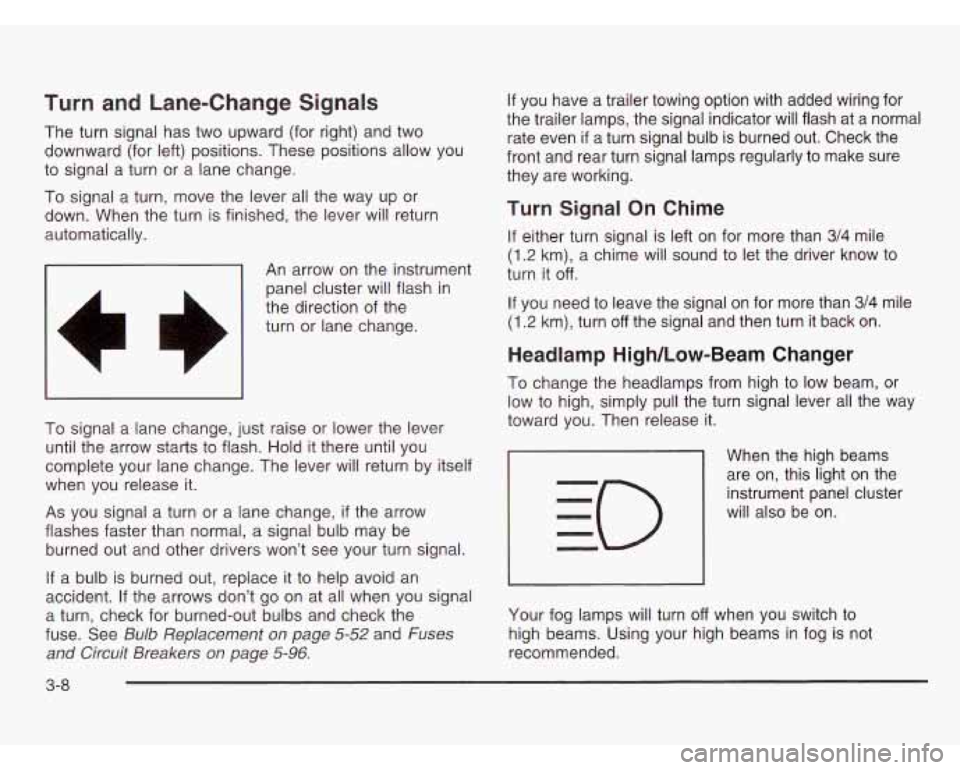
-1 An arrow on the instrument
panel cluster will flash in
the direction of the
turn or lane change.
To signal a lane change, just raise or lower the lever
until the arrow starts to flash. Hold it there until you
complete your lane change. The lever will return by itself
when you release it.
As you signal a turn or a lane change,
if the arrow
flashes faster than normal, a signal bulb may be
burned out and other drivers won’t see your turn signal.
If a bulb is burned out, replace it to help avoid an
accident. If the arrows don’t go on at all when you signal
a turn, check for burned-out bulbs and check the
fuse. See
Bulb Replacement on page 5-52 and Fuses
and Circuit Breakers on page
5-96.
If you have a trailer towing option with added wiring for
the trailer lamps, the signal indicator will flash at a normal
rate even
if a turn signal bulb is burned out. Check the
front and rear turn signal lamps regularly to make sure
they are working.
Turn Signal On Chime
If either turn signal is left on for more than 3/4 mile
(1.2 km), a chime will sound to let the driver know to
turn
it off.
If you need to leave the signal on for more than 3/4 mile
(1.2 km), turn off the signal and then turn it back on.
Headlamp High/Low-Beam Changer
To change the headlamps from high to low beam, or
low to high, simply pull the turn signal lever all the way
toward you. Then release it.
When the high beams
are on, this light on the
instrument panel cluster
will also be on.
Your fog lamps will turn
off when you switch to
high beams. Using your high beams in fog is not
recommended.
3-8
Page 166 of 466
Flash-to-Pass
When the headlamps are off, pull the lever toward you
to momentarily switch on the high beams (to signal
that you are going to pass). When you release the lever,
they will turn
off.
Windshield Wipers
To operate the windshield wipers turn the band marked
WIPER, located on the multifunction lever.
MIST: Turn the band to MIST for a single wiping cycle.
Hold it there until the wipers start. Then let
go. The
wipers will stop after one wipe.
If you want more wipes,
hold the band on mist longer.
OFF: Turn the band to
OFF to turn off the
windshield wipers.
LOW: Turn the band to LOW, for steady wiping at
low speed.
HIGH: Turn the band to HIGH, for steady wiping at
high speed.
DELAY: Turn the band away from you to one of the
five sensitivity settings between
OFF and LOW, to
choose the delayed wiping cycle. The further the band
is turned toward LOW, the shorter the delay will be.
Use this setting tor light rain or snow. Remember that damaged
wiper blades may prevent you
from seeing well enough to drive safely. To avoid
damage, be sure to clear ice and snow from the wiper
blades before using them.
If they’re frozen to the
windshield, carefully loosen or thaw them. If your blades
do become damaged, get new blades or blade inserts.
Heavy snow or ice can overload your wipers.
A circuit
breaker will stop them until the motor cools. Clear away
snow or ice to prevent an overload.
Windshield Washer
To wash your windshield, press and hold the windshield
washer paddle. The washers and wipers will operate.
When you release the paddle, the washers will stop, and
the wipers will continue
to operate for two cycles, unless
your wipers had already been on. In that case, the wipers
will resume the wi--
- r speed you had selected earlier.
I I
In freezing weather, don’t use your washer
until the windshield is warmed. Otherwise the
washer fluid can form ice on the windshield,
blocking your vision.
3-9
Page 195 of 466
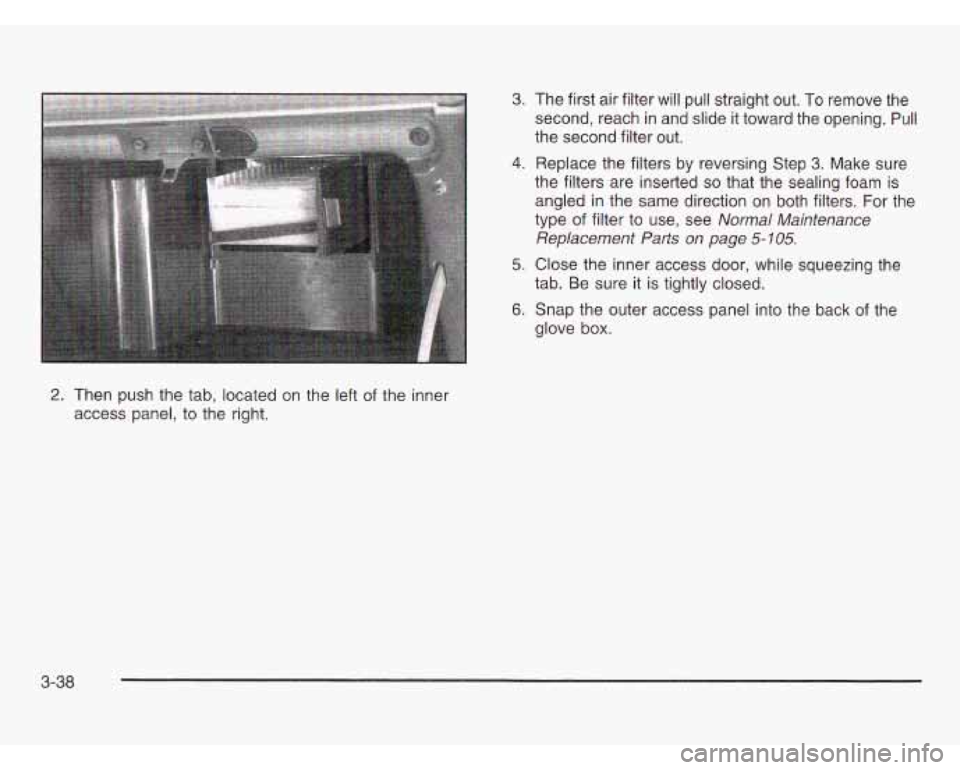
2. Then push the tab, located on the left of the inner
access panel, to the right.
3. The first air filter will pull straight out. To remove the
second, reach in and slide it toward the opening.
Pull
the second filter out.
4. Replace the filters by reversing Step 3. Make sure
the filters are inserted
so that the sealing foam is
angled in the same direction on both filters. For the
type of filter
to use, see Normal Maintenance
Replacement Parts on page
5- 105.
5. Close the inner access door, while squeezing the
6. Snap the outer access panel into the back of the
tab.
Be sure it is tightly closed.
glove box.
3-38
Page 202 of 466

If the light is still on, have the vehicle towed for service.
See
Anti-Lock Brake System Warning Light on
F e 3-45 and Towing \’ rr Vehicle on page 4-32.
Your brake system may not be working
properly
if the brake system warning light is
on. Driving with the brake system warning light
on can lead to an accident.
If the light is still
on after you’ve pulled
off the road and stopped
carefully, have the vehicle towed for service.
r
Anti-Lock Brake System
Warning Light
Your vehicle may have
this light. If it does, the
anti-lock brake system
warning light should come
on for
a few seconds
when you turn the ignition
key to RUN.
If the anti-lock brake system warning light stays on
longer than normal after you’ve started your engine, turn
the ignition
off. Or, if the light comes on and stays on
when you’re driving, stop as soon as possible and turn
the ignition
off. Then start the engine again to reset
the system. If the light still stays on, or comes on again
while you’re driving, the anti-lock brake system needs
service and you don’t have anti-lock brakes.
-I -I. I- .I I^ .-,.- -..-I __.^___ :--. l:-.LL -L-..l-l -^-_ I I le dl Ill-IWGK UldKt: byblW i I vval I 111 ly llYl11 31 lwuiu bWl I IC
on briefly when you turn the ignition key to RUN.
If the light doesn’t come on then, have it fixed so it will
be ready to warn you if there
is a problem.
3-45
Page 206 of 466
If the Light Is Flashing
The following may prevent more serious damage to
your vehicle:
Reducing vehicle speed.
Avoiding hard accelerations.
Avoiding steep uphill grades.
If you are towing a trailer, reduce the amount of
cargo being hauled as soon as
it is possible.
If the light stops flashing and remains on steady,
see
“If the Light Is On Steady” following.
If the light continues to flash, when it is safe to do so,
stop the vehicle. Find a safe place to park your vehicle.
Turn the key off, wait at least
10 seconds and restart
the engine. If the light remains on steady, see
“If the
Light
Is On Steady” following. If the light is still flashing,
follow the previous steps, and drive the vehicle to
your dealer or qualified service center for service.
If the Light Is On Steady
You may be able to correct the emission system
malfunction by considering the following:
Did you recently put fuel into your vehicle?
If
so, reinstall the fuel cap, making sure to fully
install the cap. See
Filling Your Tank on page 5-7.
The diagnostic system can determine if the fuel cap has
been left off or improperly installed.
A loose or missing
fuel cap will allow fuel to evaporate into the atmosphere.
A few driving trips with the cap properly installed
should turn the light
off.
Did you just drive through a deep puddle of water?
If so, your electrical system may be wet. The condition
will usually be corrected when the electrical system
dries out.
A few driving trips should turn the light off.
Are you low on fuel?
As your engine starts to run out of fuel, your engine
may not run as efficiently as designed since small
amounts of air are sucked into the fuel line causing
misfire. The system can detect this. Adding fuel should
correct this condition. Make sure to install the fuel
cap properly. See
Filling Your Tank on page 5-7.
It will take a few driving trips to turn the light off.
3-49
Page 223 of 466
Setting the Tone (Bassnreble)
AUDIO: Push and release the AUDIO knob until BASS
or TREB appears on the display. Turn the knob to
increase or to decrease. The display will show the
bass or the treble level. If a station is weak or noisy,
you may want to decrease the treble.
To adjust the bass and the treble to the middle position,
push and hold the AUDIO knob. The radio will produce
one beep and adjust the display level to the middle
position.
To adjust all tone and speaker controls to the middle
position, push and hold the AUDIO knob when no tone
or speaker control is displayed. You will hear one
beep and the radio will display ALL. The bass and the
treble will be adjusted to the middle position.
AUTO TONE (Automatic Tone): Press this button to
choose bass and treble equalization settings designed
for country/western, jazz, talk, pop, rock and classical
stations.
Adjusting the Speakers (Balance/Fade)
AUDIO: To adjust the balance between the right
and the left speakers, push and release the AUDIO
knob until BAL appears on the display. Turn the knob to
move the sound toward the right or the left speakers.
To adjust the fade, push and release the AUDIO knob
until FADE appears on the display. Turn the knob to
move the sound toward the front or the rear speakers.
To adjust the balance and the fade to the middle position,
push the AUDIO knob, then push it again and hold it until
you hear one beep. The balance and the fade
will be
adjusted to the middle position and the display will show
the speaker balance.
To adjust all tone and speaker controls to the middle
position, push and hold the AUDIO knob when no tone or
speaker control is displayed. The radio
will produce one
beep and display ALL with the level display in the middle
position.
To return the bass and treble to the manual mode, push
and release the AUDIO knob until MANUAL is displayed.
3-66
Page 230 of 466
Setting the Tone (Bassnreble)
AUDIO: Push and release the AUDIO knob until BASS
or TREB appears on the display. Turn the knob
to
increase or to decrease. The display will show the bass
or the treble level.
If a station is weak or noisy, you
may want
to decrease the treble.
To adjust bass and treble to the middle position, push
and hold the AUDIO knob. The radio
will produce
one beep and adjust the display level to the middle
position.
To adjust all tone and speaker controls
to the middle
position, push and hold the AUDIO knob when no tone
or speaker control is displayed. The radio will produce
one beep and display ALL with the level display in
the middle position.
AUTO
TONE (Automatic Tone): Press this button to
choose bass and treble equalization settings designed
for country/western, jazz, talk, pop, rock and classical
stations.
Adjusting the Speakers (Balance/Fade)
AUDIO: To adjust the balance between the right
and the left speakers, push and release the AUDIO
knob until BAL appears on the display. Turn the knob to
move the sound toward the right or the left speakers.
To adjust the fade between the front and the rear
speakers, push and release the AUDIO knob until FADE
appears on the display. Turn the knob
to move the
sound toward the front or the rear speakers.
To adjust the balance and fade to the middle position,
push the AUDIO knob then push it again and hold it until
you hear one beep. The balance and the fade will be
adjusted to the middle position and the display will show
the speaker balance.
To adjust all tone and speaker controls to the middle
position, push and hold the AUDIO knob when no tone
or speaker control is displayed. The radio will produce
one beep and display ALL with the level display in
the middle position.
To return the bass and treble
to the manual mode, push
and release the AUDIO knob until MANUAL
is displayed.
3-73
Page 239 of 466
Setting the Tone (BasdTreble)
AUDIO: Push the AUDIO knob until BASS, MID or
TREB appears on the display. Turn the knob to increase
or to decrease.
If a station is weak or noisy, you may
want to decrease the treble.
To adjust bass, midrange or treble to the middle
position, select BASS, MID or TREB and push and hold
the AUDIO knob. The radio will produce one beep
and adjust the display level to zero.
To adjust all tone and speaker controls to the middle
position, push and hold the AUDIO knob when no tone
or speaker control is displayed. The radio will produce
one beep and CENTERED will appear on the display.
AUTO
EQ (Automatic Equalization): Press this
button to choose between bass, midrange and treble
equalization settings designed for country, jazz,
talk, pop, rock and classical program types.
To return to the manual mode (CUSTOM), press the
AUTO EQ button until CUSTOM appears on the display.
Then you will be able to manually adjust the bass,
midrange and treble using the AUDIO knob.
Adjusting the Speakers (Balance/Fade)
AUDIO: To adjust the balance between the right
and the left speakers, push the AUDIO knob until
BAL appears on the display. Turn the knob to move
the sound toward the left or the right speakers.
To adjust the fade between the front and rear speakers,
push and hold the AUDIO knob until FAD appears on
the display. Turn the knob to move the sound toward the
front or the rear speakers.
To adjust the balance and the fade to the middle
position, select balance or fade and push and hold
the AUDIO knob. The radio
will beep once and
will adjust the display level to the middle position.
To adjust all tone and speaker controls to the middle
position, push and hold the AUDIO knob when no tone
or speaker controls are displayed. The radio will
produce one beep and CENTERED will appear
on
the display.
3-82
Page 251 of 466
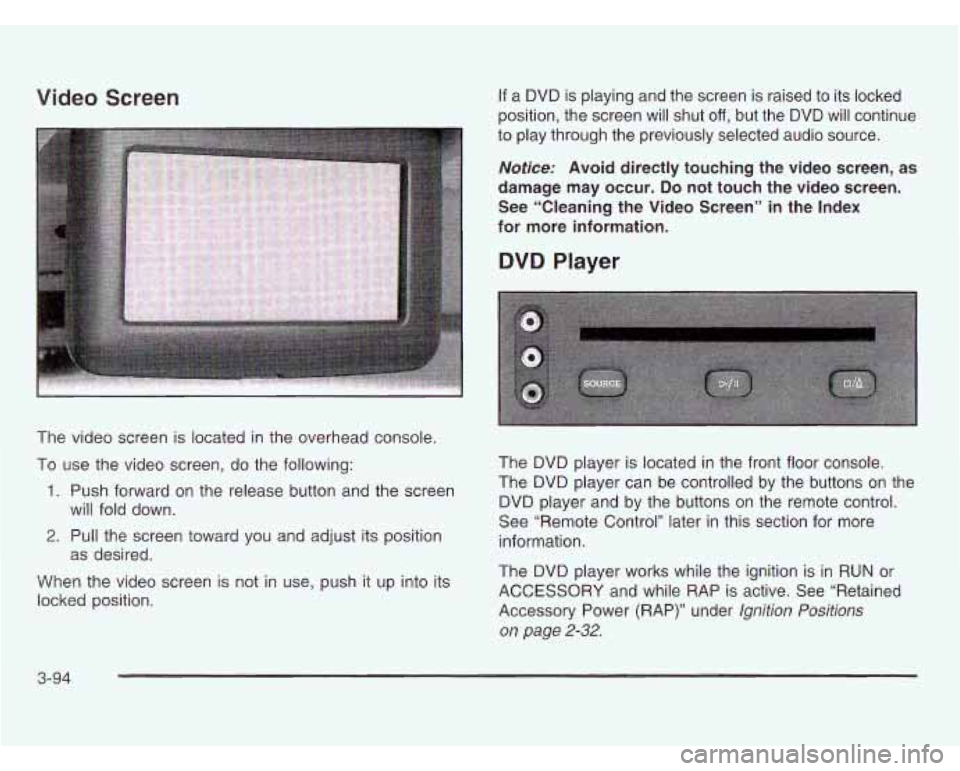
Video Screen
The video screen is located in the overhead console.
To use the video screen, do the following:
1. Push forward on the release button and the screen
2. Pull the screen toward you and adjust its position
When the video screen is not in use, push it up into its
locked position. will fold
down.
as desired.
If a DVD is playing and the screen is raised to its locked
position, the screen will shut
off, but the DVD will continue
to play through the previously selected audio source.
Notice: Avoid directly touching the video screen, as
damage may occur.
Do not touch the video screen.
See “Cleaning the Video Screen” in the Index
for more information.
DVD Player
The DVD player is located in the front floor console.
The DVD player can be controlled by the buttons on the
DVD player and by the buttons on the remote control.
See “Remote Control’’ later in this section for more
information.
The DVD player works while the ignition is in
RUN or
ACCESSORY and while RAP is active. See “Retained
Accessory Power (RAP)” under
Ignition Positions
on page
2-32.
3-94
Page 264 of 466
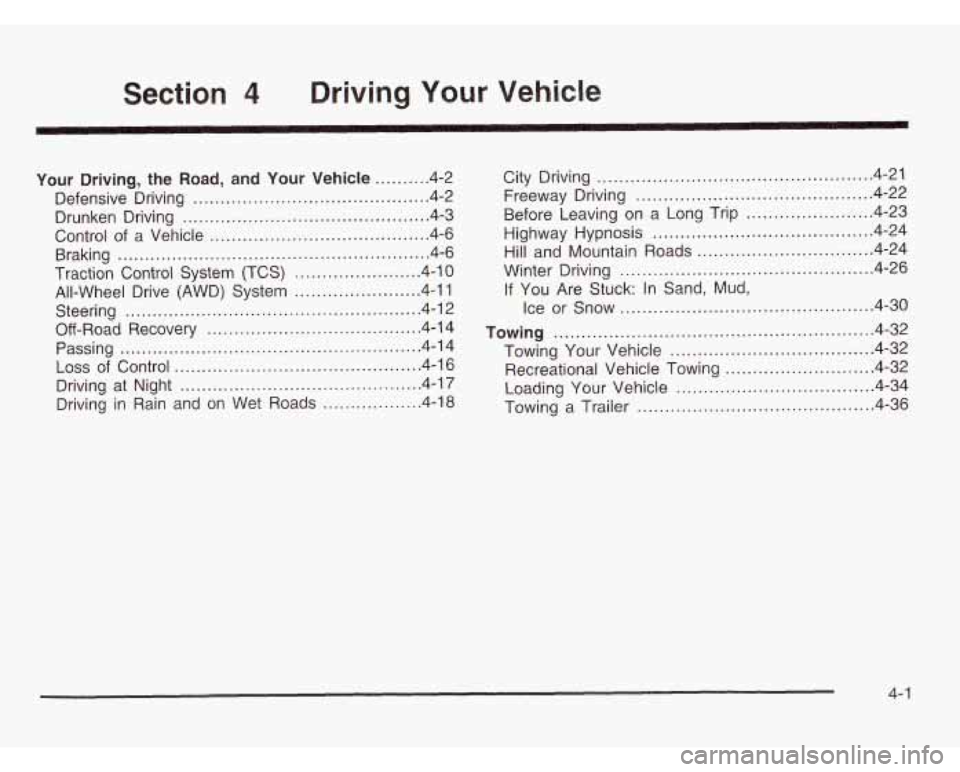
Section Driving Your Vehicle
Your
Driving. the Road. and Your Vehicle .......... 4-2
Defensive Driving
........................................... 4.2
Drunken Driving
............................................. 4.3
Braking
......................................................... 4.6
Traction Control System (TCS)
....................... 4.10
Steering
...................................................... 4.12
Off-Road Recovery
....................................... 4.14
Passing
........................................ .... 4.14
Loss of Control
.................................. .... 4.16
Driving at Night
......................................... 4.17
Driving in Rain and on Wet Roads
.............. 4-18
Control of a Vehicle ........................................ 4-6
All-Wheel Drive (AWD) System
....................... 4-1 1 City Driving
.................................................. 4.21
Freeway Driving
............................... ..... 4.22
Before Leaving on a Long Trip
....................... 4-23
Highway Hypnosis
........................................ 4-24
Winter Driving
.............................................. 4.26
Ice or Snow
.............................................. 4-30
Towing .......................................................... 4-32
Towing Your Vehicle
..................................... 4-32
Recreational Vehicle Towing
........................... 4-32
Loading Your Vehicle
.................................... 4-34
Towing a Trailer
.............................. ..... 4-36
Hill
and Mountain Roads
................................ 4-24
If You Are Stuck: In Sand, Mud,
4- 1