OPEL AGILA 2009 Workshop Manual
Manufacturer: OPEL, Model Year: 2009, Model line: AGILA, Model: OPEL AGILA 2009Pages: 153, PDF Size: 1.82 MB
Page 51 of 153
5-1Instruments and controls
Instruments and
controlsSteering wheel adjustment
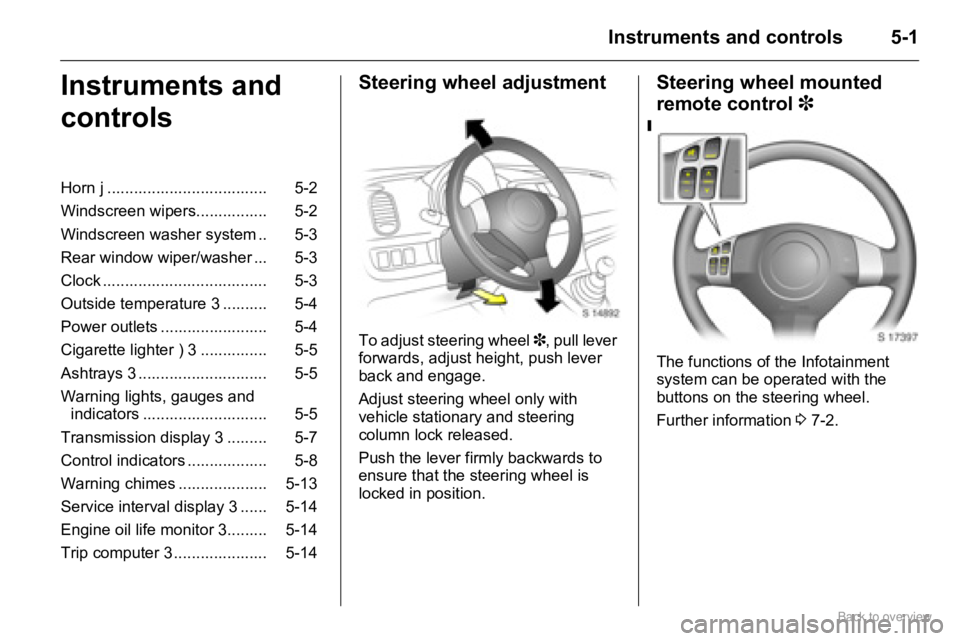
To adjust steering wheel 3, pull lever
forwards, adjust height, push lever
back and engage.
Adjust steering wheel only with
vehicle stationary and steering
column lock released.
Push the lever firmly backwards to
ensure that the steering wheel is
locked in position.
Steering wheel mounted
remote control 3
The functions of the Infotainment
system can be operated with the
buttons on the steering wheel.
Further information 3 7-2. Horn j .................................... 5-2
Windscreen wipers................ 5-2
Windscreen washer system .. 5-3
Rear window wiper/washer ... 5-3
Clock ..................................... 5-3
Outside temperature 3 .......... 5-4
Power outlets ........................ 5-4
Cigarette lighter ) 3 ............... 5-5
Ashtrays 3 ............................. 5-5
Warning lights, gauges and
indicators ............................ 5-5
Transmission display 3 ......... 5-7
Control indicators .................. 5-8
Warning chimes .................... 5-13
Service interval display 3 ...... 5-14
Engine oil life monitor 3......... 5-14
Trip computer 3 ..................... 5-14
Page 52 of 153
5-2 Instruments and controls
Horn j
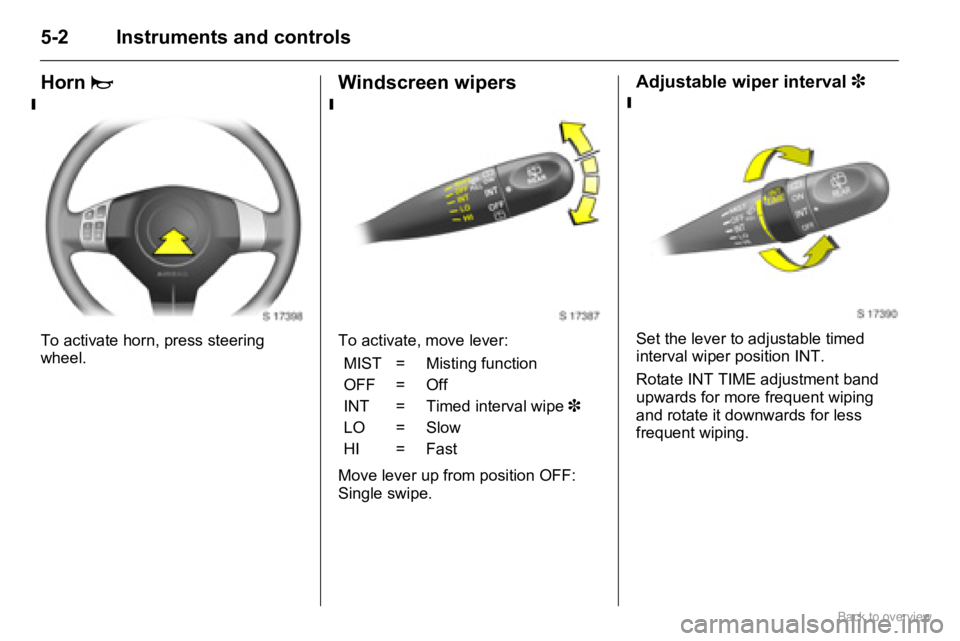
To activate horn, press steering
wheel.
Windscreen wipers
To activate, move lever:
Move lever up from position OFF:
Single swipe.
Adjustable wiper interval 3
Set the lever to adjustable timed
interval wiper position INT.
Rotate INT TIME adjustment band
upwards for more frequent wiping
and rotate it downwards for less
frequent wiping.
MIST = Misting function
OFF = Off
INT = Timed interval wipe 3
LO = Slow
HI = Fast
Page 53 of 153
5-3Instruments and controls
Windscreen washer system
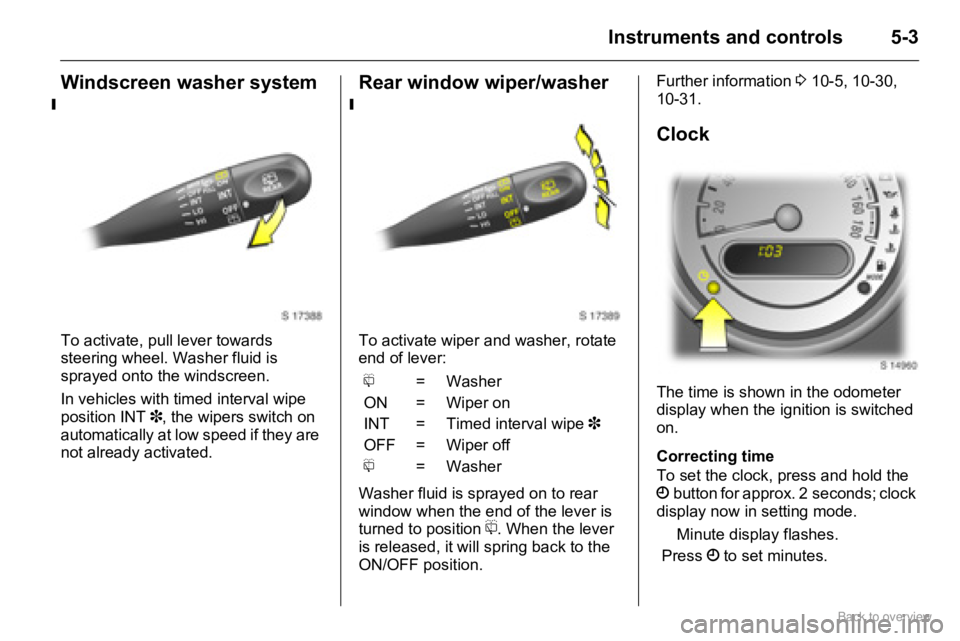
To activate, pull lever towards
steering wheel. Washer fluid is
sprayed onto the windscreen.
In vehicles with timed interval wipe
position INT 3, the wipers switch on
automatically at low speed if they are
not already activated.
Rear window wiper/washer
To activate wiper and washer, rotate
end of lever:
Washer fluid is sprayed on to rear
window when the end of the lever is
turned to position
f. When the lever
is released, it will spring back to the
ON/OFF position.Further information 3 10-5, 10-30,
10-31.
Clock
The time is shown in the odometer
display when the ignition is switched
on.
Correcting time
To set the clock, press and hold the
Öbutton for approx. 2 seconds; clock
display now in setting mode. f=Washer
ON = Wiper on
INT = Timed interval wipe 3
OFF = Wiper off
f=Washer
Minute display flashes.
Press Ö to set minutes.
Page 54 of 153
5-4 Instruments and controls
Outside temperature 3
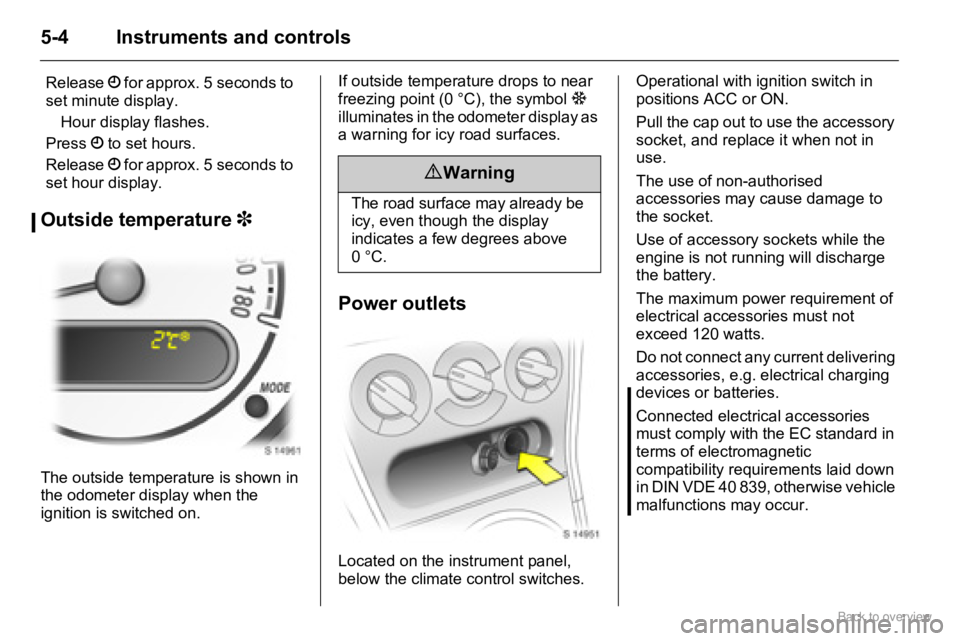
The outside temperature is shown in
the odometer display when the
ignition is switched on.If outside temperature drops to near
freezing point (0 °C), the symbol:
illuminates in the odometer display as
a warning for icy road surfaces.
Power outlets
Located on the instrument panel,
below the climate control switches.Operational with ignition switch in
positions ACC or ON.
Pull the cap out to use the accessory
socket, and replace it when not in
use.
The use of non-authorised
accessories may cause damage to
the socket.
Use of accessory sockets while the
engine is not running will discharge
the battery.
The maximum power requirement of
electrical accessories must not
exceed 120 watts.
Do not connect any current delivering
accessories, e.g. electrical charging
devices or batteries.
Connected electrical accessories
must comply with the EC standard in
terms of electromagnetic
compatibility requirements laid down
in DIN VDE 40 839, otherwise vehicle
malfunctions may occur. Release Ö for approx. 5 seconds to
set minute display.
Hour display flashes.
Press Ö to set hours.
Release Ö for approx. 5 seconds to
set hour display.
9 Warning
The road surface may already be
icy, even though the display
indicates a few degrees above
0°C.
Page 55 of 153
5-5Instruments and controls
Cigarette lighter ) 3
With ignition switch in positions ACC
or ON, push the cigarette lighter in all
the way and release it.
Heating up ceases once element is
glowing; cigarette lighter pops up
automatically. Withdraw lighter.
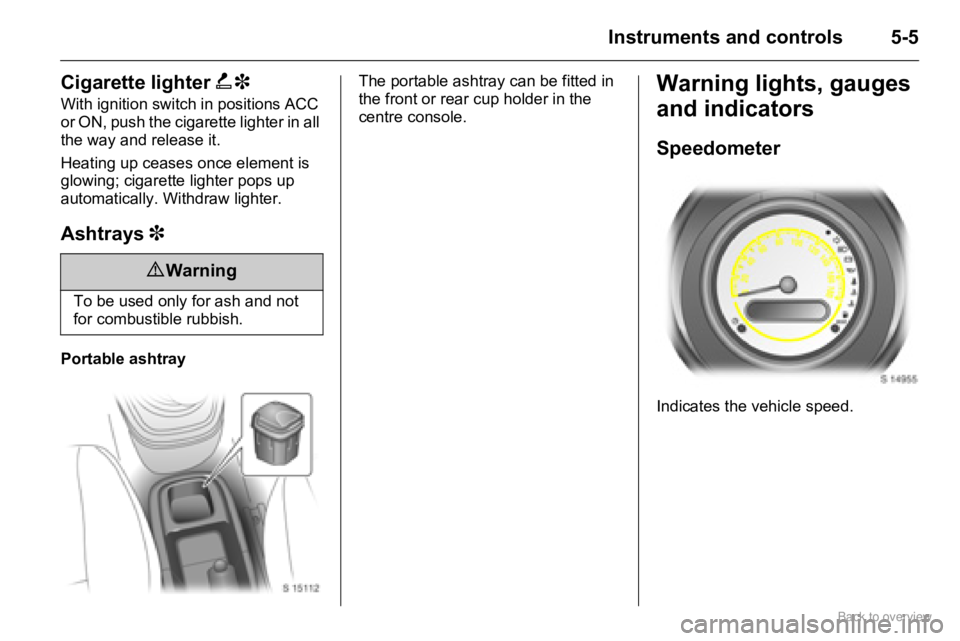
Ashtrays 3
Portable ashtrayThe portable ashtray can be fitted in
the front or rear cup holder in the
centre console.
Warning lights, gauges
and indicators
Speedometer
Indicates the vehicle speed.
9 Warning
To be used only for ash and not
for combustible rubbish.
Page 56 of 153
5-6 Instruments and controls
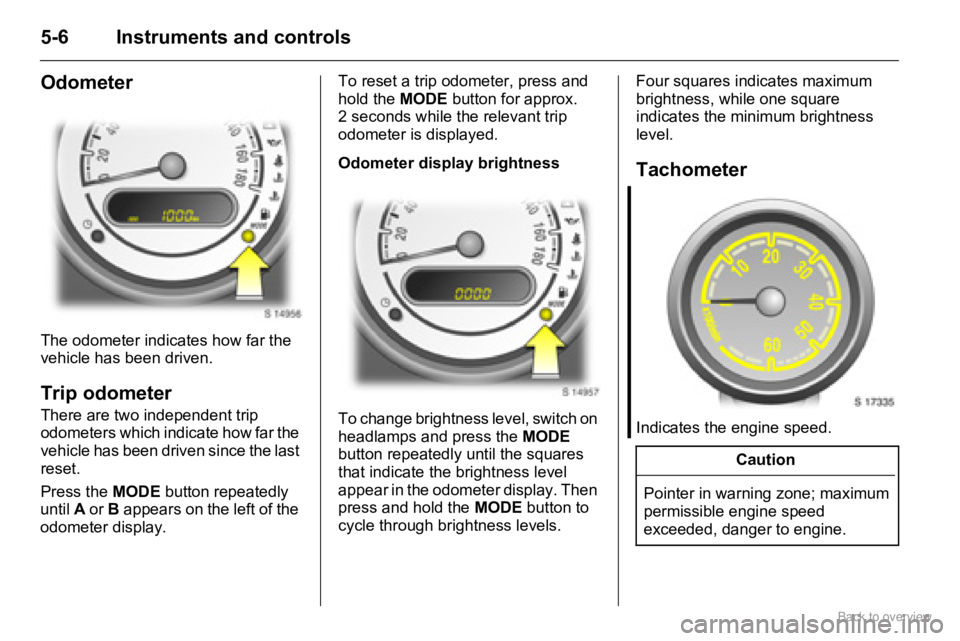
Odometer
The odometer indicates how far the
vehicle has been driven.
Trip odometer
There are two independent trip
odometers which indicate how far the
vehicle has been driven since the last
reset.
Press the MODE button repeatedly
until A or B appears on the left of the
odometer display. To reset a trip odometer, press and
hold the MODE button for approx.
2 seconds while the relevant trip
odometer is displayed.
Odometer display brightness
To change brightness level, switch on
headlamps and press the MODE
button repeatedly until the squares
that indicate the brightness level
appear in the odometer display. Then
press and hold the MODE button to
cycle through brightness levels.Four squares indicates maximum
brightness, while one square
indicates the minimum brightness
level.
Tachometer
Indicates the engine speed.
Caution
Pointer in warning zone; maximum
permissible engine speed
exceeded, danger to engine.
Page 57 of 153
5-7Instruments and controls
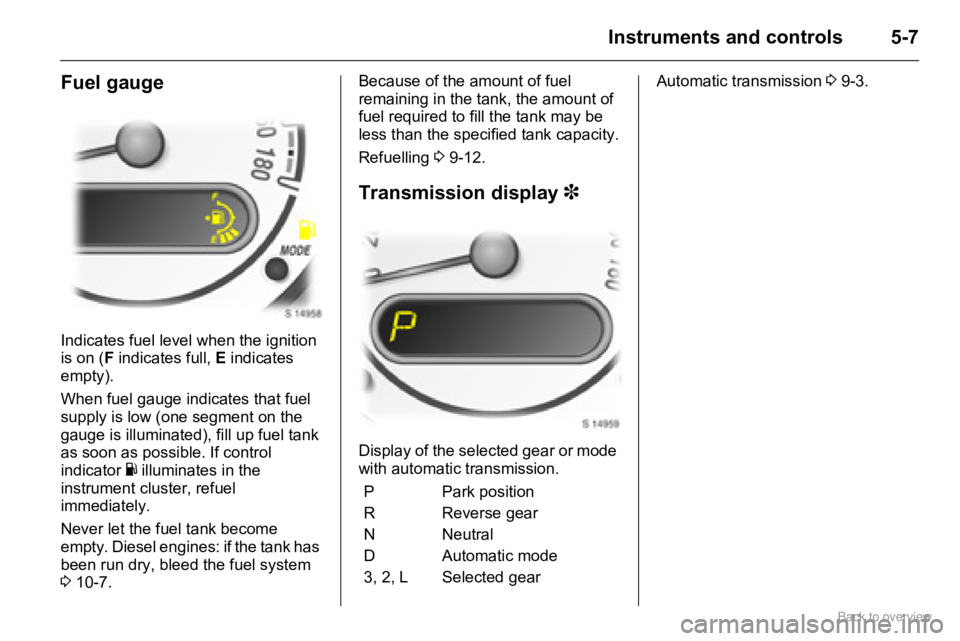
Fuel gauge
Indicates fuel level when the ignition
is on (F indicates full, E indicates
empty).
When fuel gauge indicates that fuel
supply is low (one segment on the
gauge is illuminated), fill up fuel tank
as soon as possible. If control
indicator
Y illuminates in the
instrument cluster, refuel
immediately.
Never let the fuel tank become
empty. Diesel engines: if the tank has
been run dry, bleed the fuel system
310-7.Because of the amount of fuel
remaining in the tank, the amount of
fuel required to fill the tank may be
less than the specified tank capacity.
Refuelling 39-12.
Transmission display 3
Display of the selected gear or mode
with automatic transmission.Automatic transmission 39-3.
P Park position
R Reverse gear
N Neutral
D Automatic mode
3, 2, L Selected gear
Page 58 of 153
5-8 Instruments and controls
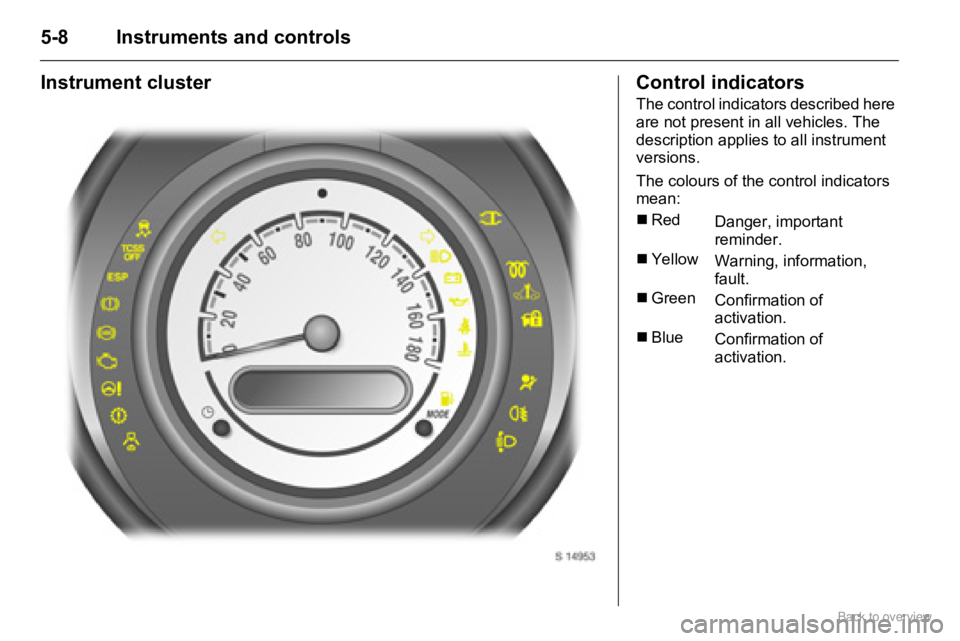
Instrument clusterControl indicators
The control indicators described here
are not present in all vehicles. The
description applies to all instrument
versions.
The colours of the control indicators
mean:
�„Red
Danger, important
reminder.
�„Yellow
Warning, information,
fault.
�„Green
Confirmation of
activation.
�„Blue
Confirmation of
activation.
Page 59 of 153

5-9Instruments and controls
X Driver’s seat belt
Will illuminate in red when ignition is
switched on if driver’s seat belt is not
engaged.
If vehicle speed exceeds 15 km/h
(9 mph) and driver’s seat belt is not
engaged, the control indicator will
flash for approx. 90 seconds along
with a warning chime and then
illuminate until driver’s seat belt is
fastened correctly.
Seat belts 3 3-5.
v Airbag systems, belt
tensioners
Will flash in red several times when
the ignition is switched on, then
extinguish.
If it does not flash when the ignition is
switched on, stays lit, illuminates or
flashes whilst driving, there is a fault
with the airbag systems or with the
belt tensioners. The systems might
not therefore be triggered in the event
of an accident. Seek the assistance
of a workshop immediately.
Belt tensioners 3 3-6, airbags 3 3-13.
p Charging system
Will illuminate in red when ignition is
switched on. Extinguishes after
engine is started.
If it stays lit after the ignition is
switched on or illuminates during
driving: stop vehicle and switch off
engine. The battery is not being
charged and the engine cooling may
be interrupted. The brake servo unit
may cease to be effective. Interrupt
your journey immediately.
Remove ignition key and check drive
belt condition and tensioning before
seeking the assistance of a
workshop.
s Service transmission 3
Will illuminate briefly in yellow when
the ignition is switched on.
If it flashes, there is a fault in the
automatic transmission. Seek the
assistance of a workshop
immediately.
Automatic transmission 39-3.
R Brake system
Will illuminate in red when ignition is
switched on. Extinguishes after
engine is started.
Illuminates when engine is running if
parking brake is applied and/or fluid
level for brake hydraulics is too low.
Further information 3 9-9,
brake fluid level 3 10-6.
u Anti-lock Brake System
(ABS)
Will illuminate briefly in yellow when
ignition is switched on.
At the same time, the system
performs a self-check. When the
control indicator extinguishes, the
system is ready for operation.
Caution
If it illuminates when the parking
brake is not applied: stop vehicle;
interrupt your journey immediately.
Seek the assistance of a workshop.
Page 60 of 153

5-10 Instruments and controls
If it does not illuminate when the
ignition is switched on, stays lit or
illuminates during driving, there is a
fault in the ABS. The vehicle’s brake
system may remain operational
without ABS regulation.
If it illuminates during driving along
with brake system control indicator
R, there is a serious fault in the
brake system. Seek the assistance of
a workshop immediately, to have the
system checked.
Further information 3 9-9.
2 Power steering
Will illuminate in yellow when ignition
is switched on. Extinguishes after
engine is started.
If it does not illuminate when the
ignition is switched on, stays lit or
illuminates during driving, there is a
fault in the system. Seek the
assistance of a workshop as soon as
possible.
TCSS OFF Traction Control
Support System off 3
Will illuminate briefly in yellow when
the ignition is switched on.
When the TCSS OFF switch (located
on the lower instrument panel) is
pressed, the control indicator
illuminates. The traction control
aspect of the Electronic Stability
Program (ESP
®) is switched off.
With ESP® active, if wheels are
slipping on wet, snowy or icy roads,
the traction control aspect of ESP
®
may switch off automatically and the
control indicator will illuminate. It will
extinguish automatically when
prevailing road conditions improve.
Further information 3 9-11.
R Electronic Stability
Program (ESP®) active 3
Will illuminate briefly in yellow when
the ignition is switched on.
If it stays lit or illuminates during
driving, there may be a fault with
ESP
®. Seek the assistance of a
workshop.If it flashes 5 times per second when
the engine is running, the system has
come into action. The engine output
may be reduced (the sound of the
engine changes) and the vehicle may
be braked automatically to a small
degree.
If it remains illuminated whilst driving,
there may be a fault with ESP
®. The
vehicle’s brake system remains
operational without ESP
® regulation.
Seek the assistance of a workshop to
have the cause of the fault remedied.
If the vehicle’s battery has been
disconnected and reconnected,
ESP
® is deactivated and the control
indicator flashes once per second.
Reactivate ESP
® by driving in a
straight line at over 15 km/h (9 mph)
for a few seconds until flashing
ceases.
Further information 3 9-10.
ESP
Electronic Stability
Program (ESP®) fault 3
Will illuminate briefly in yellow when
the ignition is switched on.