wheel OPEL ASTRA SALOON 2014 User Guide
[x] Cancel search | Manufacturer: OPEL, Model Year: 2014, Model line: ASTRA SALOON, Model: OPEL ASTRA SALOON 2014Pages: 245, PDF Size: 7.12 MB
Page 52 of 245
50Seats, restraints
■ Adjust the thigh support so thatthere is a space approx. two fingers
wide between the edge of the seat
and the hollow of the knee.
■ Adjust the lumbar support so that it
supports the natural shape of the
spine.
Seat adjustment9 Danger
Do not sit nearer than 25 cm from
the steering wheel, to permit safe
airbag deployment.
9 Warning
Never adjust seats while driving as
they could move uncontrollably.
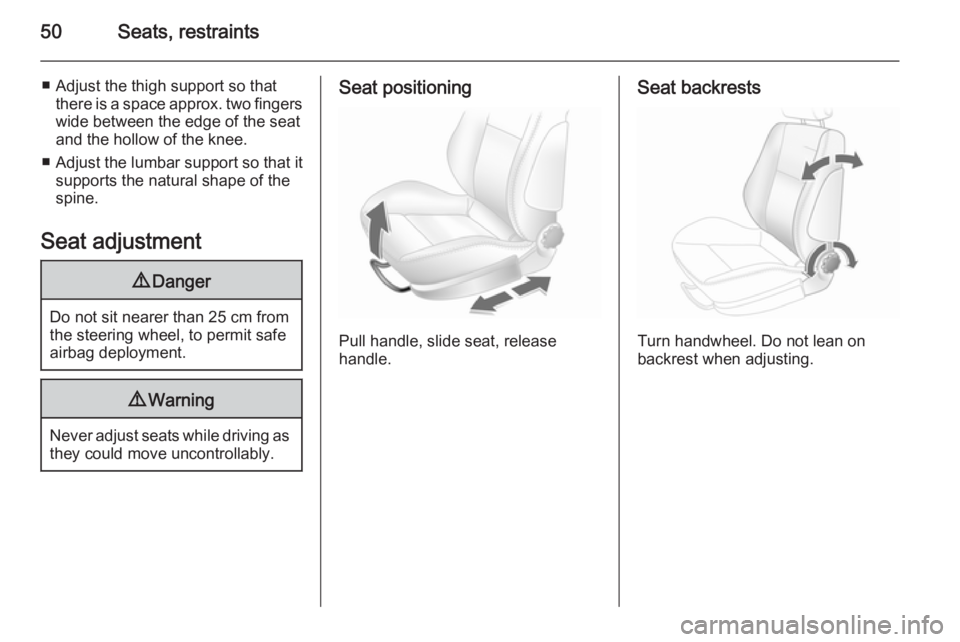
Seat positioning
Pull handle, slide seat, release
handle.
Seat backrests
Turn handwheel. Do not lean on
backrest when adjusting.
Page 53 of 245
Seats, restraints51
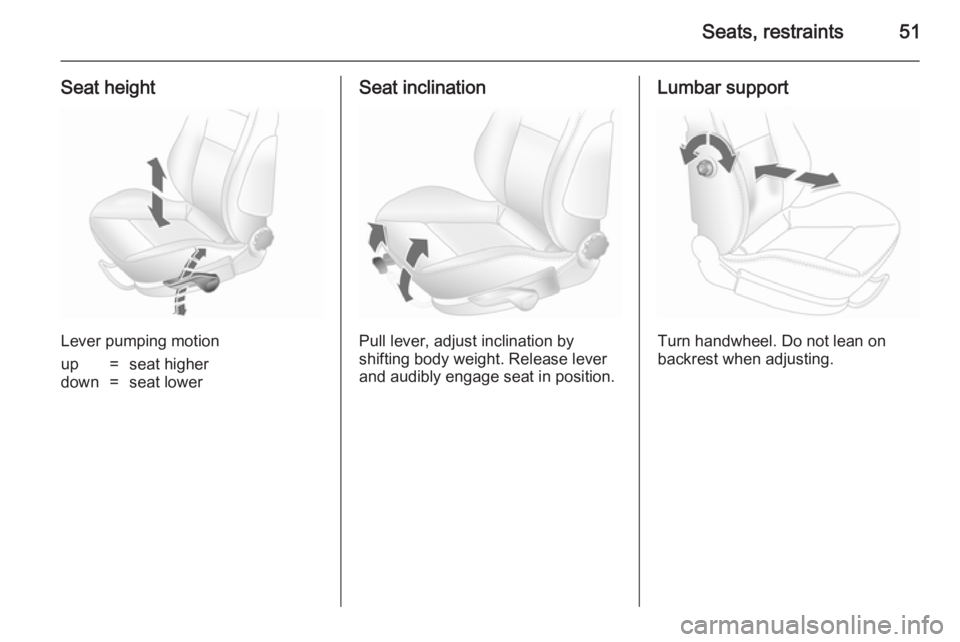
Seat height
Lever pumping motion
up=seat higherdown=seat lowerSeat inclination
Pull lever, adjust inclination by
shifting body weight. Release lever
and audibly engage seat in position.
Lumbar support
Turn handwheel. Do not lean on
backrest when adjusting.
Page 54 of 245
52Seats, restraints
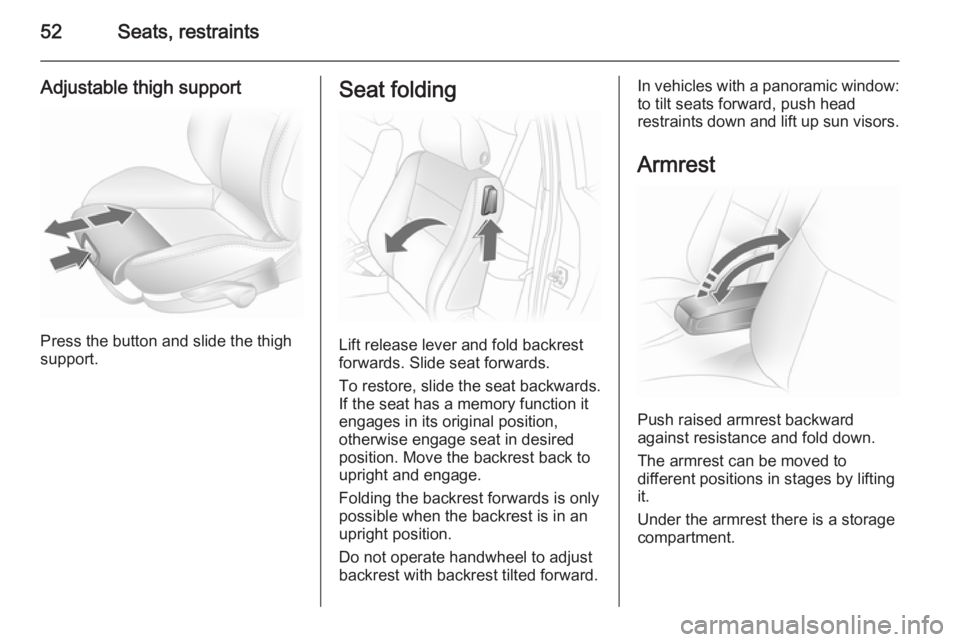
Adjustable thigh support
Press the button and slide the thigh
support.
Seat folding
Lift release lever and fold backrest
forwards. Slide seat forwards.
To restore, slide the seat backwards.
If the seat has a memory function it
engages in its original position,
otherwise engage seat in desired
position. Move the backrest back to
upright and engage.
Folding the backrest forwards is only
possible when the backrest is in an
upright position.
Do not operate handwheel to adjust
backrest with backrest tilted forward.
In vehicles with a panoramic window:
to tilt seats forward, push head
restraints down and lift up sun visors.
Armrest
Push raised armrest backward
against resistance and fold down.
The armrest can be moved to
different positions in stages by lifting
it.
Under the armrest there is a storage
compartment.
Page 59 of 245
Seats, restraints57Airbag system
The airbag system consists of a
number of individual systems
depending on the scope of
equipment.
When triggered, the airbag inflates
within milliseconds. They also deflate
so quickly that it is often unnoticeable during the collision.9 Warning
If handled improperly the airbag
systems can be triggered in an
explosive manner.
Note
The control electronics of the airbag systems, belt pretensioners and
deployable anti-roll bars are located
in the centre console area. Do not
put any magnetic objects in this
area.
Do not stick anything on the airbag
covers and do not cover them with
other materials.
Each airbag/anti-roll bar is triggered
only once. Have deployed airbags/
anti-roll bars replaced by a
workshop. Furthermore, it might be
necessary to have the steering
wheel, the instrument panel, parts of
the panelling, the door seals,
handles and the seats replaced.
Do not make any modifications to
the airbag system/anti-roll bars as
this will invalidate the vehicle type
approval.
When the airbags inflate, escaping
hot gases may cause burns.
Control indicator v for airbag systems
and anti-roll bars 3 96.
Child restraint systems on front
passenger seat with airbag
systems
Warning according to ECE R94.02:
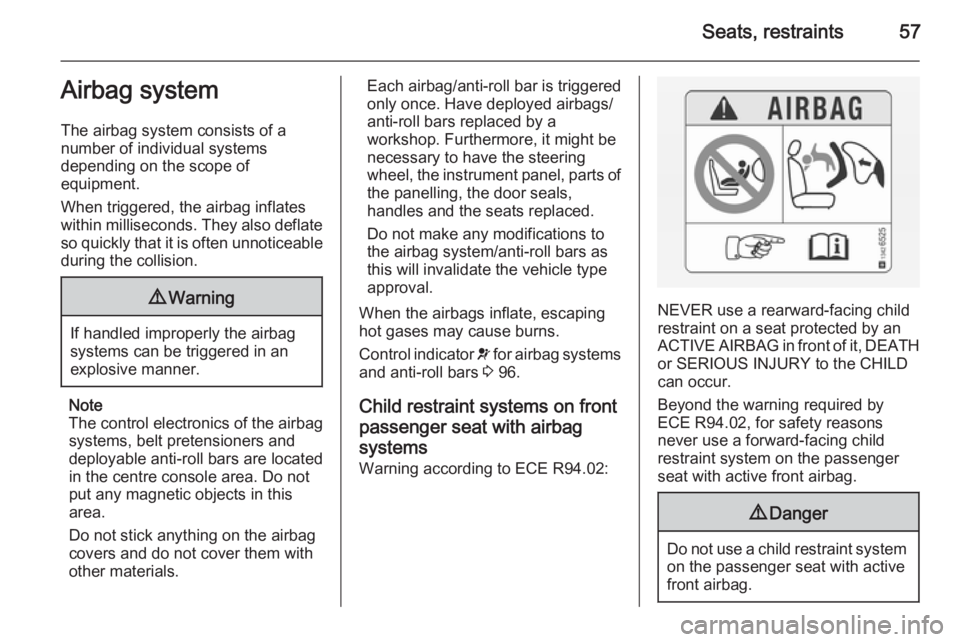
NEVER use a rearward-facing child
restraint on a seat protected by an
ACTIVE AIRBAG in front of it, DEATH or SERIOUS INJURY to the CHILD
can occur.
Beyond the warning required by
ECE R94.02, for safety reasons
never use a forward-facing child
restraint system on the passenger
seat with active front airbag.
9 Danger
Do not use a child restraint system
on the passenger seat with active
front airbag.
Page 60 of 245
58Seats, restraintsFront airbag system
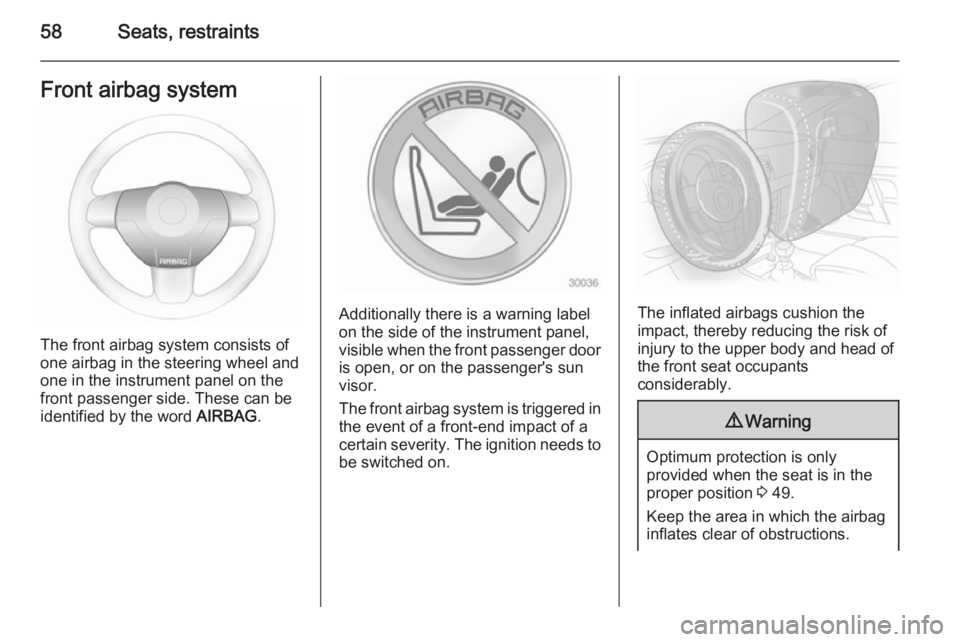
The front airbag system consists of
one airbag in the steering wheel and
one in the instrument panel on the
front passenger side. These can be
identified by the word AIRBAG.
Additionally there is a warning label
on the side of the instrument panel,
visible when the front passenger door
is open, or on the passenger's sun
visor.
The front airbag system is triggered in
the event of a front-end impact of a
certain severity. The ignition needs to be switched on.The inflated airbags cushion the
impact, thereby reducing the risk of
injury to the upper body and head of
the front seat occupants
considerably.
9 Warning
Optimum protection is only
provided when the seat is in the
proper position 3 49.
Keep the area in which the airbag
inflates clear of obstructions.
Page 88 of 245
86Instruments and controlsInstruments and
controlsControls ....................................... 86
Warning lights, gauges and indi‐
cators ........................................... 93
Information displays ...................102
Vehicle messages ...................... 109
Trip computer ............................. 112Controls
Steering wheel adjustment
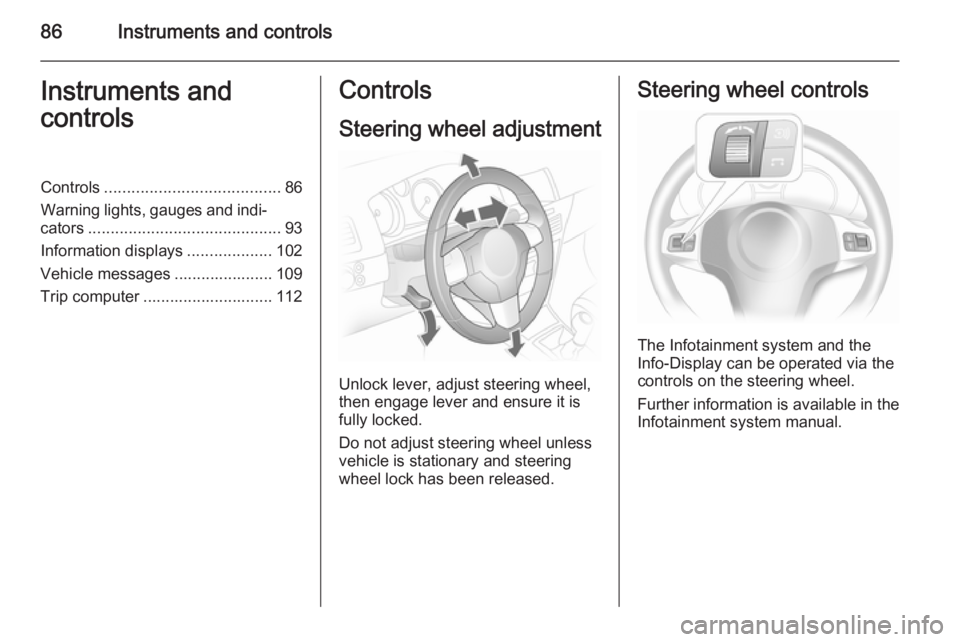
Unlock lever, adjust steering wheel,
then engage lever and ensure it is fully locked.
Do not adjust steering wheel unless
vehicle is stationary and steering
wheel lock has been released.
Steering wheel controls
The Infotainment system and the
Info-Display can be operated via the
controls on the steering wheel.
Further information is available in the
Infotainment system manual.
Page 102 of 245
100Instruments and controls
Control indicator illuminatesyellow
Fault in system or tyre without
pressure sensor mounted (e.g. spare
wheel). Consult a workshop.
Flashes Flashes three times to indicatesystem initialisation.
Deflation detection system 3 191,
tyre pressure monitoring system 3 191.
Interactive driving system,
continuous damping
control, sport mode
IDS+ illuminates yellow.
Illuminates when the ignition is
switched on and goes out shortly after the engine starts. Illumination whilst
driving indicates a fault in the system.
Have the cause of the fault remedied
by a workshop.
IDS Plus
3 148, CDC 3 149, Sport
mode 3 148.Engine oil pressure
I illuminates red.
Illuminates when the ignition is
switched on and goes out shortly after
the engine starts.
Illuminates when the engine isrunningCaution
Engine lubrication may be
interrupted. This may result in
damage to the engine and/or
locking of the drive wheels.
1. Depress clutch.
2. Select neutral gear, set selector lever to N.
3. Move out of the flow of traffic as quickly as possible without
impeding other vehicles.
4. Switch off ignition.
9 Warning
When the engine is off,
considerably more force is needed
to brake and steer.
Do not remove key until vehicle is stationary, otherwise the steeringwheel lock could engage
unexpectedly.
Check oil level before seeking the
assistance of a workshop 3 161.
Low engine oil level
S illuminates yellow.
Engine oil level is checked
automatically.
Illuminates when the engine isrunning
Low engine oil level. Check engine oil
level and top up as necessary
3 161.
Low fuel Y illuminates or flashes yellow.
Page 103 of 245
Instruments and controls101
IlluminatesLevel in fuel tank too low.
Flashes
Fuel used up. Refuel immediately.
Never run the tank dry.
Catalytic converter 3 136.
Bleeding the diesel fuel system
3 165.
Open&Start system
0 illuminates or flashes yellow.
Flashes The electronic key is no more withinthe reception range of the vehicle interior. The engine cannot be
started. Hold the Start/Stop button
depressed a bit longer to switch off
the ignition.
or
Failure of the electronic key.
Operation is yet only possible via
emergency operation.Illuminates
Fault in system. Try to operate with
the spare key, the remote control or
through emergency operation. Hold
the Start/Stop button depressed a bit
longer to switch off the ignition. Seek
the assistance of a workshop.
or
The steering wheel lock is still
engaged. Move the steering wheel
slightly and press the Start/Stop
button.
Open&Start System 3 22.
Apply footbrake
j illuminates yellow.
The engine with manual transmission automated can only be started if the
foot brake is depressed. If the foot
brake is not depressed, the control
indicator illuminates 3 142.
Exterior light 8 illuminates green.
Illuminates when the exterior lights
are on 3 117.High beam
C illuminates blue.
Illuminates when high beam is on and during headlamp flash 3 118.
Adaptive forward lighting
B illuminates or flashes yellow.
Illuminates Fault in system.
If the swivelling device for curve
lighting fails, the corresponding low
beam lamp is deactivated and the fog lamp is switched on.
Seek the assistance of a workshop.
Flashes
Fault in system. Consult a workshop
immediately.
Control indicator B flashes for
approx. 4 seconds after the ignition is switched on as a reminder that the
system has been switched 3 118.
Adaptive Forward Lighting (AFL) 3 119.
Page 105 of 245
Instruments and controls103
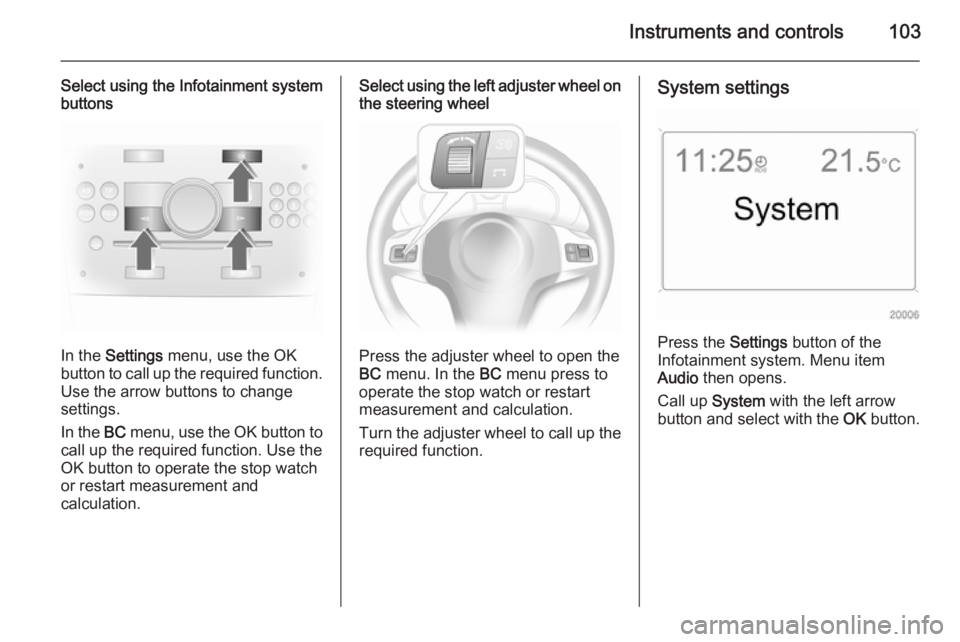
Select using the Infotainment system
buttons
In the Settings menu, use the OK
button to call up the required function.
Use the arrow buttons to change
settings.
In the BC menu, use the OK button to
call up the required function. Use the
OK button to operate the stop watch
or restart measurement and
calculation.
Select using the left adjuster wheel on the steering wheel
Press the adjuster wheel to open the
BC menu. In the BC menu press to
operate the stop watch or restart
measurement and calculation.
Turn the adjuster wheel to call up the required function.
System settings
Press the Settings button of the
Infotainment system. Menu item
Audio then opens.
Call up System with the left arrow
button and select with the OK button.
Page 107 of 245
Instruments and controls105
Setting units of measure
Select the required unit of
measurement with the arrow buttons.
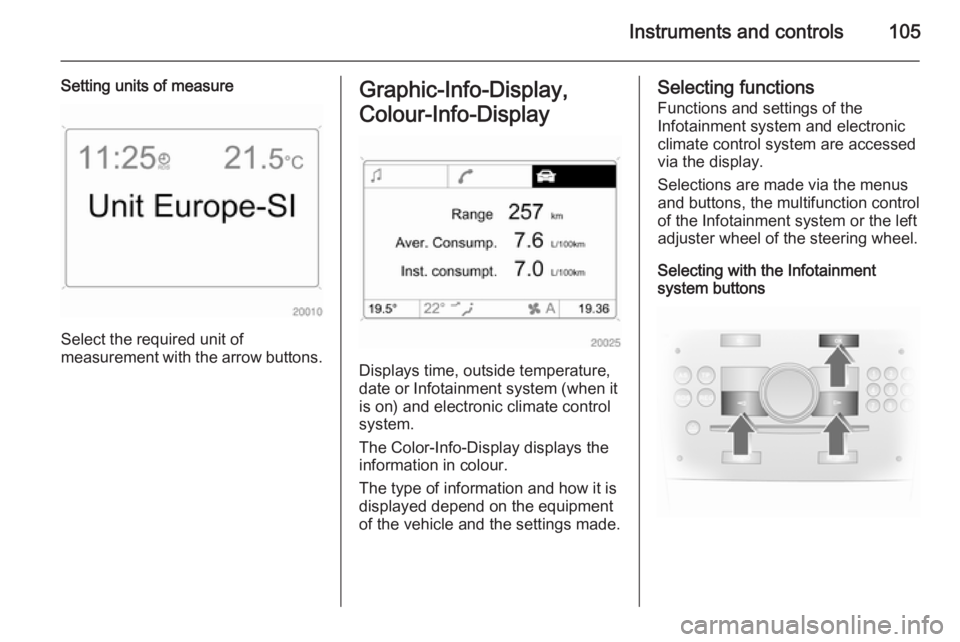
Graphic-Info-Display,
Colour-Info-Display
Displays time, outside temperature,
date or Infotainment system (when it
is on) and electronic climate control
system.
The Color-Info-Display displays the
information in colour.
The type of information and how it is
displayed depend on the equipment
of the vehicle and the settings made.
Selecting functions
Functions and settings of the
Infotainment system and electronic
climate control system are accessed via the display.
Selections are made via the menus
and buttons, the multifunction control
of the Infotainment system or the left
adjuster wheel of the steering wheel.
Selecting with the Infotainment
system buttons