roof rack OPEL COMBO 2010 Owners Manual
[x] Cancel search | Manufacturer: OPEL, Model Year: 2010, Model line: COMBO, Model: OPEL COMBO 2010Pages: 212, PDF Size: 2.49 MB
Page 51 of 212
45
Seats, Interior
Picture no: 12443s.tif
Safety net
3
Passengers must not be carried behind the
safety net.
The safety net can be fitted behind the rear
seats or, with the rear seat backrest folded
down, behind the front seats.
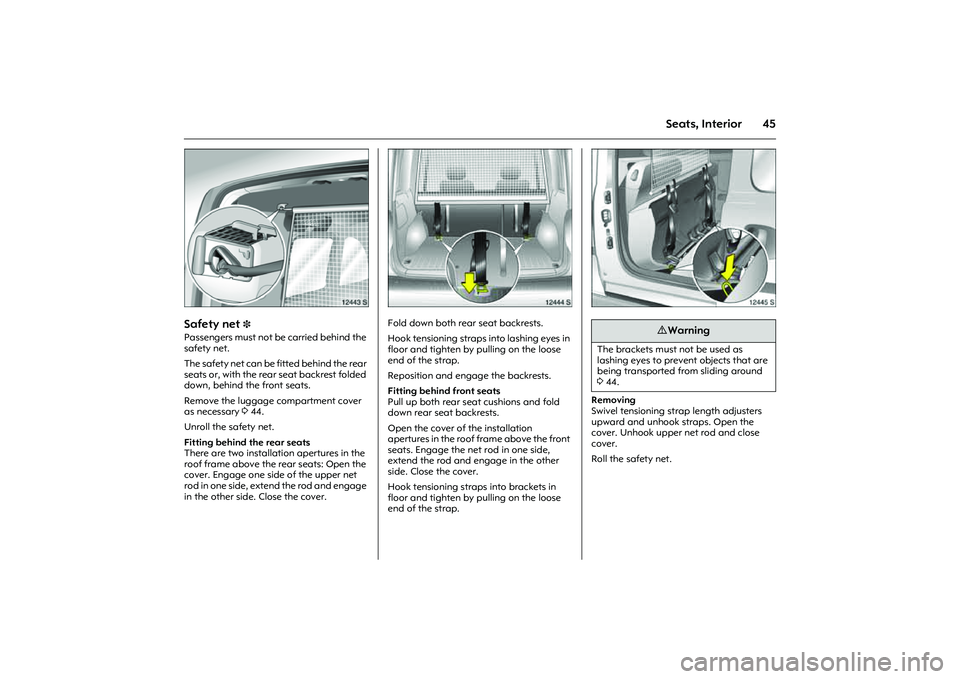
Remove the luggage compartment cover
as necessary 344.
Unroll the safety net.
Fitting behind the rear seats
There are two installation apertures in the
roof frame above the rear seats: Open the
cover. Engage one side of the upper net
rod in one side, extend the rod and engage
in the other side. Close the cover.
Picture no: 12444s.tif
Fold down both rear seat backrests.
Hook tensioning straps into lashing eyes in
floor and tighten by pulling on the loose
end of the strap.
Reposition and engage the backrests.
Fitting behind front seats
Pull up both rear seat cushions and fold
down rear seat backrests.
Open the cover of the installation
apertures in the roof frame above the front
seats. Engage the net rod in one side,
extend the rod and engage in the other
side. Close the cover.
Hook tensioning straps into brackets in
floor and tighten by pulling on the loose
end of the strap.
Picture no: 12445s.tif
Removing
Swivel tensioning strap length adjusters
upward and unhook straps. Open the
cover. Unhook upper net rod and close
cover.
Roll the safety net.
9 Warning
The brackets must not be used as
lashing eyes to prevent objects that are
being transported from sliding around
344.
Page 53 of 212
47
Seats, Interior
Picture no: 18103s.tif
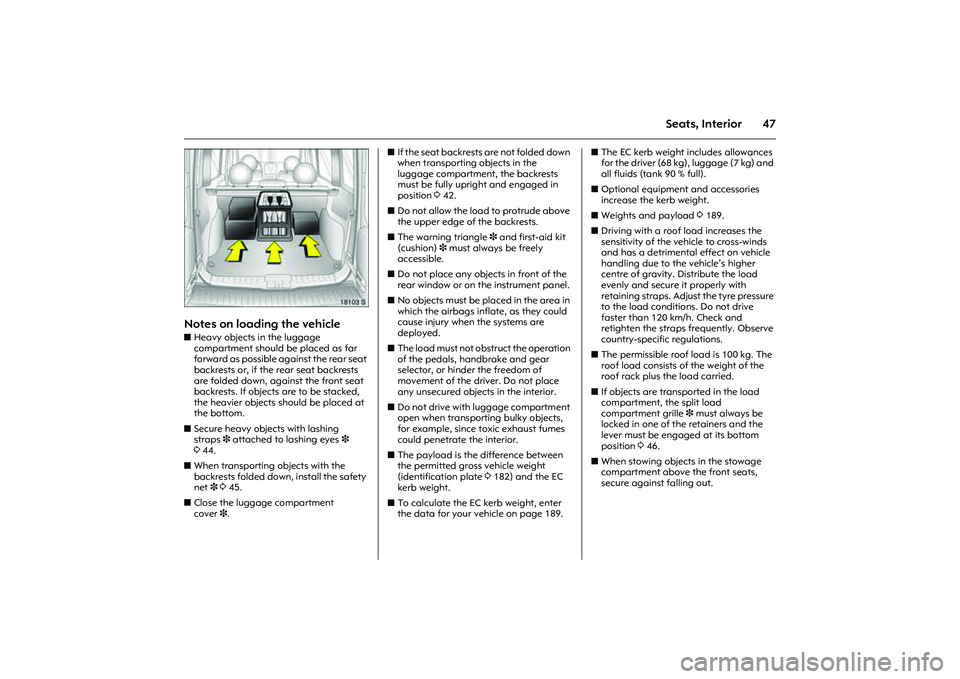
Notes on loading the vehicle zHeavy objects in the luggage
compartment should be placed as far
forward as possible against the rear seat
backrests or, if the rear seat backrests
are folded down, against the front seat
backrests. If objects are to be stacked,
the heavier objects should be placed at
the bottom.
zSecure heavy objects with lashing
straps3 attached to lashing eyes 3
344.
zWhen transporting objects with the
backrests folded down, install the safety
net 3 345.
zClose the luggage compartment
cover3. zIf the seat backrests are not folded down
when transporting objects in the
luggage compartment, the backrests
must be fully upright and engaged in
position 342.
zDo not allow the load to protrude above
the upper edge of the backrests.
zThe warning triangle 3 and first-aid kit
(cushion) 3 must always be freely
accessible.
zDo not place any objects in front of the
rear window or on the instrument panel.
zNo objects must be placed in the area in
which the airbags inflate, as they could
cause injury when the systems are
deployed.
zThe load must not obstruct the operation
of the pedals, handbrake and gear
selector, or hinder the freedom of
movement of the driver. Do not place
any unsecured objects in the interior.
zDo not drive with luggage compartment
open when transporting bulky objects,
for example, since toxic exhaust fumes
could penetrate the interior.
zThe payload is the difference between
the permitted gross vehicle weight
(identification plate 3182) and the EC
kerb weight.
zTo calculate the EC kerb weight, enter
the data for your vehicle on page 189. zThe EC kerb weight includes allowances
for the driver (68 kg), luggage (7 kg) and
all fluids (tank 90 % full).
zOptional equipment and accessories
increase the kerb weight.
zWeights and payload 3189.
zDriving with a roof load increases the
sensitivity of the vehicle to cross-winds
and has a detrimental effect on vehicle
handling due to the vehicle’s higher
centre of gravity. Distribute the load
evenly and secure it properly with
retaining straps. Adjust the tyre pressure
to the load conditions. Do not drive
faster than 120 km/h. Check and
retighten the straps frequently. Observe
country-specific regulations.
zThe permissible roof load is 100 kg. The
roof load consists of the weight of the
roof rack plus the load carried.
zIf objects are transported in the load
compartment, the split load
compartment grille
3 must always be
locked in one of the retainers and the
lever must be engaged at its bottom
position 346.
zWhen stowing objects in the stowage
compartment above the front seats,
secure against falling out.
Page 106 of 212
100 Driving and operationDriving and operation
Manual transmission
automated
3
The Easytronic transmission permits
manual (manual mode) or automatic gear
shifting (automatic mode), both with
automatic clutch control.
Picture no: 12478s.tif
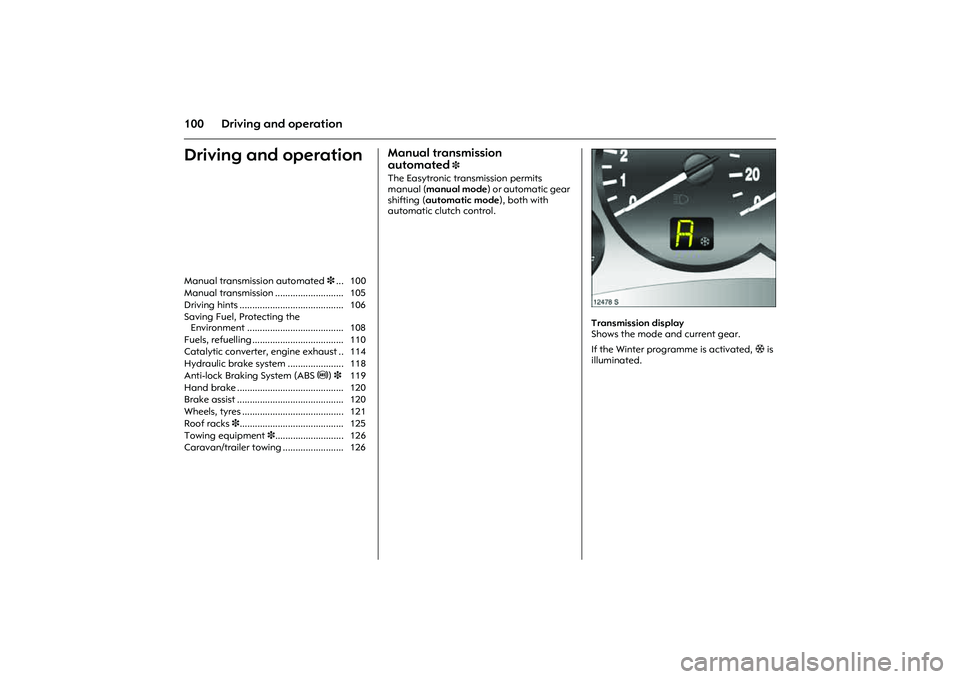
Transmission display
Shows the mode and current gear.
If the Winter programme is activated, T is
illuminated. Manual transmission automated3... 100
Manual transmission ........................... 105
Driving hints ......................................... 106
Saving Fuel, Protecting the
Environment ...................................... 108
Fuels, refuelling .................................... 110
Catalytic converter, engine exhaust .. 114
Hydraulic brake system ...................... 118
Anti-lock Braking System (ABSu)3 119
Hand brake .......................................... 120
Brake assist .......................................... 120
Wheels, tyres ........................................ 121
Roof racks 3......................................... 125
Towing equipment 3........................... 126
Caravan/trailer towing ........................ 126
Page 115 of 212
109
Driving and operation
Overrun
zThe fuel supply is automatically shut off
during overrun, e.g. when the vehicle is
being driven down long gradients or
when braking 3107.
zTo enable the overrun cut-off to come
into action and save fuel, do not
accelerate or declutch during overrun.
Correct gear selection
zHigh revs increase engine wear and fuel
consumption.
zDo not race your engine. Avoid driving at
high engine speeds.
Making use of the tachometer helps to
save fuel. Drive in a low engine speed
range for each gear as much as possible
with uniform engine speeds. Drive as
often as possible in top gear, select the
next higher gear as soon as possible,
and only change down when the engine
is no longer running perfectly smoothly.
High speed
zThe higher the speed, the higher the
consumption and the noise level. At top
speed, you consume a great deal of fuel
and produce excessive noise and
exhaust emissions. zSlightly releasing the accelerator pedal
results in distinct fuel savings with no
major loss of speed.
Drive at no more than around three
quarters of maximum speed and you will
use up to 50 % less fuel, without losing a
great deal of time.
Tyre pressure
zInadequate tyre pressure, leading to
higher road resistance, costs money in
two ways: for more fuel and increased
tyre wear.
zRegular checks (every 14 days) pay off.
Electrical loads
zThe power consumption of electrical
equipment increases fuel consumption.
zSwitch off all auxiliary electrical loads
(e.g. air conditioning3, heated rear
window) when not needed.
Roof racks
zDue to air resistance, a roof load can
increase fuel consumption by approx.
1 l/100 km.
zRemove them if they are not being used. Repair and maintenance
zImproper repairs or adjustment and
maintenance work can increase fuel
consumption. Do not carry out work on
the engine yourself.
You may out of ignorance infringe
environmental laws by not disposing of
materials properly.
Appropriate parts might not be recycled.
Contact with some of the materials
involved may pose a health hazard.
zWe recommend that repair and
maintenance be entrusted to your Opel
Partner.
Extreme driving conditions
zGoing up steep slopes, cornering, driving
on poor roads and winter driving all
increase fuel consumption.
Fuel consumption increases dramatically
in urban traffic and at winter
temperatures, especially on short trips
when the engine operating temperature
is not reached.
zFollowing the instructions given above
will minimise consumption under these
conditions.
Page 131 of 212

125
Driving and operation
Picture no: 6459u.tif
Tyre chains 3
Limitations 3191.
Tyre chains are only permitted on the
driven wheels (front axle). They must be
fitted to the tyres symmetrically in order to
achieve a concentric fit.
Always use fine mesh chains that add no
more than 10 mm to the tyre tread and the
inboard sides (including chain lock). Remove the wheel trims when using tyre
chains 3137.
T y r e c h a i n s m a y o n l y b e u s e d a t s p e e d s u p
to 50 km/h. When travelling on roads that
are free of snow, they may only be used for
brief periods.
Tyre chains must not be used on the
temporary spare wheel. If you need to use
tyre chains after suffering a flat front tyre,
fit the temporary spare on the rear axle
and transfer one of the rear wheels to the
front axle.
Roof racks
3
For safety reasons and to avoid roof
damage we recommend using the Opel
roof rack system that is approved for your
vehicle.
Follow the usage instructions for the roof
rack.
Remove the roof rack when not in use.
Remove the covers from the roof rack
mounting apertures.
Driving hints 3106.
9 Warning
Damage may lead to tyre blowout.
Page 167 of 212
161
Self-help, vehicle care
Washing
The paintwork of your vehicle is exposed to
environmental influences. Wash and wax
your vehicle regularly. When using
automatic car washes, select a programme
that includes waxing.
Bird droppings, dead insects, resin, pollen
and the like should be cleaned off
immediately, as they contain aggressive
constituents which can cause paint
damage.
When using a car wash, follow the car-
wash manufacturer’s instructions. Switch
off the windscreen wipers 3. Unscrew the
antenna 3 and remove the roof rack 3.
If you wash your vehicle by hand, make
sure that the insides of the wings are also
thoroughly rinsed out.
Clean edges and folds on opened doors
and flaps as well as the areas they cover. Thoroughly rinse off and leather-off the
vehicle. Rinse leather frequently. Use
separate leathers for paint and window
surfaces: remnants of wax on the windows
will impair vision.
Do not use hard objects to remove spots of
tar. Use tar removal spray on painted
surfaces.
Polishing and waxing
Wax the vehicle regularly (at the latest
when water no longer beads). Otherwise,
the paintwork will dry out.
Polishing is necessary only if the paint has
become dull or if solid deposits have
become attached to it.
Paintwork polish with silicone forms a
protective film, making waxing
unnecessary.
Plastic body parts should not be treated
with wax and polish. Wheels and tyres
Do not use high-pressure jet cleaners.
Clean wheels with a pH-neutral wheel
cleaner.
Wheels are painted and can be treated
with the same agents as the body.
Paintwork damage
Rectify minor paintwork damage with a
touch-up pen before rust forms. Have more
extensive damage or rust areas repaired
by a workshop.
Page 195 of 212
189
Technical data
Weights, payload and roof load The payload is the difference between the
permitted gross vehicle weight (see
identification plate 3182) and the EC kerb
weight.
To calculate the kerb weight, enter the
data for your vehicle below:
is the EC kerb weight.
Optional equipment and accessories
increase the kerb weight, which means that
the payload will also change slightly.
Note the weights given in the vehicle
documents and the identification plate. The combined total of front and rear axle
loads must not exceed the permissible
gross vehicle weight. For example, if the
front axle is bearing its maximum
permissible load, the rear axle can only
bear a load that is equal to the gross
vehicle weight minus the front axle load.
The permissible axle loads must not be
exceeded.
See the identification plate or vehicle
documents for permissible axle loads.
Caravan/trailer towing 3126. Roof load
The permissible roof load is 100 kg. The
roof load consists of the weight of the roof
rack plus the load carried.
Driving hints 3106. Roof rack 3125.
zKerb weight from
Table 1 3190 +.............. kg
zWeight of heavy
accessories from
Table 2 3190 +.............. kg
Total =.............. kg
Page 208 of 212
202 IndexPPaintwork damage ................................ 161
Parking ..................................................... 17
Parking lamps ............................................ 6
Bulb replacement ............................... 153
Parking the vehicle .................................. 17
Parts ........................................................ 174
Pedals ..................................................... 107
Performance ................................... 185, 186
Petrol ...................................................... 184
Pollen filter ............................................... 99
Power steering,
see electric power steering ............ 70, 106
Power-assisted steering,
see electric power steering ............ 70, 106
Preheater start switch ............................. 16
Preheating ................................................ 68
Pushing, towing ..................................... 129
RRadio ........................................................ 90
Radio equipment (CB) ............................. 91
Radio reception ....................................... 90
Rear lamp cluster .................................... 84
Bulb replacement .............................. 157
Rear seat backrests ................................. 42
Rear window
washer system .................14, 83, 161, 180
Rear window wiper ............................ 14, 83
Refuelling
Fuel filler cap ...................................... 111
Fuel gauge ..................................... 73, 74
Relays ..................................................... 145
Remote control ........................................ 23
Central locking system ........................ 23
Steering wheel ...................................... 90
Replacement keys ................................... 20
Reversing lamps ...................................... 85
Bulb replacement .............................. 157
Roof load .................................. 47, 106, 109
Roof rack .................................. 47, 109, 125
Roof racks ................................ 47, 109, 125
Running-in .............................................. 106
Brakes ................................................. 178
SSafeguard against
Unauthorised use ................ 16, 17, 20, 21
Safety accessories ................................. 133
Safety net ................................................. 45
Saving energy ........................................ 108
Seat adjustment ...................................... 38
Seat belts ......................................... 52, 162
Seat height adjustment ...................... 4, 39
Seat position ............................................ 39
Seats ..................................................... 3, 38
Heated ................................................. 40
Self-diagnosis ............................ 51, 60, 120
Self-help ................................................. 128
Central locking ..................................... 26
Electric windows .................................. 36
Information display ............................. 77
Radio remote control .......................... 23
Service interval display ......................... 173
Service intervals ..................................... 164
Additional work ................................. 171
Extreme operating conditions .......... 171
Main service ....................................... 164
Service work ........................................... 173
Side airbags ............................................. 58