service OPEL FRONTERA 1998 Repair Manual
[x] Cancel search | Manufacturer: OPEL, Model Year: 1998, Model line: FRONTERA, Model: OPEL FRONTERA 1998Pages: 6000, PDF Size: 97 MB
Page 1163 of 6000
6E–46
ENGINE DRIVEABILITY AND EMISSIONS
060RW223
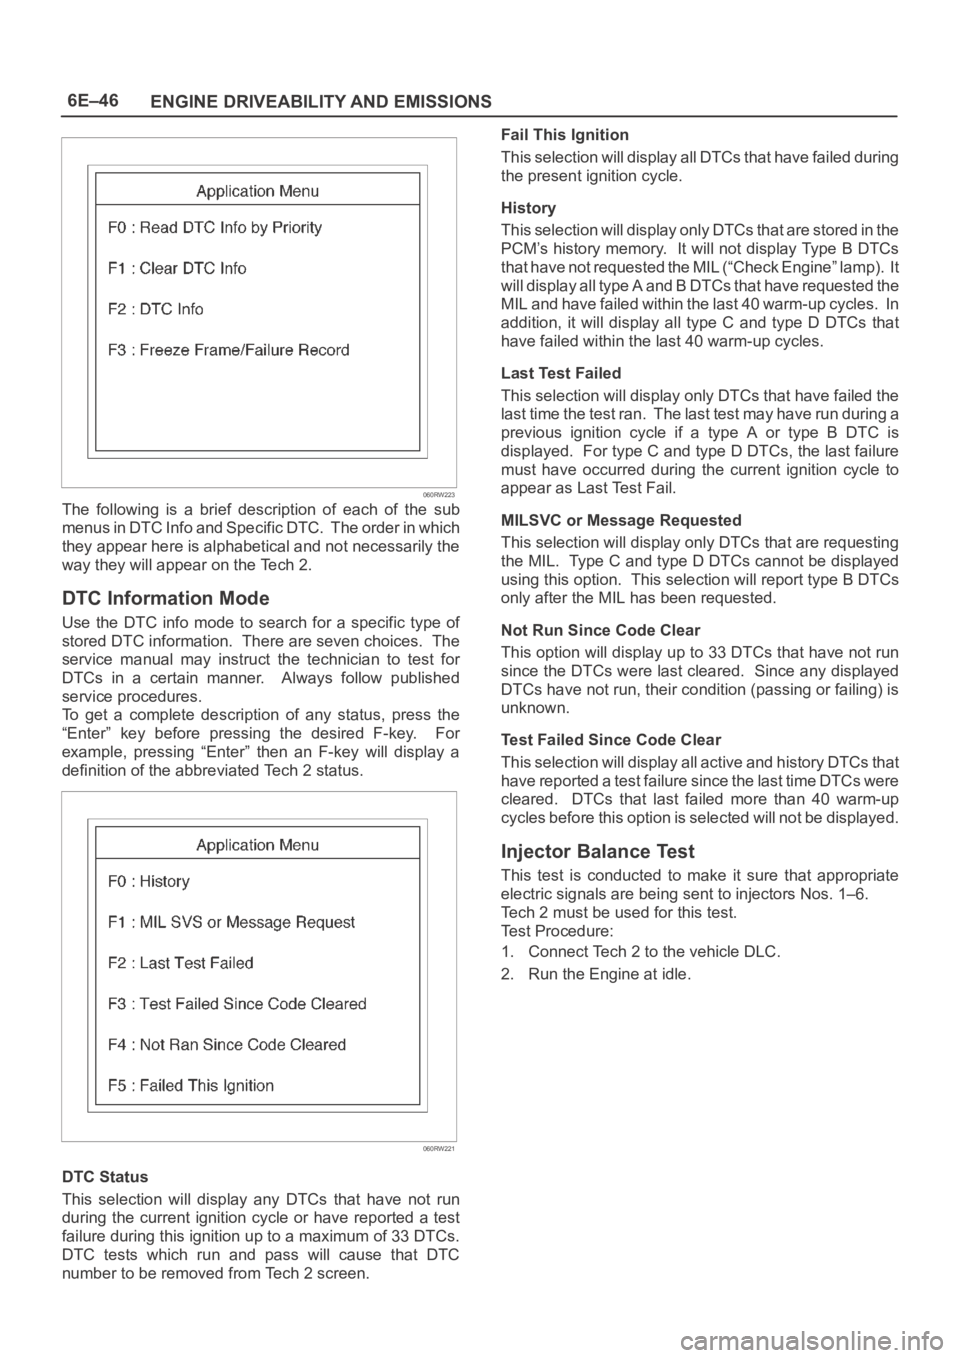
The following is a brief description of each of the sub
menus in DTC Info and Specific DTC. The order in which
they appear here is alphabetical and not necessarily the
way they will appear on the Tech 2.
DTC Information Mode
Use the DTC info mode to search for a specific type of
stored DTC information. There are seven choices. The
service manual may instruct the technician to test for
DTCs in a certain manner. Always follow published
service procedures.
To get a complete description of any status, press the
“Enter” key before pressing the desired F-key. For
example, pressing “Enter” then an F-key will display a
definition of the abbreviated Tech 2 status.
060RW221
DTC Status
This selection will display any DTCs that have not run
during the current ignition cycle or have reported a test
failure during this ignition up to a maximum of 33 DTCs.
DTC tests which run and pass will cause that DTC
number to be removed from Tech 2 screen.Fail This Ignition
This selection will display all DTCs that have failed during
the present ignition cycle.
History
This selection will display only DTCs that are stored in the
PCM’s history memory. It will not display Type B DTCs
that have not requested the MIL (“Check Engine” lamp). It
will display all type A and B DTCs that have requested the
MIL and have failed within the last 40 warm-up cycles. In
addition, it will display all type C and type D DTCs that
have failed within the last 40 warm-up cycles.
Last Test Failed
This selection will display only DTCs that have failed the
last time the test ran. The last test may have run during a
previous ignition cycle if a type A or type B DTC is
displayed. For type C and type D DTCs, the last failure
must have occurred during the current ignition cycle to
appear as Last Test Fail.
MILSVC or Message Requested
This selection will display only DTCs that are requesting
the MIL. Type C and type D DTCs cannot be displayed
using this option. This selection will report type B DTCs
only after the MIL has been requested.
Not Run Since Code Clear
This option will display up to 33 DTCs that have not run
since the DTCs were last cleared. Since any displayed
DTCs have not run, their condition (passing or failing) is
unknown.
Test Failed Since Code Clear
This selection will display all active and history DTCs that
have reported a test failure since the last time DTCs were
cleared. DTCs that last failed more than 40 warm-up
cycles before this option is selected will not be displayed.
Injector Balance Test
This test is conducted to make it sure that appropriate
electric signals are being sent to injectors Nos. 1–6.
Tech 2 must be used for this test.
Test Procedure:
1. Connect Tech 2 to the vehicle DLC.
2. Run the Engine at idle.
Page 1167 of 6000
6E–50
ENGINE DRIVEABILITY AND EMISSIONS
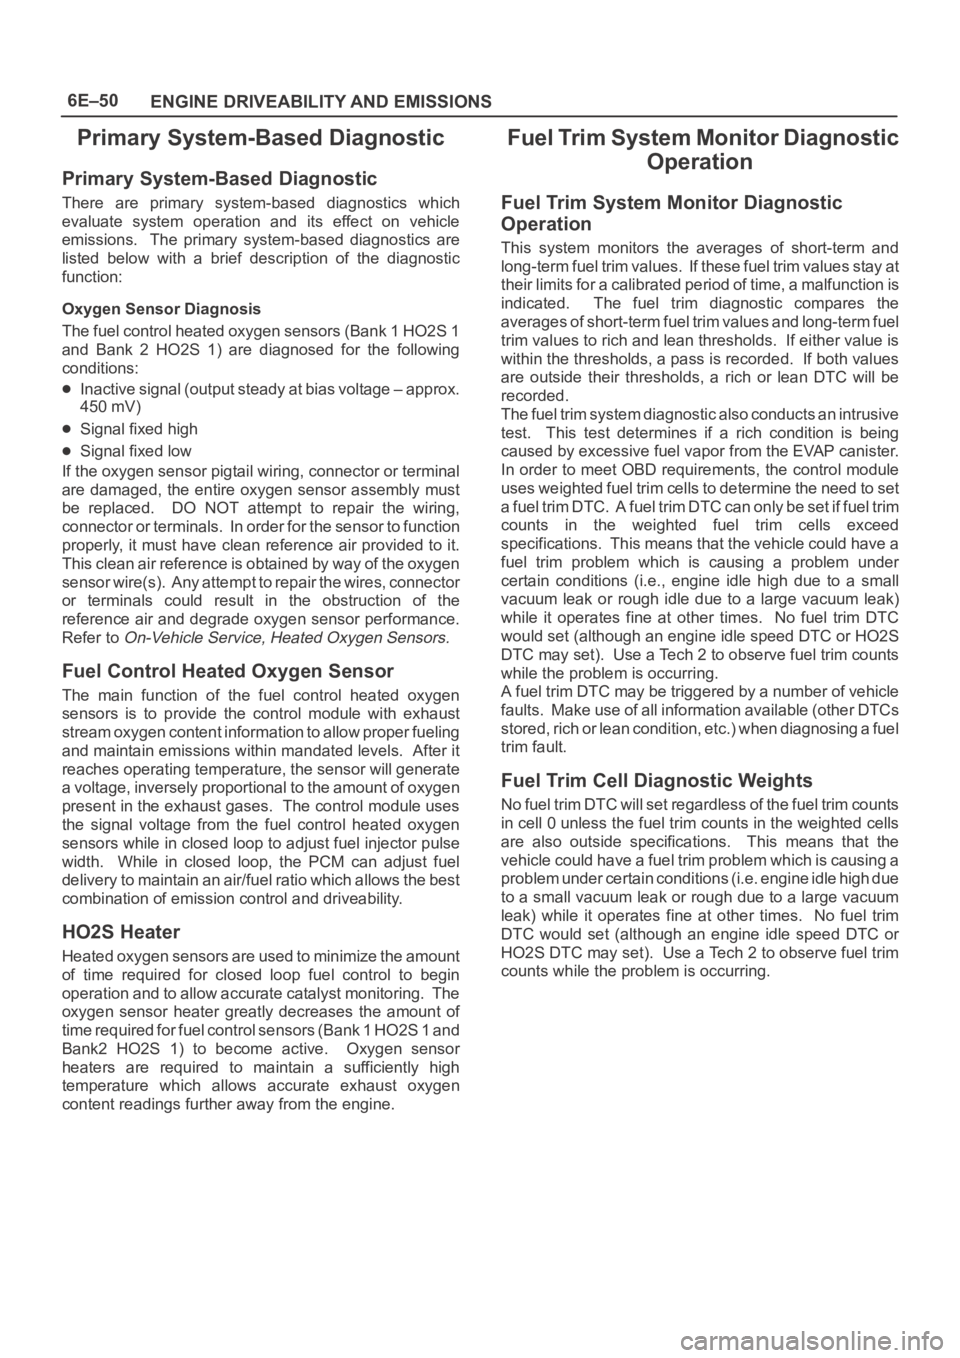
Primary System-Based Diagnostic
Primary System-Based Diagnostic
There are primary system-based diagnostics which
evaluate system operation and its effect on vehicle
emissions. The primary system-based diagnostics are
listed below with a brief description of the diagnostic
function:
Oxygen Sensor Diagnosis
The fuel control heated oxygen sensors (Bank 1 HO2S 1
and Bank 2 HO2S 1) are diagnosed for the following
conditions:
Inactive signal (output steady at bias voltage – approx.
450 mV)
Signal fixed high
Signal fixed low
If the oxygen sensor pigtail wiring, connector or terminal
are damaged, the entire oxygen sensor assembly must
be replaced. DO NOT attempt to repair the wiring,
connector or terminals. In order for the sensor to function
properly, it must have clean reference air provided to it.
This clean air reference is obtained by way of the oxygen
sensor wire(s). Any attempt to repair the wires, connector
or terminals could result in the obstruction of the
reference air and degrade oxygen sensor performance.
Refer to
On-Vehicle Service, Heated Oxygen Sensors.
Fuel Control Heated Oxygen Sensor
The main function of the fuel control heated oxygen
sensors is to provide the control module with exhaust
stream oxygen content information to allow proper fueling
and maintain emissions within mandated levels. After it
reaches operating temperature, the sensor will generate
a voltage, inversely proportional to the amount of oxygen
present in the exhaust gases. The control module uses
the signal voltage from the fuel control heated oxygen
sensors while in closed loop to adjust fuel injector pulse
width. While in closed loop, the PCM can adjust fuel
delivery to maintain an air/fuel ratio which allows the best
combination of emission control and driveability.
HO2S Heater
Heated oxygen sensors are used to minimize the amount
of time required for closed loop fuel control to begin
operation and to allow accurate catalyst monitoring. The
oxygen sensor heater greatly decreases the amount of
time required for fuel control sensors (Bank 1 HO2S 1 and
Bank2 HO2S 1) to become active. Oxygen sensor
heaters are required to maintain a sufficiently high
temperature which allows accurate exhaust oxygen
content readings further away from the engine.
Fuel Trim System Monitor Diagnostic
Operation
Fuel Trim System Monitor Diagnostic
Operation
This system monitors the averages of short-term and
long-term fuel trim values. If these fuel trim values stay at
their limits for a calibrated period of time, a malfunction is
indicated. The fuel trim diagnostic compares the
averages of short-term fuel trim values and long-term fuel
trim values to rich and lean thresholds. If either value is
within the thresholds, a pass is recorded. If both values
are outside their thresholds, a rich or lean DTC will be
recorded.
The fuel trim system diagnostic also conducts an intrusive
test. This test determines if a rich condition is being
caused by excessive fuel vapor from the EVAP canister.
In order to meet OBD requirements, the control module
uses weighted fuel trim cells to determine the need to set
a fuel trim DTC. A fuel trim DTC can only be set if fuel trim
counts in the weighted fuel trim cells exceed
specifications. This means that the vehicle could have a
fuel trim problem which is causing a problem under
certain conditions (i.e., engine idle high due to a small
vacuum leak or rough idle due to a large vacuum leak)
while it operates fine at other times. No fuel trim DTC
would set (although an engine idle speed DTC or HO2S
DTC may set). Use a Tech 2 to observe fuel trim counts
while the problem is occurring.
A fuel trim DTC may be triggered by a number of vehicle
faults. Make use of all information available (other DTCs
stored, rich or lean condition, etc.) when diagnosing a fuel
trim fault.
Fuel Trim Cell Diagnostic Weights
N o f u e l t r i m D T C w i l l s e t r e g a r d l e s s o f t h e f u e l t r i m c o u n t s
in cell 0 unless the fuel trim counts in the weighted cells
are also outside specifications. This means that the
vehicle could have a fuel trim problem which is causing a
problem under certain conditions (i.e. engine idle high due
to a small vacuum leak or rough due to a large vacuum
leak) while it operates fine at other times. No fuel trim
DTC would set (although an engine idle speed DTC or
HO2S DTC may set). Use a Tech 2 to observe fuel trim
counts while the problem is occurring.
Page 1170 of 6000
6E–53 ENGINE DRIVEABILITY AND EMISSIONS
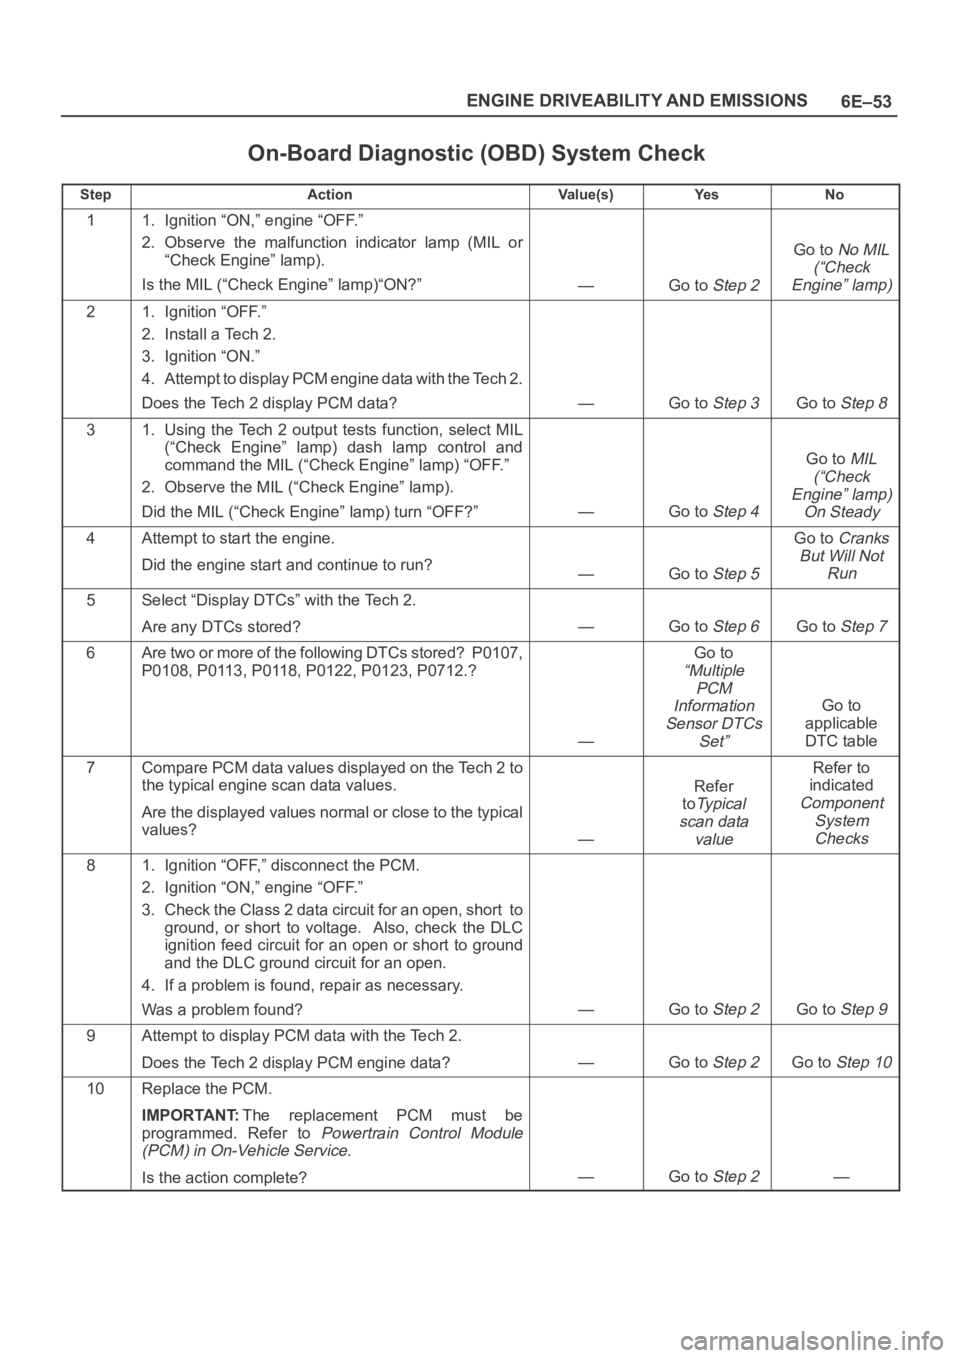
On-Board Diagnostic (OBD) System Check
StepActionVa l u e ( s )Ye sNo
11. Ignition “ON,” engine “OFF.”
2. Observe the malfunction indicator lamp (MIL or
“Check Engine” lamp).
Is the MIL (“Check Engine” lamp)“ON?”
—Go to Step 2
Go to No MIL
(“Check
Engine” lamp)
21. Ignition “OFF.”
2. Install a Tech 2.
3. Ignition “ON.”
4. Attempt to display PCM engine data with the Tech 2.
Does the Tech 2 display PCM data?
—Go to Step 3Go to Step 8
31. Using the Tech 2 output tests function, select MIL
(“Check Engine” lamp) dash lamp control and
command the MIL (“Check Engine” lamp) “OFF.”
2. Observe the MIL (“Check Engine” lamp).
Did the MIL (“Check Engine” lamp) turn “OFF?”
—Go to Step 4
Go to MIL
(“Check
Engine” lamp)
On Steady
4Attempt to start the engine.
Did the engine start and continue to run?
—Go to Step 5
Go to Cranks
But Will Not
Run
5Select “Display DTCs” with the Tech 2.
Are any DTCs stored?
—Go to Step 6Go to Step 7
6Are two or more of the following DTCs stored? P0107,
P0108, P0113, P0118, P0122, P0123, P0712.?
—
Go to
“Multiple
PCM
Information
Sensor DTCs
Set”
Go to
applicable
DTC table
7Compare PCM data values displayed on the Tech 2 to
the typical engine scan data values.
Are the displayed values normal or close to the typical
values?
—
Refer
to
Ty p i c a l
scan data
value
Refer to
indicated
Component
System
Checks
81. Ignition “OFF,” disconnect the PCM.
2. Ignition “ON,” engine “OFF.”
3. Check the Class 2 data circuit for an open, short to
ground, or short to voltage. Also, check the DLC
ignition feed circuit for an open or short to ground
and the DLC ground circuit for an open.
4. If a problem is found, repair as necessary.
Was a problem found?
—Go to Step 2Go to Step 9
9Attempt to display PCM data with the Tech 2.
Does the Tech 2 display PCM engine data?
—Go to Step 2Go to Step 10
10Replace the PCM.
IMPORTANT:The replacement PCM must be
programmed. Refer to
Powertrain Control Module
(PCM) in On-Vehicle Service.
Is the action complete?—Go to Step 2—
Page 1175 of 6000
6E–58
ENGINE DRIVEABILITY AND EMISSIONS
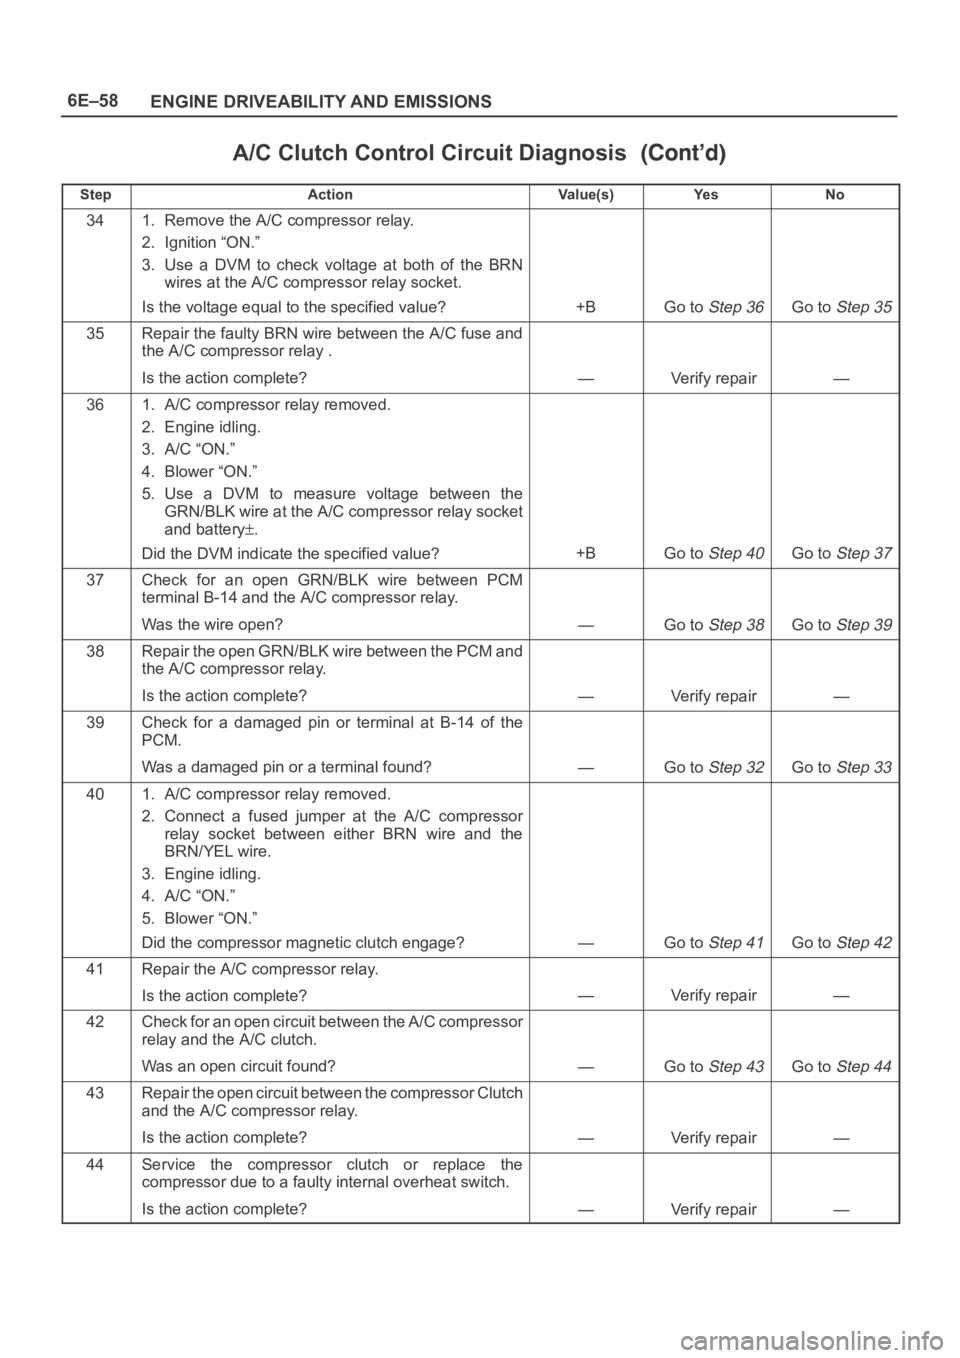
A/C Clutch Control Circuit Diagnosis
StepNo Ye s Va l u e ( s ) Action
341. Remove the A/C compressor relay.
2. Ignition “ON.”
3. Use a DVM to check voltage at both of the BRN
wires at the A/C compressor relay socket.
Is the voltage equal to the specified value?
+BGo to Step 36Go to Step 35
35Repair the faulty BRN wire between the A/C fuse and
the A/C compressor relay .
Is the action complete?
—Verify repair—
361. A/C compressor relay removed.
2. Engine idling.
3. A/C “ON.”
4. Blower “ON.”
5. Use a DVM to measure voltage between the
GRN/BLK wire at the A/C compressor relay socket
and battery
.
Did the DVM indicate the specified value?
+BGo to Step 40Go to Step 37
37Check for an open GRN/BLK wire between PCM
terminal B-14 and the A/C compressor relay.
Was the wire open?
—Go to Step 38Go to Step 39
38Repair the open GRN/BLK wire between the PCM and
the A/C compressor relay.
Is the action complete?
—Verify repair—
39Check for a damaged pin or terminal at B-14 of the
PCM.
Was a damaged pin or a terminal found?
—Go to Step 32Go to Step 33
401. A/C compressor relay removed.
2. Connect a fused jumper at the A/C compressor
relay socket between either BRN wire and the
BRN/YEL wire.
3. Engine idling.
4. A/C “ON.”
5. Blower “ON.”
Did the compressor magnetic clutch engage?
—Go to Step 41Go to Step 42
41Repair the A/C compressor relay.
Is the action complete?
—Verify repair—
42Check for an open circuit between the A/C compressor
relay and the A/C clutch.
Was an open circuit found?
—Go to Step 43Go to Step 44
43Repair the open circuit between the compressor Clutch
and the A/C compressor relay.
Is the action complete?
—Verify repair—
44Service the compressor clutch or replace the
compressor due to a faulty internal overheat switch.
Is the action complete?
—Verify repair—
Page 1187 of 6000
6E–70
ENGINE DRIVEABILITY AND EMISSIONS
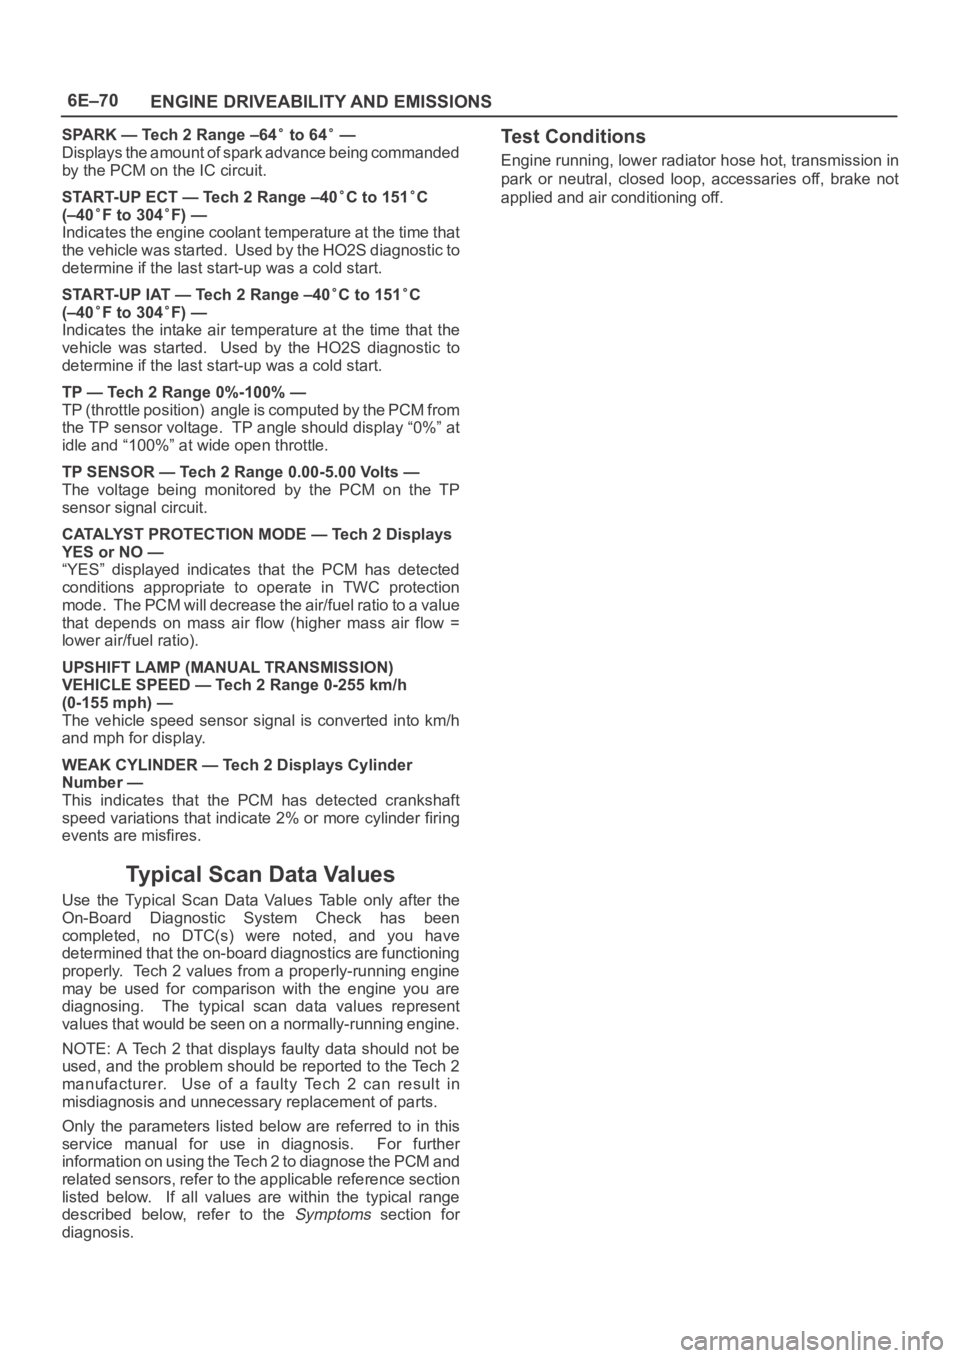
SPARK — Tech 2 Range –64 to 64 —
Displays the amount of spark advance being commanded
by the PCM on the IC circuit.
START-UP ECT — Tech 2 Range –40
C to 151C
(–40
F to 304F) —
Indicates the engine coolant temperature at the time that
the vehicle was started. Used by the HO2S diagnostic to
determine if the last start-up was a cold start.
START-UP IAT — Tech 2 Range –40
C to 151C
(–40
F to 304F) —
Indicates the intake air temperature at the time that the
vehicle was started. Used by the HO2S diagnostic to
determine if the last start-up was a cold start.
TP — Tech 2 Range 0%-100% —
TP (throttle position) angle is computed by the PCM from
the TP sensor voltage. TP angle should display “0%” at
idle and “100%” at wide open throttle.
TP SENSOR — Tech 2 Range 0.00-5.00 Volts —
The voltage being monitored by the PCM on the TP
sensor signal circuit.
CATALYST PROTECTION MODE — Tech 2 Displays
YES or NO —
“YES” displayed indicates that the PCM has detected
conditions appropriate to operate in TWC protection
mode. The PCM will decrease the air/fuel ratio to a value
that depends on mass air flow (higher mass air flow =
lower air/fuel ratio).
UPSHIFT LAMP (MANUAL TRANSMISSION)
VEHICLE SPEED — Tech 2 Range 0-255 km/h
(0-155 mph) —
The vehicle speed sensor signal is converted into km/h
and mph for display.
WEAK CYLINDER — Tech 2 Displays Cylinder
Number —
This indicates that the PCM has detected crankshaft
speed variations that indicate 2% or more cylinder firing
events are misfires.
Typical Scan Data Values
Use the Typical Scan Data Values Table only after the
On-Board Diagnostic System Check has been
completed, no DTC(s) were noted, and you have
determined that the on-board diagnostics are functioning
properly. Tech 2 values from a properly-running engine
may be used for comparison with the engine you are
diagnosing. The typical scan data values represent
values that would be seen on a normally-running engine.
NOTE: A Tech 2 that displays faulty data should not be
used, and the problem should be reported to the Tech 2
manufacturer. Use of a faulty Tech 2 can result in
misdiagnosis and unnecessary replacement of parts.
Only the parameters listed below are referred to in this
service manual for use in diagnosis. For further
information on using the Tech 2 to diagnose the PCM and
related sensors, refer to the applicable reference section
listed below. If all values are within the typical range
described below, refer to the
Symptoms section for
diagnosis.
Test Conditions
Engine running, lower radiator hose hot, transmission in
park or neutral, closed loop, accessaries off, brake not
applied and air conditioning off.
Page 1193 of 6000
6E–76
ENGINE DRIVEABILITY AND EMISSIONS
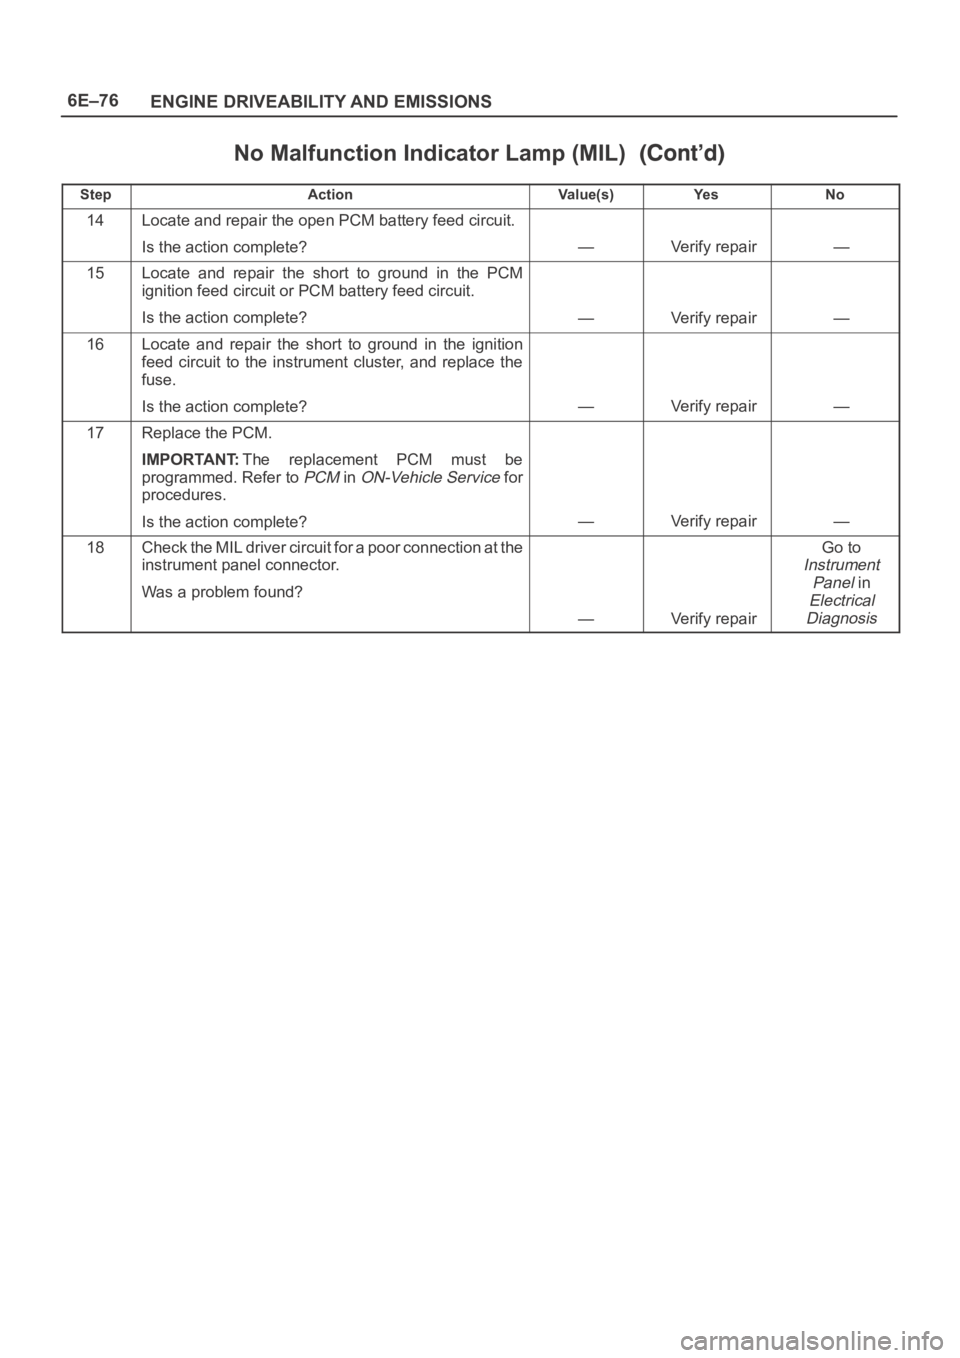
No Malfunction Indicator Lamp (MIL)
StepNo Ye s Va l u e ( s ) Action
14Locate and repair the open PCM battery feed circuit.
Is the action complete?
—Verify repair—
15Locate and repair the short to ground in the PCM
ignition feed circuit or PCM battery feed circuit.
Is the action complete?
—Verify repair—
16Locate and repair the short to ground in the ignition
feed circuit to the instrument cluster, and replace the
fuse.
Is the action complete?
—Verify repair—
17Replace the PCM.
IMPORTANT:The replacement PCM must be
programmed. Refer to
PCM in ON-Vehicle Service for
procedures.
Is the action complete?
—Verify repair—
18Check the MIL driver circuit for a poor connection at the
instrument panel connector.
Was a problem found?
—Verify repair
Go to
Instrument
Panel
in
Electrical
Diagnosis
Page 1195 of 6000
6E–78
ENGINE DRIVEABILITY AND EMISSIONS
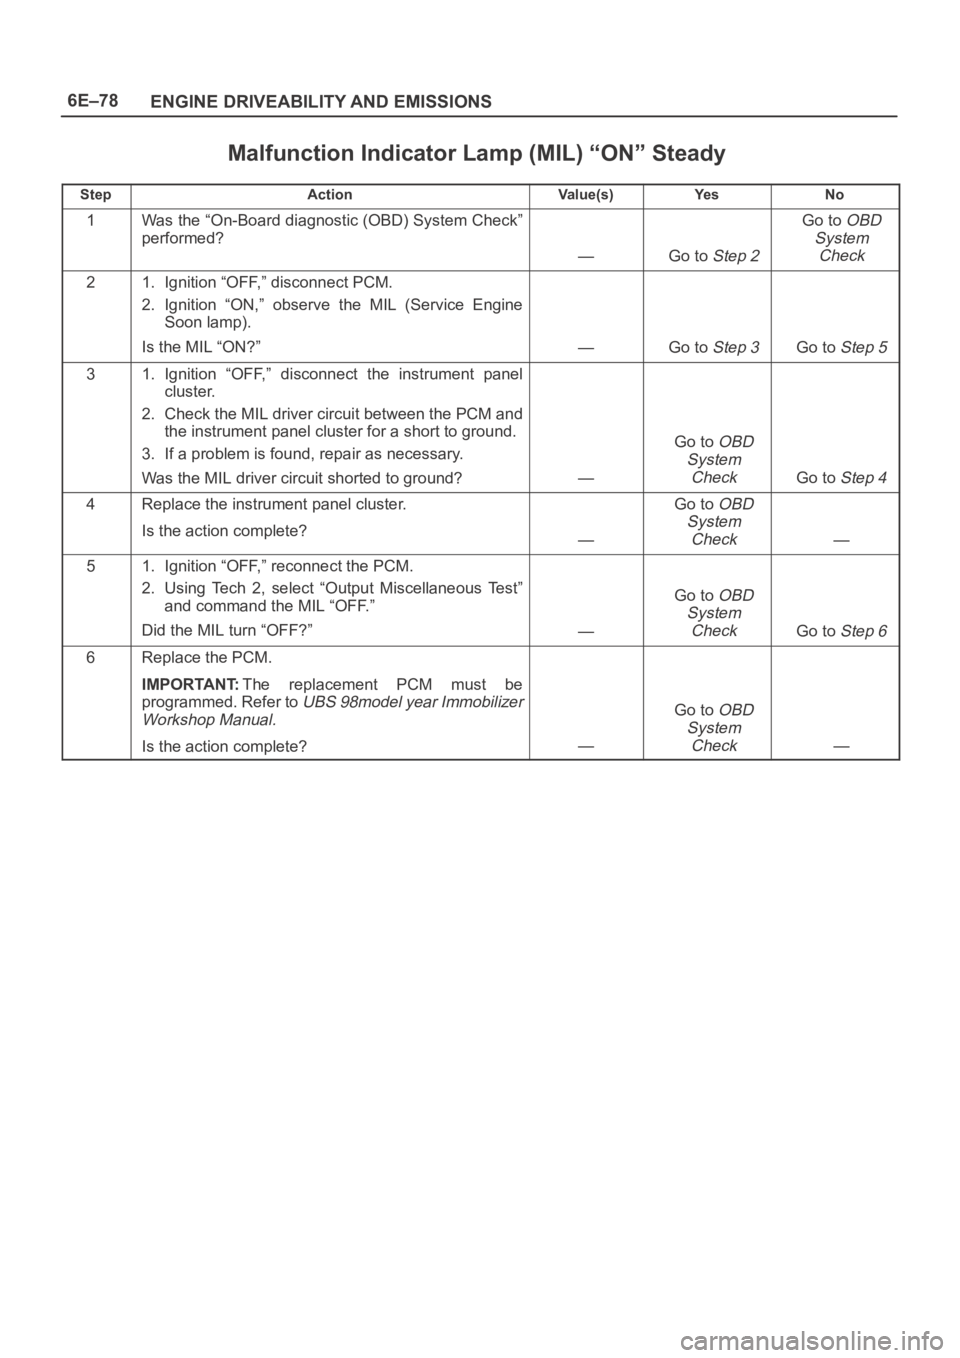
Malfunction Indicator Lamp (MIL) “ON” Steady
StepActionVa l u e ( s )Ye sNo
1Was the “On-Board diagnostic (OBD) System Check”
performed?
—Go to Step 2
Go to OBD
System
Check
21. Ignition “OFF,” disconnect PCM.
2. Ignition “ON,” observe the MIL (Service Engine
Soon lamp).
Is the MIL “ON?”
—Go to Step 3Go to Step 5
31. Ignition “OFF,” disconnect the instrument panel
cluster.
2. Check the MIL driver circuit between the PCM and
the instrument panel cluster for a short to ground.
3. If a problem is found, repair as necessary.
Was the MIL driver circuit shorted to ground?
—
Go to OBD
System
Check
Go to Step 4
4Replace the instrument panel cluster.
Is the action complete?
—
Go to OBD
System
Check
—
51. Ignition “OFF,” reconnect the PCM.
2. Using Tech 2, select “Output Miscellaneous Test”
and command the MIL “OFF.”
Did the MIL turn “OFF?”
—
Go to OBD
System
Check
Go to Step 6
6Replace the PCM.
IMPORTANT:The replacement PCM must be
programmed. Refer to
UBS 98model year Immobilizer
Workshop Manual.
Is the action complete?—
Go to OBD
System
Check
—
Page 1206 of 6000
6E–89 ENGINE DRIVEABILITY AND EMISSIONS
The valve or valve seat within the fuel pressure
regulator.
The fuel injector(s).
4. Fuel pressure that drops off during acceleration,
cruise, or hard cornering may case a lean condition.
A lean condition can cause a loss of power, surging,
or misfire. A lean condition can be diagnosed using
a Tech II Tech 2. If an extremely lean condition
occurs, the oxygen sensor(s) will stop toggling. The
oxygen sensor output voltage(s) will drop below 500
mV. Also, the fuel injector pulse width will increase.
IMPORTANT:Make sure the fuel system is not
operating in the “Fuel Cut-Off Mode.”
When the engine is at idle, the manifold pressure is
low (high vacuum). This low pressure (high vacuum)
is applied to the fuel pressure regulator diaphragm.
The low pressure (high vacuum) will offset the
pressure being applied to the fuel pressure regulator
diaphragm by the spring inside the fuel pressure
regulator. When this happens, the result is lower fuel
pressure. The fuel pressure at idle will vary slightly as
the barometric pressure changes, but the fuel
pressure at idle should always be less than the fuel
pressure noted in step 2 with the engine “OFF.”
16.Check the spark plug associated with a particular
fuel injector for fouling or saturation in order to
determine if that particular fuel injector is leaking. If
checking the spark plug associated with a particular
fuel injector for fouling or saturation does not
determine that a particular fuel injector is leaking,
use the following procedure:
Remove the fuel rail, but leave the fuel lines and
injectors connected to the fuel rail. Refer to
Fuel Rail
Assembly
in On-Vehicle Service.
Lift the fuel rail just enough to leave the fuel injector
nozzles in the fuel injector ports.
CAUTION: In order to reduce the risk of fire and
personal injury that may result from fuel spraying on
the engine, verify that the fuel rail is positioned over
the fuel injector ports and verify that the fuel injector
retaining clips are intact.
Pressurize the fuel system by connecting a 10 amp
fused jumper between B+ and the fuel pump relay
connector.
Visually and physically inspect the fuel injector
nozzles for leaks.
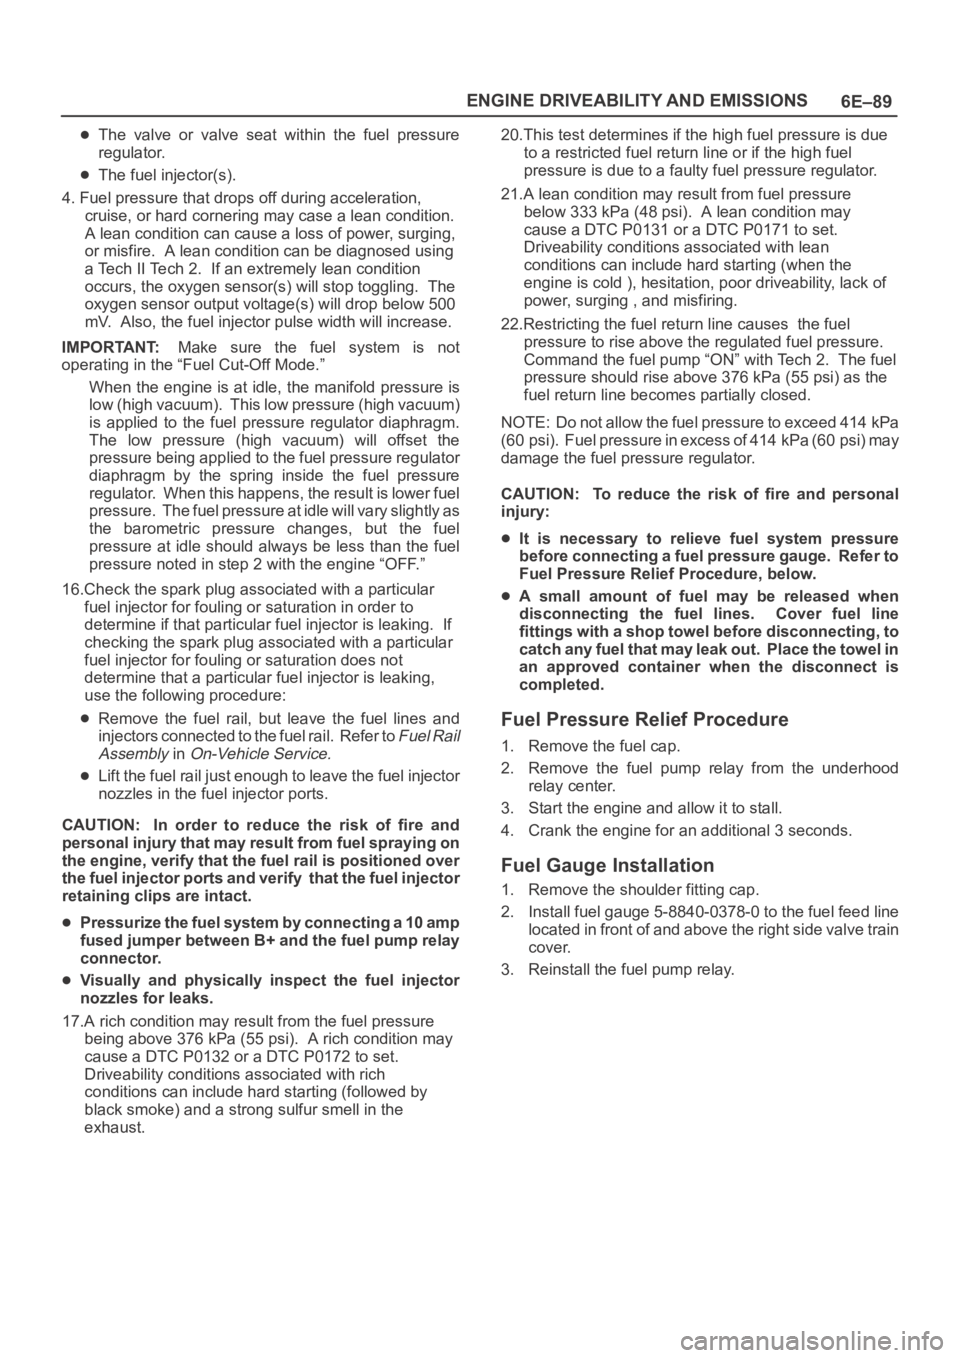
17.A rich condition may result from the fuel pressure
being above 376 kPa (55 psi). A rich condition may
cause a DTC P0132 or a DTC P0172 to set.
Driveability conditions associated with rich
conditions can include hard starting (followed by
black smoke) and a strong sulfur smell in the
exhaust.20.This test determines if the high fuel pressure is due
to a restricted fuel return line or if the high fuel
pressure is due to a faulty fuel pressure regulator.
21.A lean condition may result from fuel pressure
below 333 kPa (48 psi). A lean condition may
cause a DTC P0131 or a DTC P0171 to set.
Driveability conditions associated with lean
conditions can include hard starting (when the
engine is cold ), hesitation, poor driveability, lack of
power, surging , and misfiring.
22.Restricting the fuel return line causes the fuel
pressure to rise above the regulated fuel pressure.
Command the fuel pump “ON” with Tech 2. The fuel
pressure should rise above 376 kPa (55 psi) as the
fuel return line becomes partially closed.
NOTE: Do not allow the fuel pressure to exceed 414 kPa
( 6 0 p s i ) . F u e l p r e s s u r e i n e x c e s s o f 4 1 4 k P a ( 6 0 p s i ) m a y
damage the fuel pressure regulator.
CAUTION: To reduce the risk of fire and personal
injury:
It is necessary to relieve fuel system pressure
before connecting a fuel pressure gauge. Refer to
Fuel Pressure Relief Procedure, below.
A small amount of fuel may be released when
disconnecting the fuel lines. Cover fuel line
fittings with a shop towel before disconnecting, to
catch any fuel that may leak out. Place the towel in
an approved container when the disconnect is
completed.
Fuel Pressure Relief Procedure
1. Remove the fuel cap.
2. Remove the fuel pump relay from the underhood
relay center.
3. Start the engine and allow it to stall.
4. Crank the engine for an additional 3 seconds.
Fuel Gauge Installation
1. Remove the shoulder fitting cap.
2. Install fuel gauge 5-8840-0378-0 to the fuel feed line
located in front of and above the right side valve train
cover.
3. Reinstall the fuel pump relay.
Page 1211 of 6000
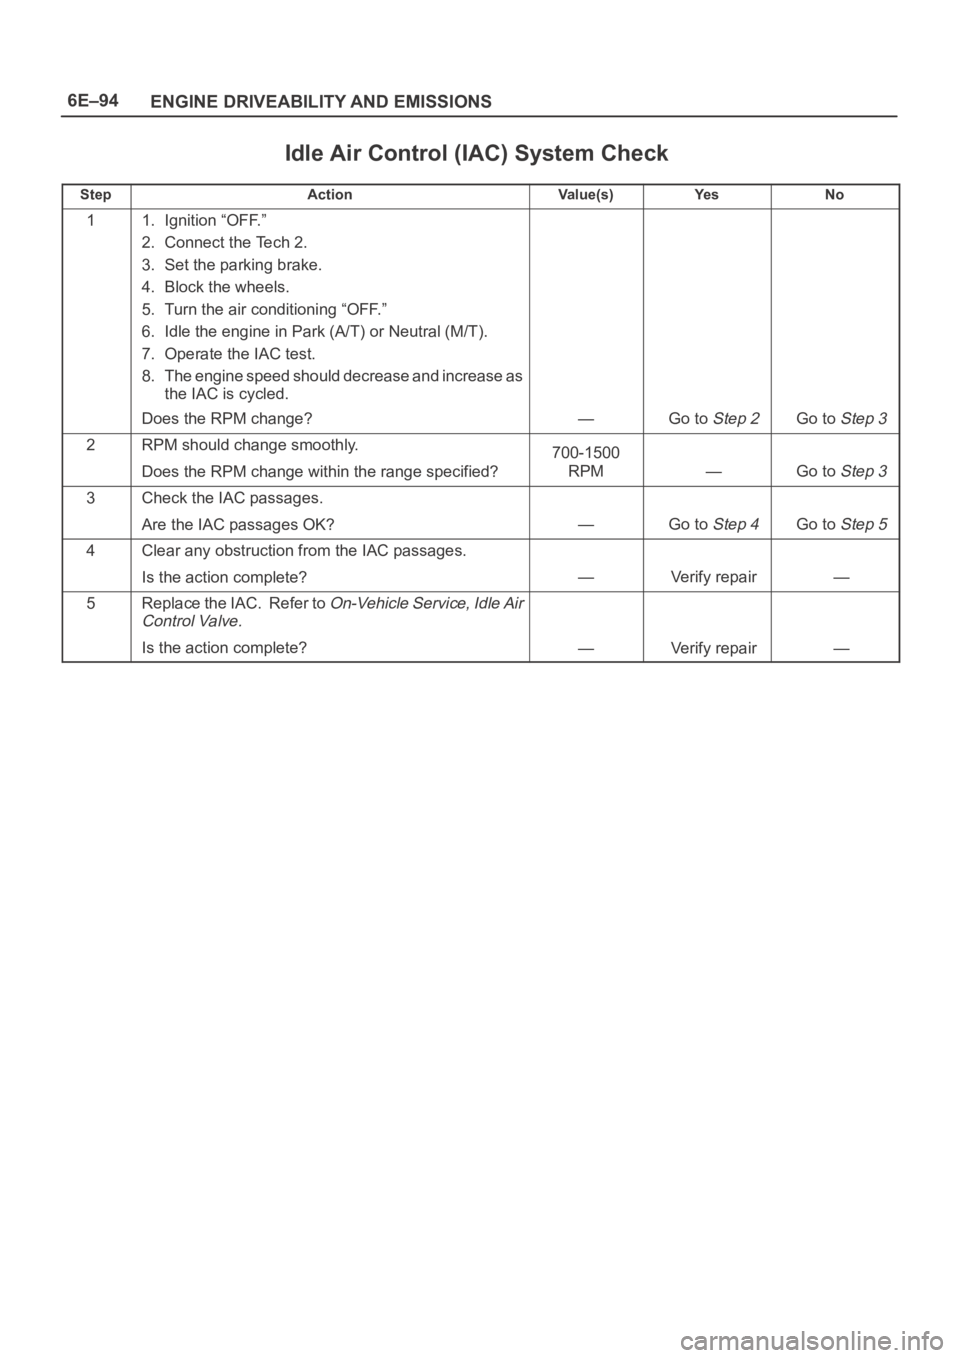
6E–94
ENGINE DRIVEABILITY AND EMISSIONS
Idle Air Control (IAC) System Check
StepActionVa l u e ( s )Ye sNo
11. Ignition “OFF.”
2. Connect the Tech 2.
3. Set the parking brake.
4. Block the wheels.
5. Turn the air conditioning “OFF.”
6. Idle the engine in Park (A/T) or Neutral (M/T).
7. Operate the IAC test.
8. The engine speed should decrease and increase as
the IAC is cycled.
Does the RPM change?
—Go to Step 2Go to Step 3
2RPM should change smoothly.
Does the RPM change within the range specified?700-1500
RPM
—Go to Step 3
3Check the IAC passages.
Are the IAC passages OK?
—Go to Step 4Go to Step 5
4Clear any obstruction from the IAC passages.
Is the action complete?
—Verify repair—
5Replace the IAC. Refer to On-Vehicle Service, Idle Air
Control Valve.
Is the action complete?—Verify repair—
Page 1217 of 6000
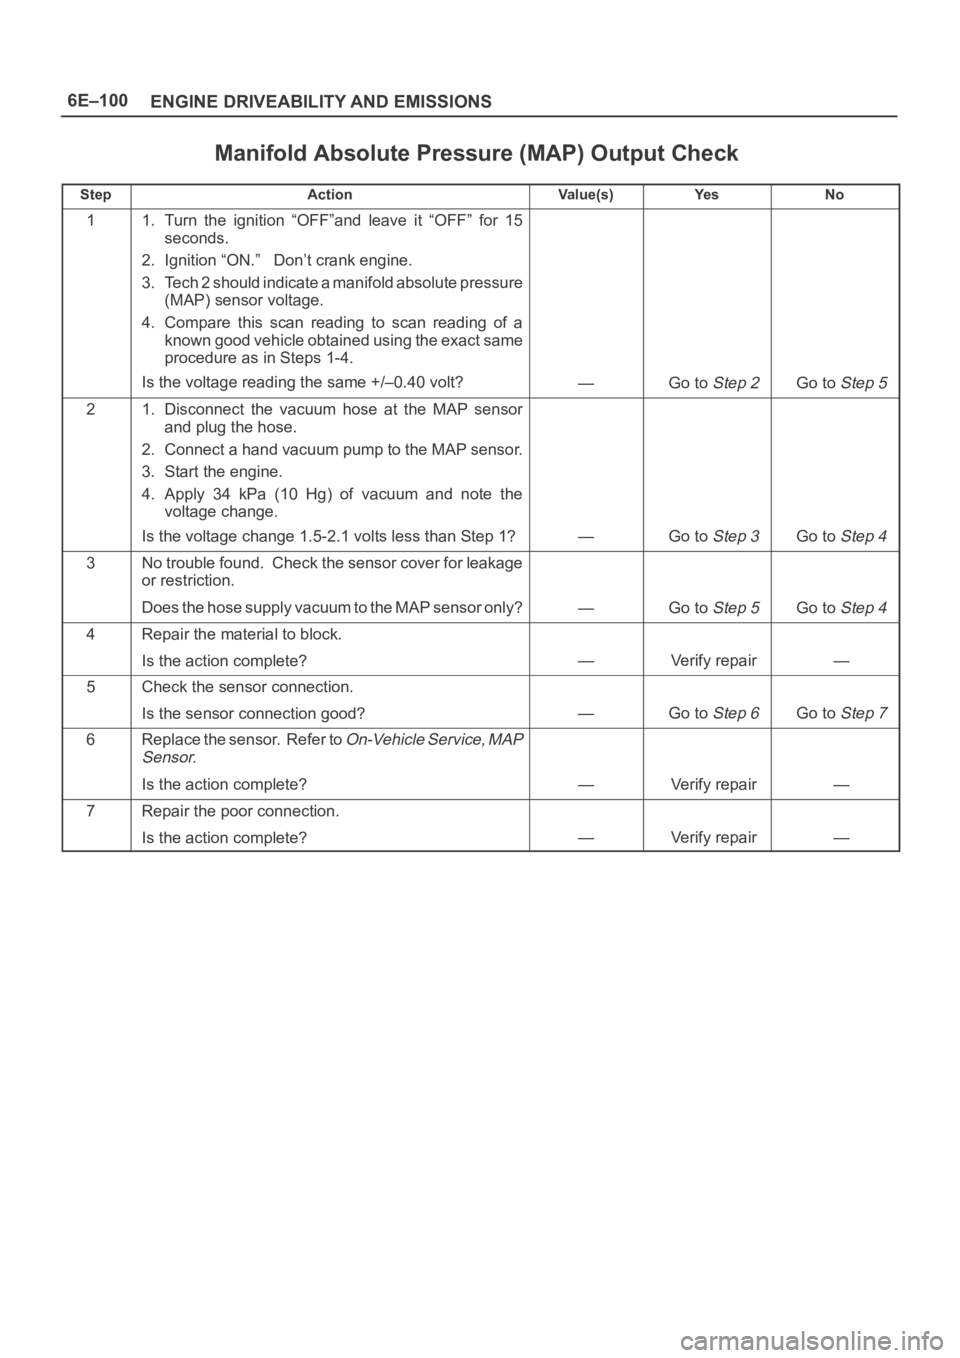
6E–100
ENGINE DRIVEABILITY AND EMISSIONS
Manifold Absolute Pressure (MAP) Output Check
StepActionVa l u e ( s )Ye sNo
11. Turn the ignition “OFF”and leave it “OFF” for 15
seconds.
2. Ignition “ON.” Don’t crank engine.
3. Tech 2 should indicate a manifold absolute pressure
(MAP) sensor voltage.
4. Compare this scan reading to scan reading of a
known good vehicle obtained using the exact same
procedure as in Steps 1-4.
Is the voltage reading the same +/–0.40 volt?
—Go to Step 2Go to Step 5
21. Disconnect the vacuum hose at the MAP sensor
and plug the hose.
2. Connect a hand vacuum pump to the MAP sensor.
3. Start the engine.
4. Apply 34 kPa (10 Hg) of vacuum and note the
voltage change.
Is the voltage change 1.5-2.1 volts less than Step 1?
—Go to Step 3Go to Step 4
3No trouble found. Check the sensor cover for leakage
or restriction.
Does the hose supply vacuum to the MAP sensor only?
—Go to Step 5Go to Step 4
4Repair the material to block.
Is the action complete?
—Verify repair—
5Check the sensor connection.
Is the sensor connection good?
—Go to Step 6Go to Step 7
6Replace the sensor. Refer to On-Vehicle Service, MAP
Sensor.
Is the action complete?—Verify repair—
7Repair the poor connection.
Is the action complete?
—Verify repair—