lock OPEL GT-R 1973 Workshop Manual
[x] Cancel search | Manufacturer: OPEL, Model Year: 1973, Model line: GT-R, Model: OPEL GT-R 1973Pages: 625, PDF Size: 17.22 MB
Page 143 of 625

2D-201973 OPEL SERVICE MANUAL
2. Remove door sash window.
Figure 2D-23 Guide Rail Screws
3. Pull guide rail towards the top out of door.
4. Position sash window so that cable retainer can be
unscrewed through access hole. Pull out sash win-
dow towards the top.
5. Push sash channel off window glass. See Figure2D- 24.Figure 2D-25 Cable and Pully Location
3. Loosen sheave adjustable bracket. Unscrew win-
dow regulator from inner door panel and remove
regulator and cable through access hole. See Figure
2D-26.Figure 2D-24 Sash Channel
6. Place new window glass and new filler into sash
channel.
REMOVAL AND INSTALLATION OF REAR
DOOR WINDOW REGULATOR
1. Remove door trim pad.Figure
213-26 Regulator Attaching Screws
Installation
- Left Door
In counterclockwise direction, wind cable onto pul-
ley up to the shoulder and clamp it behind lug. See
Figure 2D-27.
Page 144 of 625

DOORSZD- 21
RIGHTLEFT ~-ZD-27
Figure ZD-27 Cables Wound On Regulators
Installation - Right DoorIn clockwise direction, wind cable onto pulley up to
the shoulder and clamp it behind lug. See Figure2D-27.
REMOVING AND INSTALLING
’
TAILGATE HINGES
Removal1. Remove screws securing hinge trim panel covering
tailgate binges and lift out trim panel. See Figure
2D-28.2. Disconnect battery, remove tail
te trun pad, and
withdraw wiring from tailgate.
u3. Mark position of tailgate hinges on tailgate,
remove bolts securing tailgate to hinges and lift off
tailgate.
,’HINGE TRIM
PANEL1IFigure ZD-28 Removing Tailgate Hinge Trim Panel
4. Release and remove torque rods. See Figure 2D-
29.Figure ZD-29 Tailgate Torque Rods
5. Remove bolts securing tailgate hinges to roof
panel and lift out tailgate hinges.
Installation1. Install tailgate hinges to roof panel and secure
with bolts.
2. Install torque rods. Installation of torque rods may
be facilitated by using vise-grip pliers to work torque
rod end over catch.
3. Install tailgate to tailgate hinges.
4. Install wiring to tailgate
5. Install tailgate trim pad and tailgate hinges panel
COVehg.6. Connect battery
Page 145 of 625

ZE-221973 OPEL SERVICE MANUAL’REAR COMPARTMENT LID
CONTENTS
Subject
DESCRIPTION AND OPERATION: (Not Applicable)
DIAGNOSIS: (Not Applicable)
MAINTENANCE AND ADJUSTMENTS: (Not
Applicable)
MAJOR REPAIR:
Removal and Installation
Weatherstrip
. . . . . . . . . . . . . . . . . . . . . . . . . . . . . . . . . . . . . . . . . . . . . . . . . . . . . . . . . . . . . . . . . . . .Lock Cylinder
. . . . . . . . . . . . . . . . . . . . . . . . . . . . . . . . . . . . . . . . . . . . . . . . . . . . . . . . . . . . . . . . . .
LuggageCompartmentLid. . . . . . . . . . . . . . . . . . . . . . . . . . . . . . . . . . . . . . . . . .SPECIFICATIONS: (Not Applicable)Page No.
2E-22
2E-22
2E-23
MAJOR REPAIRREMOVAL AND INSTALLATION OF LUGGAGE
COMPARTMENT LID WEATHERSTRIP
1. Detach old weatherstrip and clean sealing surface.2. Coat new weatherstrip and contacting surface
with rubber cement, and allow cement to dry for a
few minutes.3. Install new weatherstrip with rubber cement. See
Figure
2E-2.REMOVAL AND INSTALLATION OF LUGGAGE
COMPARTMENT LID LOCK CYLINDER
Removal
1. Remove luggage compartment lid lock. See Figure
2E-3.Figure
ZE-2 installing Luggage Compartment Lid2. With luggage compartment lid in almost horizon-Weatherstriptal position, unscrew lock cylinder nut, using a 13/16Figure
2E-3 Lid Lock Attaching Screws
Page 146 of 625

REAR COMPARTMENT LID2E- 23
inch deep socket, and remove it, together with inter-
mediate ring. See Figure 2E-4.Fiyure
ZE-4 Removing Lock Cylinder Nut
Installation
1. Install lock cylinder nut, together with intermedi-
ate ring, and fasten with a 13/16 inch deep socket.
See Figure 2B96.
2. Install luggage compartment lock so that the lock
cylinder rod rests in opening of the lock. See Figure
2E-5.REMOVAL AND INSTALLATION OF LUGGAGE
COMPARTMENT LID
Removal1. With a wooden wedge, remove letters and orna-
ment.
2. From below, push ornament out of luggage com-
partment lid.2E-5
Figure
ZE-5 Lock Cylinder Rod Location
3. Remove rubber bumpers, lamp, lid lock, and lock
cylinder. See Figure
2E-6.Figure
2E-6 Rubber Bumpers Lamp and Lock Location
4. Unscrew luggage compartment lid from hinges.
5. The luggage compartment lid must be aligned so
that the gaps between lid and adjacent surfaces are
almost equal.
Page 147 of 625

2F-241973 OPEL SERVICE MANUAL
ROOF AND SUN ROOF
CONTENTS
,.,Subject
DESC,RIF?TION AND OPERATION: (Not Applicable)
DIAGNOSIS: Sun Roof Diagnosis
. . . . . . . . . . . . . . . . . . . . . . . . . . . . . . . . . . . . \
. . . . . . . . . . . . . . . . . . . . . .
MAINTENANCE AND ADJUSTMENTS:Sun Roof Height Adjustment
. . . . . . . . . . . . . . . . . . . . . . . . . . . . . . . . . . . . \
. . . .
MAJOR REPAIR:
Removal and Installation
Sun Roof Panel andFrame. . . . . . . . . . . . . . . . . . . . . . . . . . . . . . . . . . . . \
. . . .
Velvet Strip and Weather Strip. . . . . . . . . . . . . . . . . . . . . . . . . . . . . . . .
RearGuides andCables. . . . . . . . . . . . . . . . . . . . . . . . . . . . . . . . . . . . \
. . . . . . . . . .
Drive Pinion. . . . . . . . . . . . . . . . . . . . . . . . . . . . . . . . . . . . \
. . . . . . . . . . . . . . . . . . . . . . . . . . . . . . . . . .
Water DrainHoses. . . . . . . . . . . . . . . . . . . . . . . . . . . . . . . . . . . . \
. . . . . . . . . . . . . . . . . . . .
Luggage Rack. . . . . . . . . . . . . . . . . . . . . . . . . . . . . . . . . . . . \
. . . . . . . . . . . . . . . . . . . . . . . . . . . . . .
SPECIFICATIONS: (Not Applicable) Page No.
2F-24
2F-26
iF-27
2F-29
2F-29
2F-30
2F-31
2F-3i
DIAGNOSIS
SUN ROOF DIAGNOSIS
_ -
CONhTlONPAUSEI~C~RRECTI~X~
Sun roof does not operate
Transporter cable lengths
parallel. equal.Close sun roof, slide sun roof
frame to rear, remove.crank
handle
and cable crank. Check
that sun roof bears against sun
roof opening velvet strip and
that lifter’ portion of rear lifter
guides is positioned approximately
90 degrees to guide rails.
Turn
cable crank fully clockwise and
reinstall into cable box.
Transporter cables damaged
or worn. Replace cables. Both cables
must be replaced if either one
is damaged or worn.
Page 148 of 625

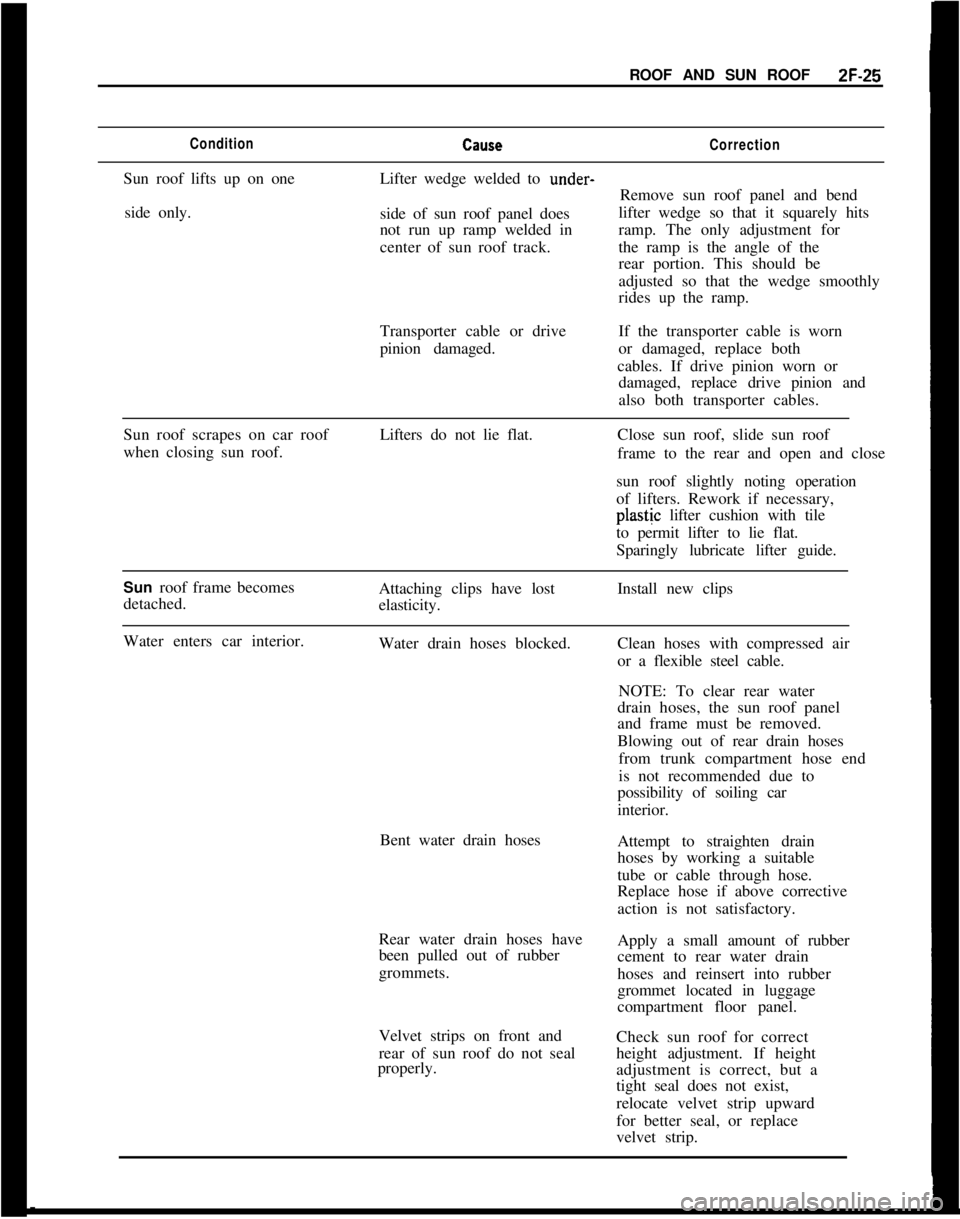
ROOF AND SUN ROOFZF-25ConditionCallseCorrectionSun roof lifts up on one
side only.Lifter wedge welded to under-
Remove sun roof panel and bend
side of sun roof panel doeslifter wedge so that it squarely hits
not run up ramp welded inramp. The only adjustment for
center of sun roof track.the ramp is the angle of the
rear portion. This should be
adjusted so that the wedge smoothly
rides up the ramp.
Transporter cable or drive
pinion damaged.If the transporter cable is worn
or damaged, replace both
cables. If drive pinion worn or
damaged, replace drive pinion and
also both transporter cables.
Sun roof scrapes on car roof
when closing sun roof.Lifters do not lie flat.Close sun roof, slide sun roof
frame to the rear and open and close
sun roof slightly noting operation
of lifters. Rework if necessary,plastjc lifter cushion with tile
to permit lifter to lie flat.
Sparingly lubricate lifter guide.
Sun roof frame becomes
detached.Attaching clips have lost
elasticity.Install new clips
Water enters car interior.
Water drain hoses blocked.
Bent water drain hoses
Rear water drain hoses have
been pulled out of rubber
grommets.
Velvet strips on front and
rear of sun roof do not seal
properly.Clean hoses with compressed air
or a flexible steel cable.
NOTE: To clear rear water
drain hoses, the sun roof panel
and frame must be removed.
Blowing out of rear drain hoses
from trunk compartment hose end
is not recommended due to
possibility of soiling car
interior.
Attempt to straighten drain
hoses by working a suitable
tube or cable through hose.
Replace hose if above corrective
action is not satisfactory.
Apply a small amount of rubber
cement to rear water drain
hoses and reinsert into rubber
grommet located in luggage
compartment floor panel.
Check sun roof for correct
height adjustment. If height
adjustment is correct, but a
tight seal does not exist,
relocate velvet strip upward
for better seal, or replace
velvet strip.
Page 150 of 625

ROOF AND SUN ROOF2F-27
not the case, take off crank handle and cable crank
(see Figure 2F-4) and physically reposition lifters to
be approximately 90 degrees to guide rails and to
contact guide stops. Rotate cable crank to its fully
clockwise limit alad reinstall.
Figure 2F-4 Sun Roof Cranking Handle and CableCrank2. Open sun roof until rear lifters lay in a horizontal
position (see Figure
2F-5), loosen lifter pin nut and
turn lifter pin adjusting screw accordingly to lower
or raise lifter pin in slot of lifter.3. Hold lifter pin adjusting screw down and tighten
lifter pin nut.
4. Recheck operation of sun roof and note that lifter
contacts stop when lifter is approximately 90 degrees
to guide rail.
Pull sun roof frame forward and reattach to sun roof
panel.
MAJOR REPAIRREMOVAL AND INSTALLATION OF SUN ROOF
PANEL AND SUN ROOF FRAME
Removal of Sun Roof Panel1. Open sun roof to half open position and pry loose
sun roof frame from sun roof panel (see Figure
2F-1).2. Push detached sun roof frame toward the rear
until it contacts car roof stop.
NOTE: If difficulty is encountered when pushing
sun roof frame rearward due to the frame hooking
into sun roof panel, close sun roof panel completely
and then proceed to push sun roof frame toward rear
of car.
3. Close sun roof panel and then open it approxi-
mately one turn of operating crank.
4. Remove one of two screws holding each of front
Figure
2F-5 Lifter Pin Adjusting Screw
Figure ZF-6 Swinging Front Guide Inboard
Page 151 of 625

2F-281973 OPEL SERVICE MANUAL
guides to height adjustment rings, loosen second
screw (see Figure 2F-6), and swing guides away from
guide rail.
NOTE: When swinging front guides inboard, be
careful not to change position of height adjustment
rings. It is suggested that the position of the height
adjustment rings be marked with a pencil prior to
loosening of front guide attaching screws.
5. Retighten remaining screw holding front guide in
position to prevent height adjustment rings from
turning.
6. Turn lifter guide tension springs 90 degrees in-
board and pull lifters out of sun roof panel brackets
(see Figure
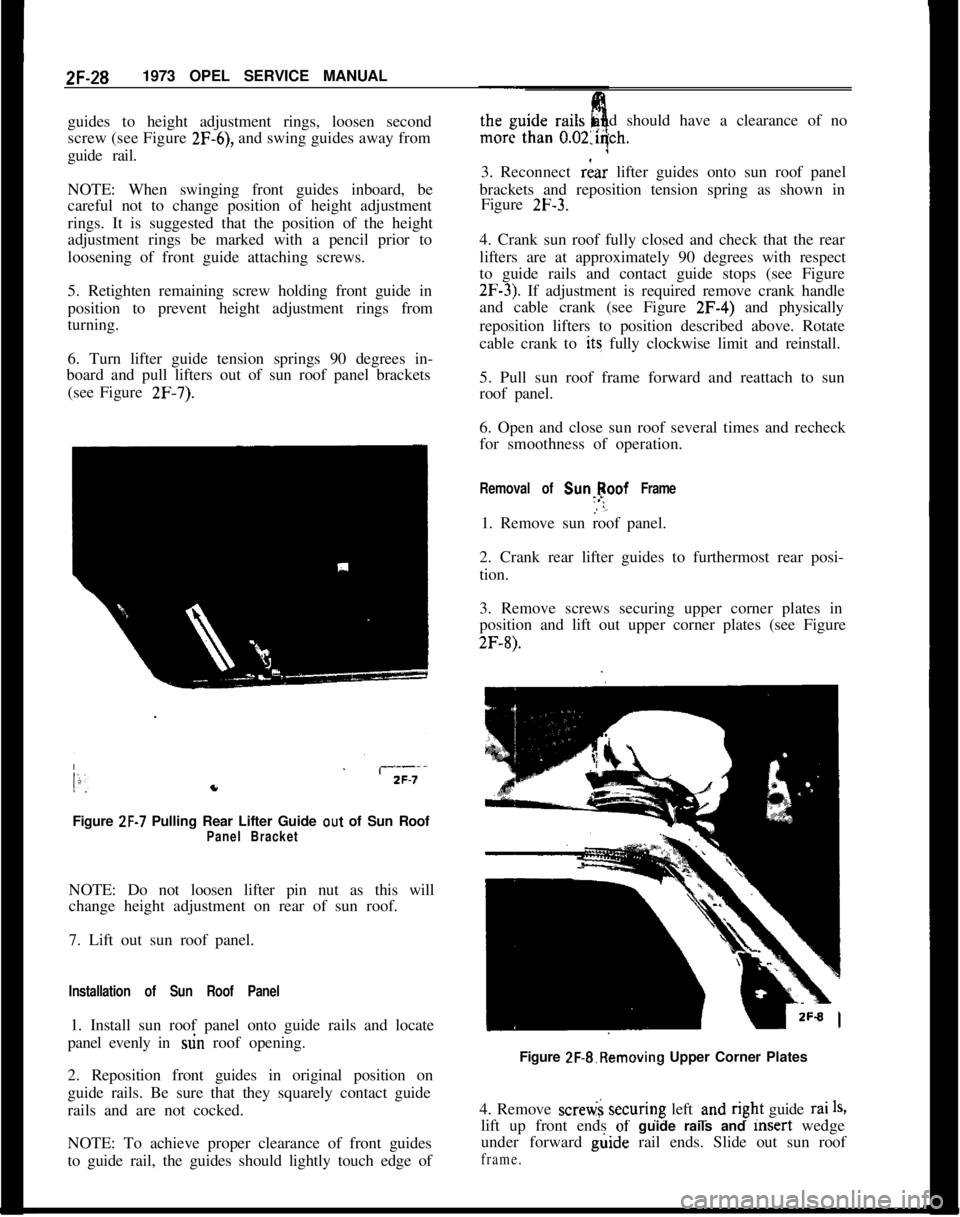
2F-7).Figure
ZF-7 Pulling Rear Lifter Guide out of Sun RoofPanel BracketNOTE: Do not loosen lifter pin nut as this will
change height adjustment on rear of sun roof.
7. Lift out sun roof panel.
Installation of Sun Roof Panel1. Install sun roof panel onto guide rails and locate
panel evenly in stin roof opening.
2. Reposition front guides in original position on
guide rails. Be sure that they squarely contact guide
rails and are not cocked.
NOTE: To achieve proper clearance of front guides
to guide rail, the guides should lightly touch edge ofdshould have a clearance of no
3. Reconnect
riar lifter guides onto sun roof panel
brackets and reposition tension spring as shown in
Figure
2F-3.4. Crank sun roof fully closed and check that the rear
lifters are at approximately 90 degrees with respect
to guide rails and contact guide stops (see Figure
2F-3). If adjustment is required remove crank handle
and cable crank (see Figure 2F-4) and physically
reposition lifters to position described above. Rotate
cable crank to its fully clockwise limit and reinstall.
5. Pull sun roof frame forward and reattach to sun
roof panel.
6. Open and close sun roof several times and recheck
for smoothness of operation.
Removal of Sunlpoof Frame1. Remove sun roof panel.
2. Crank rear lifter guides to furthermost rear posi-
tion.
3. Remove screws securing upper corner plates in
position and lift out upper corner plates (see Figure
2F-8).Figure 2F-&Removing Upper Corner Plates
4. Remove scretii securing left und
r@t guide rai1%lift up front ends
of- guide rails and msert wedge
under forward g&de rail ends. Slide out sun roof
frame.
Page 153 of 625

2F-301973 OPEL SERVICE MANUAL
3. Unscrew and remove upper and lower corner
plates (see Figure 2F-8).4. Unscrew and remove left and right upper cable
shields ans pull cable ends out of cable box.
5. Pull cable and rear lifter guides out of leftand
right guide rails.
Installation of Rear Guides and Cable1. Check both cables for wear or damage. If eigher
cable is defective, replace both cables.
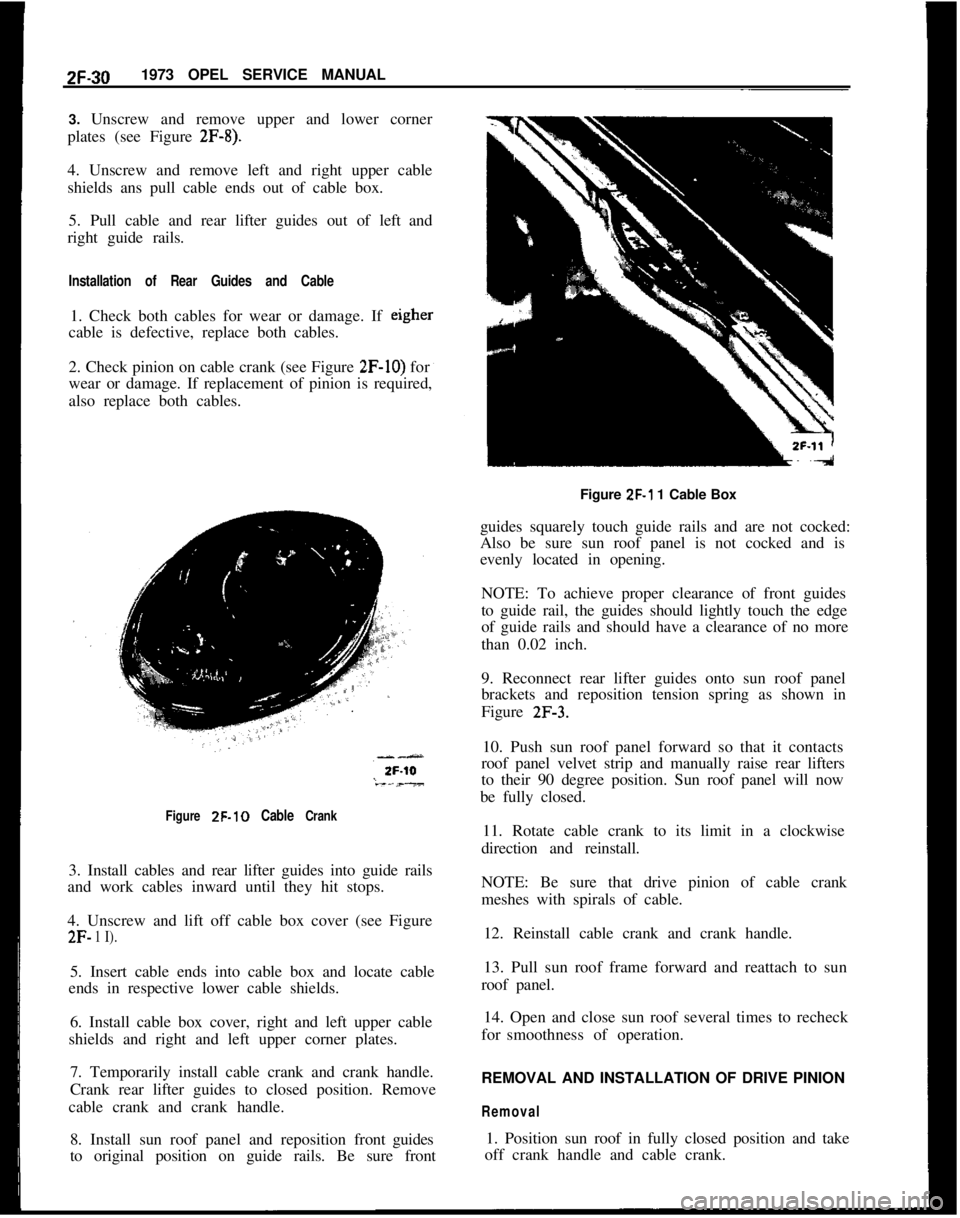
2. Check pinion on cable crank (see Figure
2F-IO) for
wear or damage. If replacement of pinion is required,
also replace both cables.
Figure ZF-10 Cable Crank3. Install cables and rear lifter guides into guide rails
and work cables inward until they hit stops.
4. Unscrew and lift off cable box cover (see Figure
2F- 1 I).5. Insert cable ends into cable box and locate cable
ends in respective lower cable shields.
6. Install cable box cover, right and left upper cable
shields and right and left upper corner plates.
7. Temporarily install cable crank and crank handle.
Crank rear lifter guides to closed position. Remove
cable crank and crank handle.
8. Install sun roof panel and reposition frontguides
to original position on guide rails. Be sure frontFigure
ZF-1 1 Cable Box
guides squarely touch guide rails and are not cocked:
Also be sure sun roof panel is not cocked and is
evenly located in opening.
NOTE: To achieve proper clearance of front guides
to guide rail, the guides should lightly touch the edge
of guide rails and should have a clearance of no more
than 0.02 inch.
9. Reconnect rear lifter guides onto sun roof panel
brackets and reposition tension spring as shown in
Figure
2F-3.10. Push sun roof panel forward so that it contacts
roof panel velvet strip and manually raise rear lifters
to their 90 degree position. Sun roof panel will now
be fully closed.
11. Rotate cable crank to its limit in a clockwise
direction and reinstall.
NOTE: Be sure that drive pinion of cable crank
meshes with spirals of cable.
12. Reinstall cable crank and crank handle.
13. Pull sun roof frame forward and reattach to sun
roof panel.
14. Open and close sun roof several times to recheck
forsmoothness of operation.
REMOVAL AND INSTALLATION OF DRIVE PINION
Removal1. Position sun roof in fully closed position and take
off crank handle and cable crank.
Page 154 of 625

2. Press off snap ring holding drive pinion in place
and remove drive pinion (see Figure 2F-10).
Installation1. Install drive pinion reverse of removal.
NOTE: If drive pinion is to be replaced, also replace
both cables to insure smooth operation of sun roof.
2. Rotate cable crank to its limit in a clockwise direc-
tion and install reverse of removal procedure.ROOF AND SUN ROOF2F-31
REMOVAL AND INSTALLATION OF FRONT AND
REAR WATER DRAINAGE HOSES
Removal of Front Water Drainage Hose
1, Remove sun visor from side of car which will have
drainage pipe taken out.
2. Partially detach pinchweld finishing strip from
door opening involved.
II2F-12L
Figure 2F-12 Sun Roof (Exploded View)