tow OPEL INSIGNIA 2014 Manual user
[x] Cancel search | Manufacturer: OPEL, Model Year: 2014, Model line: INSIGNIA, Model: OPEL INSIGNIA 2014Pages: 321, PDF Size: 8.95 MB
Page 21 of 321
In brief19
To restart the engine, depress the
clutch pedal again.
Stop-start system 3 153.
ParkingCaution
Do not park the vehicle on an
easily ignitable surface. The high
temperature of the exhaust
system could ignite the surface.
■ Always apply the parking brake.
Apply electric parking brake by
pulling switch m for approx. one
second.
Activate the manual parking brake
without pushing the release button. Apply as firmly as possible on a
downhill slope or uphill slope.
Depress foot brake at the same
time to reduce operating force.
■ If the vehicle is on a level surface or
uphill slope, engage first gear or set
the selector lever to position P
before switching off the ignition. On
an uphill slope, turn the front
wheels away from the kerb.
If the vehicle is on a downhill slope, engage reverse gear or set theselector lever to position P before
switching off the ignition. Turn the
front wheels towards the kerb.
■ After running at high engine speeds
or with high engine loads, operate
the engine briefly at a low load or
run in neutral for approx.
30 seconds before switching off, in
order to protect the turbocharger.
■ Switch off the engine and ignition. Turn the steering wheel until it
locks.
Automatic transmission: key can
only be removed with selector lever in P.
■ Close the windows and the sunroof.
■ Lock the vehicle and activate the anti-theft alarm system 3 23,
3 34.
■ The engine cooling fans may run after the engine has been switched
off 3 214.
Keys, locks 3 20, Laying the vehicle
up for a long period of time 3 213.
Page 34 of 321
32Keys, doors and windows
Adjust reduced opening height in
intermediate mode
1. Turn operation mode switch to 3/4 .
2. Open power tailgate with any operation switch.
3. Stop movement at the desired height by pressing any operation
switch. If required, manually move
the stopped tailgate to the desired position.
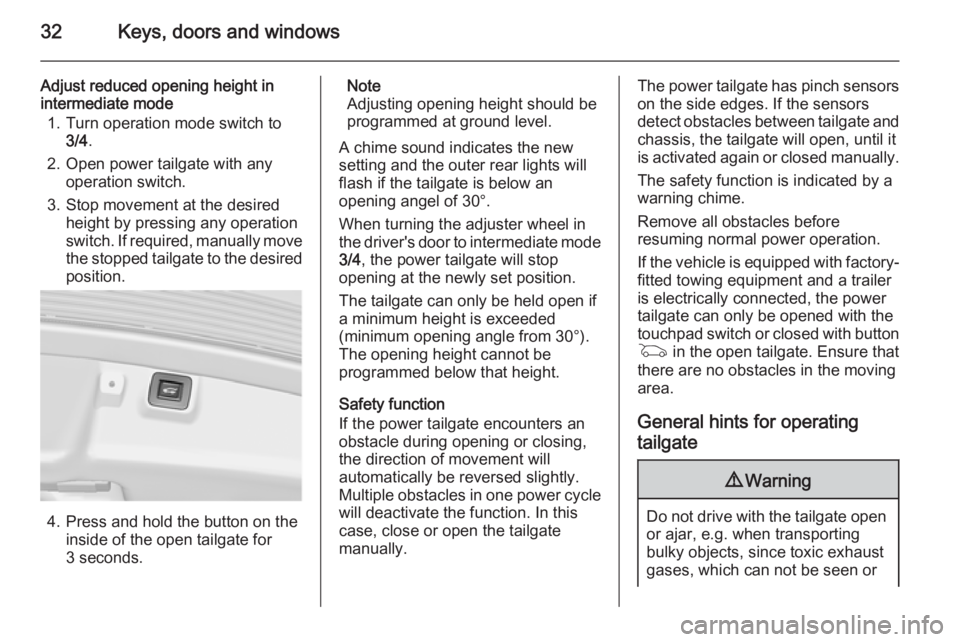
4. Press and hold the button on the
inside of the open tailgate for
3 seconds.
Note
Adjusting opening height should be
programmed at ground level.
A chime sound indicates the new
setting and the outer rear lights will
flash if the tailgate is below an
opening angel of 30°.
When turning the adjuster wheel in
the driver's door to intermediate mode 3/4 , the power tailgate will stop
opening at the newly set position.
The tailgate can only be held open if a minimum height is exceeded
(minimum opening angle from 30°).
The opening height cannot be
programmed below that height.
Safety function
If the power tailgate encounters an
obstacle during opening or closing,
the direction of movement will
automatically be reversed slightly.
Multiple obstacles in one power cycle
will deactivate the function. In this
case, close or open the tailgate
manually.The power tailgate has pinch sensors
on the side edges. If the sensors
detect obstacles between tailgate and chassis, the tailgate will open, until it
is activated again or closed manually.
The safety function is indicated by a
warning chime.
Remove all obstacles before
resuming normal power operation.
If the vehicle is equipped with factory- fitted towing equipment and a trailer
is electrically connected, the power
tailgate can only be opened with the
touchpad switch or closed with button
G in the open tailgate. Ensure that
there are no obstacles in the moving
area.
General hints for operating
tailgate9 Warning
Do not drive with the tailgate open
or ajar, e.g. when transporting
bulky objects, since toxic exhaust
gases, which can not be seen or
Page 73 of 321
Storage71Load compartment coverDo not place any objects on the cover.
5-door Hatchback
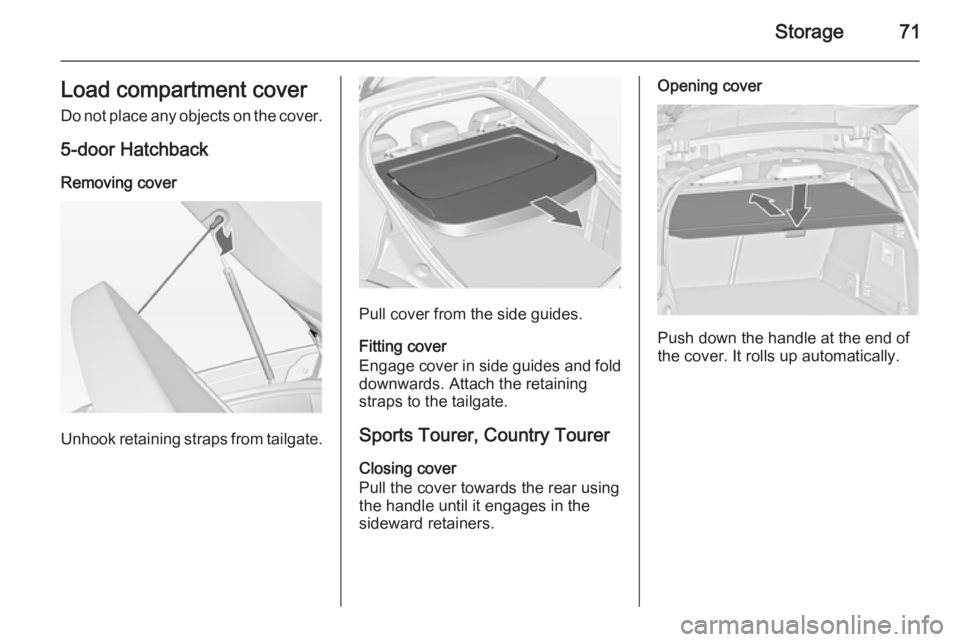
Removing cover
Unhook retaining straps from tailgate.
Pull cover from the side guides.
Fitting cover
Engage cover in side guides and fold
downwards. Attach the retaining
straps to the tailgate.
Sports Tourer, Country Tourer
Closing cover
Pull the cover towards the rear using
the handle until it engages in the
sideward retainers.
Opening cover
Push down the handle at the end of
the cover. It rolls up automatically.
Page 79 of 321
Storage77
Safety net cassette behind the
rear seats
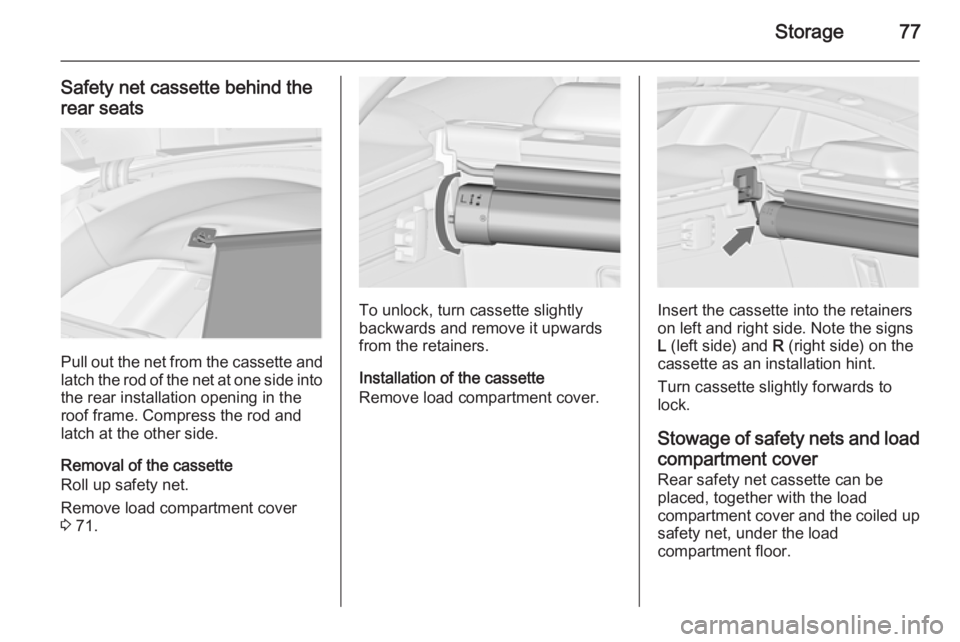
Pull out the net from the cassette and latch the rod of the net at one side into
the rear installation opening in the
roof frame. Compress the rod and
latch at the other side.
Removal of the cassette
Roll up safety net.
Remove load compartment cover
3 71.
To unlock, turn cassette slightly
backwards and remove it upwards from the retainers.
Installation of the cassette
Remove load compartment cover.Insert the cassette into the retainers
on left and right side. Note the signs
L (left side) and R (right side) on the
cassette as an installation hint.
Turn cassette slightly forwards to
lock.
Stowage of safety nets and load
compartment cover Rear safety net cassette can be
placed, together with the load
compartment cover and the coiled up safety net, under the load
compartment floor.
Page 80 of 321
78Storage
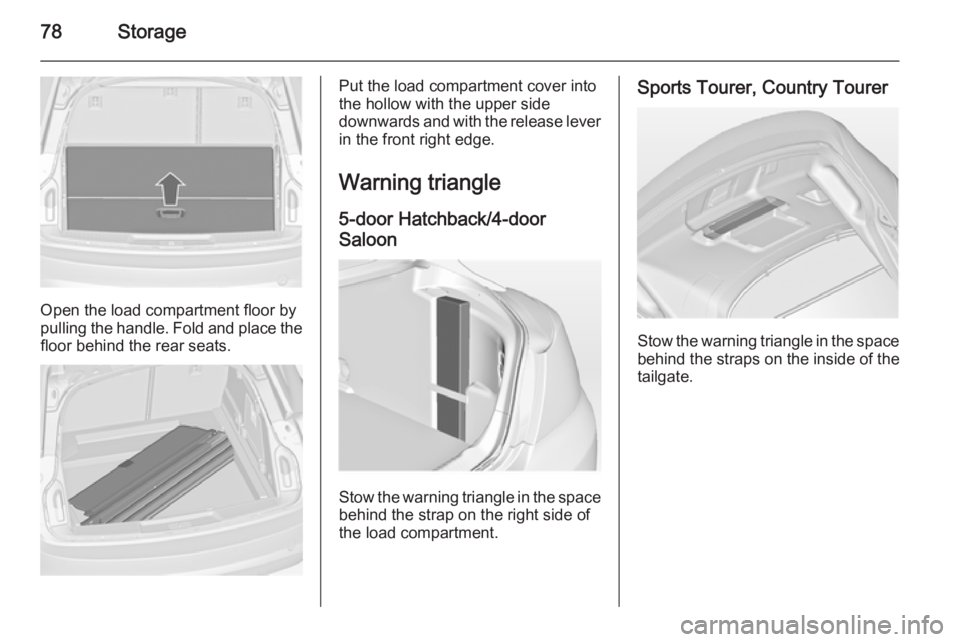
Open the load compartment floor by
pulling the handle. Fold and place the floor behind the rear seats.
Put the load compartment cover into
the hollow with the upper side
downwards and with the release lever in the front right edge.
Warning triangle 5-door Hatchback/4-door
Saloon
Stow the warning triangle in the space
behind the strap on the right side of
the load compartment.
Sports Tourer, Country Tourer
Stow the warning triangle in the space
behind the straps on the inside of the
tailgate.
Page 81 of 321

Storage79First aid kit
5-door Hatchback/4-door
Saloon
Stow the first aid kit in the space
behind the mesh net on the left side
of the load compartment.
Sports Tourer, Country Tourer
Stow the first aid kit in the space
behind a strap on the inside of the
tailgate.
Roof rack system
Roof rack For safety reasons and to avoid
damage to the roof, the vehicle
approved roof rack system is
recommended.
Follow the installation instructions
and remove the roof rack when not in
use.
Mounting roof rack 5-door Hatchback/4-door Saloon
Open all doors.
Page 83 of 321
Storage819Warning
Always make sure that the load in
the vehicle is securely stowed.
Otherwise objects can be thrown
around inside the vehicle and
cause personal injury or damage
to the load or car.
■ The payload is the difference between the permitted gross
vehicle weight (see identification
plate 3 264) and the EC kerb
weight.
To calculate the payload, enter the
data for your vehicle in the Weights
table at the front of this manual.
The EC kerb weight includes
weights for the driver (68 kg),
luggage (7 kg) and all fluids (tank
90 % full).
Optional equipment and
accessories increase the kerb
weight.
■ Driving with a roof load increases the sensitivity of the vehicle to
cross-winds and has a detrimental
effect on vehicle handling due to
the vehicle's higher centre of
gravity. Distribute the load evenly
and secure it properly with retaining
straps. Adjust the tyre pressure and vehicle speed according to the load
conditions. Check and retighten the straps frequently.
Do not drive faster than 120 km/h.
The permissible roof load is
100 kg. The roof load is the
combined weight of the roof rack
and the load.
Page 128 of 321
126Lighting
Playstreet lightingActivated automatically at low speed
up to approx. 30 km/h. The light beam is turned at an angle of 8° to the
roadside.
Town lighting Activated automatically at a speed
range between approx. 40 and
55 km/h and when street lights are
detected by the light sensor. The light
range is reduced by an extended light
distribution.
Country lighting
Activated automatically at a speed
range between approx. 55 and
115 km/h. The beam of light and the
brightness is different between the
left and the right side.
Motorway lighting
Activated automatically at a speed
above approx. 115 km/h and minimal
steering movements. It switches on
after a delay or immediately when the
vehicle is powerfully accelerated. The light beam is longer and brighter.Adverse weather lighting
Activated automatically up to a speed of approx. 70 km/h, when the rain
sensor recognizes condensation or
the wiper operates continuously. The
range, distribution and light intensity
is regulated variably depending on visibility.
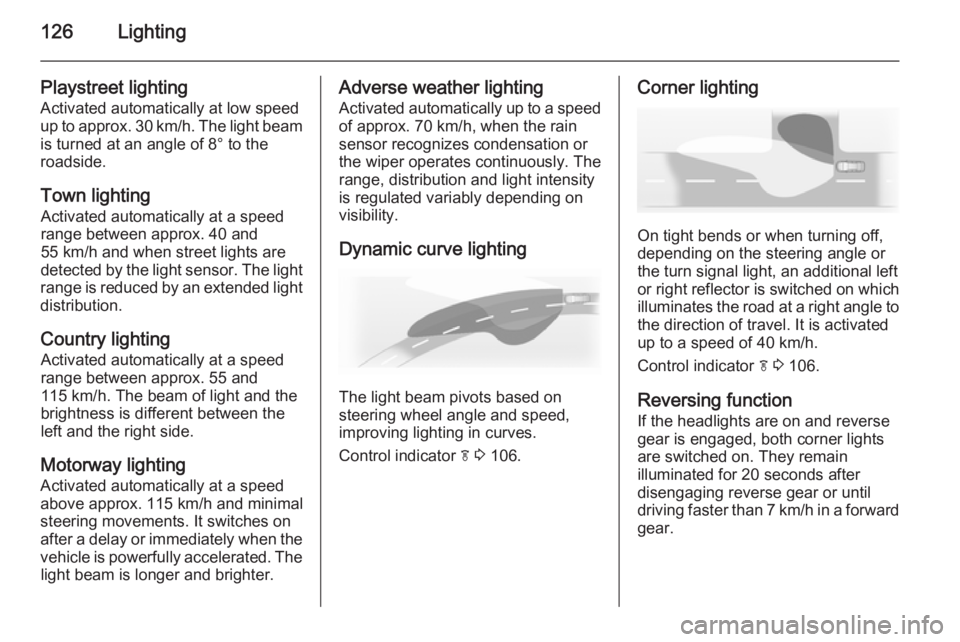
Dynamic curve lighting
The light beam pivots based on
steering wheel angle and speed,
improving lighting in curves.
Control indicator f 3 106.
Corner lighting
On tight bends or when turning off,
depending on the steering angle or
the turn signal light, an additional left
or right reflector is switched on which illuminates the road at a right angle to
the direction of travel. It is activated
up to a speed of 40 km/h.
Control indicator f 3 106.
Reversing function If the headlights are on and reverse
gear is engaged, both corner lights
are switched on. They remain
illuminated for 20 seconds after disengaging reverse gear or until
driving faster than 7 km/h in a forward
gear.
Page 131 of 321
Lighting129
Light switch in position AUTO:
switching on front fog lights will switch headlights on automatically.
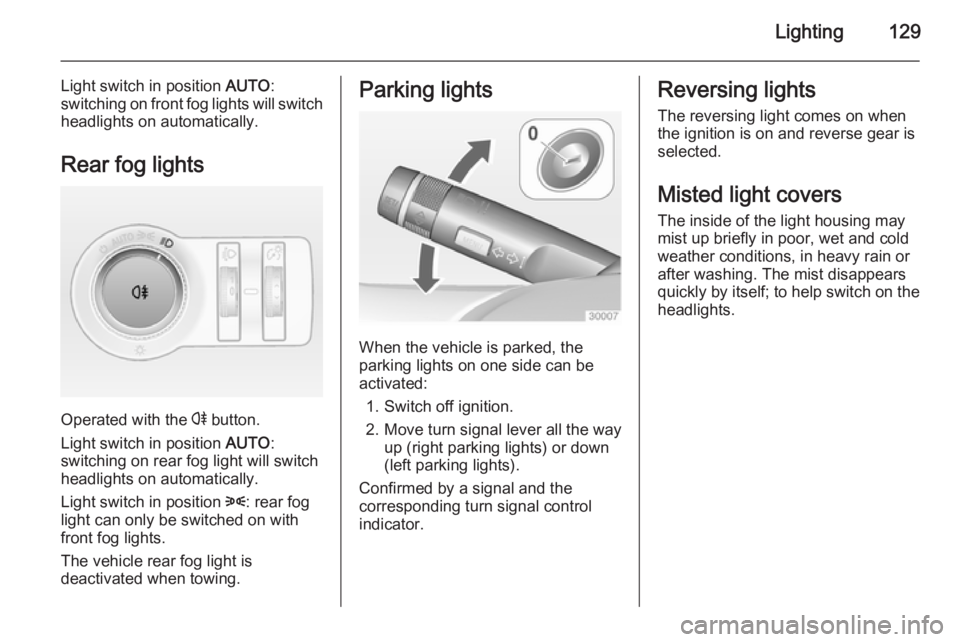
Rear fog lights
Operated with the r button.
Light switch in position AUTO:
switching on rear fog light will switch
headlights on automatically.
Light switch in position 8: rear fog
light can only be switched on with
front fog lights.
The vehicle rear fog light is
deactivated when towing.
Parking lights
When the vehicle is parked, the
parking lights on one side can be
activated:
1. Switch off ignition.
2. Move turn signal lever all the way up (right parking lights) or down
(left parking lights).
Confirmed by a signal and the
corresponding turn signal control
indicator.
Reversing lights
The reversing light comes on when
the ignition is on and reverse gear is
selected.
Misted light covers The inside of the light housing may
mist up briefly in poor, wet and cold weather conditions, in heavy rain or
after washing. The mist disappears
quickly by itself; to help switch on the
headlights.
Page 138 of 321
136Climate control
If no cooling or drying is required,
switch off the cooling system for fuel
saving reasons. Activated cooling
might inhibit Autostops.
Stop-start system 3 153.
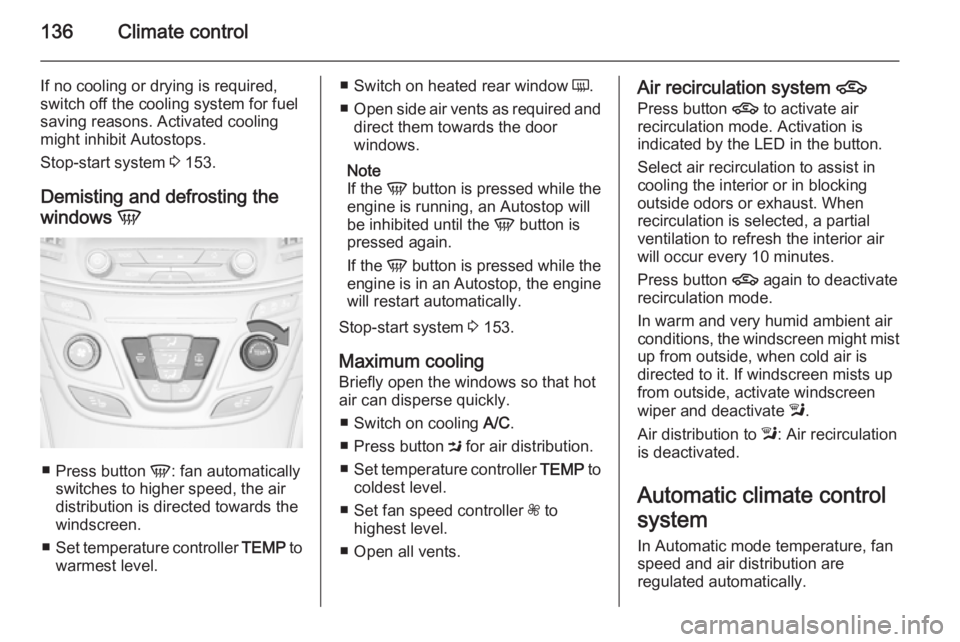
Demisting and defrosting the
windows V
■
Press button V: fan automatically
switches to higher speed, the air distribution is directed towards the
windscreen.
■ Set temperature controller TEMP to
warmest level.
■ Switch on heated rear window Ü.
■ Open side air vents as required and
direct them towards the door
windows.
Note
If the V button is pressed while the
engine is running, an Autostop will
be inhibited until the V button is
pressed again.
If the V button is pressed while the
engine is in an Autostop, the engine
will restart automatically.
Stop-start system 3 153.
Maximum cooling
Briefly open the windows so that hot
air can disperse quickly.
■ Switch on cooling A/C.
■ Press button M for air distribution.
■ Set temperature controller TEMP to
coldest level.
■ Set fan speed controller Z to
highest level.
■ Open all vents.Air recirculation system 4
Press button 4 to activate air
recirculation mode. Activation is
indicated by the LED in the button.
Select air recirculation to assist in
cooling the interior or in blocking
outside odors or exhaust. When
recirculation is selected, a partial
ventilation to refresh the interior air
will occur every 10 minutes.
Press button 4 again to deactivate
recirculation mode.
In warm and very humid ambient air
conditions, the windscreen might mist
up from outside, when cold air is
directed to it. If windscreen mists up
from outside, activate windscreen
wiper and deactivate l.
Air distribution to l: Air recirculation
is deactivated.
Automatic climate control
system
In Automatic mode temperature, fan
speed and air distribution are
regulated automatically.