PEUGEOT 106 2001.5 Repair Manual
Manufacturer: PEUGEOT, Model Year: 2001.5, Model line: 106, Model: PEUGEOT 106 2001.5Pages: 107, PDF Size: 2.92 MB
Page 61 of 107
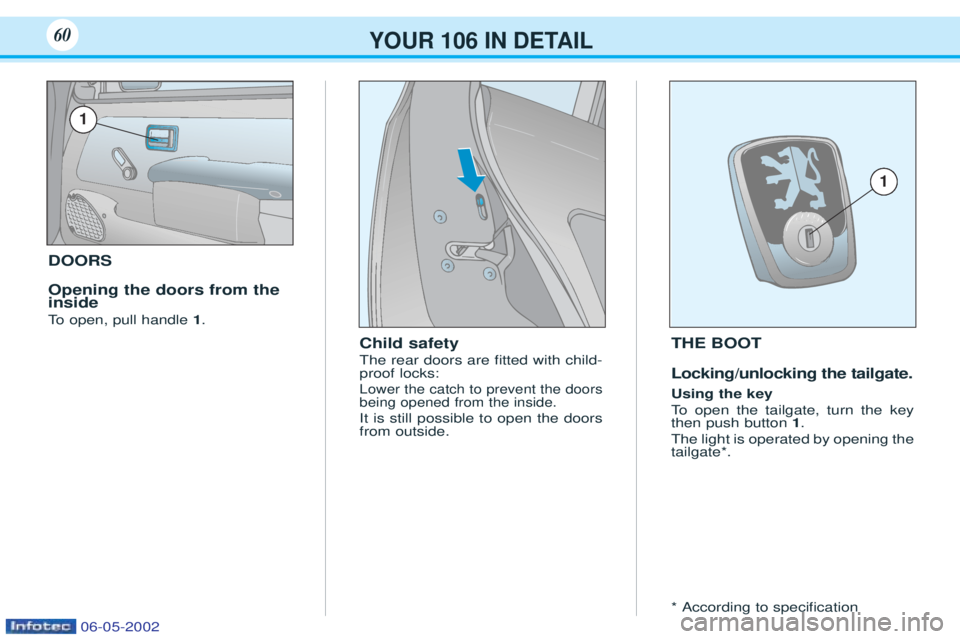
DOORS Opening the doors from the inside
To open, pull handle 1.
Child safety The rear doors are Þtted with child- proof locks:
Lower the catch to prevent the doorsbeing opened from the inside.
It is still possible to open the doorsfrom outside. THE BOOT Locking/unlocking the tailgate. Using the key
To
open the tailgate, turn the key
then push button 1.
The light is operated by opening the tailgate*. * According to speciÞcation
YOUR 106 IN DETAIL60
1
1
06-05-2002
Page 62 of 107
YOUR 106 IN DETAIL61
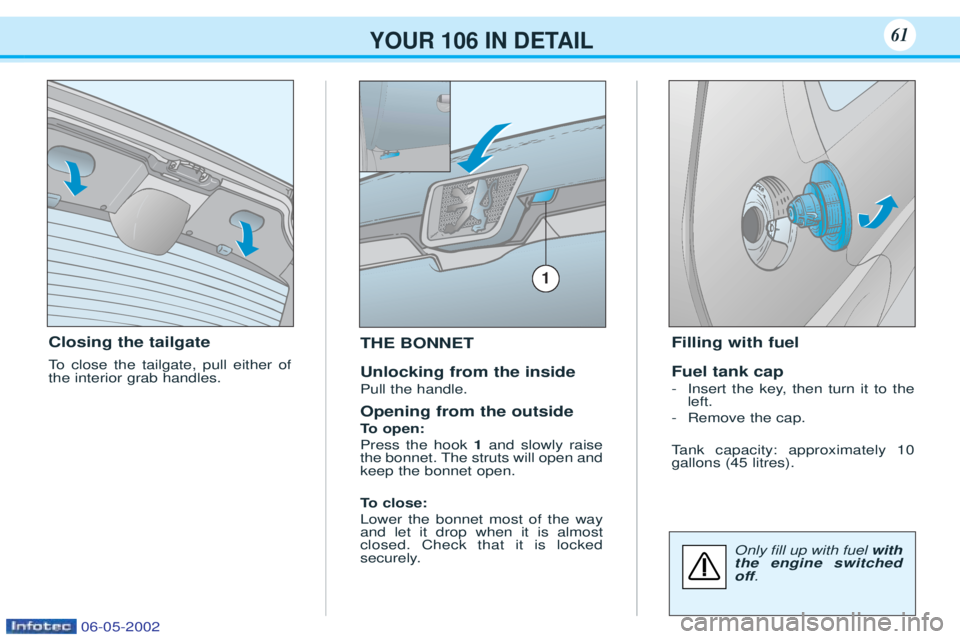
Closing the tailgate
To close the tailgate, pull either of
the interior grab handles. THE BONNET Unlocking from the inside Pull the handle. Opening from the outside
To
open:
Press the hook 1and slowly raise
the bonnet. The struts will open and keep the bonnet open.
To close:
Lower the bonnet most of the way and let it drop when it is almostclosed. Check that it is locked
securely. Filling with fuel Fuel tank cap -
Insert the key, then turn it to the left.
- Remove the cap.
T ank capacity: approximately 10
gallons (45 litres).
1
Only Þll up with fuel with
the engine switched
off .
06-05-2002
Page 63 of 107
YOUR 106 IN DETAIL68
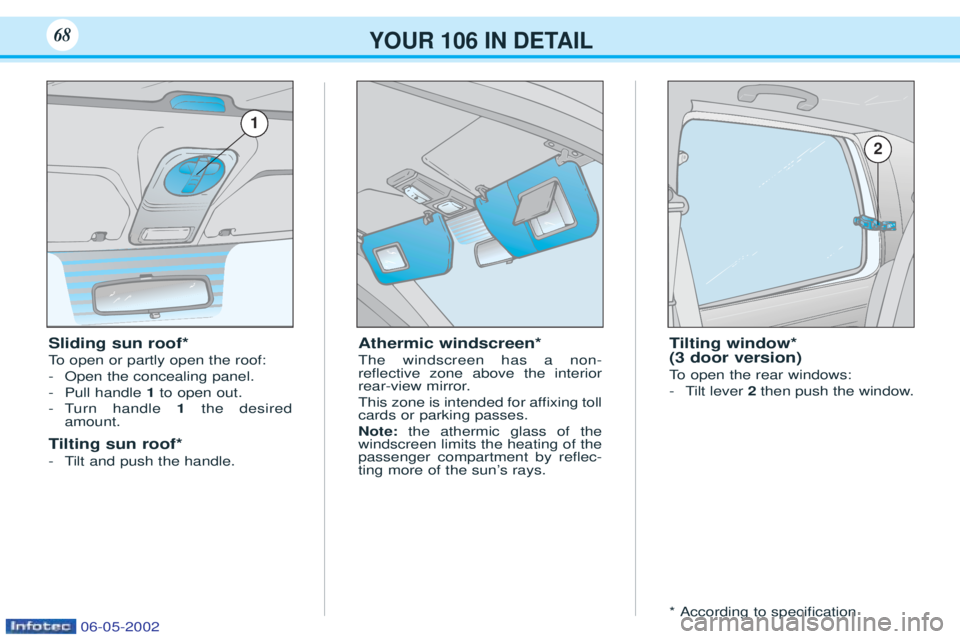
Athermic windscreen* The windscreen has a non- reßective zone above the interior
rear-view mirror.
This zone is intended for afÞxing toll cards or parking passes. Note:the athermic glass of the
windscreen limits the heating of the passenger compartment by reßec-
ting more of the sunÕs rays.Sliding sun roof*
To open or partly open the roof:
- Open the concealing panel.
- Pull handle 1to open out.
-T urn handle 1the desired
amount.
T ilting sun roof*
-T ilt and push the handle.
1
Tilting window*
(3 door version)
To open the rear windows:
-T ilt lever 2then push the window.
* According to speciÞcation
2
06-05-2002
Page 64 of 107
YOUR 106 IN DETAIL61
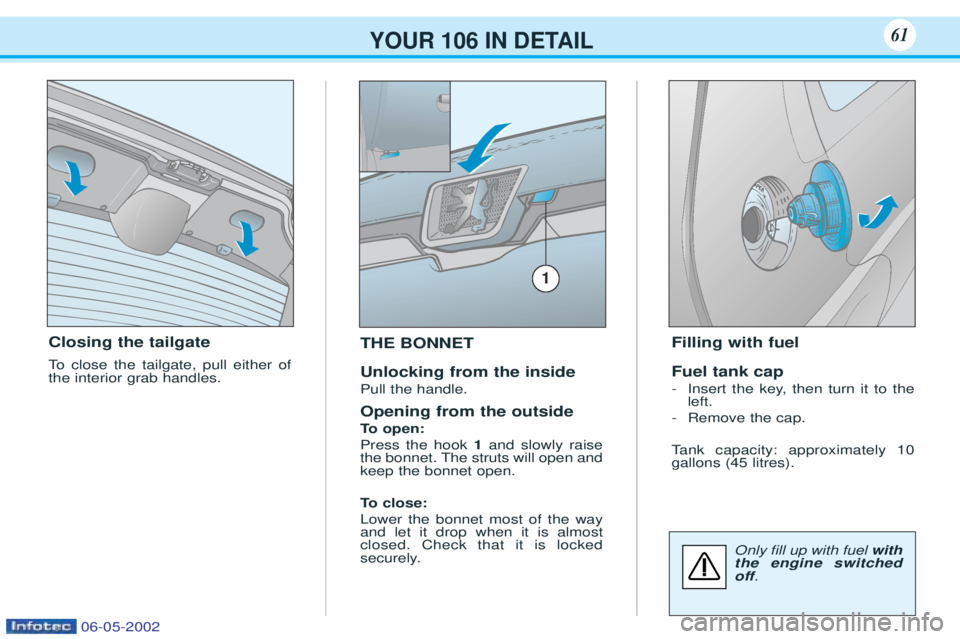
Closing the tailgate
To close the tailgate, pull either of
the interior grab handles. THE BONNET Unlocking from the inside Pull the handle. Opening from the outside
To
open:
Press the hook 1and slowly raise
the bonnet. The struts will open and keep the bonnet open.
To close:
Lower the bonnet most of the way and let it drop when it is almostclosed. Check that it is locked
securely. Filling with fuel Fuel tank cap -
Insert the key, then turn it to the left.
- Remove the cap.
T ank capacity: approximately 10
gallons (45 litres).
1
Only Þll up with fuel with
the engine switched
off .
06-05-2002
Page 65 of 107
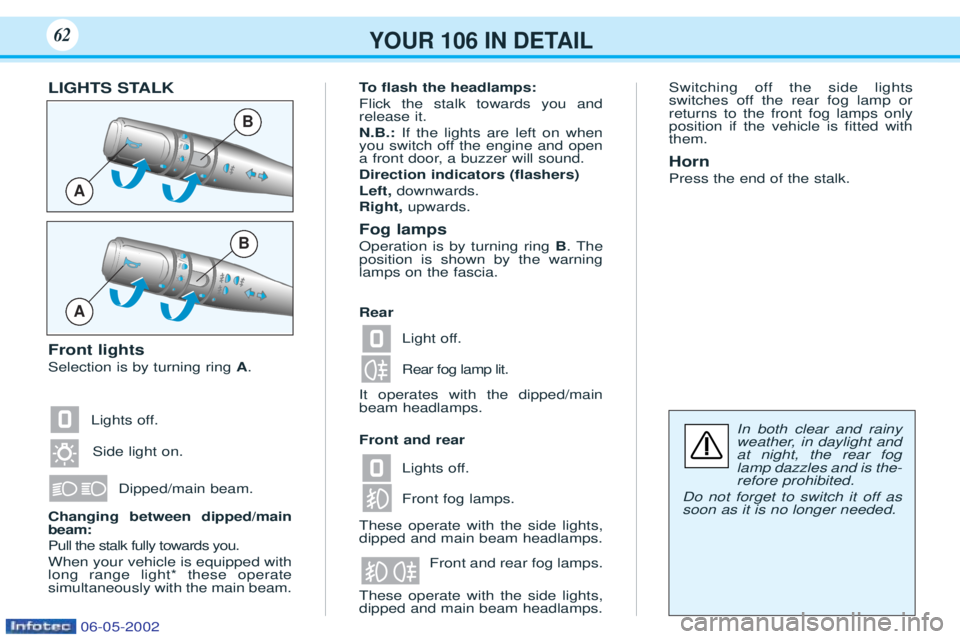
Light off. Rear fog lamp lit.
Lights off. Front fog lamps.Front and rear fog lamps.
These operate with the side lights, dipped and main beam headlamps.
Lights off.
Side light on.
Dipped/main beam.
YOUR 106 IN DETAIL62
In both clear and rainy
weather, in daylight andat night, the rear foglamp dazzles and is the-refore prohibited.
Do not forget to switch it off assoon as it is no longer needed.
A
B
A
B
LIGHTS STALK Front lights Selection is by turning ring A.
Changing between dipped/main beam: Pull the stalk fully towards you.When your vehicle is equipped with long range light* these operatesimultaneously with the main beam. To
flash the headlamps:
Flick the stalk towards you andrelease it. N.B.: If the lights are left on when
you switch off the engine and open
a front door, a buzzer will sound. Direction indicators ( flashers)
Left, downwards.
Right, upwards.
Fog lamps Operation is by turning ring B. The
position is shown by the warning lamps on the fascia. It operates with the dipped/main beam headlamps. These operate with the side lights, dipped and main beam headlamps. Switching off the side lights
switches off the rear fog lamp orreturns to the front fog lamps onlyposition if the vehicle is Þtted withthem. Horn Press the end of the stalk.
Rear Front and rear
06-05-2002
Page 66 of 107
YOUR 106 IN DETAIL63
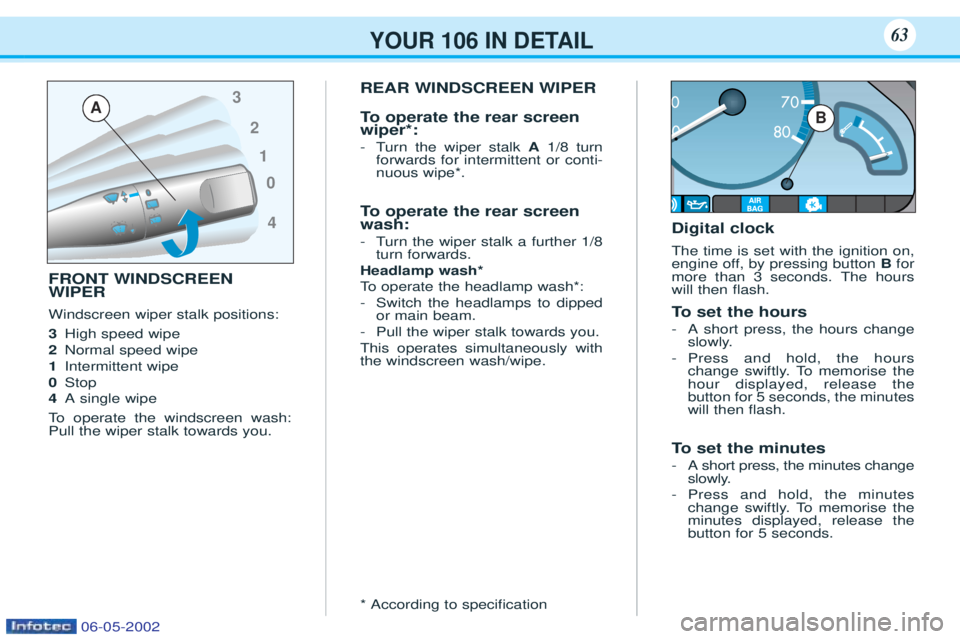
FRONT WINDSCREEN WIPER Windscreen wiper stalk positions: 3High speed wipe
2 Normal speed wipe
1 Intermittent wipe
0 Stop
4 A single wipe
To operate the windscreen wash:
Pull the wiper stalk towards you. REAR WINDSCREEN WIPER
To
operate the rear screen
wiper*: -T urn the wiper stalk A1/8 turn
forwards for intermittent or conti- nuous wipe*.
To operate the rear screen
wash: -T urn the wiper stalk a further 1/8
turn forwards.
Headlamp wash*
To operate the headlamp wash*:
- Switch the headlamps to dipped or main beam.
- Pull the wiper stalk towards you.
This operates simultaneously withthe windscreen wash/wipe. * According to speciÞcation Digital clock The time is set with the ignition on,
engine off, by pressing button
Bfor
more than 3 seconds. The hourswill then ßash.
To set the hours
-A short press, the hours change
slowly.
- Press and hold, the hours
change swiftly. To memorise thehour displayed, release thebutton for 5 seconds, the minuteswill then ßash.
To set the minutes
-A short press, the minutes change
slowly.
- Press and hold, the minutes
change swiftly. To memorise theminutes displayed, release thebutton for 5 seconds.
0
4
1
2
3
AB
06-05-2002
Page 67 of 107
YOUR 106 IN DETAIL64
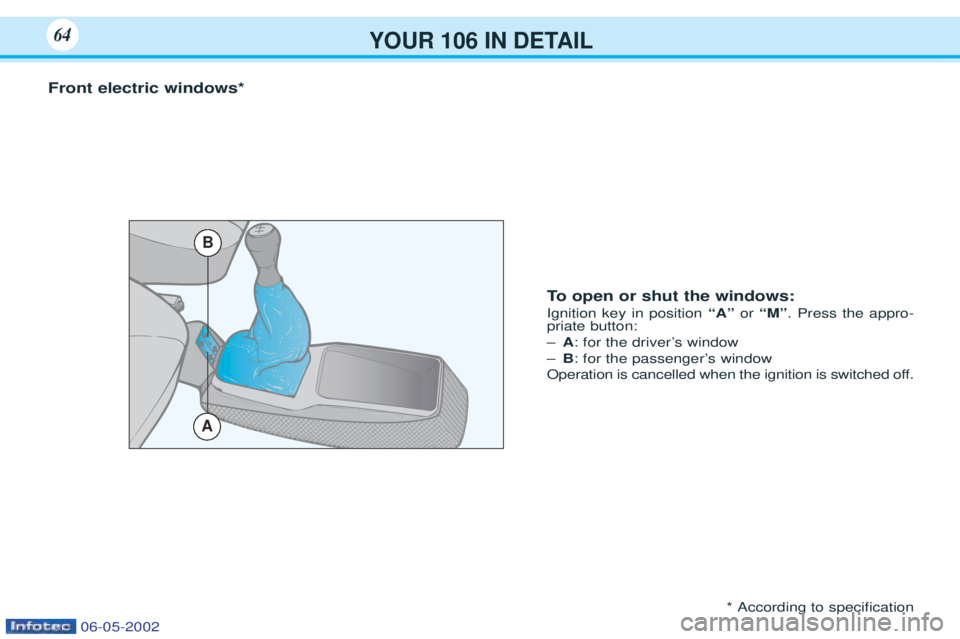
Front electric windows*To open or shut the windows:
Ignition key in position “A”or “M” . Press the appro-
priate button: Ð A: for the driverÕs window
Ð B: for the passengerÕs window
Operation is cancelled when the ignition is switched off.
* According to speciÞcation
B
A
06-05-2002
Page 68 of 107
YOUR 106 IN DETAIL65
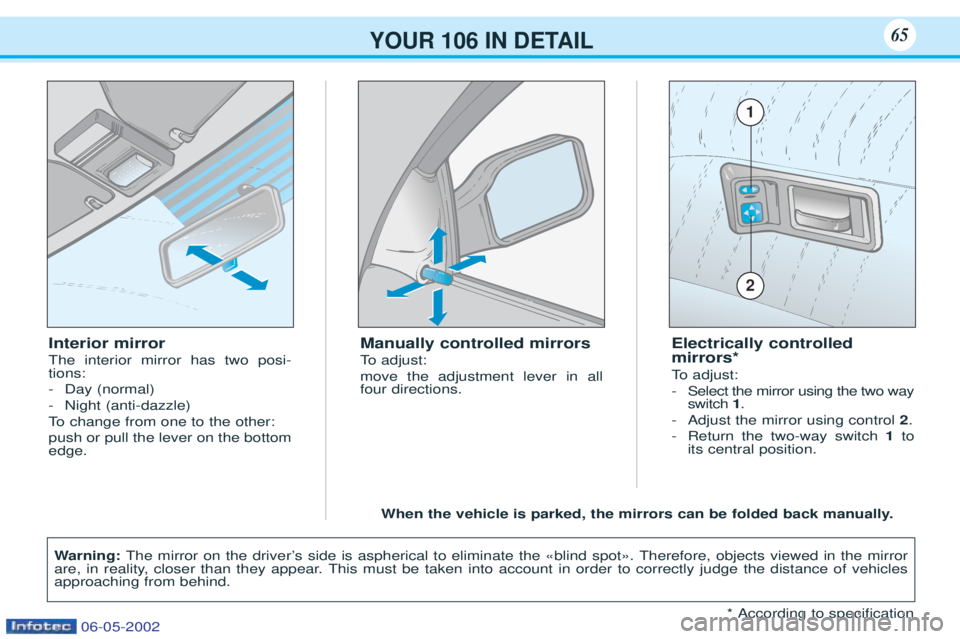
Interior mirror The interior mirror has two posi- tions: -Day (normal)
- Night (anti-dazzle)
To change from one to the other:
push or pull the lever on the bottom edge. Manually controlled mirrors
To
adjust:
move the adjustment lever in all four directions. Electrically controlled mirrors*
To
adjust:
- Select the mirror using the two way switch 1.
- Adjust the mirror using control 2.
- Return the two-way switch 1to
its central position.
1
2
* According to speciÞcation
When the vehicle is parked, the mirrors can be folded back manually.
W arning: The mirror on the driverÕs side is aspherical to eliminate the Çblind spotÈ. Therefore, objects viewed in the mirror
are, in reality, closer than they appear. This must be taken into account in order to correctly judge the distance of vehicles approaching from behind.06-05-2002
Page 69 of 107
YOUR 106 IN DETAIL66
5
78
10
9
1
6
1112
432
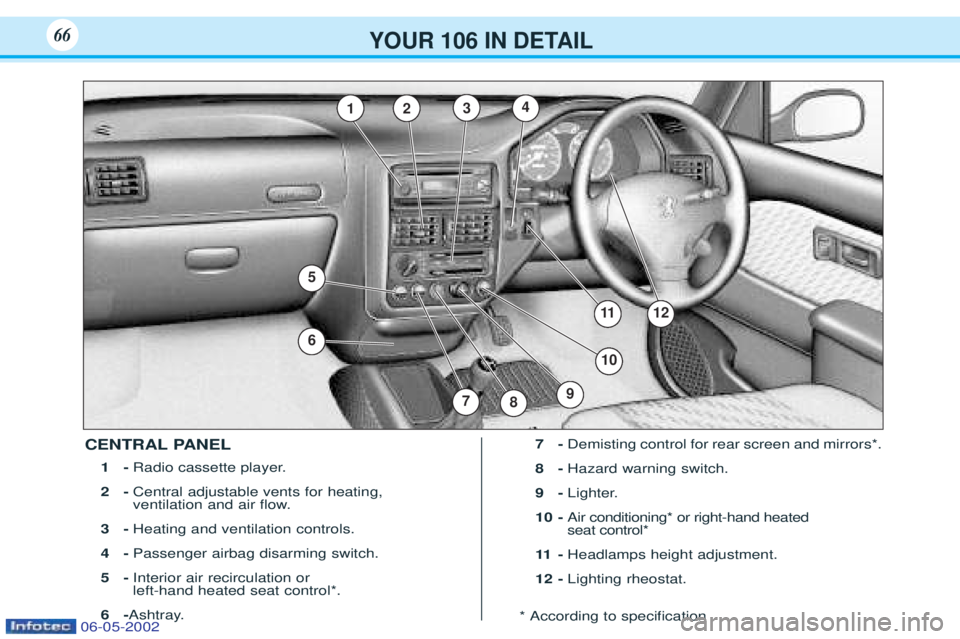
CENTRAL PANEL1- Radio cassette player.
2- Central adjustable vents for heating,
ventilation and air ßow.
3- Heating and ventilation controls.
4- Passenger airbag disarming switch.
5- Interior air recirculation or left-hand heated seat control*.
6- Ashtray. 7-
Demisting control for rear screen and mirrors*.
8- Hazard warning switch.
9- Lighter.
10 - Air conditioning* or right-hand heated seat control*
11 - Headlamps height adjustment.
12 - Lighting rheostat.
* According to speciÞcation
06-05-2002
Page 70 of 107
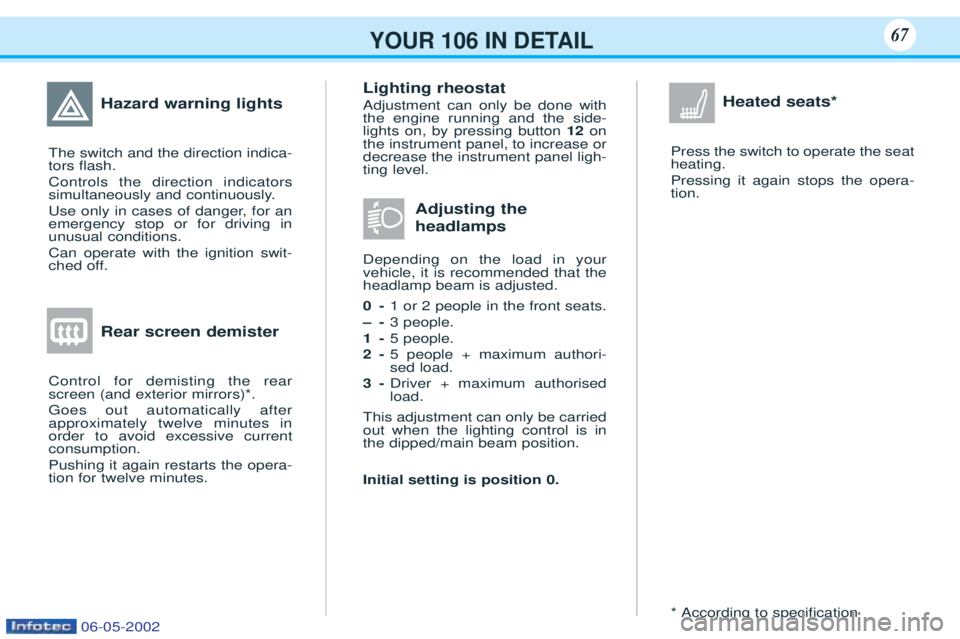
Heated seats*
Press the switch to operate the seat heating. Pressing it again stops the opera- tion. * According to speciÞcation
Lighting rheostat Adjustment can only be done with the engine running and the side-lights on, by pressing button
12on
the instrument panel, to increase ordecrease the instrument panel ligh-ting level.
Adjusting the headlamps
Depending on the load in your vehicle, it is recommended that theheadlamp beam is adjusted. 0- 1 or 2 people in the front seats.
–- 3 people.
1- 5 people.
2- 5 people + maximum authori- sed load.
3- Driver + maximum authorised load.
This adjustment can only be carriedout when the lighting control is inthe dipped/main beam position. Initial setting is position 0.
Hazard warning lights
The switch and the direction indica- tors ßash. Controls the direction indicators
simultaneously and continuously.
Use only in cases of danger, for an emergency stop or for driving inunusual conditions. Can operate with the ignition swit-
ched off.
Rear screen demister
Control for demisting the rearscreen (and exterior mirrors)*. Goes out automatically after approximately twelve minutes inorder to avoid excessive currentconsumption. Pushing it again restarts the opera- tion for twelve minutes.
YOUR 106 IN DETAIL67
06-05-2002