ignition PEUGEOT 108 2015 User Guide
[x] Cancel search | Manufacturer: PEUGEOT, Model Year: 2015, Model line: 108, Model: PEUGEOT 108 2015Pages: 271, PDF Size: 7.42 MB
Page 45 of 271
43
108_en_Chap02_ouvertures_ed01-2015
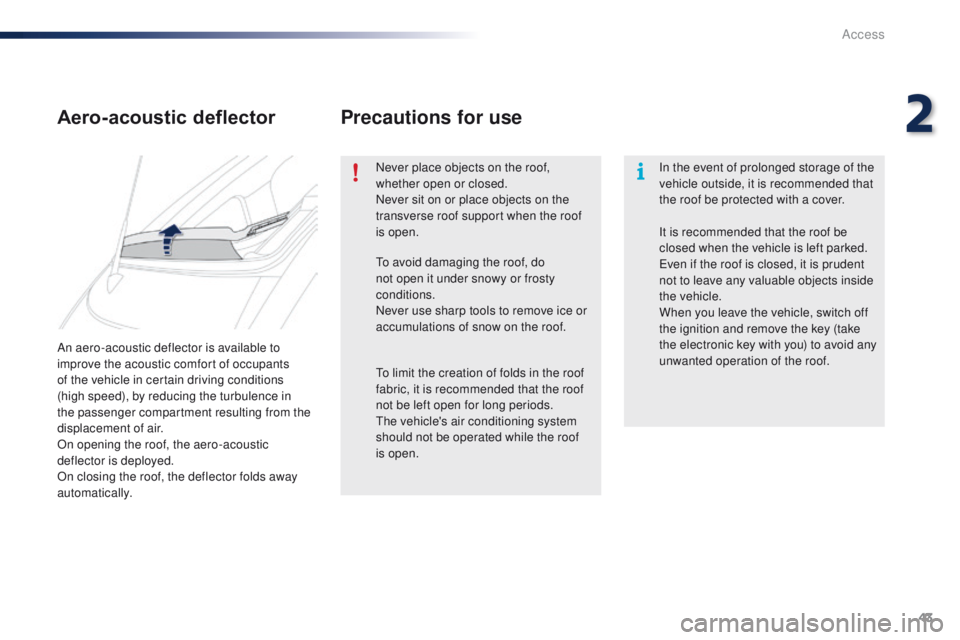
An aero-acoustic deflector is available to
improve the acoustic comfort of occupants
of the vehicle in certain driving conditions
(high speed), by reducing the turbulence in
the passenger compartment resulting from the
displacement of air.
On opening the roof, the aero-acoustic
deflector is deployed.
On closing the roof, the deflector folds away
automatically.
Aero-acoustic deflector Precautions for use
Never place objects on the roof,
whether open or closed.
Never sit on or place objects on the
transverse roof support when the roof
is open. In the event of prolonged storage of the
vehicle outside, it is recommended that
the roof be protected with a cover.
to a
void damaging the roof, do
not open it under snowy or frosty
conditions.
Never use sharp tools to remove ice or
accumulations of snow on the roof.
to l
imit the creation of folds in the roof
fabric, it is recommended that the roof
not be left open for long periods.
th
e vehicle's air conditioning system
should not be operated while the roof
is open. It is recommended that the roof be
closed when the vehicle is left parked.
ev
en if the roof is closed, it is prudent
not to leave any valuable objects inside
the vehicle.
When you leave the vehicle, switch off
the ignition and remove the key (take
the electronic key with you) to avoid any
unwanted operation of the roof.
2
Access
Page 48 of 271
46
108_en_Chap03_confort_ed01-2015
ensure that no person or object
prevents the seat slide from returning to
its initial position.
Check that the seat belt has reeled in
correctly so as to not impede access for
passengers to the rear seats.
Heated seat controlAccess to the rear seats
(3-door)
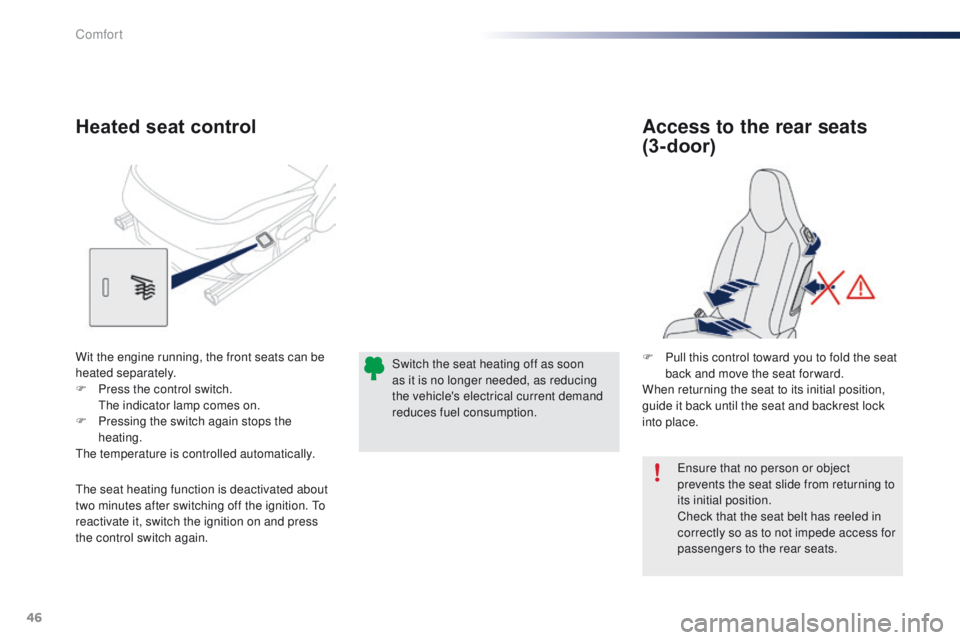
F Pull this control toward you to fold the seat
back and move the seat for ward.
When returning the seat to its initial position,
guide it back until the seat and backrest lock
into place.
Wit the engine running, the front seats can be
heated separately.
F
P
ress the control switch.
t
h
e indicator lamp comes on.
F
P
ressing the switch again stops the
heating.
the
temperature is controlled automatically.
the
seat heating function is deactivated about
two minutes after switching off the ignition.
t
o
r
eactivate it, switch the ignition on and press
the control switch again. Switch the seat heating off as soon
as it is no longer needed, as reducing
the vehicle's electrical current demand
reduces fuel consumption.
Comfort
Page 71 of 271
69
108_en_Chap05_conduite_ed01-2015
Starting - switching off the engine with the key
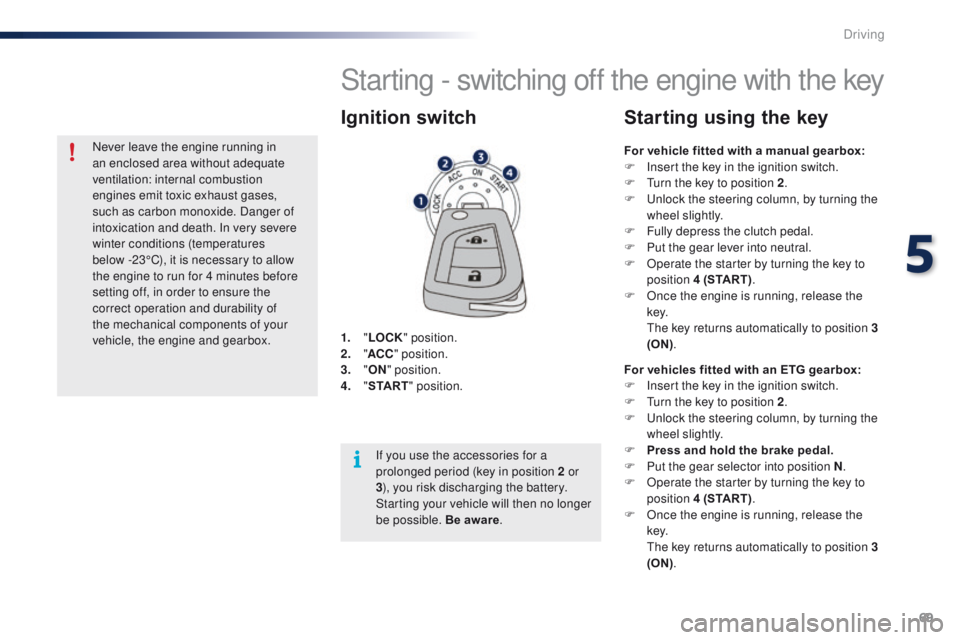
1. "LOCK " position.
2. " AC
C" position.
3.
"ON " position.
4.
" S
TA R T" position.
Ignition switch
For vehicle fitted with a manual gearbox:
F
I nsert the key in the ignition switch.
F
t
u
rn the key to position 2 .
F
u
n
lock the steering column, by turning the
wheel slightly.
F
F
ully depress the clutch pedal.
F
P
ut the gear lever into neutral.
F
O
perate the starter by turning the key to
position 4 (START) .
F
O
nce the engine is running, release the
key.
t
h
e key returns automatically to position 3
(ON) .
Starting using the key
For vehicles fitted with an ETG gearbox:
F
I nsert the key in the ignition switch.
F
t
u
rn the key to position 2 .
F
u
n
lock the steering column, by turning the
wheel slightly.
F
P
ress and hold the brake pedal.
F
P
ut the gear selector into position N .
F
O
perate the starter by turning the key to
position 4 (START) .
F
O
nce the engine is running, release the
key.
t
h
e key returns automatically to position 3
(ON) .
If you use the accessories for a
prolonged period (key in position 2 or
3
), you risk discharging the battery.
Starting your vehicle will then no longer
be possible. Be aware .
Never leave the engine running in
an enclosed area without adequate
ventilation: internal combustion
engines emit toxic exhaust gases,
such as carbon monoxide. Danger of
intoxication and death. In very severe
winter conditions (temperatures
below
-23°C), it is necessary to allow
the engine to run for 4 minutes before
setting off, in order to ensure the
correct operation and durability of
the mechanical components of your
vehicle, the engine and gearbox.
5
Driving
Page 72 of 271
70
108_en_Chap05_conduite_ed01-2015
If you use the accessories for a
prolonged period, the vehicle will
automatically switch to "OFF" mode
after about 20 minutes.
Be aware in order to avoid discharging
the battery.
Starting - switching off the engine with
the Keyless e
n
try and Starting system
Changing the mode of the
vehicle
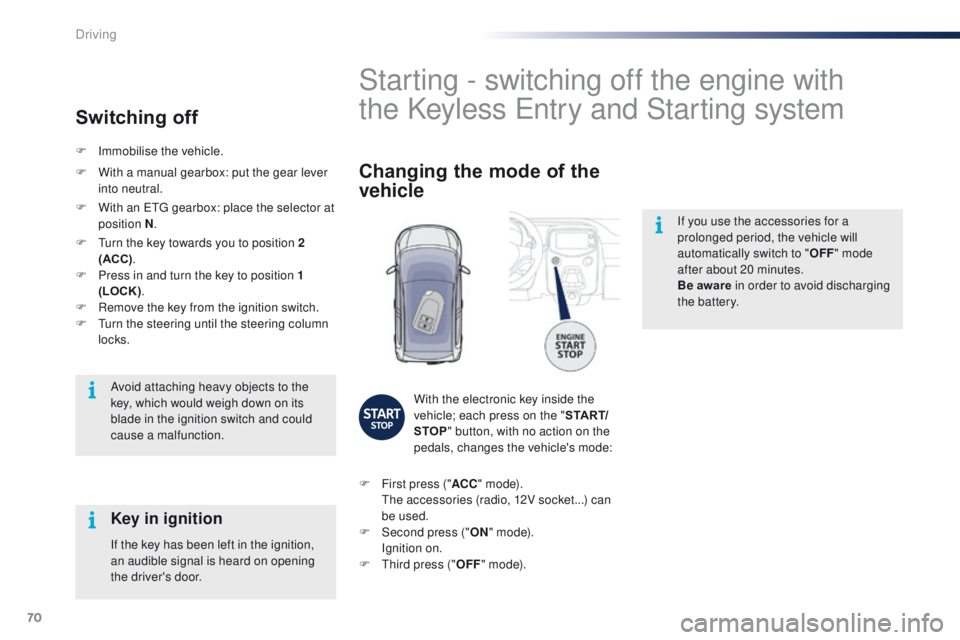
With the electronic key inside the
vehicle; each press on the " S TA R T/
STOP " button, with no action on the
pedals, changes the vehicle's mode:
F
F
irst press (" ACC" m o d e).
t
h
e accessories (radio, 12V socket...) can
be used.
F
Sec
ond press (" ON" m o d e).
I
gnition on.
F
t
h
ird press (" OFF" m o d e).
Avoid attaching heavy objects to the
key, which would weigh down on its
blade in the ignition switch and could
cause a malfunction.
Key in ignition
If the key has been left in the ignition,
an audible signal is heard on opening
the driver's door.
F
Imm
obilise the vehicle.
Switching off
F With a manual gearbox: put the gear lever
into neutral.
F
W
ith an etg gearbox: place the selector at
position N .
F
t
u
rn the key towards you to position 2
(ACC) .
F
P
ress in and turn the key to position 1
(LOCK) .
F
R
emove the key from the ignition switch.
F
t
u
rn the steering until the steering column
locks.
Driving
Page 73 of 271
71
108_en_Chap05_conduite_ed01-2015
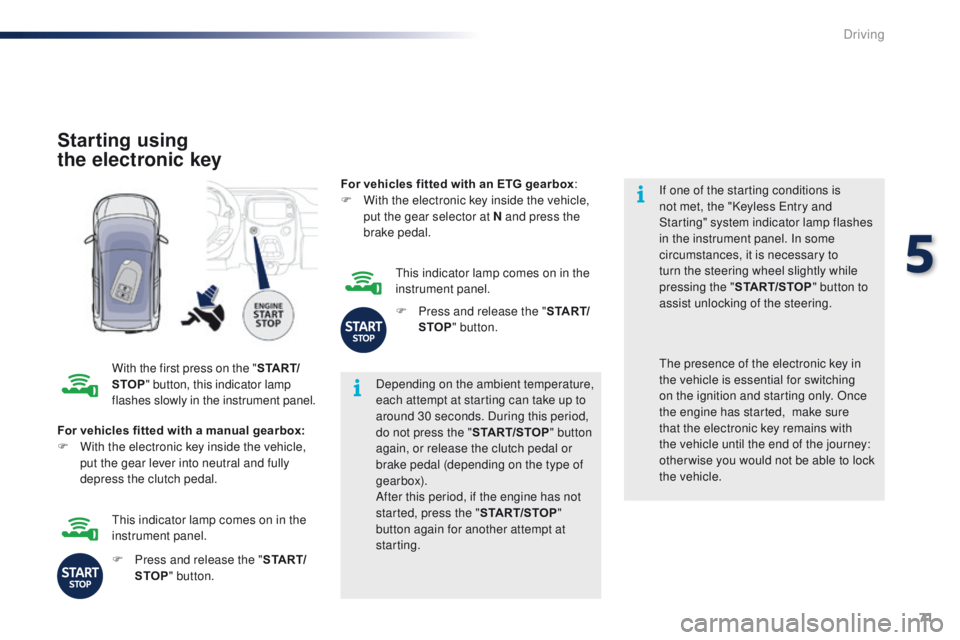
Starting using
the electronic key
With the first press on the " S TA R T/
STOP " button, this indicator lamp
flashes slowly in the instrument panel. Depending on the ambient temperature,
each attempt at starting can take up to
around 30 seconds. During this period,
do not press the "
START/STOP" button
again, or release the clutch pedal or
brake pedal (depending on the type of
gearbox).
After this period, if the engine has not
started, press the " START/STOP"
button again for another attempt at
starting. If one of the starting conditions is
not met, the "Keyless
e
n
try and
Starting" system indicator lamp flashes
in the instrument panel. In some
circumstances, it is necessary to
turn the steering wheel slightly while
pressing the " START/STOP " button to
assist unlocking of the steering.
For vehicles fitted with a manual gearbox:
F
W
ith the electronic key inside the vehicle,
put the gear lever into neutral and fully
depress the clutch pedal.th e presence of the electronic key in
the vehicle is essential for switching
on the ignition and starting only. Once
the engine has started,
make sure
that the electronic key remains with
the vehicle until the end of the journey:
other wise you would not be able to lock
the vehicle.
F
P
ress and release the " S TA R T/
STOP " button.
th
is indicator lamp comes on in the
instrument panel. For vehicles fitted with an ETG gearbox
:
F
W
ith the electronic key inside the vehicle,
put the gear selector at N and press the
brake pedal.
th
is indicator lamp comes on in the
instrument panel.
F
P
ress and release the "
S TA R T/
STOP " button.
5
Driving
Page 75 of 271
73
108_en_Chap05_conduite_ed01-2015
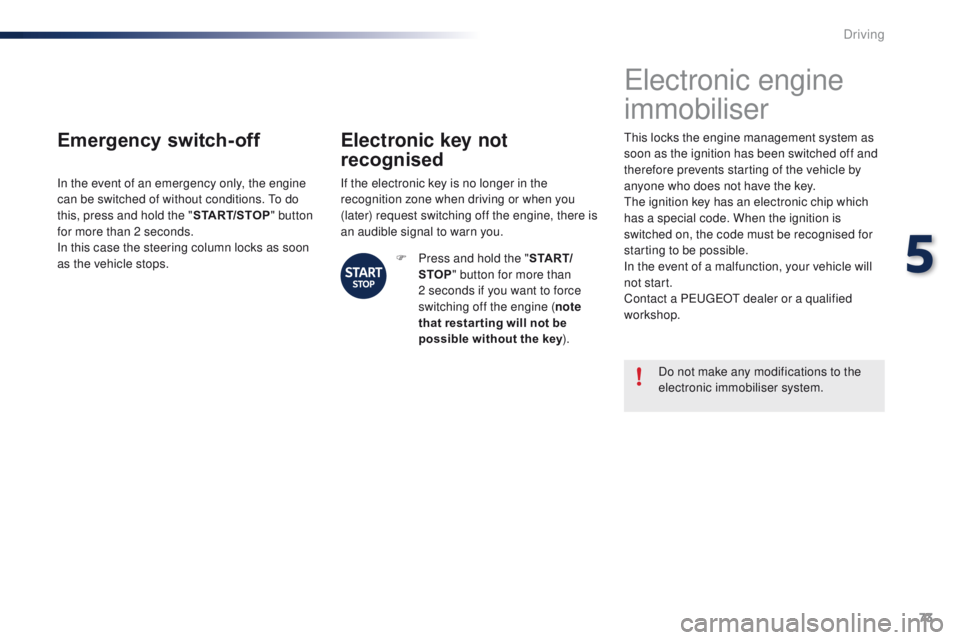
Emergency switch-off
In the event of an emergency only, the engine
can be switched of without conditions. to d o
this, press and hold the " START/STOP" button
for more than 2 seconds.
In this case the steering column locks as soon
as the vehicle stops.
Electronic key not
recognised
If the electronic key is no longer in the
recognition zone when driving or when you
(later) request switching off the engine, there is
an audible signal to warn you.
F
P
ress and hold the " S TA R T/
STOP " button for more than
2 seconds if you want to force
switching off the engine ( note
that restar ting will not be
possible without the key ).
electronic engine
immobiliser
this locks the engine management system as
soon as the ignition has been switched off and
therefore prevents starting of the vehicle by
anyone who does not have the key.
th
e ignition key has an electronic chip which
has a special code. When the ignition is
switched on, the code must be recognised for
starting to be possible.
In the event of a malfunction, your vehicle will
not start.
Contact a P
e
uge
Ot
dealer or a qualified
workshop.
Do not make any modifications to the
electronic immobiliser system.
5
Driving
Page 76 of 271
74
108_en_Chap05_conduite_ed01-2015
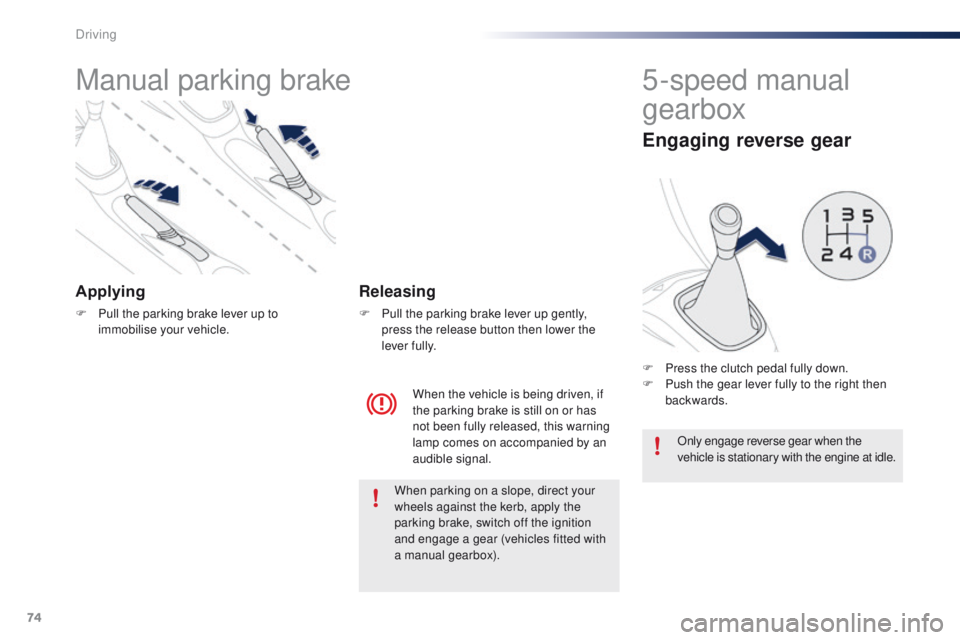
Manual parking brake
Applying
F Pull the parking brake lever up to immobilise your vehicle.
When the vehicle is being driven, if
the parking brake is still on or has
not been fully released, this warning
lamp comes on accompanied by an
audible signal.
Releasing
F Pull the parking brake lever up gently, press the release button then lower the
lever fully.
5-speed manual
gearbox
Engaging reverse gear
F Press the clutch pedal fully down.
F P ush the gear lever fully to the right then
backwards.
Only engage reverse gear when the
vehicle is stationary with the engine at idle.
When parking on a slope, direct your
wheels against the kerb, apply the
parking brake, switch off the ignition
and engage a gear (vehicles fitted with
a manual gearbox).
Driving
Page 80 of 271
78
108_en_Chap05_conduite_ed01-2015
to engage reverse, the vehicle must be
stationary with your foot on the brake pedal.
F
Sel
ect position R .
Reverse
there is an audible signal on engaging reverse.
th
e vehicle can be stopped whatever the
position of the gear selector ( N, E or R ).
However, there is an audible signal on opening
the driver's door if the gear selector is not at
position N .
Switching off
When the vehicle is stopped with the
engine running, always put the gear
selector to neutral N .
th
ere is a continuous audible signal
if you turn the ignition switch to " OFF"
with the vehicle in 2
nd, 3rd, 4th or 5th g e a r.
In this case return the ignition switch
to " ON ", move the gear selector to
position
N , then to position E , M or R,
then turn the ignition switch to " OFF". On a slope, use the brakes to
immobilise the vehicle and place the
gear selector in position N
, E or R.
With the ignition on, illumination
of this warning lamp indicates a
gearbox fault.
Contact a P
e
uge
Ot
dealer or a
qualified workshop.
If N
i
s flashing in the instrument panel
accompanied by an audible signal for
a long time:
Operating faults
In all cases, it is essential that you
apply the parking brake to immobilise
the vehicle.
Before doing anything under the
bonnet, check that the gear selector is
in neutral N and the parking brake is
applied.
Limits of operation
On a gradient, or when hill start assist is
activated, never hold the vehicle using the
accelerator : you could damage the clutch.
In these situations there is an audible signal.
F
M
ove the gear selector to position N .
F
W
ait 15 minutes to allow the clutch to cool
down before setting off. -
c
heck that the ignition switch is at the "
ON"
position,
-
p
lace the gear selector at N
, then move it
to E , M or R .
If 1 is flashing in the instrument panel:
-
p
lace the gear selector at E or M
, then
move it to N .
If R is flashing in the instrument panel:
-
p
lace the gear selector at R, then move it
to N .
Driving
Page 83 of 271

81
108_en_Chap05_conduite_ed01-2015
Stop & Start (Vti 68 S&S engine)
Operation
Going into engine STOP mode
this indicator lamp comes on in the
instrument panel and the engine
goes into standby automatically:
-
w
hen stationary, in neutral, and you
release the clutch pedal.
Never refuel with the engine in S
tO
P
mode; you must switch off the ignition
with the button. For smoother operation, during
parking manoeuvres S
tO
P mode is
not available for a few seconds after
coming out of reverse gear.
S
tO
P mode does not affect the
vehicle's systems, such as for example,
braking, power steering...
Special cases: STOP mode not
available
StOP mode is not invoked principally when:
- t he driver's door is open,
-
t
he driver's seat belt is not fastened,
-
t
he engine is needed to maintain a
comfortable temperature in the passenger
compartment,
-
d
emisting is active,
-
s
ome special conditions (battery charge,
engine temperature, braking assistance,
vehicle stopped on a steep gradient, high
altitude...) where the engine is needed to
assure control of a system.
th
e Stop & Start
system puts the engine temporarily into standby - S
tO
P mode - during stops in the traffic (red lights, traffic jams, or other...). t
h
e
engine restarts automatically - S
tA
R
t
mode - as soon as you want to move off.
t
h
e restart takes place instantly, quickly and silently.
Per fect for urban use, the Stop & Start system reduces fuel consumption and exhaust emissions as well as the noise level when stationary.
Stop & Start time counters
A partial time counter counts the periods in
StO P mode during a journey.
It is displayed in the trip computer once the
Stop & Start acts.
Press one of the screen management buttons
to return to the previous display.
A global time counter counts the periods in
S
tO
P mode since the last reset.
When it is displayed, press one of the screen
management buttons to reset the counter.
5
Driving
Page 86 of 271
84
108_en_Chap05_conduite_ed01-2015
the speed limiter cannot, in any
circumstances, replace the need to
observe speed limits, nor can it replace the
need for vigilance on the part of the driver.
Speed limiter (Puretech 82 engine)
the speed limiter is switched on manually:
this can be done whatever the speed of the
vehicle. However, if you are driving at less than
20 mph (30 km/h), the programmed speed will
be fixed at 20 mph (30 km/h).
th
e speed limiter is paused by operation of the
control.
th
e programmed speed can be exceeded
temporarily by pressing the accelerator firmly
beyond the point of resistance.
to r
eturn to the programmed speed, simply
release the accelerator pedal until the vehicle
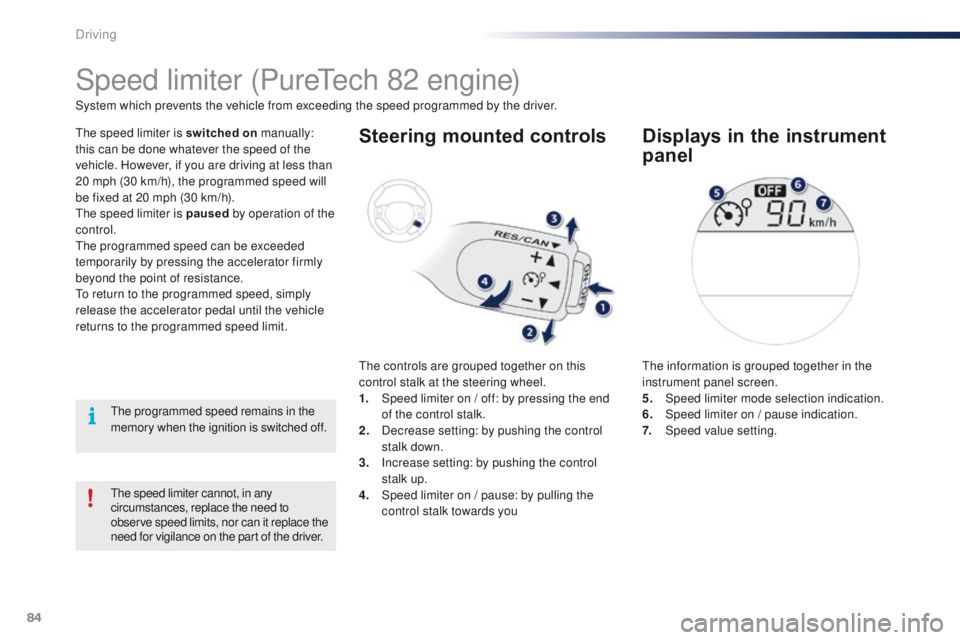
returns to the programmed speed limit. System which prevents the vehicle from exceeding the speed programmed by the driver.Steering mounted controls
the controls are grouped together on this
control stalk at the steering wheel.
1.
S
peed limiter on / off: by pressing the end
of the control stalk.
2.
D
ecrease setting: by pushing the control
stalk down.
3.
I
ncrease setting: by pushing the control
stalk up.
4.
S
peed limiter on / pause: by pulling the
control stalk towards you
Displays in the instrument
panel
the information is grouped together in the
instrument panel screen.
5.
Spe
ed limiter mode selection indication.
6.
S
peed limiter on / pause indication.
7.
Spe
ed value setting.
th
e programmed speed remains in the
memory when the ignition is switched off.
Driving