tailgate Peugeot 807 2013 Owner's Manual
[x] Cancel search | Manufacturer: PEUGEOT, Model Year: 2013, Model line: 807, Model: Peugeot 807 2013Pages: 234, PDF Size: 9.8 MB
Page 4 of 234
2
Contents
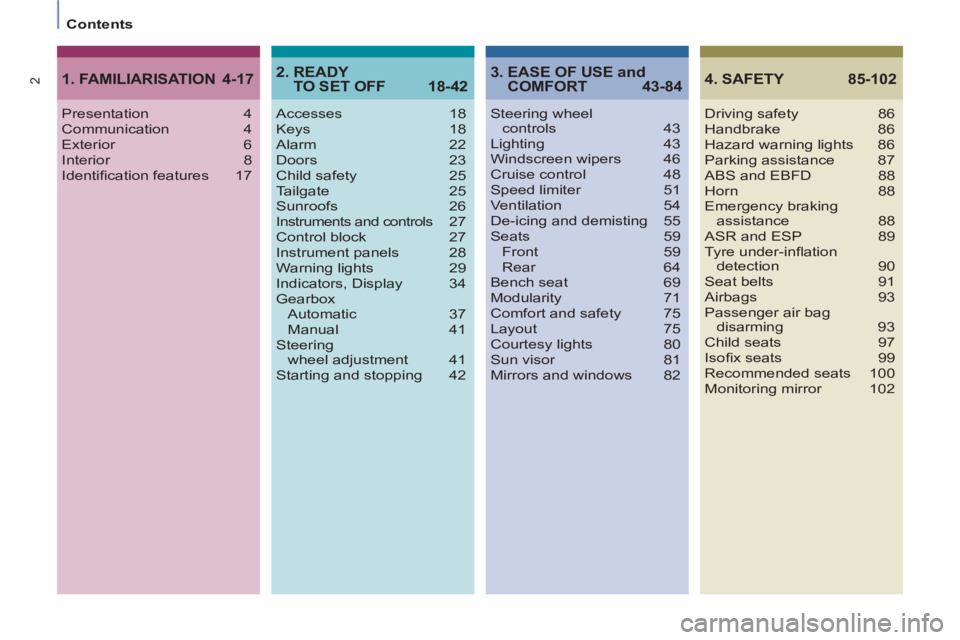
4. SAFETY 85-102
Driving safety 86
Handbrake 86
Hazard warning lights 86
Parking assistance 87
ABS and EBFD 88
Horn 88
Emergency braking
assistance 88
ASR and ESP 89
Tyre under-infl ation
detection 90
Seat belts 91
Airbags 93
Passenger air bag
disarming 93
Child seats 97
Isofi x seats 99
Recommended seats 100
Monitoring mirror 102 Steering wheel
controls 43
Lighting 43
Windscreen wipers 46
Cruise control 48
Speed limiter 51
Ventilation 54
De-icing and demisting 55
Seats 59
Front 59
Rear 64
Bench seat 69
Modularity 71
Comfort and safety 75
Layout 75
Courtesy lights 80
Sun visor 81
Mirrors and windows 82
3. EASE OF USE and
COMFORT 43-84
Presentation 4
Communication 4
Exterior 6
Interior 8
Identifi cation features 17
1. FAMILIARISATION 4-17
Accesses 18
Keys 18
Alarm 22
Doors 23
Child safety 25
Tailgate 25
Sunroofs 26
Instruments and controls 27
Control block 27
Instrument panels 28
Warning lights 29
Indicators, Display 34
Gearbox
Automatic 37
Manual 41
Steering
wheel adjustment 41
Starting and stopping 42
2. READY
TO SET OFF 18-42
Page 9 of 234
4
7a
7b7b 2
4
7a5
5
2
7
1
FAMILIARISATIO
N
Exterior
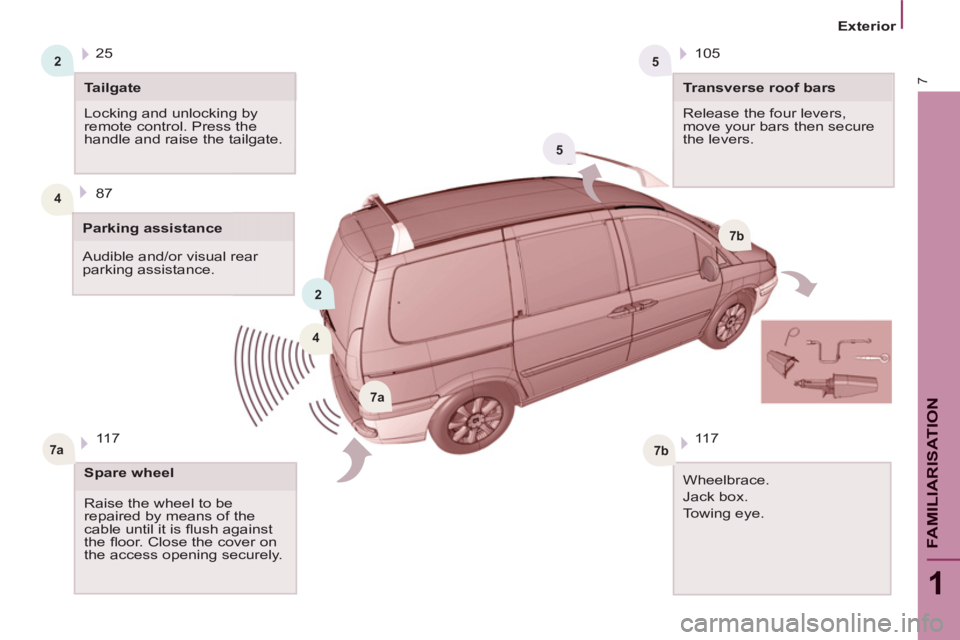
Audible and/or visual rear
parking assistance. 87
Tailgate
Locking and unlocking by
remote control. Press the
handle and raise the tailgate.
Parking assistance 25
Transverse roof bars
Release the four levers,
move your bars then secure
the levers. 105
Spare wheel
Raise the wheel to be
repaired by means of the
cable until it is fl ush against
the fl oor. Close the cover on
the access opening securely. 117
Wheelbrace.
Jack box.
Towing eye.
11 7
Page 20 of 234
Access
18
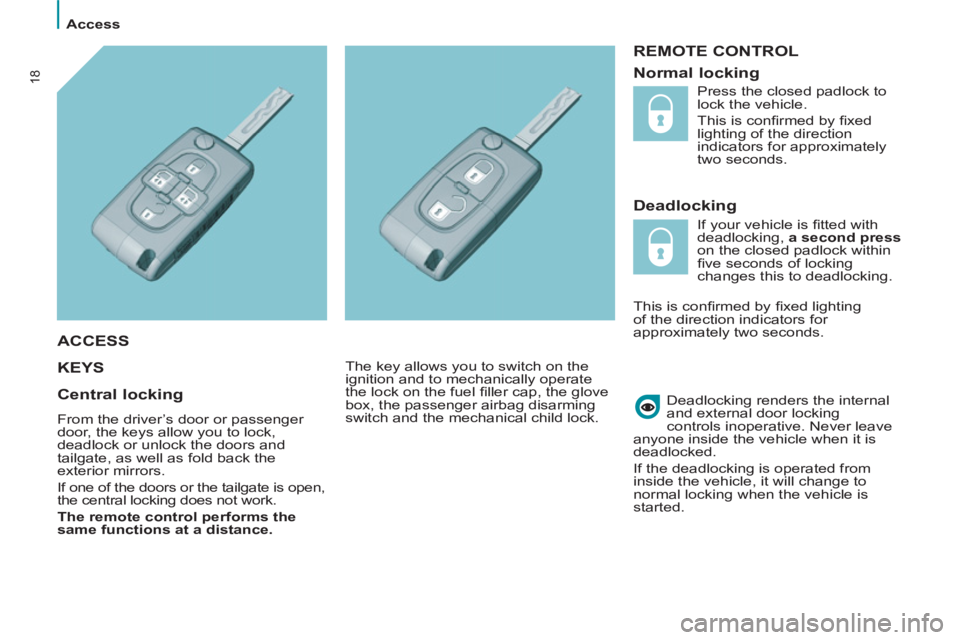
REMOTE CONTROL
Deadlocking
KEY
S
Deadlocking renders the internal
and external door locking
controls inoperative. Never leave
anyone inside the vehicle when it is
deadlocked.
If the deadlocking is operated from
inside the vehicle, it will change to
normal locking when the vehicle is
started.
ACCESS
Press the closed padlock to
lock the vehicle.
This is confi rmed by fi xed
lighting of the direction
indicators for approximately
two seconds.
Central locking
From the driver’s door or passenger
door, the keys allow you to lock,
deadlock or unlock the doors and
tailgate, as well as fold back the
exterior mirrors.
If one of the doors or the tailgate is open,
the central locking does not work.
The remote control performs the
same functions at a distance.
The key allows you to switch on the
ignition and to mechanically operate
the lock on the fuel fi ller cap, the glove
box, the passenger airbag disarming
switch and the mechanical child lock.
Normal locking
If your vehicle is fi tted with
deadlocking, a second press
on the closed padlock within
fi ve seconds of locking
changes this to deadlocking.
This is confi rmed by fi xed lighting
of the direction indicators for
approximately two seconds.
Page 24 of 234
Access
22
ALARM
If fi tted on your vehicle, this provides
two types of protection:
- exterior protection: it sounds if a
door, the tailgate or the bonnet is
opened.
- interior protection: it sounds if
the volume inside the passenger
compartment changes (breaking of
a window or a movement inside the
vehicle).
A red indicator light, located in the
centre of the fascia, indicates the
information detailed below. To lock your vehicle without setting
the alarm, insert the key in the
lock then lock the vehicle (e.g. for
washing).
When the alarm is triggered, the siren
sounds and the direction indicator
lights fl ash for thirty seconds.
Warning - alarm triggered: the red indicator
light fl ashes rapidly, insert the key and
switch on the ignition to switch it off.
When the alarm has been triggered ten
times in succession (on the eleventh time)
the alarm is deactivated. Repeat the rules
for setting the alarm.
- Close the sunroofs,
- Switch off the ignition,
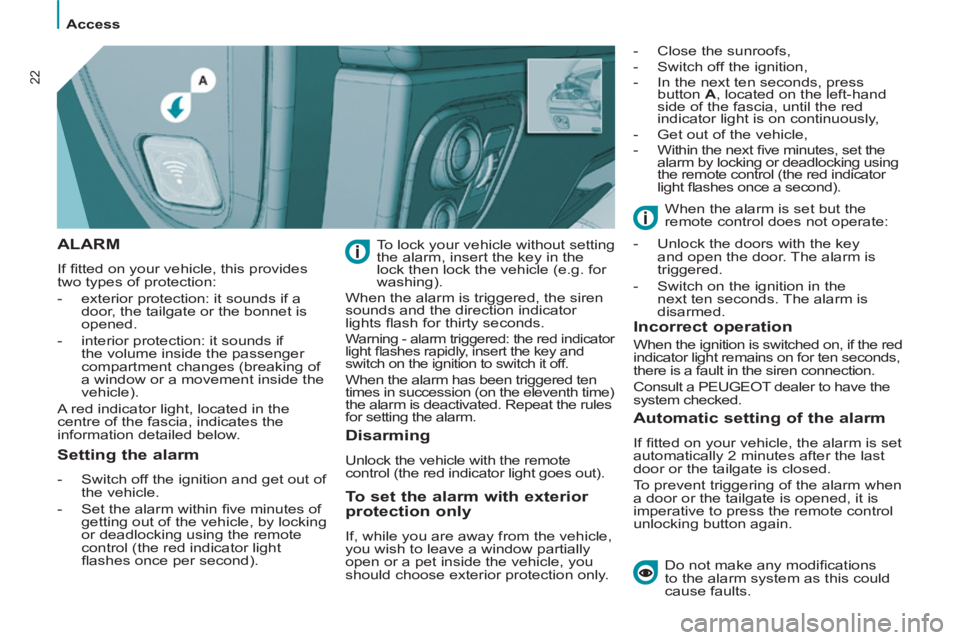
- In the next ten seconds, press
button A
, located on the left-hand
side of the fascia, until the red
indicator light is on continuously,
- Get out of the vehicle,
- Within the next fi ve minutes, set the
alarm by locking or deadlocking using
the remote control (the red indicator
light fl ashes once a second).
Do not make any modifi cations
to the alarm system as this could
cause faults.
Setting the alarm
- Switch off the ignition and get out of
the vehicle.
- Set the alarm within fi ve minutes of
getting out of the vehicle, by locking
or deadlocking using the remote
control (the red indicator light
fl ashes once per second).
Disarming
Unlock the vehicle with the remote
control (the red indicator light goes out).
To set the alarm with exterior
protection only
If, while you are away from the vehicle,
you wish to leave a window partially
open or a pet inside the vehicle, you
should choose exterior protection only.
Incorrect operation
When the ignition is switched on, if the red
indicator light remains on for ten seconds,
there is a fault in the siren connection.
Consult a PEUGEOT dealer to have the
system checked.
Automatic setting of the alarm
If fi tted on your vehicle, the alarm is set
automatically 2 minutes after the last
door or the tailgate is closed.
To prevent triggering of the alarm when
a door or the tailgate is opened, it is
imperative to press the remote control
unlocking button again. When the alarm is set but the
remote control does not operate:
- Unlock the doors with the key
and open the door. The alarm is
triggered.
- Switch on the ignition in the
next ten seconds. The alarm is
disarmed.
Page 25 of 234
Access
READY TO SET OFF
2
23
DOORS
Automatic central locking
The doors can lock automatically when
you are driving (at a speed of more
than 6 mph (10 km/h)).
You can activate or deactivate this
function.
To deactivate
With the ignition on, press
and hold the padlock.
Deactivation of the function
is accompanied by an audible signal.
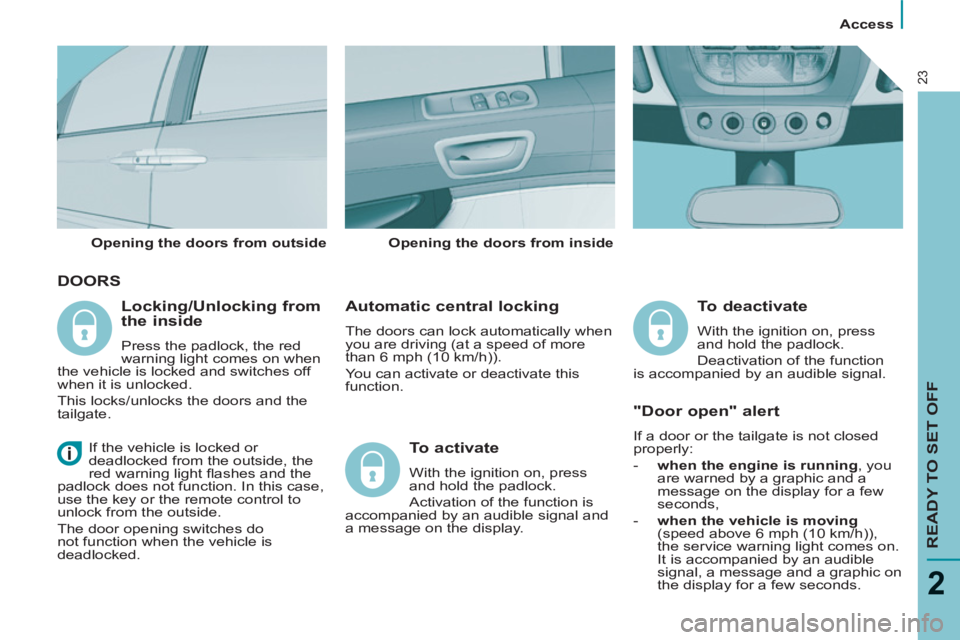
Opening the doors from outside
Opening the doors from inside
If the vehicle is locked or
deadlocked from the outside, the
red warning light fl ashes and the
padlock does not function. In this case,
use the key or the remote control to
unlock from the outside.
The door opening switches do
not function when the vehicle is
deadlocked.
Locking/Unlocking from
the inside
Press the padlock, the red
warning light comes on when
the vehicle is locked and switches off
when it is unlocked.
This locks/unlocks the doors and the
tailgate.
To activate
With the ignition on, press
and hold the padlock.
Activation of the function is
accompanied by an audible signal and
a message on the display
.
"Door open" alert
If a door or the tailgate is not closed
properly:
- when the engine is running
, you
are warned by a graphic and a
message on the display for a few
seconds,
- when the vehicle is moving
(speed above 6 mph (10 km/h)),
the service warning light comes on.
It is accompanied by an audible
signal, a message and a graphic on
the display for a few seconds.
Page 27 of 234
Access
READY TO SET OFF
2
25
ELECTRIC CHILD SAFETY
Simultaneous locking or
unlocking of the tailgate and the
doors
The tailgate is locked or unlocked by
the remote control or the driver’s door
or passenger door lock.
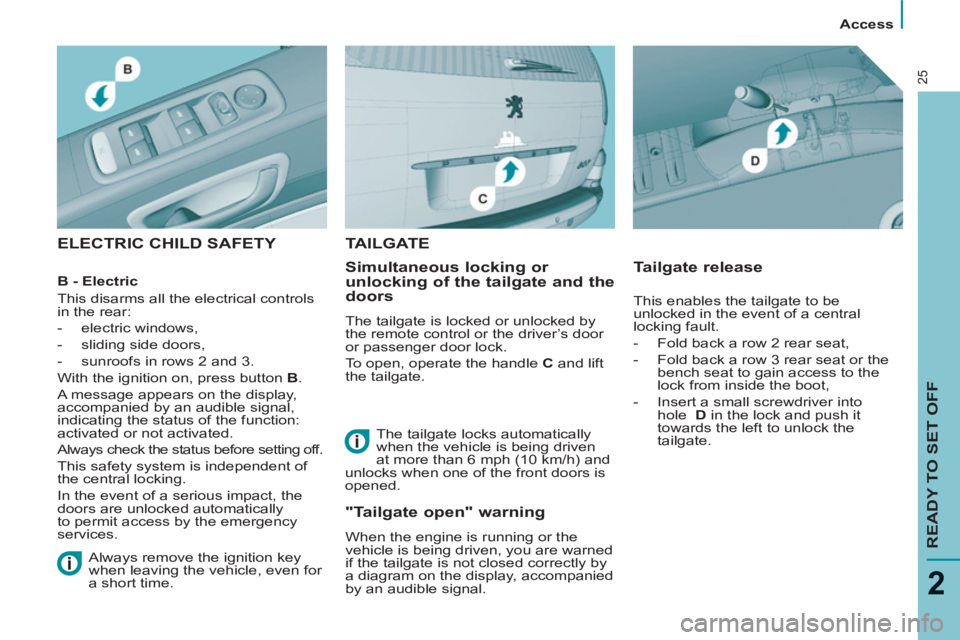
To open, operate the handle C
and lift
the tailgate.
Tailgate release
The tailgate locks automatically
when the vehicle is being driven
at more than 6 mph (10 km/h) and
unlocks when one of the front doors is
opened.
TAILGATE
"Tailgate open" warning
When the engine is running or the
vehicle is being driven, you are warned
if the tailgate is not closed correctly by
a diagram on the display, accompanied
by an audible signal. This enables the tailgate to be
unlocked in the event of a central
locking fault.
- Fold back a row 2 rear seat,
- Fold back a row 3 rear seat or the
bench seat to gain access to the
lock from inside the boot,
- Insert a small screwdriver into
hole D
in the lock and push it
towards the left to unlock the
tailgate.
B - Electric
This disarms all the electrical controls
in the rear:
- electric windows,
- sliding side doors,
- sunroofs in rows 2 and 3.
With the ignition on, press button B
.
A message appears on the display,
accompanied by an audible signal,
indicating the status of the function:
activated or not activated.
Always check the status before setting off.
This safety system is independent of
the central locking.
In the event of a serious impact, the
doors are unlocked automatically
to permit access by the emergency
services.
Always remove the ignition key
when leaving the vehicle, even for
a short time.
Page 49 of 234
Steering wheel controls
EASE OF USE and COMFORT
3
47
Activation
Press the control downwards.
Activation of the function is
accompanied by a message on the
display.
The automatic windscreen wipers
function must be reactivated
if the
ignition has been switched off for more
than one minute, by pressing the stalk
downwards.
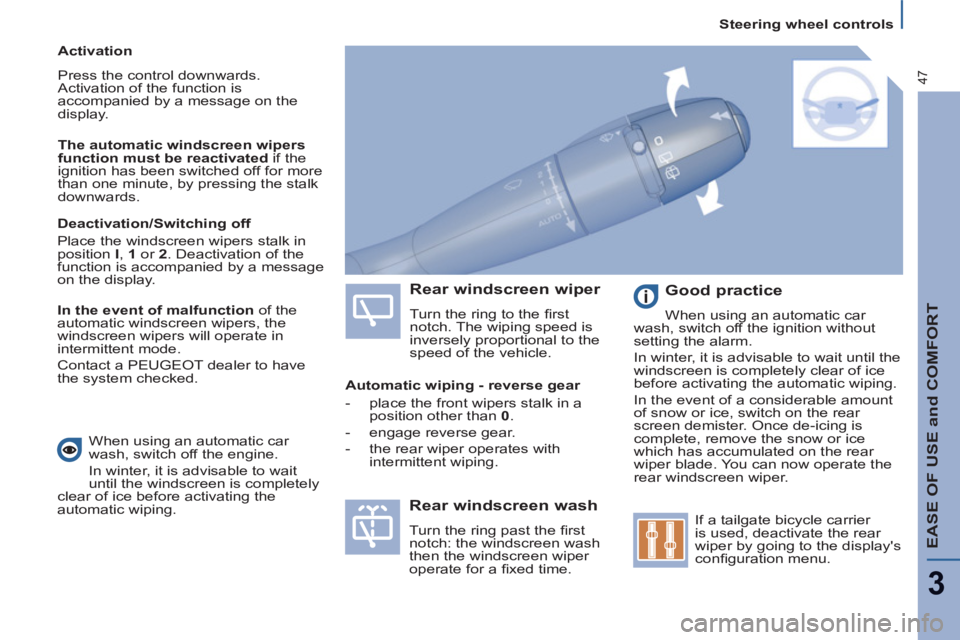
Rear windscreen wiper
Turn the ring to the fi rst
notch. The wiping speed is
inversely proportional to the
speed of the vehicle.
Rear windscreen wash
Turn the ring past the fi rst
notch: the windscreen wash
then the windscreen wiper
operate for a fi xed time.
Good practice
When using an automatic car
wash, switch off the ignition without
setting the alarm.
In winter, it is advisable to wait until the
windscreen is completely clear of ice
before activating the automatic wiping.
In the event of a considerable amount
of snow or ice, switch on the rear
screen demister. Once de-icing is
complete, remove the snow or ice
which has accumulated on the rear
wiper blade. You can now operate the
rear windscreen wiper.
If a tailgate bicycle carrier
is used, deactivate the rear
wiper by going to the display's
confi guration menu.
Deactivation/Switching off
Place the windscreen wipers stalk in
position I
, 1
or 2
. Deactivation of the
function is accompanied by a message
on the display.
In the event of malfunction
of the
automatic windscreen wipers, the
windscreen wipers will operate in
intermittent mode.
Contact a PEUGEOT dealer to have
the system checked.
Automatic wiping - reverse gear
- place the front wipers stalk in a
position other than 0
.
- engage reverse gear.
- the rear wiper operates with
intermittent wiping.
When using an automatic car
wash, switch off the engine.
In winter, it is advisable to wait
until the windscreen is completely
clear of ice before activating the
automatic wiping.
Page 71 of 234
EASE OF USE and COMFORT
3
69
Seats
REAR BENCH SEAT
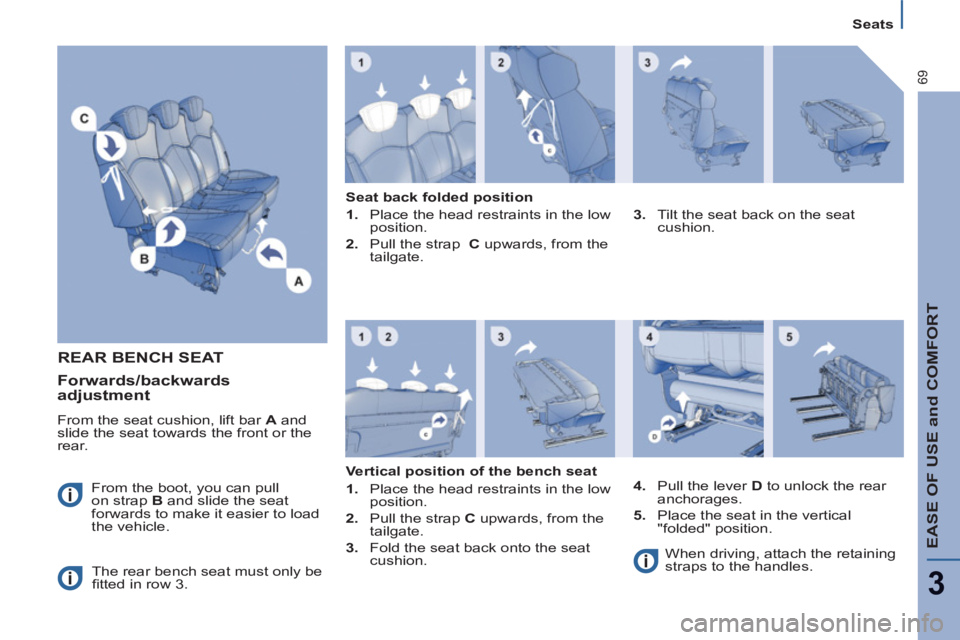
From the boot, you can pull
on strap B
and slide the seat
forwards to make it easier to load
the vehicle.
The rear bench seat must only be
fi tted in row 3.
Seat back folded position
1.
Place the head restraints in the low
position.
2.
Pull the strap C
upwards, from the
tailgate.
3.
Tilt the seat back on the seat
cushion.
Vertical position of the bench seat
1.
Place the head restraints in the low
position.
2.
Pull the strap C
upwards, from the
tailgate.
3.
Fold the seat back onto the seat
cushion.
4.
Pull the lever D
to unlock the rear
anchorages.
5.
Place the seat in the vertical
"folded" position.
When driving, attach the retaining
straps to the handles.
Forwards/backwards
adjustment
From the seat cushion, lift bar A
and
slide the seat towards the front or the
rear.
Page 81 of 234
EASE OF USE and COMFORT
3
79
Practical information
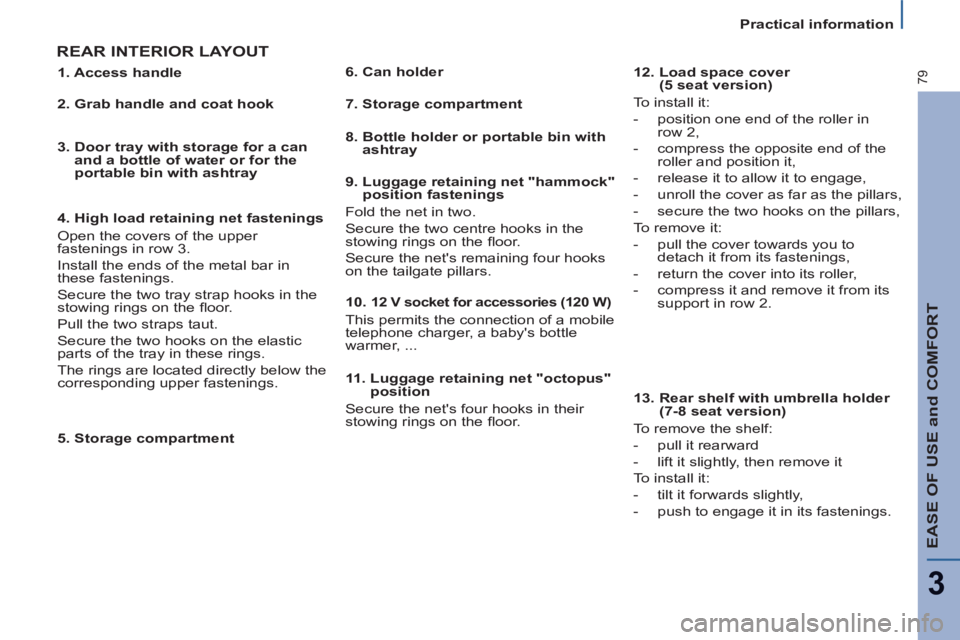
REAR INTERIOR LAYOUT
5. Storage compartment
11. Luggage retaining net "octopus"
position
Secure the net's four hooks in their
stowing rings on the fl oor.
1. Access handle
2. Grab handle and coat hook
3. Door tray with storage for a can
and a bottle of water or for the
portable bin with ashtray
4. High load retaining net fastenings
Open the covers of the upper
fastenings in row 3.
Install the ends of the metal bar in
these fastenings.
Secure the two tray strap hooks in the
stowing rings on the fl oor.
Pull the two straps taut.
Secure the two hooks on the elastic
parts of the tray in these rings.
The rings are located directly below the
corresponding upper fastenings.
6. Can holder
7. Storage compartment
8. Bottle holder or portable bin with
ashtray
9. Luggage retaining net "hammock"
position fastenings
Fold the net in two.
Secure the two centre hooks in the
stowing rings on the fl oor.
Secure the net's remaining four hooks
on the tailgate pillars.
10.
12 V socket for accessories (120 W)
This permits the connection of a mobile
telephone charger, a baby's bottle
warmer, ...
12. Load space cover
(5 seat version)
To install it:
- position one end of the roller in
row 2,
- compress the opposite end of the
roller and position it,
- release it to allow it to engage,
- unroll the cover as far as the pillars,
- secure the two hooks on the pillars,
To remove it:
- pull the cover towards you to
detach it from its fastenings,
- return the cover into its roller,
- compress it and remove it from its
support in row 2.
13. Rear shelf with umbrella holder
(7-8 seat version)
To remove the shelf:
- pull it rearward
- lift it slightly, then remove it
To install it:
- tilt it forwards slightly,
- push to engage it in its fastenings.
Page 106 of 234
104
Towing a trailer
On the contrary, use a high gear to
lower the engine speed and reduce
your speed.
In all cases, pay attention to the
coolant temperature.
Brakes:
towing increases the braking
distance. Drive at a moderate speed,
change down early and brake
gradually. Please contact a PEUGEOT dealer
fi rst for further information.
Automatic adjustment
For vehicles with Xenon bulbs, and if
the change in load makes it necessary,
this system automatically corrects the
height of the beam after approximately
2 minutes. The driver is then assured
of having optimum lighting and not
causing a nuisance to other road
users.
In certain cases of particularly
arduous use (towing the
maximum load up a steep slope
in high temperatures), the engine
automatically limits its power. In this
case, cutting off the air conditioning
allows the engine power to be
recovered, and therefore the towing
speed to be signifi cantly increased
(approximately 12 mph [20 km/h]
more). Sequential control of the
gearbox may also become unavailable.
Lighting
Bicycle carrier
Refer to the "Identifi cation
features" section of chapter 8. Refer to the "Steering wheel
controls" section of chapter 3.
When using a trailer connection,
you must add a fuse. Refer to
the "Changing a fuse" section of
chapter 7.
If the coolant temperature warning light
comes on, stop the vehicle and switch
off the engine as soon as possible.
Tyres:
check the tyre pressures of
the towing vehicle and of the trailer,
observing the recommended pressure.
Side wind:
sensitivity to side wind is
increased. Drive smoothly and at a
moderate speed.
Towbar
We recommend the use of original
PEUGEOT towbars, which have been
tested for endurance from the design
stage of your vehicle.
Towing equipment must be fi tted in
accordance with the manufacturer's
instructions, with particular attention to
the towing capacities of your vehicle,
the load towed, the nose weight and
the electrical connection. As this fi tting
should be carried out by a professional,
we recommend that you entrust the
fi tting of this equipment to a PEUGEOT
dealer.
In accordance with the general
instructions referred to above, we draw
your attention to the risk connected
with fi tting a towbar or other electrical
accessory which is not recommended
by the PEUGEOT network. Fitting such
equipment could result in a failure of
your vehicle's electronic system.
Manual adjustment
Adjust your headlamps so as not to
dazzle other road users. Check the
electrical signalling of the trailer.
If you fi t a bicycle carrier on
the tailgate, deactivate the
rear wiper from the display's
confi guration menu.