cut off Peugeot Bipper 2011 Owner's Manual
[x] Cancel search | Manufacturer: PEUGEOT, Model Year: 2011, Model line: Bipper, Model: Peugeot Bipper 2011Pages: 180, PDF Size: 5.14 MB
Page 22 of 180
Limit the causes of excess
consumption
Spread loads throughout the vehicle; place
the heaviest items in the bottom of the boot,
as close as possible to the rear seats.
Limit the loads carried in the vehicle and
reduce wind resistance (roof bars, roof rack,
bicycle carrier, trailer...). Use a roof box in
preference.
Remove roof bars and roof racks after use.
At the end of winter, remove snow tyres and
refi t your summer tyres.
Observe the recommendations on
maintenance
Check the tyre pressures regularly, when
cold, referring to the label in the door
aperture, driver's side.
Carry out this check in particular:
- before a long journey,
- at each change of season,
- after a long period out of use.
Don't forget the spare wheel and the tyres on
any trailer or caravan.
Have your vehicle serviced regularly (engine
oil, oil fi lter, air fi lter...) and observe the
schedule of operations recommended by the
manufacturer.
When refuelling, do not continue after
the 3 rd cut-off of the nozzle to avoid any
overfl ow.
At the wheel of your new vehicle, it is only
after the fi rst 1 800 miles (3 000 kilometres)
that you will see the fuel consumption settle
down to a consistent average.
20
Page 37 of 180
35
1
READY TO SET OFF
Access
ALARM
This provides:
- exterior perimeter protection by means of
detectors on the doors and bonnet and
on the electrical supply,
- interior protection,
- anti-tilt protection,
- protection against the unauthorised
insertion of a key in the starter.
The equipment includes a siren.
Activation of the alarm
First ensure that all of the accesses are
closed correctly.
The alarm is activated by pressing
this control, the protection is
active after a few seconds.
While the alarm is monitoring, any
intrusion triggers the siren for approximately
30 seconds, accompanied by illumination of
the direction indicators.
The alarm then returns to monitoring mode.
The alarm is also triggered following an
electrical supply cut-off, when the supply is
restored.
Deactivation using the remote control
Deactivation using the key
Unlock the doors using the key and enter
the vehicle. Switch on the ignition to the
RUNNING position, identification of the key
code will switch off the alarm.
Deactivation of the volumetric and
anti-tilt protection
Good practice
To quickly deactivate the siren following
unwanted triggering, unlock the vehicle
using the remote control.
To avoid setting the alarm, before washing
the vehicle for example, lock the vehicle
using the key.
When this button is pressed, the
alarm is deactivated when the
vehicle is unlocked.
Signalling of attempted intrusion
When you return to your vehicle,
flashing of the electronic engine
immobiliser warning lamp or
the appearance of a warning
message in the instrument panel display
indicates an attempted intrusion during your
absence.
To deactivate the volumetric
and anti-tilt protection, press the
button located in the vehicle's
courtesy lamp. To be effective,
this operation must be repeated every time
the ignition is switched off.
Page 134 of 180
132
Towing a trailer
In certain cases of particularly arduous
use (towing the maximum load up a steep
slope in high temperatures), the engine
automatically limits its power. In this case,
automatic cutting off of the air conditioning
allows the engine power to be saved.
If the coolant temperature
warning lamp comes on, stop the
vehicle and switch off the engine
as soon as possible.
See the "Levels" section of chapter 7.
Tyres:
check the tyre pressures of the
towing vehicle (see the "Identification
markings" section of chapter 7) and of
the trailer, observing the recommended
pressures.
Brakes:
towing increases the braking
distance. Drive at a moderate speed,
change down early and brake gradually.
Side wind:
sensitivity to side wind is
increased. Drive smoothly and at a
moderate speed.
ABS:
the system only controls the vehicle,
not the trailer.
Rear parking sensors:
the sensors
will be deactivated automatically when
an genuine PEUGEOT towbar is used
(see the "Rear parking sensors" section of
chapter 3).
Towbar
We recommend the use of original
PEUGEOT towbars and their harnesses,
which have been tested and approved from
the design stage of your vehicle, and that
the fitting of this equipment is entrusted to a
PEUGEOT dealer or a qualified workshop.
If this equipment is not fitted by a PEUGEOT
dealer, it is essential that it is fitted using
the electrical pre-equipment located at
the rear of the vehicle and following the
manufacturer's instructions.
The operation of the rear parking sensors is
deactivated automatically when the trailer
cable connector is inserted in the towbar
socket.
When the trailer cable is removed, the rear
parking sensors are re-activated.
Distribution of loads
Distribute the load in the trailer so that the
heaviest objects are as close as possible
to the axle and the nose weight is close to
the maximum authorised without, however,
exceeding it. The air density decreases with
altitude, so reducing the performance of
the engine. The maximum towed load must
be reduced by 10 % for each 1 000 metres
of altitude. Refer to the "Technical data"
chapter for details of the weights and towed
loads applicable to your vehicle and also to
the administrative documents
(V5 registration document, ...).
Page 158 of 180
156
Fuel
FILLING WITH FUEL
Capacity of the fuel tank: approximately
45 litres.
Low fuel level
When the minimum fuel tank level
is reached, this warning lamp
comes on. When it first comes on,
you have approximately
6 litres
of fuel remaining. Refuel without delay to
avoid running out of fuel. Refuelling must be done with the engine
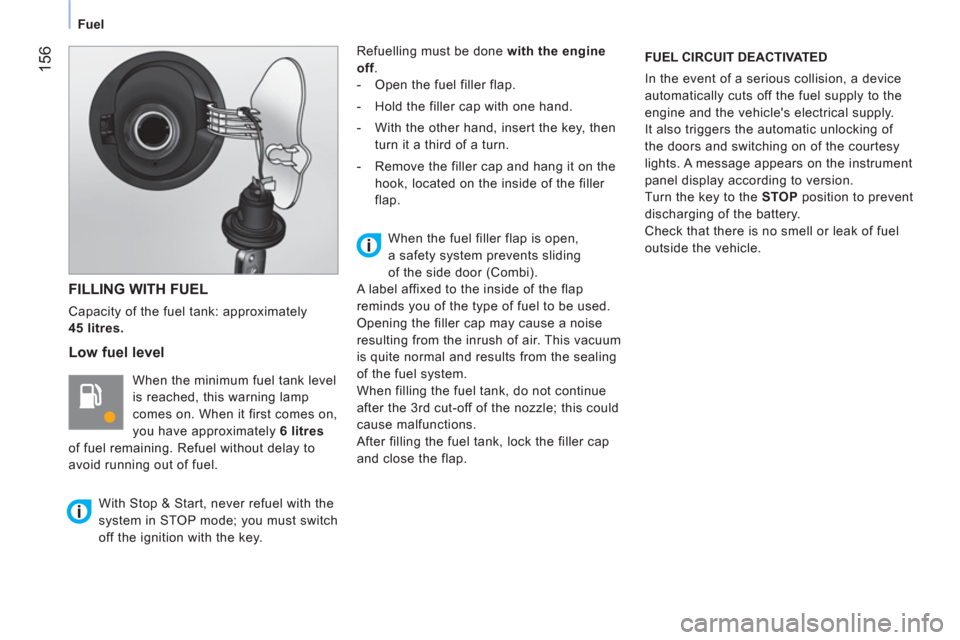
off.
- Open the fuel filler flap.
- Hold the filler cap with one hand.
- With the other hand, insert the key, then
turn it a third of a turn.
- Remove the filler cap and hang it on the
hook, located on the inside of the filler
flap. FUEL CIRCUIT DEACTIVATED
In the event of a serious collision, a device
automatically cuts off the fuel supply to the
engine and the vehicle's electrical supply.
It also triggers the automatic unlocking of
the doors and switching on of the courtesy
lights. A message appears on the instrument
panel display according to version.
Turn the key to the STOP position to prevent
discharging of the battery.
Check that there is no smell or leak of fuel
outside the vehicle.
With Stop & Start, never refuel with the
system in STOP mode; you must switch
off the ignition with the key.
When the fuel filler flap is open,
a safety system prevents sliding
of the side door (Combi).
A label affixed to the inside of the flap
reminds you of the type of fuel to be used.
Opening the filler cap may cause a noise
resulting from the inrush of air. This vacuum
is quite normal and results from the sealing
of the fuel system.
When filling the fuel tank, do not continue
after the 3rd cut-off of the nozzle; this could
cause malfunctions.
After filling the fuel tank, lock the filler cap
and close the flap.
Page 169 of 180
167
8
VISUAL SEARCH
Exterior
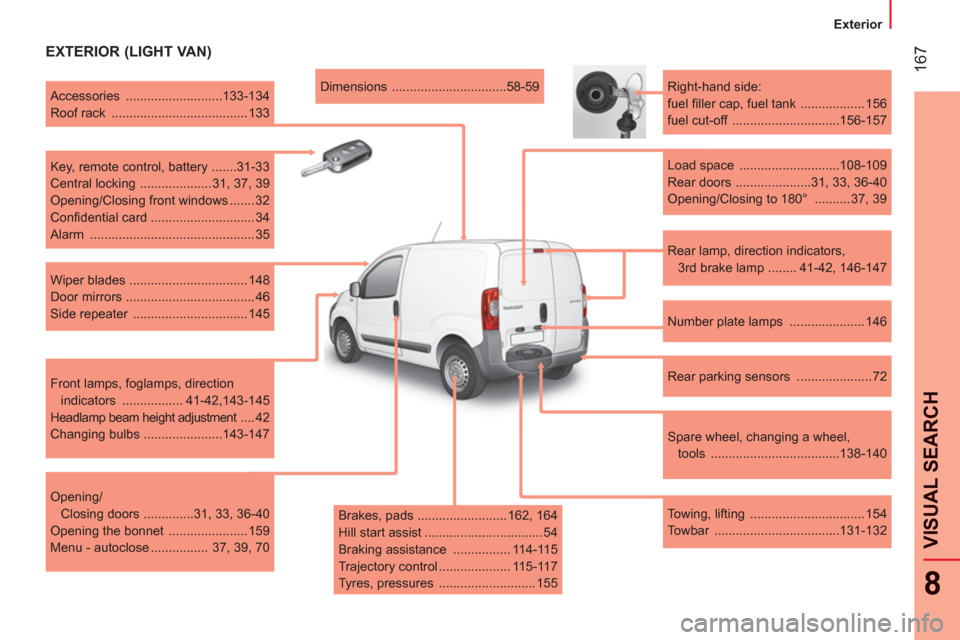
EXTERIOR (LIGHT VAN)
Rear lamp, direction indicators,
3rd brake lamp ........ 41-42, 146-147
Right-hand side:
fuel fi ller cap, fuel tank .................. 156
fuel cut-off ..............................156-157
Load space ............................108-109
Rear doors .....................31, 33, 36-40
Opening/Closing to 180° .......... 37, 39
Number plate lamps ..................... 146
Rear parking sensors ..................... 72
Spare wheel, changing a wheel,
tools ....................................138-140
Towing, lifting ................................ 154
Towbar ...................................131-132
Dimensions ................................58-59
Accessories ...........................133-134
Roof rack ...................................... 133
Key, remote control, battery .......31-33
Central locking .................... 31, 37, 39
Opening/Closing front windows ....... 32
Confi dential card ............................. 34
Alarm .............................................. 35
Wiper blades ................................. 148
Door mirrors .................................... 46
Side repeater ................................ 145
Front lamps, foglamps, direction
indicators ................. 41-42,143-145
Headlamp beam height adjustment .... 42
Changing bulbs ......................143-147
Opening/
Closing doors ..............31, 33, 36-40
Opening the bonnet ...................... 159
Menu - autoclose ................ 37, 39, 70
Brakes, pads ......................... 162, 164
Hill start assist ................................. 54
Braking assistance ................ 114-115
Trajectory control .................... 115-117
Tyres, pressures ........................... 155
Page 170 of 180
168
Exterior
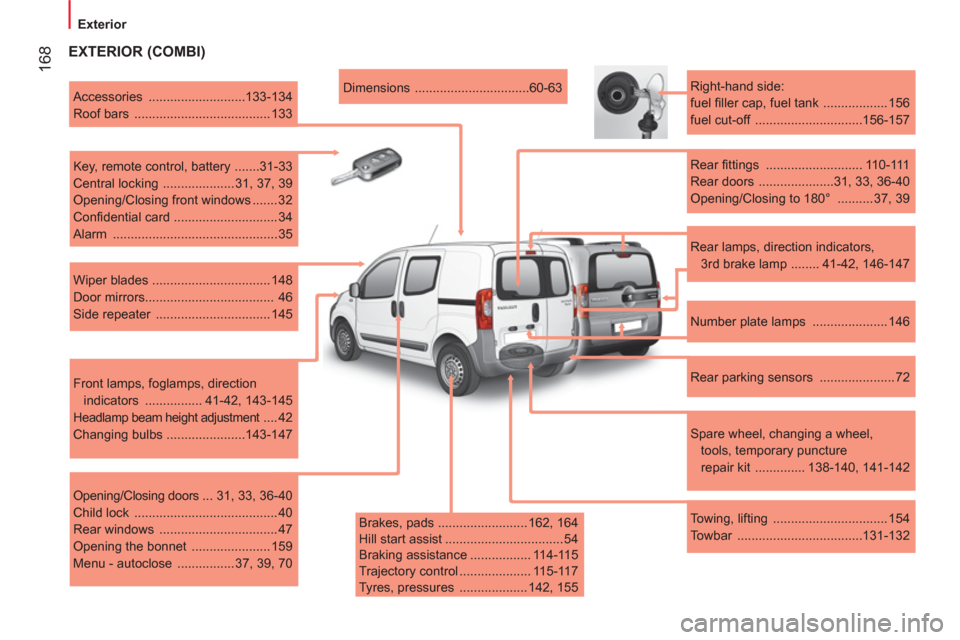
EXTERIOR (COMBI)
Brakes, pads ......................... 162, 164
Hill start assist ................................. 54
Braking assistance ................. 114-115
Trajectory control .................... 115-117
Tyres, pressures ................... 142, 155
Dimensions ................................60-63
Accessories ...........................133-134
Roof bars ...................................... 133
Key, remote control, battery .......31-33
Central locking .................... 31, 37, 39
Opening/Closing front windows ....... 32
Confi dential card ............................. 34
Alarm .............................................. 35
Wiper blades ................................. 148
Door mirrors .................................... 46
Side repeater ................................ 145
Front lamps, foglamps, direction
indicators ................ 41-42, 143-145
Headlamp beam height adjustment .... 42
Changing bulbs ......................143-147
Opening/Closing doors ... 31, 33, 36-40
Child lock ........................................ 40
Rear windows ................................. 47
Opening the bonnet ...................... 159
Menu - autoclose ................ 37, 39, 70
Right-hand side:
fuel fi ller cap, fuel tank .................. 156
fuel cut-off ..............................156-157
Rear fi ttings ........................... 110-111
Rear doors .....................31, 33, 36-40
Opening/Closing to 180° .......... 37, 39
Number plate lamps ..................... 146
Rear parking sensors ..................... 72
Spare wheel, changing a wheel,
tools, temporary puncture
repair kit .............. 138-140, 141-142
Towing, lifting ................................ 154
Towbar ...................................131-132
Rear lamps, direction indicators,
3 rd brake lamp ........ 41-42, 146-147