indicator Peugeot Boxer 2020 Owner's Guide
[x] Cancel search | Manufacturer: PEUGEOT, Model Year: 2020, Model line: Boxer, Model: Peugeot Boxer 2020Pages: 196, PDF Size: 5.1 MB
Page 39 of 196
37
Ease of use and comfort
3Delayed starting of the
heating system
The start time can be programmed between 1
minute and 24 hours in advance.
You can memorise up to three different start
times, but only programme a single delayed
start.
To perform a daily start at a fixed time, reprogramme the memorised time each
day.
► Press button 3; the screen comes on.
The - -:- - symbol or the previous memorised
time and the corresponding preset number (1, 2
or 3) are displayed for 10 seconds.
To recall the other preset times, press button 3 several times before the end of
the 10 seconds.
Within 10 seconds, press one of the buttons 1 to
select the desired start time.
The memorisation is confirmed by the
disappearance of the start time, the display of
the preset number (1, 2 or 3) and the lighting of
the screen.
By default, preset times are already
memorised in the system (1 = 06:00, 2 =
16:00, 3 = 22:00). Any change cancels and
replaces the previous preset time.
If the battery is disconnected, the default
preset times will be restored.
Cancelling the programming
► To delete the programmed start time, briefly press button 3.
The lighting of the screen and the preset number
(1, 2 or 3) go off.
Recalling one of the preset
start times
► Press button 3 as many times as necessary until the number corresponding to the desired
preset start time (1, 2 or 3) appears.
After ten seconds, the time disappears but
remains memorised while the corresponding
number (1, 2 or 3) and the screen remain on.
Setting the operating
duration
The operating duration can be set between 10
and 60 minutes.
► Press and hold button 3.► Press simultaneously one of the buttons 1.
The time and the time setting indicator lamp light
up.
► Press and hold button 3 again.► Press simultaneously one of the buttons 1
again.
The programmed operating duration is displayed
and the heating or ventilation cycle indicator
lamp flashes.
► Set the duration by pressing one of the buttons 1.
The memorisation is confirmed by the
disappearance of the duration on the screen or
by pressing button 3 again.
Switching the heating off
In the event of a delayed start, the heating
switches off automatically at the end of the
programmed duration.
► In the event of an immediate start, press button 2 again to switch it off manually.
The heating cycle indicator lamp and the screen
switch off.
Have the additional heating checked at
least once a year at the beginning of
winter. Maintenance and repairs should only
be carried out by a PEUGEOT dealer or a
qualified workshop.
Use only genuine replacement parts.
To avoid the risks of poisoning or asphyxia, the additional heating must not
be used, even for short periods, in a closed
environment such as a garage or workshop
which are not equipped with an exhaust gas
extraction system.
The additional heating switches off when the
battery voltage is low, so as to allow engine
starting.
The additional heating is fed by the vehicle's
fuel tank. Ensure that the low fuel warning
lamp is not on.
Page 48 of 196
46
Lighting and visibility
Lighting control stalk
In some weather conditions (e.g. low
temperature or humidity), the presence
of misting on the internal surface of the glass
of the headlamps and rear lamps is normal; it
disappears after the lamps have been on for a
few minutes.
Travelling abroad
If using your vehicle in a country that
drives on the other side of the road, the
headlamps must be adjusted to avoid
dazzling on-coming drivers.
Contact a PEUGEOT dealer or a qualified
workshop.
Selection of main lighting
mode
► Turn the lighting control stalk to place the white mark opposite the desired symbol.Lighting off (ignition off) / Daytime running
lamps (engine running)
Dipped beam headlamps / Main beam
headlamps
Automatic lighting of dipped beam headlamps / main beam headlamps
Switching the headlamps
(dipped beam/main beam)
► Pull the lighting control stalk towards you to switch between the lighting of the dipped beam
headlamps and main beam headlamps.
To flash the headlamps, pull the control stalk
towards you, regardless of the position of the
ring.
Direction indicators
► Left or right: lower or raise the lighting control stalk, beyond the point of resistance.
"Motorway" function
► Press briefly upwards or downwards, without going beyond the point of resistance; the
direction indicators will flash five times.
Foglamps
If the vehicle is equipped with foglamps, they
operate with the dipped bean headlamps or main
beam headlamps.
Front foglamps
Rear foglamps
► Press one of these controls to turn on the corresponding lamps.
Foglamps should only be used in fog or
falling snow.
In clear or rainy weather, both day and
night, rear foglamps dazzle and their use is
prohibited.
Do not forget to switch them off when they are
no longer necessary.
LED daytime running
lamps
On starting the vehicle, in daylight, the daytime
running lamps come on automatically.
If the sidelamps and headlamps are switched on
manually or automatically, the daytime running
lamps switch off.
Programming
For countries where exterior lighting by day is
not a legal requirement, you can activate or
deactivate the function via the configuration
menu.
Automatic illumination of
headlamps
If your vehicle is fitted with this function, the
dipped beam headlamps are switched on
automatically if the light is poor.
In fog or snow, the sunshine sensor may
detect sufficient light. In this case, the
lighting will not come on automatically. If
necessary, you must switch on the dipped
beam headlamps manually.
They are switched off when the light returns
to a sufficient level.
Do not cover the sunshine sensor at the top
centre of the windscreen.
You can adjust the sensitivity of the sunshine sensor.
For more information on Vehicle
configuration , refer to the corresponding
section.
Activation
► Turn the ring to this position.
The lamps go out automatically when the ignition
is switched off.
Page 49 of 196
47
Lighting and visibility
4Automatic illumination of headlamps
If your vehicle is fitted with this function, the
dipped beam headlamps are switched on
automatically if the light is poor.
In fog or snow, the sunshine sensor may
detect sufficient light. In this case, the
lighting will not come on automatically. If
necessary, you must switch on the dipped
beam headlamps manually.
They are switched off when the light returns
to a sufficient level.
Do not cover the sunshine sensor at the top
centre of the windscreen.
You can adjust the sensitivity of the sunshine sensor.
For more information on Vehicle
configuration , refer to the corresponding
section.
Activation
► Turn the ring to this position.
The lamps go out automatically when the ignition
is switched off.
Guide-me-home lighting
If your vehicle is equipped: when you leave your
vehicle, the dipped beam headlamps remain on
for the selected period of time (e.g. leaving a car
park).
With the ignition off or the
key in the STOP position
► Within 2 minutes of switching off the engine, turn the ignition key to the STOP position or
remove the key.
► Pull the lighting control stalk towards the steering wheel.This indicator lamp lights up on the
dashboard.
Each action on the lighting control stalk, pulled
towards the steering wheel, extends the
guide-me-home lighting by 30 seconds up to
approximately 3 minutes. Once this time has
elapsed, the lamps go out automatically.
Deactivate this control by holding the control
stalk pulled towards the steering wheel for more
than 2 seconds.
Automatic headlamp dip
System which automatically changes to main
beam according to the ambient light level and
the driving conditions, using a camera located at
the top of the windscreen.
This system is a driving aid. The driver remains responsible for
the vehicle's lighting, its correct use for the
prevailing conditions of light, visibility and
traffic, and observation of driving regulations.
Activation
► Turn the lighting control stalk ring to this position.► Set the function by pressing the MODE button: select "ON" in the
"Automatic main beam" menu.
For more information on Vehicle
configuration , refer to the corresponding
section.
► Flash the headlamps (going beyond the point of resistance) to activate the function.
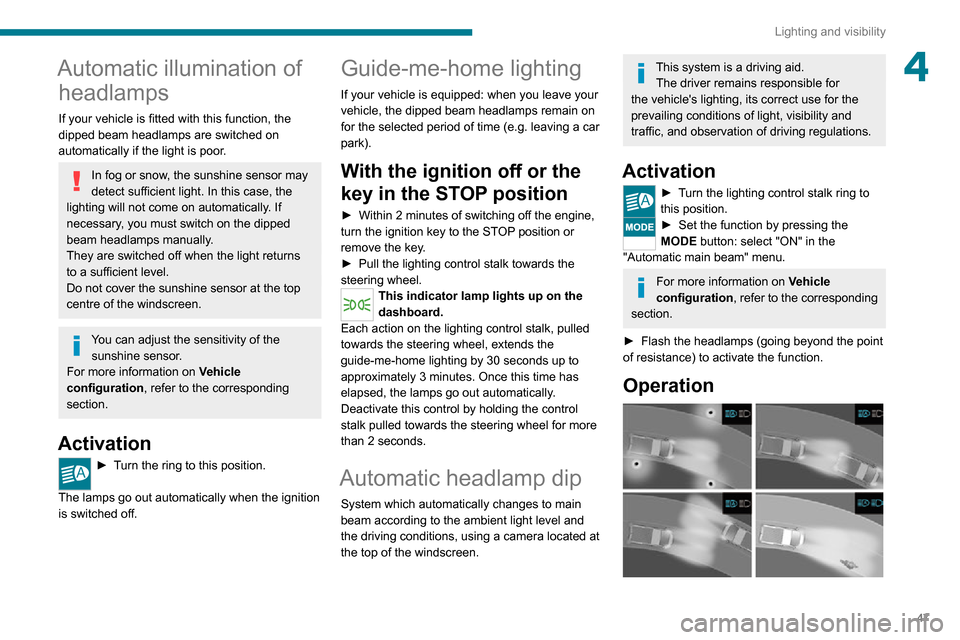
Operation
Page 50 of 196
48
Lighting and visibility
Once the function is activated, the system
operates as follows:
If the brightness is sufficient and/or if the traffic
conditions do not allow illumination of the main
beam headlamps:
– The dipped beam headlamps will remain on: this indicator lamp lights up on
the instrument panel.
If the brightness is very low and the traffic conditions allow:– The main beam headla mps come on automatically: these
indicator lamps light up on the instrument panel.
If the situation requires a change of headlamp
beam, the driver can take over at any time.
Flashing the headlamps again pauses the
function and the lighting system changes to
"automatic illumination of headlamps" mode.
At a speed lower than approximately 9 mph (15
km/h), the function deactivates automatically.
If the main beam headlamps are still needed,
flash the headlamps again; the main beam
headlamps then remain on fixed until the vehicle
reaches a speed of approximately 25 mph (40
km/h).
Above 25 mph (40 km/h), the function is
reactivated automatically (provided that you have
not flashed the headlamps again to turn off the
main beam headlamps during this interval).
Deactivation
► Turn the lighting control stalk ring to the "Dipped beam" position.
The system may suffer interference or not work correctly:
– under conditions of poor visibility (falling snow, heavy rain or thick fog, etc.),– if the windscreen in front of the camera is dirty, misted or obscured (by a sticker, etc.),– if the vehicle is facing highly reflective signs.
The system is not able to detect:– road users that do not have their own lighting, such as pedestrians,– vehicles whose lighting is obscured, such as when running behind a safety barrier on a
motorway, for example,
– vehicles at the top or bottom of a steep slope, on twisty roads, on crossroads.
Parking lamps
This system allows you to leave the lamps on
when parked; with the ignition off, and the key in
the STOP position or removed.
► Move the lighting control stalk ring to position O, then to dipped beam headlamps or main
beam headlamps.
This indicator lamp comes on in the
dashboard.
The lamps will stay on for the duration of your
parking.
Extended lighting can significantly reduce
the vehicle's battery charge.
Headlamp beam height
adjustment
To avoid inconvenience to other road users,
the height of the halogen headlamps should be
adjusted according to the load in the vehicle.
This function can be accessed in dipped beam
and main beam headlamp positions.
Successive presses on these controls adjust the headlamps.
An indicator lamp on the display indicates the
selected setting position (0, 1, 2, 3).
Wiper control stalk
Windscreen wipers
The wiping is active only when the ignition key is
in the ON position.
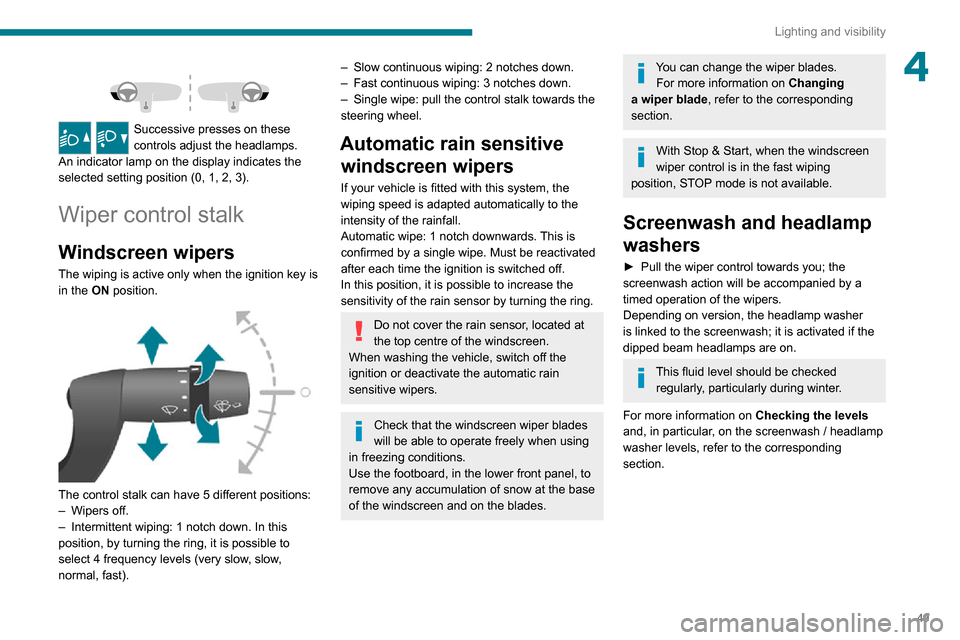
The control stalk can have 5 different positions:– Wipers off.– Intermittent wiping: 1 notch down. In this
position, by turning the ring, it is possible to
select 4 frequency levels (very slow, slow,
normal, fast).
Page 51 of 196
49
Lighting and visibility
4
Successive presses on these
controls adjust the headlamps.
An indicator lamp on the display indicates the
selected setting position (0, 1, 2, 3).
Wiper control stalk
Windscreen wipers
The wiping is active only when the ignition key is
in the ON position.
The control stalk can have 5 different positions:– Wipers off.– Intermittent wiping: 1 notch down. In this
position, by turning the ring, it is possible to
select 4 frequency levels (very slow, slow,
normal, fast).
– Slow continuous wiping: 2 notches down.– Fast continuous wiping: 3 notches down.– Single wipe: pull the control stalk towards the steering wheel.
Automatic rain sensitive windscreen wipers
If your vehicle is fitted with this system, the
wiping speed is adapted automatically to the
intensity of the rainfall.
Automatic wipe: 1 notch downwards. This is
confirmed by a single wipe. Must be reactivated
after each time the ignition is switched off.
In this position, it is possible to increase the
sensitivity of the rain sensor by turning the ring.
Do not cover the rain sensor, located at
the top centre of the windscreen.
When washing the vehicle, switch off the
ignition or deactivate the automatic rain
sensitive wipers.
Check that the windscreen wiper blades
will be able to operate freely when using
in freezing conditions.
Use the footboard, in the lower front panel, to
remove any accumulation of snow at the base of the windscreen and on the blades.
You can change the wiper blades. For more information on Changing
a wiper blade , refer to the corresponding
section.
With Stop & Start, when the windscreen
wiper control is in the fast wiping
position, STOP mode is not available.
Screenwash and headlamp
washers
► Pull the wiper control towards you; the screenwash action will be accompanied by a
timed operation of the wipers.
Depending on version, the headlamp washer
is linked to the screenwash; it is activated if the
dipped beam headlamps are on.
This fluid level should be checked regularly, particularly during winter.
For more information on Checking the levels
and, in particular, on the screenwash / headlamp
washer levels, refer to the corresponding
section.
Page 53 of 196
51
Safety
5General safety
recommendations
Do not remove the labels attached in
different places on your vehicle. They
include safety warnings as well as
identification information for the vehicle.
For all work on your vehicle, use a
qualified workshop that has the technical
information, skills and equipment required, all
of which a PEUGEOT dealer is able to
provide.
Depending on country regulations,
certain safety equipment may be
mandatory: high visibility safety vests,
warning triangles, breathalysers, spare bulbs,
spare fuses, fire extinguisher, first aid kit, mud
flaps at the rear of the vehicle, etc.
Installing electrical accessories:
– The fitting of electrical equipment or accessories not approved by PEUGEOT may
cause excessive current consumption and
faults and failures with the electrical system
of your vehicle. Contact a PEUGEOT dealer
for information on the range of approved
accessories.
– As a safety measure, access to the diagnostic socket, used for the vehicle's
electronic systems, is reserved strictly for
PEUGEOT dealers or qualified workshops,
equipped with the special tools required (risk
of malfunctions of the vehicle's electronic
systems that could cause breakdowns or
serious accidents). The Manufacturer cannot
be held responsible if this advice is not
followed.
– Any modification or adaptation not intended or authorised by PEUGEOT or carried out
without meeting the technical requirements
defined by the Manufacturer will result in the
suspension of the commercial warranty.
Installation of accessory radio
communication transmitters
Before installing a radio communication
transmitter with an external aerial, you must
without fail contact a PEUGEOT dealer for
the specification of transmitters which can
be fitted (frequency, maximum power, aerial
position, specific installation requirements),
in line with the Vehicle Electromagnetic
Compatibility Directive (2004/104/EC).
Declarations of conformity for radio
equipment
The relevant certificates are available on the
http://public.servicebox.peugeot.com/APddb/
website.
Hazard warning lamps
► Pressing the red button causes all the direction indicators to flash.
They can operate with the ignition off.
Horn
► Press the central part of the steering wheel.
Page 55 of 196
53
Safety
5Dynamic stability control
(DSC)
Switching on
The DSC system is activated automatically every
time the vehicle is started.
It comes into operation in the event of a grip or
trajectory problem.
This is indicated by the flashing of this warning lamp on the instrument panel.
Deactivation
This system cannot be deactivated by the driver.
Malfunction
The lighting of this warning lamp, accompanied by an audible signal and
confirmed by a message on the instrument panel
display, indicates a malfunction of the DSC
system.
Have the system checked by a PEUGEOT
dealer or a qualified workshop.
Anti-slip regulation (ASR)
Deactivation / Reactivation
The ASR system is activated automatically every
time the vehicle is started.
In exceptional conditions (starting a vehicle
which is bogged down, stuck in snow, on soft
ground, etc.), it may be advisable to deactivate
the ASR system, so that the wheels can turn
freely and regain grip.
Reactivate the system as soon as the level of
grip permits.
ASR
► Press this button to deactivate / reactivate the function.
The illumination of the button indicator lamp,
accompanied by a message on the instrument
panel display screen, indicates that the ASR
system is deactivated.
The ASR system is automatically reactivated
every time the ignition is switched off
Malfunction
The lighting of this warning lamp, accompanied by an audible signal and
confirmed by a message on the instrument panel
display, indicates a malfunction of the ASR
system.
Have the system checked by a PEUGEOT
dealer or a qualified workshop.
ASR / DSC
These systems offer increased safety in
normal driving, but they should not encourage
the driver to take extra risks or drive at high
speed.
It is in conditions of reduced grip (rain, snow,
ice) that the risk of loss of grip increases. It
is therefore important for your safety to keep
these systems activated in all conditions, and
particularly in difficult conditions.
The correct operation of these systems
depends on observation of the manufacturer's
recommendations regarding as much
the wheels (tyres and rims), braking and
electronic components as the assembly
and repair procedures used by PEUGEOT
dealers.
To benefit in full from the effectiveness
of these systems in wintry conditions,
the vehicle must be fitted with four snow
tyres, allowing the vehicle to retain neutral
behaviour on the road.
Intelligent Traction Control
Traction assistance system on roads with low
grip (snow, ice, mud, etc.).
This system makes it possible to detect the
situations of precarious grip which can make the
starting and the progress of the vehicle difficult.
In these situations, the Intelligent Traction
Control system overrides the ASR system by
transferring the driving force to the wheel with
the greatest contact with the ground to optimise
traction and trajectory tracking.
Page 56 of 196
54
Safety
Engage a gear corresponding to the speed to prevent the engine stalling.
► To manually deactivate the system, press the button; the indicator lamp goes out.
The function may be unavailable if the
brakes overheat. Wait a few minutes for
them to cool down before trying again.
Malfunction
When a malfunction of the Hill Assist Descent Control system occurs, this warning lamp lights up.
Have the system checked by a PEUGEOT
dealer or a qualified workshop.
Seat belts
Inertia reel
The seat belts are equipped with an inertia reel
which allows the strap length to automatically
adjust to your shape. The seat belt returns to its
storage automatically when it is not used.
The inertia reels are fitted with a device which
automatically locks the strap in the event of a
collision, emergency braking or if the vehicle rolls
over. It can be released by pulling the strap firmly
and then releasing it so that it reels in slightly.
Pyrotechnic pretensioning
This system improves safety in the event of a
frontal or side impact.
Activation/Deactivation
When starting the vehicle, this system is
deactivated.
► Press this button to activate/deactivate the system.
When the button indicator lamp comes on, the
system is activated.
This system is active up to approximately 19
mph (30 km/h).
Above approximately 19 mph (30 km/h), the
system is automatically deactivated but the
button indicator lamp remains on.
The system is automatically reactivated as soon
as the speed returns below approximately 19
mph (30 km/h).
Malfunction
When a malfunction of the intelligent
traction control system occurs, this
warning lamp lights up.
Have the system checked by a PEUGEOT
dealer or a qualified workshop.
Load inertia control
The actual total weight of a commercial vehicle
can vary considerably depending on its load.
The centre of gravity of the vehicle can therefore
move in the longitudinal direction and even in
height.
Each of these variations has repercussions
on braking, traction, cornering behaviour and
overturning.
The load inertia control estimates the actual total
weight of the vehicle by analysing its behaviour,
during acceleration and braking phases.
This system then adapts the intervention of the
DSC and ASR systems according to the weight
distribution of the vehicle. In critical situations,
your vehicle therefore remains more safely on its
trajectory.
Hill Assist Descent
Control
Descent assistance system on roads with low
grip (mud, gravel, etc.) or with a steep gradient.
This system reduces the risk of the vehicle
slipping or running out of control as it moves
downhill.
It maintains the vehicle at a constant speed
during a descent by acting independently and
differentially on the brakes.
Activation / Deactivation
When starting the vehicle, the system is
deactivated.
► With the speed below 19 mph (30 km/h), press this button to activate the system; the
button indicator lamp lights up.
When the vehicle begins its descent, you can
release the accelerator and brake pedals; the
button indicator lamp flashes.
The brake lamps automatically light up when the
function is activated.
If the speed exceeds 19 mph (30 km/h), the
system is automatically deactivated but the
button indicator lamp remains on.
The system is automatically reactivated as soon
as the speed returns below 19 mph (30 km/h).
You can depress the accelerator or brake pedal again at any time.
For the system to activate, the slope
must be greater than 8%.
Do not use the system with the gearbox in
neutral.
Page 57 of 196
55
Safety
5Engage a gear corresponding to the speed to
prevent the engine stalling.
► To manually deactivate the system, press the button; the indicator lamp goes out.
The function may be unavailable if the brakes overheat. Wait a few minutes for
them to cool down before trying again.
Malfunction
When a malfunction of the Hill Assist Descent Control system occurs, this warning lamp lights up.
Have the system checked by a PEUGEOT
dealer or a qualified workshop.
Seat belts
Inertia reel
The seat belts are equipped with an inertia reel
which allows the strap length to automatically
adjust to your shape. The seat belt returns to its
storage automatically when it is not used.
The inertia reels are fitted with a device which
automatically locks the strap in the event of a
collision, emergency braking or if the vehicle rolls
over. It can be released by pulling the strap firmly
and then releasing it so that it reels in slightly.
Pyrotechnic pretensioning
This system improves safety in the event of a
frontal or side impact.
Depending on the severity of the impact, the
pyrotechnic pretensioning system instantly
tightens the seat belts against the body of the
occupants.
The pyrotechnic pretensioning seat belts are
enabled when the ignition is on.
Force limiter
This system reduces the pressure of the seat
belt on the chest of the occupant, thus improving
their protection.
In the event of an impact
Depending on the nature and
seriousness of the impacts, the pyrotechnic
device may trigger before and independently
of airbag deployment. Deployment of the
pretensioners is accompanied by a slight
discharge of harmless smoke and a noise,
due to the activation of the pyrotechnic
cartridge incorporated in the system.
In all cases, the airbag warning lamp comes
on.
Following an impact, have the seat belt
system checked, and if necessary replaced,
by a PEUGEOT dealer or a qualified
workshop.
Front seat belts
The driver's seat is fitted with a pyrotechnic
pretensioner and a force limiter.
On versions with a front passenger airbag, the
passenger's seat is also fitted with a pyrotechnic
pretensioner and a force limiter.
The front bench seat is fitted with two seat belts.
If you install a front bench seat as an
accessory, it must be fitted with approved
seat belts.
Seat belts not fastened warning lamp
When the vehicle is started, this warning
lamp comes on, accompanied by an
increasing audible signal, if the driver and/or the
front passenger has not fastened their seat belt.
This alert works equally well for versions with an
individual passenger front seat as for versions
with a two-seat front bench seat.
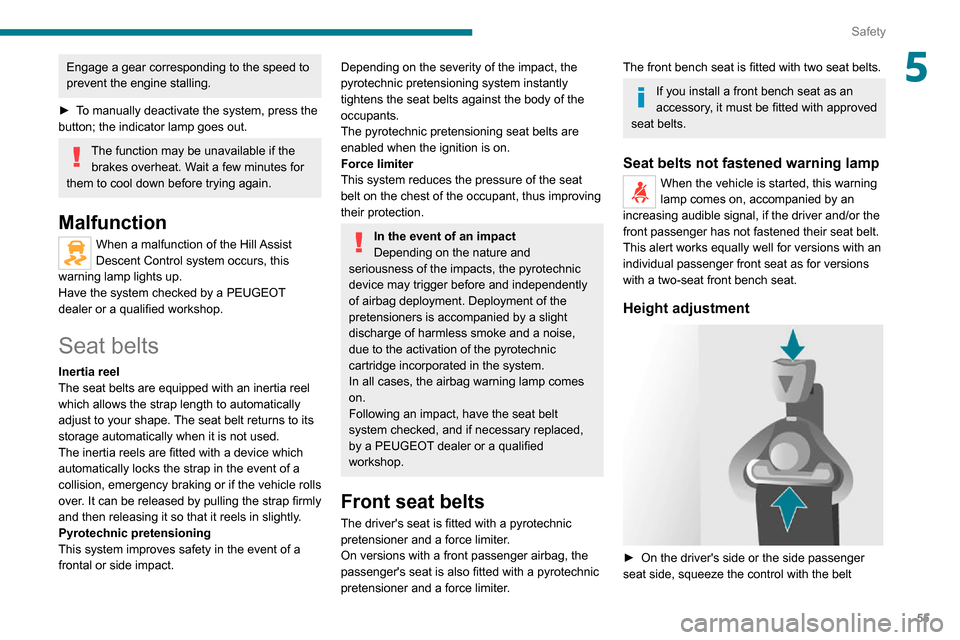
Height adjustment
► On the driver's side or the side passenger seat side, squeeze the control with the belt
Page 70 of 196
68
Driving
When the battery is in standby mode,
access to the vehicle is only possible by
unlocking the mechanical lock on the driver's
side door.
After a battery standby, the information (time, date, radio stations, etc.) is
memorised.
To remove the battery from standby mode:
► Turn the key to the MAR - ON position.► Start the vehicle normally (AV V position).
Parking brake
Application
► Apply the parking brake to immobilise the vehicle.► Check that the parking brake is correctly applied before leaving the vehicle.
Apply the parking brake only when the
vehicle is stationary.
When parking on a slope, turn your
wheels towards the kerb and pull the
parking brake lever up.
There is no advantage in engaging a gear
after parking the vehicle, particularly if the
vehicle is loaded.
In the event of a failure of the
hydraulic braking system
While driving , to avoid any accidental
movement of the vehicle, use the parking
brake while depressing the brake pedal.
In this exceptional circumstance, it is
advisable to pull the parking brake up gently
so as not to block the rear wheels - risk of
skidding!
Release
► Pull the lever up gently and press the button to release the parking brake.When the vehicle is being driven, this
warning lamp coming on indicates that
the parking brake is still applied or has not been
fully released.
Manual gearbox
To change gear easily, always fully depress the
clutch pedal.
To prevent the mat from becoming caught under
the pedal:
– ensure that the mat is positioned correctly,
– never fit one mat on top of another.
Avoid leaving your hand on the gear knob as
the force exerted, even if slight, may wear the
internal components of the gearbox over time.
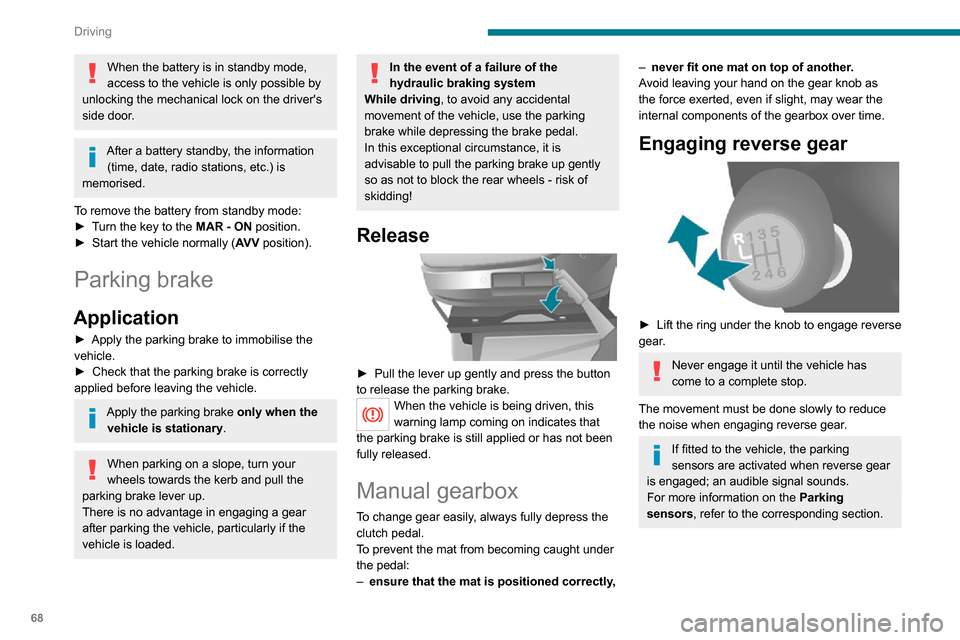
Engaging reverse gear
► Lift the ring under the knob to engage reverse gear.
Never engage it until the vehicle has
come to a complete stop.
The movement must be done slowly to reduce
the noise when engaging reverse gear.
If fitted to the vehicle, the parking
sensors are activated when reverse gear
is engaged; an audible signal sounds.
For more information on the Parking
sensors, refer to the corresponding section.
Gear shift indicator
Depending on version or engine, this system
reduces fuel consumption by recommending a
higher gear change.
Gear shift recommendations should not be
considered compulsory. In fact, the road layout,
the traffic density and safety remain the deciding
factors when choosing the best gear. The driver
therefore remains responsible for deciding
whether or not to follow the indications issued by
the system.
The system cannot be deactivated.
Operation
The information appears in the instrument panel screen in the form of the SHIFT
indicator, accompanied by an upward arrow to
signal to the driver that they can change up.
The system adapts its gear shift recommendation according to the driving
conditions (slope, load, etc.) and the driver’s
requirements (power, acceleration, braking,
etc.).
The system never recommends engaging first
gear or reverse, or changing down.
Stop & Start
The Stop & Start function puts the engine temporarily into standby - STOP mode - during
phases when the vehicle is stopped (red lights,