change clock Peugeot Boxer 2020 Owner's Manual
[x] Cancel search | Manufacturer: PEUGEOT, Model Year: 2020, Model line: Boxer, Model: Peugeot Boxer 2020Pages: 196, PDF Size: 5.1 MB
Page 21 of 196

19
Instruments
1► Select the "Time setting" menu to set the time and the clock format (24h or 12h) or select the
"Date setting" menu to set the day, month and
year.
For more information on Vehicle configuration
(MODE), refer to the corresponding section.
Using the touch screen audio and
telematics system
From the "Clock and Date" sub-menu:► Select "T ime setting and format" to set the hour, minutes and seconds and choose the
format (24h, 12h with am or pm).
► Select "Date setting" to set the day , month and year.
To set the time manually, "Time Synchro"
must be deactivated (Off).
Trip computer
Information displayed about the current journey
(range, current fuel consumption, average fuel
consumption, etc.).
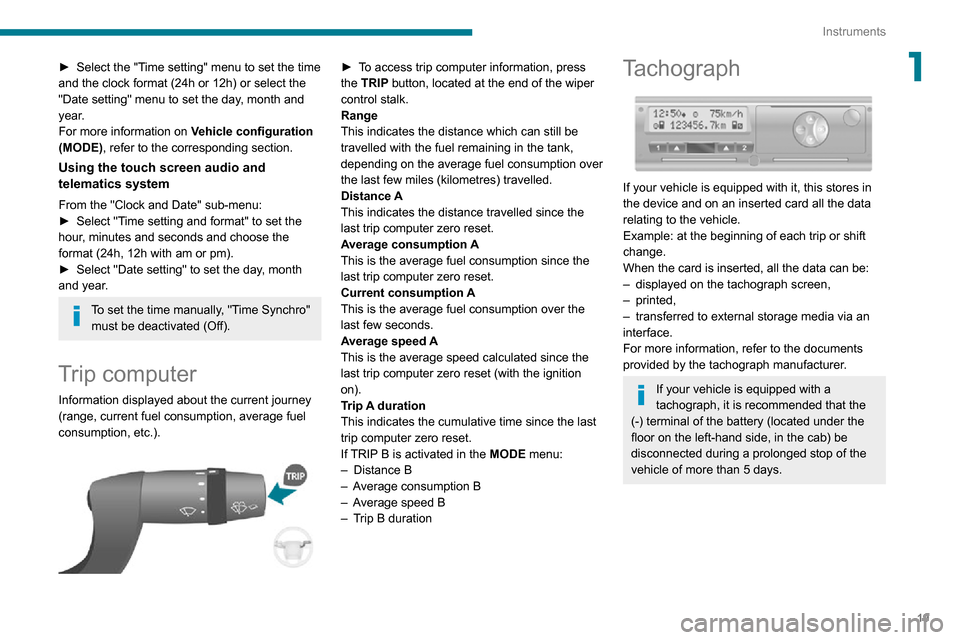
► To access trip computer information, press the TRIP button, located at the end of the wiper
control stalk.
Range
This indicates the distance which can still be
travelled with the fuel remaining in the tank,
depending on the average fuel consumption over
the last few miles (kilometres) travelled.
Distance A
This indicates the distance travelled since the last trip computer zero reset.
Average consumption A
This is the average fuel consumption since the
last trip computer zero reset.
Current consumption A
This is the average fuel consumption over the
last few seconds.
Average speed A
This is the average speed calculated since the
last trip computer zero reset (with the ignition
on).
Trip A duration This indicates the cumulative time since the last
trip computer zero reset.
If TRIP B is activated in the MODE menu:
– Distance B– Average consumption B– Average speed B– Trip B duration
Tachograph
If your vehicle is equipped with it, this stores in
the device and on an inserted card all the data
relating to the vehicle.
Example: at the beginning of each trip or shift
change.
When the card is inserted, all the data can be:
– displayed on the tachograph screen,– printed,– transferred to external storage media via an interface.
For more information, refer to the documents
provided by the tachograph manufacturer.
If your vehicle is equipped with a tachograph, it is recommended that the (-) terminal of the battery (located under the
floor on the left-hand side, in the cab) be
disconnected during a prolonged stop of the vehicle of more than 5 days.
Page 38 of 196

36
Ease of use and comfort
Delayed starting of the
heating system
The start time can be programmed between 1
minute and 24 hours in advance.
You can memorise up to three different start
times, but only programme a single delayed
start.
To perform a daily start at a fixed time, reprogramme the memorised time each
day.
► Press button 3; the screen comes on.
The - -:- - symbol or the previous memorised
time and the corresponding preset number (1, 2
or 3) are displayed for 10 seconds.
To recall the other preset times, press button 3 several times before the end of
the 10 seconds.
Within 10 seconds, press one of the buttons 1 to
select the desired start time.
The memorisation is confirmed by the
disappearance of the start time, the display of
the preset number (1, 2 or 3) and the lighting of
the screen.
By default, preset times are already
memorised in the system (1 = 06:00, 2 =
16:00, 3 = 22:00). Any change cancels and
replaces the previous preset time.
If the battery is disconnected, the default
preset times will be restored.
Setting the comfort
temperature
► Turn control 1 to select a position between
blue (cold) and red (hot) so as to adjust the
temperature to your requirements.
The OFF control on the "Mono-zone" central control panel switches the
function off.
However, a back-up system will automatically
ventilate the rear circuit, even if the control is
in position 0, to avoid the formation of mist.
Air flow
► Set control 2 to the desired position to
increase or decrease the air flow.
Additional programmable heating
The additional programmable heating gradually
brings the engine to a good temperature to
facilitate its starting.
An built-in clock allows the time of its triggering
to be programmed. The passenger compartment
will warm up faster.
The warming-up of the passenger
compartment, de-icing and demisting are
facilitated. The control panel for the programmable
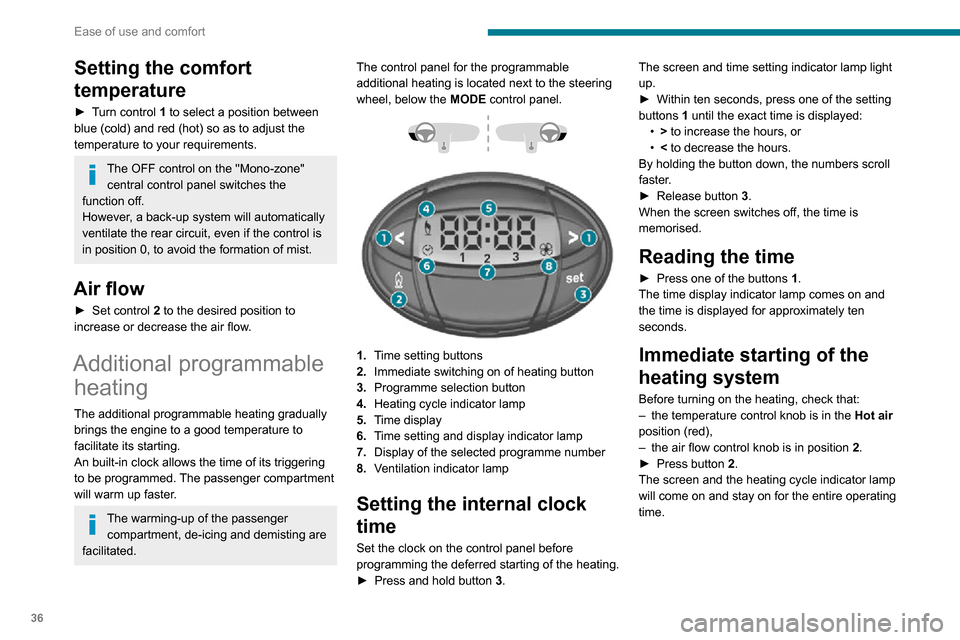
additional heating is located next to the steering
wheel, below the
MODE control panel.
1.Time setting buttons
2. Immediate switching on of heating button
3. Programme selection button
4. Heating cycle indicator lamp
5. Time display
6. Time setting and display indicator lamp
7. Display of the selected programme number
8. Ventilation indicator lamp
Setting the internal clock
time
Set the clock on the control panel before
programming the deferred starting of the heating.
► Press and hold button 3. The screen and time setting indicator lamp light
up.
► Within ten seconds, press one of the setting buttons 1 until the exact time is displayed:• > to increase the hours, or• < to decrease the hours.By holding the button down, the numbers scroll
faster.
► Release
button 3.
When the screen switches off, the time is
memorised.
Reading the time
► Press one of the buttons 1.
The time display indicator lamp comes on and
the time is displayed for approximately ten
seconds.
Immediate starting of the
heating system
Before turning on the heating, check that:– the temperature control knob is in the Hot air
position (red),
– the air flow control knob is in position 2.► Press button 2.
The screen and the heating cycle indicator lamp
will come on and stay on for the entire operating
time.
Page 96 of 196

94
Practical information
► Pull the control located on the side of the dashboard towards you.
On the outside
► Open the lock using the key .► Hold towball 4 firmly in one hand; using
the other hand, pull and turn wheel 5 fully in a
clockwise direction; do not release the wheel.
► Extract the towball from the bottom of its carrier 1.► Release the wheel; this automatically stops in the unlocked position (position B).► Refit the protective plug to the carrier .► Carefully stow the towball in its bag away from knocks and dirt.
Maintenance
Correct operation is only possible if the towball
and its carrier are kept clean.
Before cleaning the vehicle with a high-pressure
jet wash, the towball must be removed and the
protective plug fitted to the carrier.
Apply the label provided to a clearly visible area, close to the carrier or in the
boot.
Go to a PEUGEOT dealer or a qualified
workshop for any work on the towbar system.
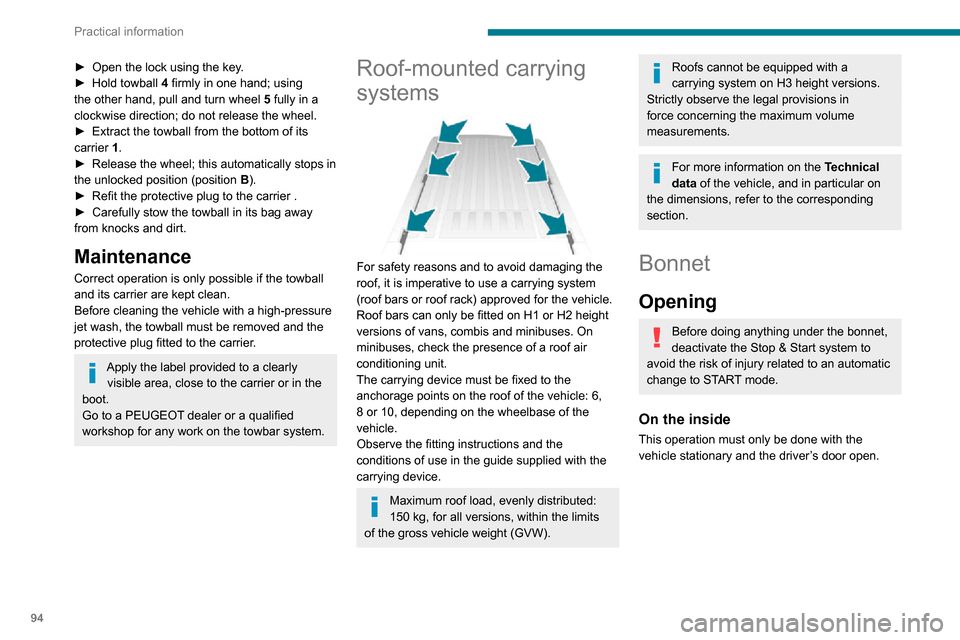
Roof-mounted carrying
systems
For safety reasons and to avoid damaging the
roof, it is imperative to use a carrying system
(roof bars or roof rack) approved for the vehicle.
Roof bars can only be fitted on H1 or H2 height
versions of vans, combis and minibuses. On
minibuses, check the presence of a roof air
conditioning unit.
The carrying device must be fixed to the
anchorage points on the roof of the vehicle: 6,
8 or 10, depending on the wheelbase of the
vehicle.
Observe the fitting instructions and the
conditions of use in the guide supplied with the
carrying device.
Maximum roof load, evenly distributed:
150 kg, for all versions, within the limits
of the gross vehicle weight (GVW).
Roofs cannot be equipped with a
carrying system on H3 height versions.
Strictly observe the legal provisions in
force concerning the maximum volume
measurements.
For more information on the Technical
data of the vehicle, and in particular on
the dimensions, refer to the corresponding
section.
Bonnet
Opening
Before doing anything under the bonnet,
deactivate the Stop & Start system to
avoid the risk of injury related to an automatic
change to START mode.
On the inside
This operation must only be done with the
vehicle stationary and the driver’s door open.
Page 109 of 196

107
In the event of a breakdown
8
► Install extended socket A, wheelbrace D and
wheel bar B on the retaining bolt.
► Turn the assembly anti-clockwise to lower the wheel.► Turn to the locking point of the winch, indicated by the hardening of the manoeuvre and
notch G not visible.
► After unrolling the cable completely , take the spare wheel out.
With steel wheels:
► Unscrew handle H.
► Remove caliper I from the outer part of the
steel wheel.
With alloy wheels:
► Unscrew the three fixing bolts K.► Unscrew handle H.► Remove bracket J from caliper I.► Remove the spare wheel and place it near the wheel to be replaced.► If possible, place a chock under the wheel diagonally opposite the wheel to be changed.
3 - Position the jack
Ensure that the jack is stable.
If the ground is slippery or loose, the jack
may collapse - Risk of injury!
Take care to place the jack strictly at jacking point 1 or 2 under the vehicle,
making sure that the jack head is centred at
the contact point on the vehicle. Otherwise,
there is a risk of damage to the vehicle and/or
the jack collapsing.
Make sure that any passengers are safe
(removed, away from the vehicle).
Never put your hands or your head in the
wheel arch.
Page 114 of 196

11 2
In the event of a breakdown
If necessary, you can remove the lamp unit:
► Depending on the country of sale, remove the winter protection foam by sliding it sideways
towards the outside.
► Disconnect the electrical connector by removing its locking ring.► Remove the two fixing screws of the lamp unit.► Move the lamp unit towards the centre of the vehicle to extract it from its slides. Pay attention
to the bonnet stay on the left-hand side.
Main beam headlamps
Type D, H7 - 55W► Remove the cover by pulling on the rubber
tab.► Disconnect the electrical connector.
► Release the locking spring by pressing the central clamp.► Change the bulb taking care to align the metal part with the groove on the lamp.
Dipped beam headlamps
Type D, H7 - 55W► Remove the cover by pulling on the rubber tab.► Disconnect the electrical connector.► Release the locking spring by pressing the central clamp.► Change the bulb taking care to align the metal part with the grooves on the lamp.
Direction indicators
Type A, WY21W - 21W► Remove the cover by pulling on the rubber tab.► Turn the bulb holder a quarter turn anti-clockwise.► Change the bulb.
Sidelamps/Daytime running lamps
Type B, W21/5W - 21W and 5W► Remove the cover by pulling on the rubber tab.► Turn the bulb holder a quarter turn anti-clockwise.► Change the bulb.
LED daytime running lamps
These light-emitting diodes (LEDs) are used both
as daytime running lamps and as sidelamps.
If your vehicle is equipped with LED daytime
running lamps, contact a PEUGEOT dealer.
Front foglamps
Type D, H11-55W► Completely turn the wheel inwards.