PEUGEOT BOXER 2021 Workshop Manual
Manufacturer: PEUGEOT, Model Year: 2021, Model line: BOXER, Model: PEUGEOT BOXER 2021Pages: 212, PDF Size: 6.37 MB
Page 51 of 212

49
Ease of use and comfort
3Sliding side windows
Depending on version, the vehicle has side
windows that can be opened.
►
Pinch both controls, then slide the window
.
When driving, the window must be
closed or locked in an intermediate
position.
Do not place long objects that protrude from
the window.
Exterior fittings
Protective grille
Depending on the country of sale, a protective
grille, fixed inside the front bumper, protects the
engine parts against loose chippings, etc.
Very cold climate protectors
Depending on the country of sale, protective
foam is present to prevent the penetration of
cold or snow in the upper part of the engine
compartment.
Located at the end of each headlamp unit, they
are fixed on the crossmember on the upper part
of the radiator.
To remove them, slide them sideways towards
the outside of the vehicle.
Page 52 of 212
50
Ease of use and comfort
Retractable footboard
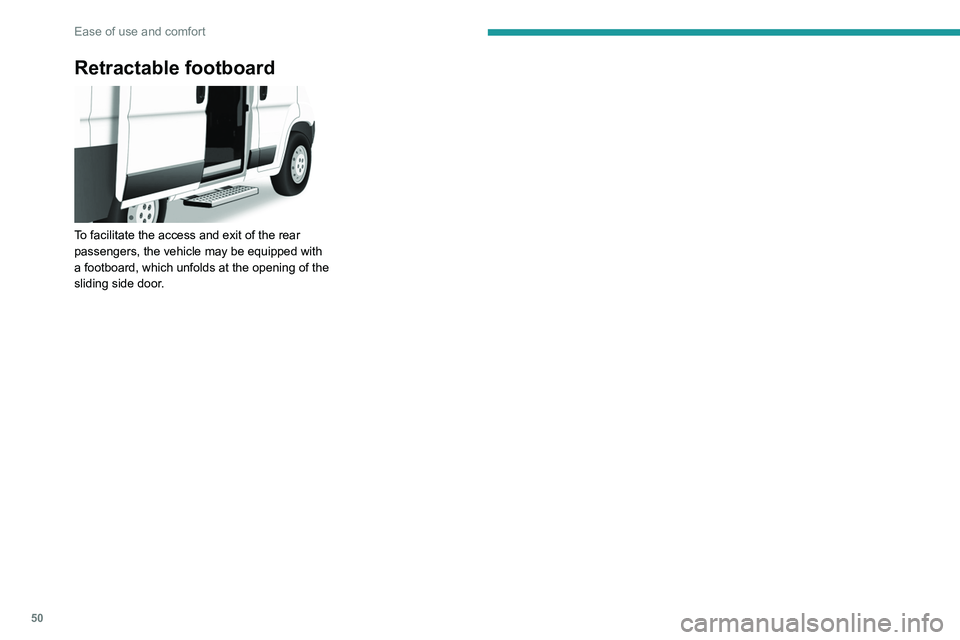
To facilitate the access and exit of the rear
passengers, the vehicle may be equipped with
a footboard, which unfolds at the opening of the
sliding side door.
Page 53 of 212
51
Lighting and visibility
4Lighting control stalk
In some weather conditions (e.g. low
temperature or humidity), the presence
of misting on the internal surface of the glass
of the headlamps and rear lamps is normal; it
disappears after the lamps have been on for a
few minutes.
Travelling abroad
If planning to use your vehicle in a
country that drives on the other side of the
road, the dipped beam headlamps must be
adjusted to avoid dazzling oncoming drivers.
Consult a PEUGEOT dealer or a qualified
workshop.
Selection of main lighting
mode
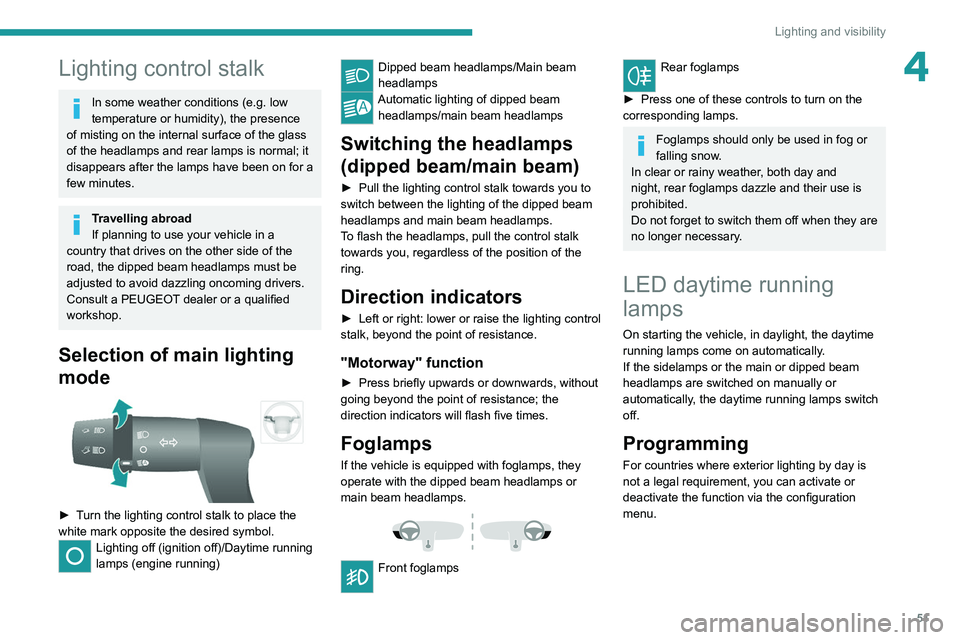
► Turn the lighting control stalk to place the
white mark opposite the desired symbol.
Lighting off (ignition off)/Daytime running
lamps (engine running)
Dipped beam headlamps/Main beam
headlamps
Automatic lighting of dipped beam headlamps/main beam headlamps
Switching the headlamps
(dipped beam/main beam)
► Pull the lighting control stalk towards you to
switch between the lighting of the dipped beam
headlamps and main beam headlamps.
T
o flash the headlamps, pull the control stalk
towards you, regardless of the position of the
ring.
Direction indicators
► Left or right: lower or raise the lighting control
stalk, beyond the point of resistance.
"Motorway" function
► Press briefly upwards or downwards, without
going beyond the point of resistance; the
direction indicators will flash five times.
Foglamps
If the vehicle is equipped with foglamps, they
operate with the dipped beam headlamps or
main beam headlamps.
Front foglamps
Rear foglamps
►
Press one of these controls to turn on the
corresponding lamps.
Foglamps should only be used in fog or
falling snow.
In clear or rainy weather, both day and
night, rear foglamps dazzle and their use is
prohibited.
Do not forget to switch them off when they are
no longer necessary.
LED daytime running
lamps
On starting the vehicle, in daylight, the daytime
running lamps come on automatically.
If the sidelamps or the main or dipped beam
headlamps are switched on manually or
automatically, the daytime running lamps switch
off.
Programming
For countries where exterior lighting by day is
not a legal requirement, you can activate or
deactivate the function via the configuration
menu.
Page 54 of 212
52
Lighting and visibility
Automatic illumination of headlamps
If your vehicle is fitted with this function, the
dipped beam headlamps are switched on
automatically if the light is poor.
In fog or snow, the sunshine sensor may
detect sufficient light. In this case, the
lighting will not come on automatically. If
necessary, you must switch on the dipped
beam headlamps manually.
They are switched off when the light returns
to a sufficient level.
Do not cover the sunshine sensor at the top
centre of the windscreen.
You can adjust the sensitivity of the sunshine sensor.
For more information on Vehicle
configuration , refer to the corresponding
section.
Activation
► Turn the ring to this position.
The lamps go out automatically when the ignition
is switched off.
Guide-me-home lighting
If your vehicle is equipped: when you leave your
vehicle, the dipped beam headlamps remain on
for the selected period of time (e.g. leaving a car
park).
With the ignition off or the
key in the STOP position
► Within 2 minutes of switching off the engine,
turn the ignition key to the ST OP position or
remove the key.
►
Pull the lighting control stalk towards the
steering wheel.
This indicator lamp lights up on the
dashboard.
Each action on the lighting control stalk, pulled
towards the steering wheel, extends the
guide-me-home lighting by 30 seconds up to
approximately 3 minutes. Once this time has
elapsed, the lamps go out automatically.
Deactivate this control by holding the control
stalk pulled towards the steering wheel for more
than 2 seconds.
Automatic headlamp dipping
System which automatically switches the main
beam headlamps on according to the brightness
and driving conditions, using a camera located at
the top of the windscreen.
This system is a driving aid.
The driver remains responsible for
the vehicle's lighting, its correct use for the
prevailing conditions of light, visibility and
traffic, as well as for observation of driving
and vehicle regulations.
Activation
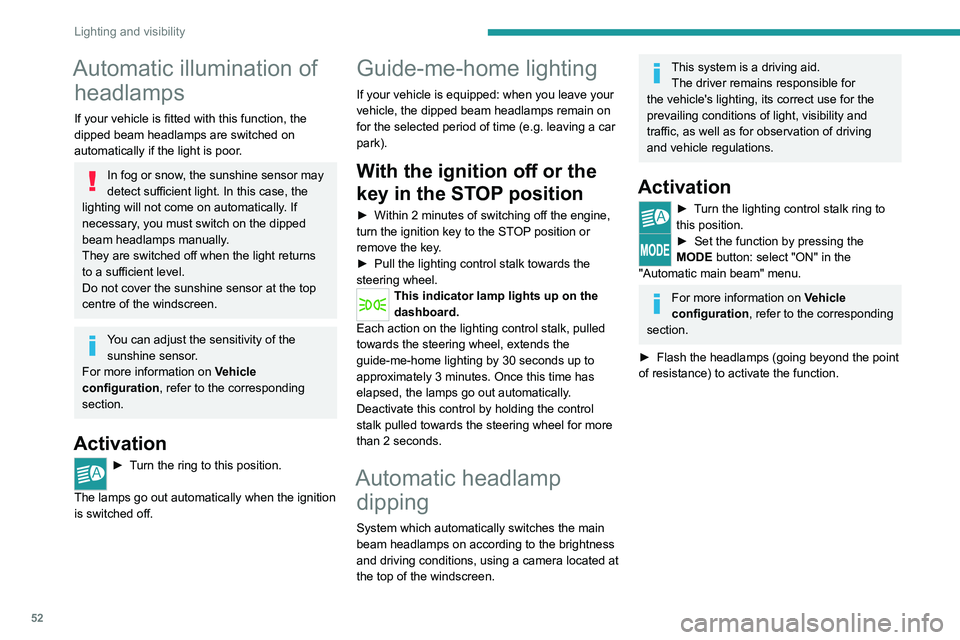
► Turn the lighting control stalk ring to
this position.
► Set the function by pressing the
MODE button: select "ON" in the
"Automatic main beam" menu.
For more information on Vehicle
configuration , refer to the corresponding
section.
►
Flash the headlamps (going beyond the point
of resistance) to activate the function.
Page 55 of 212
53
Lighting and visibility
4Operation
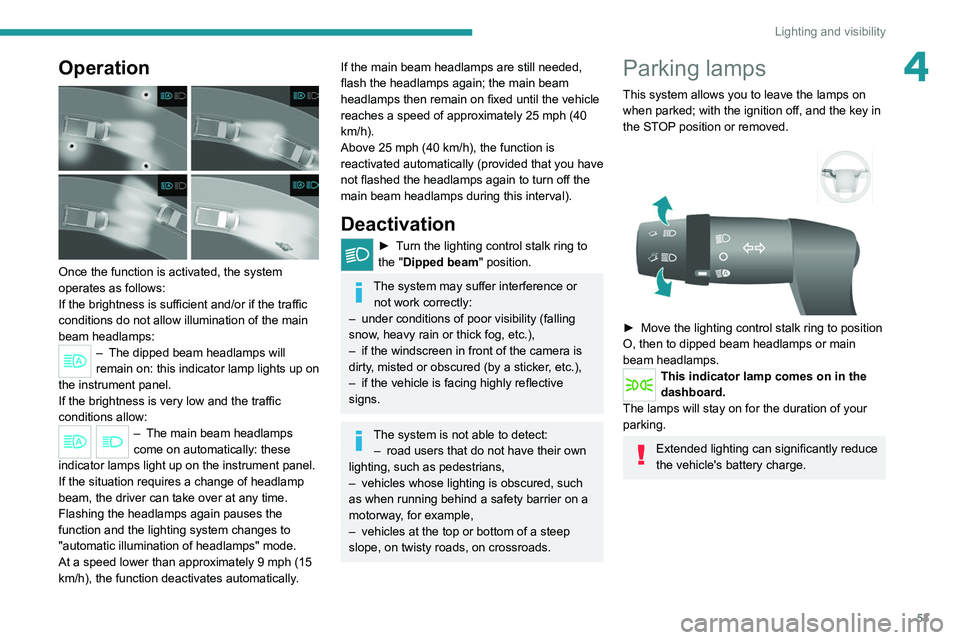
Once the function is activated, the system
operates as follows:
If the brightness is sufficient and/or if the traffic
conditions do not allow illumination of the main
beam headlamps:
– The dipped beam headlamps will
remain on: this indicator lamp lights up on
the instrument panel.
If the brightness
is very low and the traffic
conditions allow:
– The main beam headla mps
come on automatically: these
indicator lamps light up on the instrument panel.
If the situation requires a change of headlamp
beam, the driver can take over at any time.
Flashing the headlamps again pauses the
function and the lighting system changes to
"automatic illumination of headlamps" mode.
At a speed lower than approximately 9 mph (15
km/h), the function deactivates automatically.
If the main beam headlamps are still needed,
flash the headlamps again; the main beam
headlamps then remain on fixed until the vehicle
reaches a speed of approximately 25 mph (40
km/h).
Above 25 mph (40 km/h), the function is
reactivated automatically (provided that you have
not flashed the headlamps again to turn off the
main beam headlamps during this interval).
Deactivation
► Turn the lighting control stalk ring to
the "Dipped beam" position.
The system may suffer interference or not work correctly:
–
under conditions of poor visibility (falling
snow
, heavy rain or thick fog, etc.),
–
if the windscreen in front of the camera is
dirty
, misted or obscured (by a sticker, etc.),
–
if the vehicle is facing highly reflective
signs.
The system is not able to detect: – road users that do not have their own
lighting, such as pedestrians,
–
vehicles whose lighting is obscured, such
as when running behind a safety barrier on a
motorway
, for example,
–
vehicles at the top or bottom of a steep
slope, on twisty roads, on crossroads.
Parking lamps
This system allows you to leave the lamps on
when parked; with the ignition off, and the key in
the STOP position or removed.
► Move the lighting control stalk ring to position
O, then to dipped beam headlamps or main
beam headlamps.
This indicator lamp comes on in the
dashboard.
The lamps will stay on for the duration of your
parking.
Extended lighting can significantly reduce
the vehicle's battery charge.
Page 56 of 212

54
Lighting and visibility
Headlamp beam height
adjustment
To avoid inconvenience to other road users,
the height of the halogen headlamps should be
adjusted according to the load in the vehicle.
This function can be accessed in dipped beam
and main beam headlamp positions.
Successive presses on these
controls adjust the headlamps.
An indicator lamp on the display indicates the
selected setting position (0, 1, 2, 3).
Wiper control stalk
Windscreen wipers
The wiping is active only when the ignition key is
in the ON position.
The control stalk can have 5 different positions:
– Wipers off.
–
Intermittent wiping: 1 notch down. In this
position, by turning the ring, it is possible to
select 4 frequency levels (very slow
, slow,
normal, fast).
–
Slow continuous wiping: 2 notches down.
–
Fast continuous wiping: 3 notches down.
–
Single wipe: pull the control stalk towards the
steering wheel.
Automatic rain sensitive windscreen wipers
If your vehicle is fitted with this system, the
wiping speed is adapted automatically to the
intensity of the rainfall.
Automatic wipe: 1 notch downwards. This is
confirmed by a single wipe. Must be reactivated
after each time the ignition is switched off.
In this position, it is possible to increase the
sensitivity of the rain sensor by turning the ring.
Do not cover the rain sensor, located at
the top centre of the windscreen.
When washing the vehicle, switch off the
ignition or deactivate the automatic rain
sensitive wipers.
Check that the windscreen wiper blades
will be able to operate freely when using
in freezing conditions.
Use the footboard, in the lower front panel, to
remove any accumulation of snow
at the base
of the windscreen and on the blades.
You can change the wiper blades. For more information on Changing
a wiper blade , refer to the corresponding
section.
With Stop & Start, when the windscreen
wiper control is in the fast wiping
position, STOP mode is not available.
Screenwash and headlamp
washers
► Pull the wiper control towards you; the
screenwash action will be accompanied by a
timed operation of the wipers.
Depending on version, the headlamp washer
is linked to the screenwash; it is activated if the
dipped beam headlamps are on.
Page 57 of 212
55
Lighting and visibility
4This fluid level should be checked regularly, particularly during winter.
For more information on Checking the levels
and, in particular, on the screenwash / headlamp
washer levels, refer to the corresponding
section.
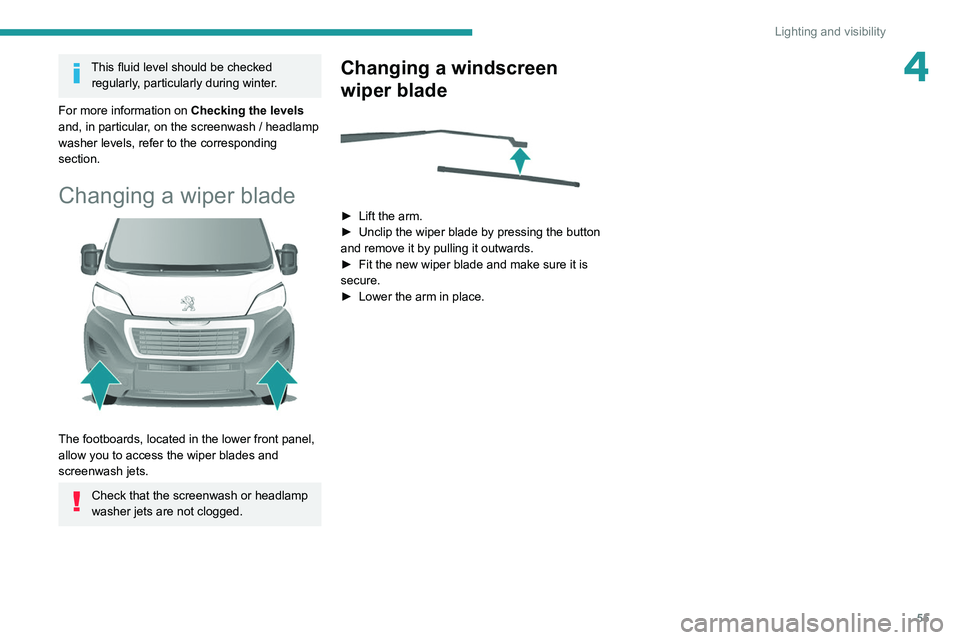
Changing a wiper blade
The footboards, located in the lower front panel,
allow you to access the wiper blades and
screenwash jets.
Check that the screenwash or headlamp
washer jets are not clogged.
Changing a windscreen
wiper blade
► Lift the arm.
► Unclip the wiper blade by pressing the button
and remove it by pulling it outwards.
►
Fit the new wiper blade and make sure it is
secure.
►
Lower the arm in place.
Page 58 of 212
56
Safety
General safety
recommendations
Do not remove the labels attached in
different places on your vehicle. They
include safety warnings as well as
identification information for the vehicle.
For all work on your vehicle, use a
qualified workshop that has the technical
information, skills and equipment required, all
of which a PEUGEOT dealer is able to
provide.
Depending on country regulations,
certain safety equipment may be
mandatory: high visibility safety vests,
warning triangles, breathalysers, spare bulbs,
spare fuses, fire extinguisher, first aid kit, mud
flaps at the rear of the vehicle, etc.
Installing electrical accessories:
– The fitting of electrical equipment or
accessories not approved by PEUGEOT
may
cause excessive current consumption and
faults and failures with the electrical system
of your vehicle. Contact a PEUGEOT dealer
for information on the range of approved
accessories.
–
As a safety measure, access to the
diagnostic socket, used for the vehicle's
electronic systems, is reserved strictly for
PEUGEOT dealers or qualified workshops,
equipped with the special tools required (risk
of malfunctions of the vehicle's electronic
systems that could cause breakdowns or
serious accidents). The Manufacturer cannot
be held responsible if this advice is not
followed.
–
Any modification or adaptation not intended
or authorised by PEUGEOT
or carried out
without meeting the technical requirements
defined by the Manufacturer will result in the
suspension of the commercial warranty.
Installation of accessory radio
communication transmitters
Before installing a radio communication
transmitter with an external aerial, you must
without fail contact a PEUGEOT dealer for
the specification of transmitters which can
be fitted (frequency, maximum power, aerial
position, specific installation requirements),
in line with the Vehicle Electromagnetic
Compatibility Directive (2004/104/EC).
Declarations of conformity for radio
equipment
The relevant certificates are available on the
http://public.servicebox.peugeot.com/APddb/
website.
Hazard warning lamps
► Pressing this red button causes all the
direction indicators to flash.
They can work with the ignition switched off.
Horn
► Press the central part of the steering wheel.
Page 59 of 212

57
Safety
5Pedestrian horn (Electric)
This system alerts pedestrians that the vehicle is approaching.
The pedestrian horn operates once the vehicle
is moving and at speeds of up to 25 mph
(40
km/h), in forward or reverse gear.
This function cannot be deactivated.
Electronic stability control
(ESC)
Electronic stability control (ESC: Electronic
Stability Control) integrating the following
systems:
–
anti-lock braking system (ABS) and electronic
brake force distribution (EBFD),
–
emergency braking assistance (EBA),
–
wheel anti-slip regulation (ASR) or traction
control,
–
dynamic stability control (DSC).
Definitions
Anti-lock braking system (ABS) and Electronic brake force distribution
(EBFD)
This system improves the stability and handling
of your vehicle when braking and contributes
towards improved control on bends, in particular
on poor or slippery road surfaces. ABS prevents wheel locking in the event of
emergency braking.
EBFD manages the braking pressure wheel by
wheel.
Emergency braking assistance (EBA)
In an emergency, this system enables you
to reach the optimum braking pressure more
quickly and therefore reduce the stopping
distance.
It is triggered in relation to the speed at which
the brake pedal is depressed. The effect of this
is a reduction in the resistance of the pedal and
an increase in braking efficiency.
Anti-slip regulation (ASR)
The ASR system (also known as Traction
Control) optimises traction in order to limit
wheel slip, by acting on the brakes of the driving
wheels and on the engine. It also improves the
directional stability of the vehicle on acceleration.
Dynamic stability control (DSC)
If there is a difference between the path followed
by the vehicle and that required by the driver, the
DSC monitors each wheel and automatically acts
on the brake of one or more wheels and on the
engine to return the vehicle to the required path,
within the limits of the laws of physics.
Anti-lock braking system
(ABS) and electronic brake
force distribution (EBFD)
When this warning lamp comes on,
accompanied by a message on the
instrument panel display screen, it indicates that
there is a fault with the ABS, which could cause
loss of control of the vehicle when braking.
When these warning lamps come
on, accompanied by a message on
the instrument panel display screen, they
indicate that there is a fault with the electronic
brake force distribution (EBFD), which could
cause loss of control of the vehicle when
braking.
You must stop as soon as it is safe to do so.
Contact a PEUGEOT dealer or a qualified
workshop.
For maximum efficiency of the braking
system, a period of adjustment of
approximately 310 miles (500 km) is
necessary. During this period, it is advisable
to avoid abrupt, repeated and prolonged
braking.
The anti-lock device does not allow for shorter braking. On a very slippery road
Page 60 of 212

58
Safety
surface (ice, oil, etc.), the ABS system is
liable to lengthen braking distances.
When changing wheels (tyres and rims),
ensure that these are approved for your
vehicle.
When braking in an emergency, press
very firmly and maintain this pressure,
even on a slippery road surface.
After an impact
Have it checked by a PEUGEOT dealer
or a qualified workshop.
Dynamic stability control
(DSC)
Switching on
The DSC system is activated automatically every
time the vehicle is started.
It comes into operation in the event of a grip or
trajectory problem.
This is indicated by the flashing of this warning lamp on the instrument panel.
Deactivation
This system cannot be deactivated by the driver.
Malfunction
In the event of a malfunction, this warning
lamp lights up on the instrument panel, accompanied by the display of a message and
an audible signal.
Have it checked by a PEUGEOT dealer or a
qualified workshop.
Anti-slip regulation (ASR)
Deactivation / Reactivation
The ASR system is activated automatically every
time the vehicle is started.
In exceptional conditions (starting a vehicle
which is bogged down, stuck in snow, on soft
ground, etc.), it may be advisable to deactivate
the ASR system, so that the wheels can turn
freely and regain grip.
Reactivate the system as soon as the level of
grip permits.
ASR
► Press this button to deactivate / reactivate the
function.
The illumination of the button indicator lamp,
accompanied by a message on the instrument
panel display screen, indicates that the
ASR
system is deactivated.
The ASR system is automatically reactivated
every time the ignition is switched off
Malfunction
In the event of a malfunction, this warning
lamp lights up on the instrument panel,
accompanied by the display of a message and
an audible signal.
Have it checked by a PEUGEOT dealer or a
qualified workshop.
ASR / DSC
These systems offer increased safety in
normal driving, but they should not encourage
the driver to take extra risks or drive at high
speed.
It is in conditions of reduced grip (rain, snow,
ice) that the risk of loss of grip increases. It
is therefore important for your safety to keep
these systems activated in all conditions, and
particularly in difficult conditions.
The correct operation of these systems
depends on observation of the manufacturer's
recommendations regarding as much
the wheels (tyres and rims), braking and
electronic components as the assembly
and repair procedures used by PEUGEOT
dealers.
To benefit in full from the effectiveness
of these systems in wintry conditions,
the vehicle must be fitted with four snow
tyres, allowing the vehicle to retain neutral
behaviour on the road.