air conditioning PEUGEOT EXPERT 2022 User Guide
[x] Cancel search | Manufacturer: PEUGEOT, Model Year: 2022, Model line: EXPERT, Model: PEUGEOT EXPERT 2022Pages: 324, PDF Size: 10.39 MB
Page 83 of 324
81
Ease of use and comfort
3Visibility programme
► Press the "visibility" button 7 to demist or
de-ice the windscreen and side windows more
quickly.
The system automatically manages the air
conditioning, air flow and air intake, and provides
optimum distribution towards the windscreen and
side windows.
►
Press the "
visibility" button 7 again to stop
the programme.
Or
►
Press the "
AUTO" button 6 to return to the
automatic comfort programme.
Air conditioning
With the engine running, the air conditioning is
designed to operate effectively in all seasons,
with the windows closed.
It is used to:
–
lower the temperature in summer
,
–
increase the effectiveness of the demisting in
winter
, above 3°C.
On/Off
► Press button 5 to activate/deactivate the air
conditioning system.
When the air conditioning is in operation, to
cool the air more quickly, you can use interior
air recirculation for a few moments by pressing
button
4. Then restore the intake of exterior air.
The air conditioning does not operate when the air flow adjustment is set to off.
Switching the system off could result in
discomfort (humidity, misting).
Air distribution
► Pressing button 3 successively directs the air
flow towards:
–
windscreen, side windows and footwells,
–
footwells,
–
central vents, side vents and footwells,
–
windscreen, side windows, central vents, side
vents and footwells,
–
central and side vents,
–
windscreen and side windows (demisting or
defrosting).
Air flow
► Press the buttons 2 to increase/decrease the
air flow.
The air flow symbol (a fan) appears. It is filled in
or emptied gradually, according to the value set.
Interior air recirculation
The intake of exterior air prevents the formation
of mist on the windscreen and side windows.
Recirculating the interior air isolates the
passenger compartment from outside odours
and fumes and allows the desired passenger
compartment temperature to be achieved more
rapidly.
► Press this button to activate/deactivate
the function (confirmed by the
illumination/extinction of the indicator lamp).
Front demisting
- defrosting
These markings on the control panel indicate the positioning of the controls for
rapid demisting or defrosting of the windscreen
and side windows.
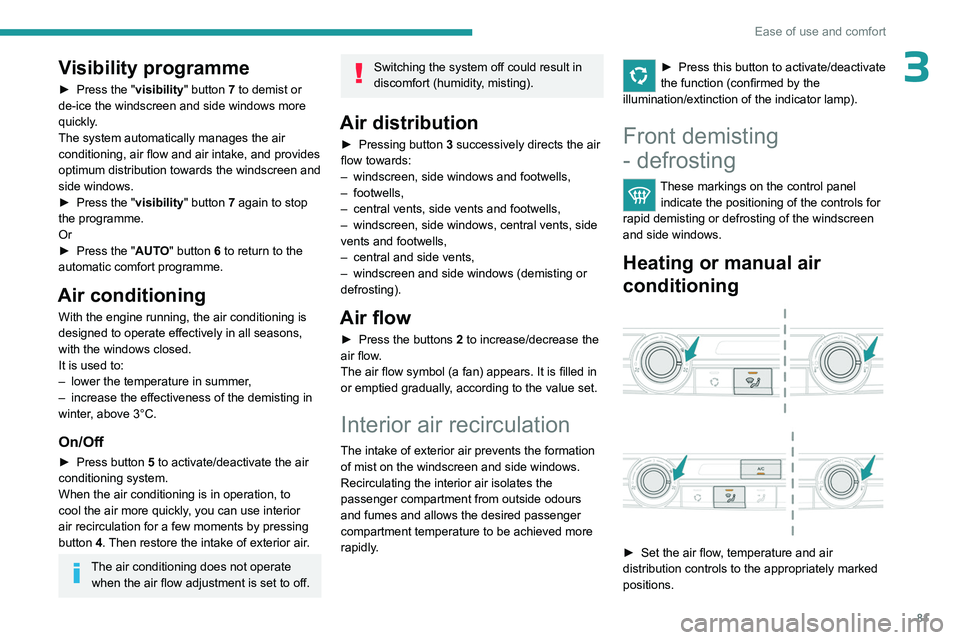
Heating or manual air
conditioning
► Set the air flow , temperature and air
distribution controls to the appropriately marked
positions.
Page 84 of 324
82
Ease of use and comfort
► For air conditioning, press this button;
its indicator lamp comes on.
Dual-zone automatic air
conditioning
► Press this button to demist or defrost
the windscreen and side windows more
quickly
.
The system automatically manages the air
conditioning, air flow and air intake, and provides
optimum distribution towards the windscreen and
side windows.
► To turn it off, press this button
again or press " AUTO".
The system restarts with the values in use before
it was deactivated.
Demisting/de-icing the
rear screen and/or the
door mirrors
► Press one of these buttons to switch on/off
rear screen and door mirror demisting/de-icing
(depending on version).
The indicator lamp in the button comes on
when
the function is activated.
Demisting/de-icing switches off automatically to
prevent excessive power consumption.
Switch off demisting/de-icing as soon
as you no longer consider it necessary,
as decreased power consumption in turn
reduces energy consumption.
Demisting/de-icing only operates with the
engine running.
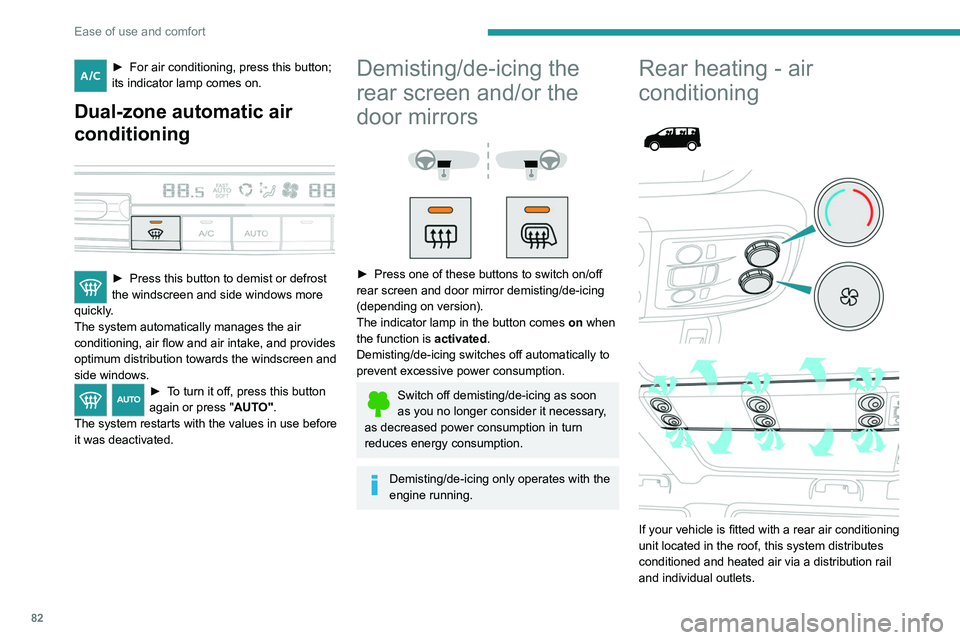
Rear heating - air
conditioning
If your vehicle is fitted with a rear air conditioning
unit located in the roof, this system distributes
conditioned and heated air via a distribution rail
and individual outlets.
Page 85 of 324
83
Ease of use and comfort
3Air flow
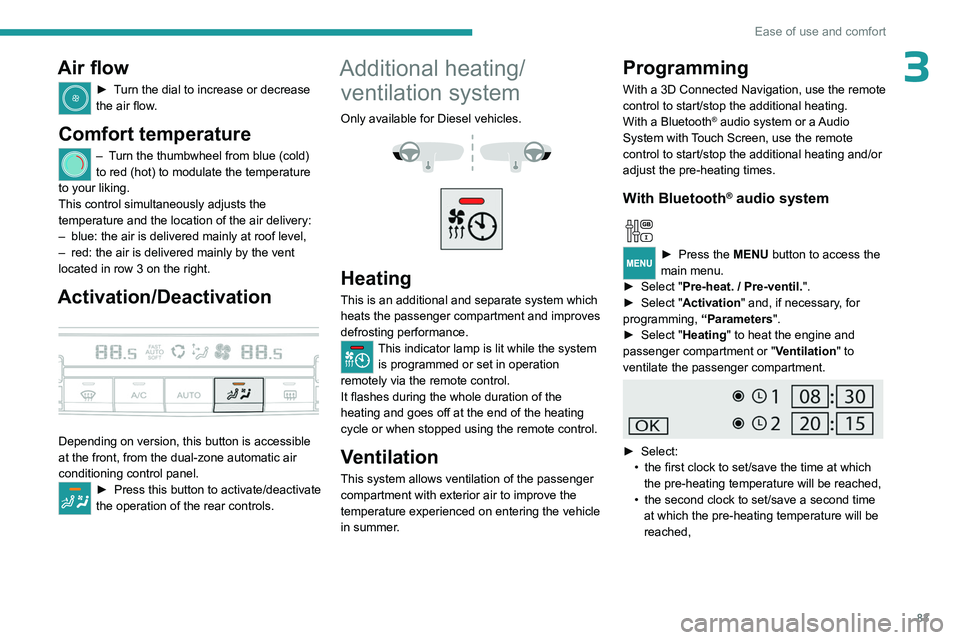
► Turn the dial to increase or decrease
the air flow.
Comfort temperature
– Turn the thumbwheel from blue (cold)
to red (hot) to modulate the temperature
to your liking.
This control simultaneously adjusts the
temperature and the location of the air delivery:
–
blue: the air is delivered mainly at roof level,
–
red: the air is delivered mainly by the vent
located in row 3 on the right.
Activation/Deactivation
Depending on version, this button is accessible
at the front, from the dual-zone automatic air
conditioning control panel.
► Press this button to activate/deactivate
the operation of the rear controls.
Additional heating/ ventilation system
Only available for Diesel vehicles.
Heating
This is an additional and separate system which
heats the passenger compartment and improves
defrosting performance.
This indicator lamp is lit while the system is programmed or set in operation
remotely via the remote control.
It flashes during the whole duration of the
heating and goes off at the end of the heating
cycle or when stopped using the remote control.
Ventilation
This system allows ventilation of the passenger
compartment with exterior air to improve the
temperature experienced on entering the vehicle
in summer.
Programming
With a 3D Connected Navigation, use the remote
control to start/stop the additional heating.
With a Bluetooth
® audio system or a Audio
System with Touch Screen, use the remote
control to start/stop the additional heating and/or
adjust the pre-heating times.
With Bluetooth® audio system
► Press the MENU button to access the
main menu.
►
Select "
Pre-heat. / Pre-ventil.".
►
Select "
Activation" and, if necessary, for
programming, “Parameters".
►
Select "
Heating" to heat the engine and
passenger compartment or " Ventilation" to
ventilate the passenger compartment.
► Select:
• the first clock to set/save the time at which
the pre-heating temperature will be reached,
•
the second clock to set/save a second time
at which the pre-heating temperature will be
reached,
Page 95 of 324
93
Lighting and visibility
4Without AUTO wiping
With AUTO wiping
Windscreen wipers
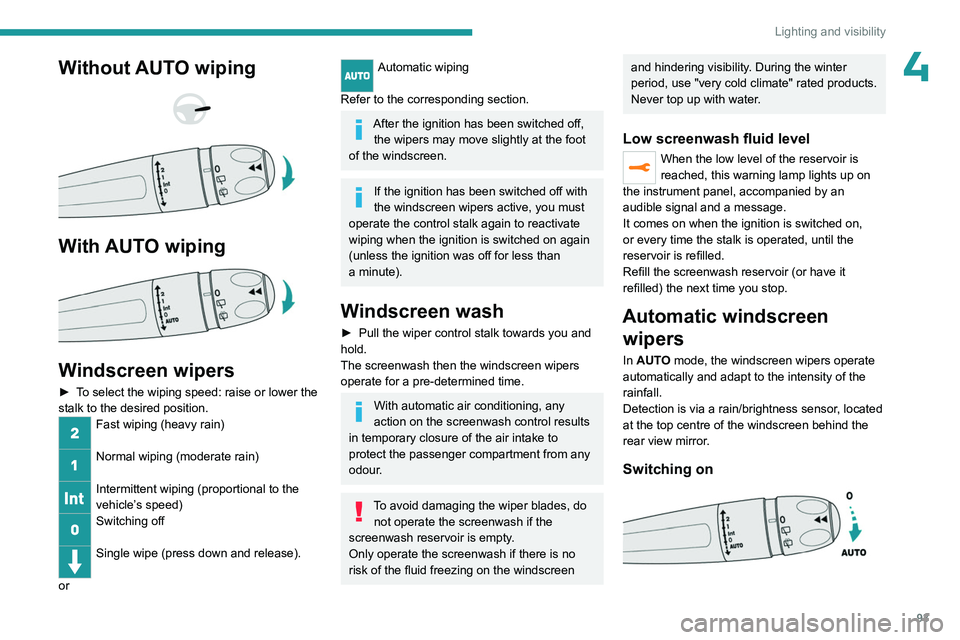
► To select the wiping speed: raise or lower the
stalk to the desired position.
Fast wiping (heavy rain)
Normal wiping (moderate rain)
Intermittent wiping (proportional to the
vehicle’s speed)
Switching off
Single wipe (press down and release).
or
Automatic wiping
Refer to the corresponding section.
After the ignition has been switched off, the wipers may move slightly at the foot
of the windscreen.
If the ignition has been switched off with
the windscreen wipers active, you must
operate the control stalk again to reactivate
wiping when the ignition is switched on again
(unless the ignition was off for less than
a
minute).
Windscreen wash
► Pull the wiper control stalk towards you and
hold.
The screenwash then the windscreen wipers
operate for a pre-determined time.
With automatic air conditioning, any
action on the screenwash control results
in temporary closure of the air intake to
protect the passenger compartment from any
odour.
To avoid damaging the wiper blades, do not operate the screenwash if the
screenwash reservoir is empty.
Only operate the screenwash if there is no
risk of the fluid freezing on the windscreen
and hindering visibility. During the winter
period, use "very cold climate" rated products.
Never top up with water.
Low screenwash fluid level
When the low level of the reservoir is
reached, this warning lamp lights up on
the instrument panel, accompanied by an
audible signal and a message.
It comes on when the ignition is switched on,
or every time the stalk is operated, until the
reservoir is refilled.
Refill the screenwash reservoir (or have it
refilled) the next time you stop.
Automatic windscreen wipers
In AUTO mode, the windscreen wipers operate
automatically and adapt to the intensity of the
rainfall.
Detection is via a rain/brightness sensor, located
at the top centre of the windscreen behind the
rear view mirror.
Switching on
Page 149 of 324
147
Driving
6When starting the vehicle, no mode can be
selected until the READY indicator lamp is
displayed.
When the message disappears, the selected
mode is activated and remains indicated on the
instrument panel (except Normal mode).
Each time the ignition is switched on, Normal
mode is selected by default.
Normal
This optimises the driving range and dynamic
performance.
To obtain maximum torque and power, depress
the accelerator pedal fully.
Eco
Optimises energy consumption, by reducing
the output of the heating and air conditioning
(without actually deactivating them) and limiting
both motor torque and power.
Power
Provides equivalent vehicle performance when
fully laden (GVW) to when the vehicle is in
Normal mode and when unladen.
Stop & Start
The Stop & Start function puts the engine temporarily into standby - STOP mode - during
phases when the vehicle is stationary (e.g.
red
lights, traffic jams). The engine automatically
restarts - START mode - as soon as the driver
indicates the intention of moving off again.
Primarily designed for urban use, the function
is intended to reduce fuel consumption and
exhaust emissions as well as the noise level
when stationary.
The function does not affect the functionalities of
the vehicle, in particular the braking.
Driving on flooded roads
Before entering into a flooded area, it is
strongly recommended that you deactivate
the Stop & Start system.
For more information on Driving
recommendations, particularly on flooded
roads, refer to the corresponding section.
Deactivation/Reactivation
With audio system
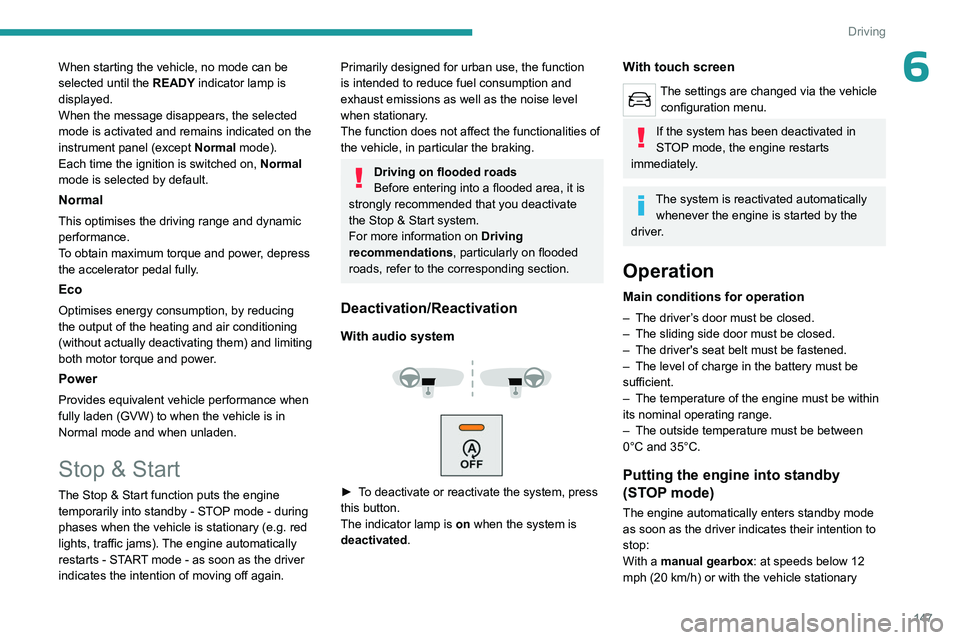
► To deactivate or reactivate the system, press
this button.
The indicator lamp is on when the system is
deactivated.
With touch screen
The settings are changed via the vehicle configuration menu.
If the system has been deactivated in
STOP mode, the engine restarts
immediately.
The system is reactivated automatically whenever the engine is started by the
driver.
Operation
Main conditions for operation
– The driver ’s door must be closed.
– The sliding side door must be closed.
–
The driver's seat belt must be fastened.
–
The level of charge in the battery must be
sufficient.
–
The temperature of the engine must be within
its nominal operating range.
–
The outside temperature must be between
0°C and 35°C.
Putting the engine into standby
(STOP mode)
The engine automatically enters standby mode
as soon as the driver indicates their intention to
stop:
With a manual gearbox: at speeds below 12
mph (20
km/h) or with the vehicle stationary
Page 183 of 324
181
Practical information
7Standard charging, mode 2
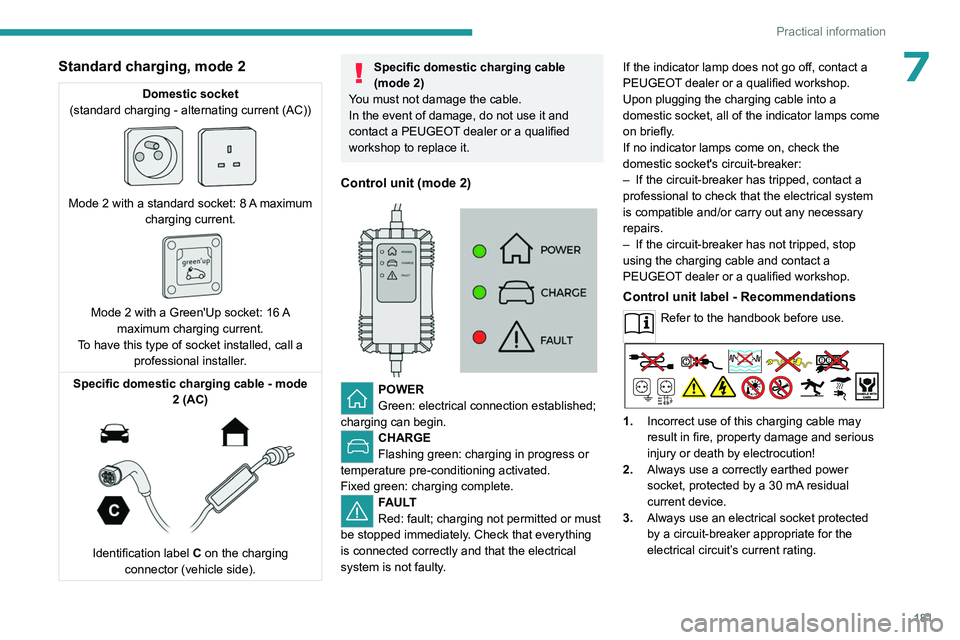
Domestic socket
(standard charging - alternating current (AC))
Mode 2 with a standard socket: 8 A maximum
charging current.
Mode 2 with a Green'Up socket: 16 A
maximum charging current.
To have this type of socket installed, call a professional installer.
Specific domestic charging cable - mode 2 (AC)
Identification label C on the charging
connector (vehicle side).
Specific domestic charging cable
(mode 2)
You must not damage the cable.
In the event of damage, do not use it and
contact a PEUGEOT dealer or a qualified
workshop to replace it.
Control unit (mode 2)
POWER
Green: electrical connection established;
charging can begin.
CHARGE
Flashing green: charging in progress or
temperature pre-conditioning activated.
Fixed green: charging complete.
FAULT
Red: fault; charging not permitted or must
be stopped immediately. Check that everything
is connected correctly and that the electrical
system is not faulty. If the indicator lamp does not go off, contact a
PEUGEOT dealer or a qualified workshop.
Upon plugging the charging cable into a
domestic socket, all of the indicator lamps come
on briefly.
If no indicator lamps come on, check the
domestic socket's circuit-breaker:
–
If the circuit-breaker has tripped, contact a
professional to check that the electrical system
is compatible and/or carry out any necessary
repairs.
–
If the circuit-breaker has not tripped, stop
using the charging cable and contact a
PEUGEOT
dealer or a qualified workshop.
Control unit label - Recommendations
Refer to the handbook before use.
1.
Incorrect use of this charging cable may
result in fire, property damage and serious
injury or death by electrocution!
2. Always use a correctly earthed power
socket, protected by a 30
mA residual
current device.
3. Always use an electrical socket protected
by a circuit-breaker appropriate for the
electrical circuit’s current rating.
Page 190 of 324
188
Practical information
With selective door unlocking activated,
press the unlocking button twice to
disconnect the charging nozzle.
When charging is complete, the green
charging indicator lamp in the flap goes
out after about 2 minutes.
Domestic charging, mode 2
The end of charging is confirmed when the green
CHARGE indicator lamp on the control unit and
the green charging indicator lamp in the flap
come on fixed.
►
Replace the protective cover on the charging
nozzle and close the charging flap.
►
Disconnect the control unit end of the
charging cable from the domestic socket.
Accelerated charging, mode 3
The end of charging is indicated by the charging
control unit and by the fixed lighting of the green
indicator lamp in the flap.
►
Hang up the nozzle on the charging unit and
close the charging flap.
Superfast charging, mode 4
The end of charging is indicated by the charger
and by the fixed lighting of the green indicator
lamp in the flap.
► You can also pause charging by
pressing this button in the flap (in mode 4
only).
►
Hang up the nozzle on the charger
.
► Depending on version, replace the protective
cover on the lower section and close the
charging flap.
When the charging nozzle is
disconnected, a message on the
instrument panel indicates that charging is
complete, even if the charging nozzle was
disconnected before full charging was
completed.
Energy economy mode
This system manages the duration of use of
certain functions, in order to conserve a sufficient
level of charge in the battery with the ignition off.
After switching off the engine and for a maximum
cumulative period of around 30 minutes, you can
continue to use functions such as the audio and
telematics system, dipped beam headlamps or
courtesy lamps.
Selecting the mode
A confirmation message is displayed when
energy economy mode is entered, and the active
functions are placed on standby.
If a telephone call is in progress at the
time, it will be maintained for around 10
minutes via the audio system’s hands-free
system.
Exiting the mode
These functions are automatically reactivated the
next time the vehicle is used.
To restore the use of these functions
immediately, start the engine and let it run:
–
For less than 10 minutes, to use the
equipment for approximately 5 minutes.
–
For more than 10 minutes, to use the
equipment for approximately 30 minutes.
Let the engine run for the specified duration to
ensure that the battery charge is sufficient.
T
o recharge the battery, avoid repeatedly or
continuously restarting the engine.
A flat battery prevents the engine from starting.
For more information on the 12
V battery,
refer to the corresponding section.
Load reduction mode
This system manages the use of certain
functions according to the level of charge
remaining in the battery.
When the vehicle is being driven, the load
reduction function temporarily deactivates certain
functions, such as the air conditioning and the
heated rear screen.
The deactivated functions are reactivated
automatically as soon as conditions permit.
Page 197 of 324
195
Practical information
7For more information on the precautions
to take before any work on the 12 V
battery, refer to the corresponding section.
Versions equipped with Stop & Start are
fitted with a 12 V lead-acid battery with
special technology and specifications.
Its replacement should be carried out only by
a PEUGEOT dealer or a qualified workshop.
Passenger compartment
filter
Depending on the environment and the
use of the vehicle (e.g. dusty atmosphere,
city driving), change it twice as often, if
necessary .
A clogged passenger compartment filter
can adversely affect air conditioning
system performance and generate
undesirable odours.
Air filter
Depending on the environment and the
use of the vehicle (e.g. dusty atmosphere,
city driving), change it twice as often, if
necessary .
Oil filter
Change the oil filter each time the engine
oil is changed.
Particle filter (Diesel)
/ The start of clogging of the
particle filter is indicated by the
temporary lighting of this warning lamp,
accompanied by an alert message.
As soon as traffic conditions allow, regenerate
the filter by driving at a speed of at least 37
mph
(60
km/h), with an engine speed above 2,500
rpm, for about 15 minutes (until the warning lamp
goes out).
If it is not possible to reach 37
mph (60 km/h),
leave the engine running at idle for about 15
minutes, then drive with an engine speed
above
2,500 rpm for 15 minutes.
Do not switch off the engine until the filter
is fully regenerated; repeated intervals
can degrade the engine oil prematurely.
Regenerating the filter while the vehicle is
stationary is not recommended.
Following prolonged operation of the
vehicle at very low speed or at idle, you
may, in exceptional circumstances, notice
water vapour coming from the exhaust while
accelerating. These emissions have no
impact on the vehicle’s behaviour and the
environment.
New vehicle
During the first few particle filter
regeneration operations, you may notice a
"burning" smell. This is perfectly normal.
Manual gearbox
The gearbox does not require any maintenance (no oil change).
Automatic gearbox
The gearbox does not require any maintenance (no oil change).
Drive selector
The drive selector does not require any maintenance.
Manual parking brake
If you notice excessive brake lever travel
or decreased effectiveness, the parking
brake must be adjusted, even between two
services.
This system must be checked by a PEUGEOT
dealer or a qualified workshop.
Electric parking brake
This system does not require any routine servicing. However, in the event of a
problem, do not hesitate to have the system
checked by a PEUGEOT dealer or a qualified
workshop.
For more information on the Electric
parking brake, refer to the
corresponding section.
Page 249 of 324
247
Audio System with Touch Screen
11Audio System with Touch Screen
Multimedia audio system -
Applications - Bluetooth
®
telephone
The functions and settings described
vary according to the vehicle version and
configuration, as well as the country of sale.
For safety reasons and because they
require sustained attention by the driver,
the following operations must be carried out
with the vehicle stationary and the ignition
on:
–
Pairing the smartphone with the system via
Bluetooth.
–
Using the smartphone.
–
Connecting to the CarPlay® or Android
Auto applications (certain applications stop
displaying when the vehicle is moving).
–
Changing the system settings and
configuration.
The system is protected so that it only operates in the vehicle.
The message Energy economy mode is
displayed when the system is about to go into
standby.
The system’s Open Source Software (OSS) source codes are available at the
following addresses:
https://www.groupe-psa.com/fr/oss/
https://www.groupe-psa.com/en/oss/
First steps
With the engine running, a press mutes
the sound.
With the ignition off, a press turns the system on.
Increase or decrease the volume using
the wheel or the "plus" or "minus" buttons
(depending on the equipment).
Use the buttons on either side of or below the
touch screen to access the menus, then press
the virtual buttons on the touch screen.
Depending on the model, use the "Source" and
"Menu" buttons on the left of the touch screen to
access the menus, then press the virtual buttons
on the touch screen.
At all times it is possible to display the rolling
menus by pressing the screen briefly with three
fingers.
All touch-sensitive areas on the screen are
white.
On pages with multiple tabs at the bottom of the
screen, you can switch between pages either
by tapping the tab for the desired page or by
swiping the pages to the left or right with your
finger.
Press in the shaded area to go back up a level
or confirm.
Press the back arrow to go back a level or
confirm.
The touch screen is of the "capacitive" type.
To clean the screen, use a soft, non-abrasive
cloth (e.g. spectacles cloth) with no additional
product.
Do not use sharp objects on the screen.
Do not touch the screen with wet hands.
Certain information is displayed permanently in
the upper bar of the touch screen:
–
Air conditioning status information (depending
on version), and direct access to the
corresponding menu.
–
Radio Media and
Telephone menu status
information.
–
Privacy status information.
–
Access to the touch screen and digital
instrument panel settings.
Audio source selection (depending on
equipment):
–
FM/DAB/AM radio stations (depending on
equipment).
–
T
elephone connected via Bluetooth and
Bluetooth multimedia broadcast (streaming).
–
USB Memory stick.
–
Media player connected via the auxiliary
socket (depending on equipment).
Page 252 of 324
250
Audio System with Touch Screen
Navigation
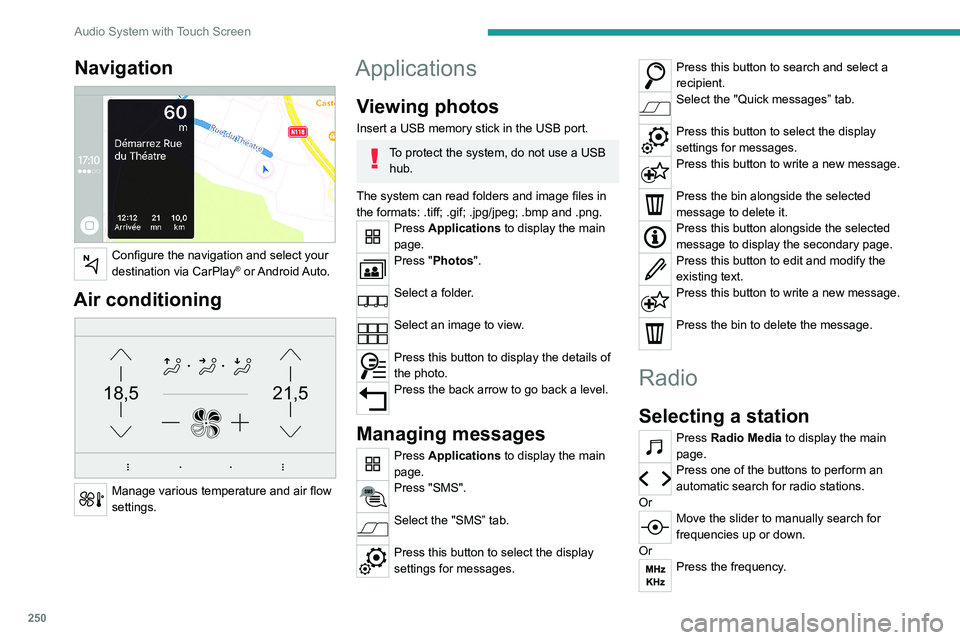
Configure the navigation and select your
destination via CarPlay® or Android Auto.
Air conditioning
21,518,5
Manage various temperature and air flow
settings.
Applications
Viewing photos
Insert a USB memory stick in the USB port.
To protect the system, do not use a USB hub.
The system can read folders and image files in
the formats: .tiff; .gif; .jpg/jpeg; .bmp and .png.
Press Applications to display the main
page.
Press "Photos".
Select a folder.
Select an image to view.
Press this button to display the details of
the photo.
Press the back arrow to go back a level.
Managing messages
Press Applications to display the main
page.
Press "SMS".
Select the "SMS” tab.
Press this button to select the display
settings for messages.
Press this button to search and select a
recipient.
Select the "Quick messages” tab.
Press this button to select the display
settings for messages.
Press this button to write a new message.
Press the bin alongside the selected
message to delete it.
Press this button alongside the selected
message to display the secondary page.
Press this button to edit and modify the
existing text.
Press this button to write a new message.
Press the bin to delete the message.
Radio
Selecting a station
Press Radio Media to display the main
page.
Press one of the buttons to perform an
automatic search for radio stations.
Or
Move the slider to manually search for
frequencies up or down.
Or
Press the frequency.