display PEUGEOT LANDTREK 2023 Owner's Manual
[x] Cancel search | Manufacturer: PEUGEOT, Model Year: 2023, Model line: LANDTREK, Model: PEUGEOT LANDTREK 2023Pages: 164, PDF Size: 6.1 MB
Page 49 of 164
47
Lighting and visibility
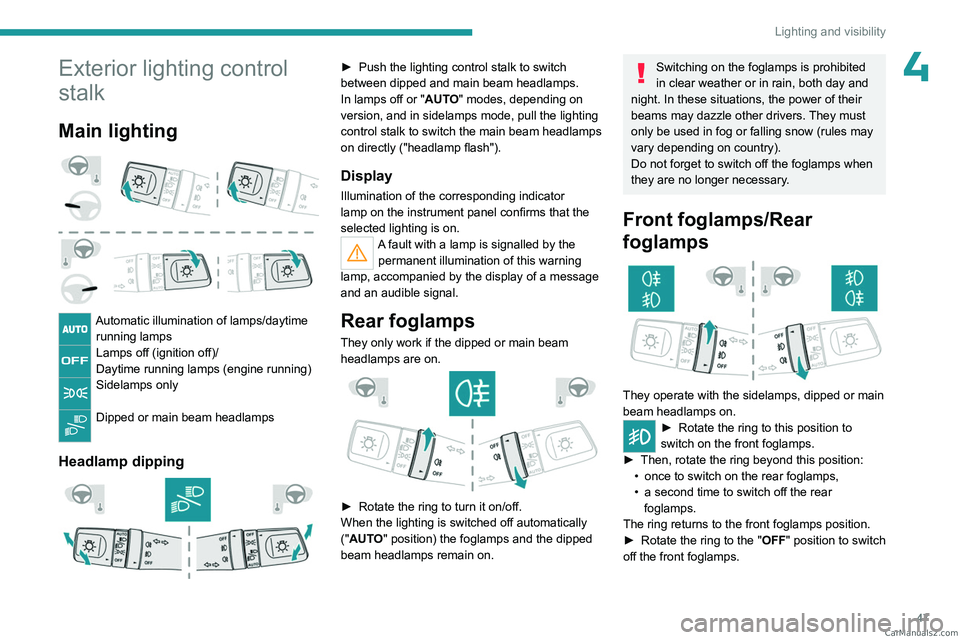
4Exterior lighting control
stalk
Main lighting
Automatic illumination of lamps/daytime running lamps
Lamps off (ignition off)/
Daytime running lamps (engine running)
Sidelamps only
Dipped or main beam headlamps
Headlamp dipping
► Push the lighting control stalk to switch
between dipped and main beam headlamps.
In lamps off or "
AUTO" modes, depending on
version, and in sidelamps mode, pull the lighting
control stalk to switch the main beam headlamps
on directly ("headlamp flash").
Display
Illumination of the corresponding indicator
lamp on the instrument panel confirms that the
selected lighting is on.
A fault with a lamp is signalled by the permanent illumination of this warning
lamp, accompanied by the display of a message
and an audible signal.
Rear foglamps
They only work if the dipped or main beam headlamps are on.
► Rotate the ring to turn it on/off.
When the lighting is switched off automatically
("
AUTO" position) the foglamps and the dipped
beam headlamps remain on.
Switching on the foglamps is prohibited
in clear weather or in rain, both day and
night. In these situations, the power of their
beams may dazzle other drivers. They must
only be used in fog or falling snow (rules may
vary depending on country).
Do not forget to switch off the foglamps when
they are no longer necessary.
Front foglamps/Rear
foglamps
They operate with the sidelamps, dipped or main
beam headlamps on.
► Rotate the ring to this position to
switch on the front foglamps.
►
Then, rotate the ring beyond this position:
•
once to switch on the rear foglamps,
•
a second time to switch off the rear
foglamps.
The ring returns to the front foglamps position.
►
Rotate the ring to the "
OFF" position to switch
off the front foglamps. CarM an uals 2 .c o m
Page 51 of 164
49
Lighting and visibility
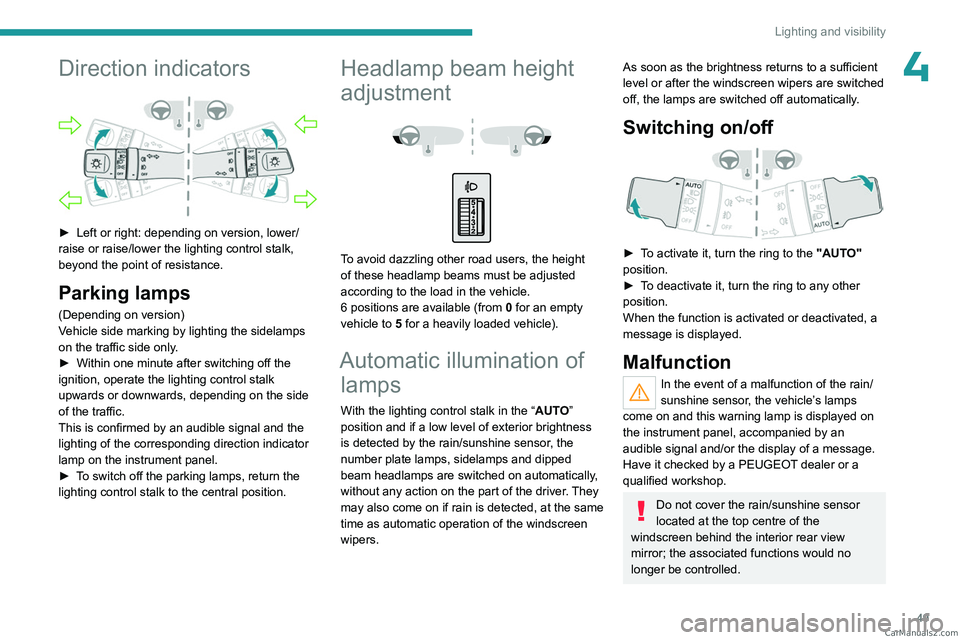
4Direction indicators
► Left or right: depending on version, lower/
raise or raise/lower the lighting control stalk,
beyond the point of resistance.
Parking lamps
(Depending on version)
Vehicle side marking by lighting the sidelamps
on the traffic side only.
►
Within one minute after switching off the
ignition, operate the lighting control stalk
upwards or downwards, depending on the side
of the traffic.
This is confirmed by an audible signal and the
lighting of the corresponding direction indicator
lamp on the instrument panel.
►
T
o switch off the parking lamps, return the
lighting control stalk to the central position.
Headlamp beam height
adjustment
To avoid dazzling other road users, the height
of these headlamp beams must be adjusted
according to the load in the vehicle.
6 positions are available (from 0 for an empty
vehicle to 5 for a heavily loaded vehicle).
Automatic illumination of lamps
With the lighting control stalk in the “ AUTO”
position and if a low level of exterior brightness
is detected by the rain/sunshine sensor, the
number plate lamps, sidelamps and dipped
beam headlamps are switched on automatically,
without any action on the part of the driver. They
may also come on if rain is detected, at the same
time as automatic operation of the windscreen
wipers.
As soon as the brightness returns to a sufficient
level or after the windscreen wipers are switched
off, the lamps are switched off automatically.
Switching on/off
► To activate it, turn the ring to the "AUTO"
position.
►
T
o deactivate it, turn the ring to any other
position.
When the function is activated or deactivated, a
message is displayed.
Malfunction
In the event of a malfunction of the rain/
sunshine sensor, the vehicle’s lamps
come on and this warning lamp is displayed on
the instrument panel, accompanied by an
audible signal and/or the display of a message.
Have it checked by a PEUGEOT dealer or a
qualified workshop.
Do not cover the rain/sunshine sensor
located at the top centre of the
windscreen behind the interior rear view
mirror; the associated functions would no
longer be controlled. CarM an uals 2 .c o m
Page 54 of 164
52
Lighting and visibility
► Unclip the worn wiper blade closest to you
and remove it.
►
Install the new wiper blade and clip it to the
arm.
►
Repeat the procedure for the other wiper
blade.
►
Starting with the wiper blade closest to you,
once again hold each arm by the rigid section,
then guide it carefully onto the windscreen.
Automatic windscreen wipers
In AUTO mode, the windscreen wipers work
automatically and adapt to the intensity of the
rain.
The rainfall detection function uses a rain/
sunshine sensor located at the top centre of the
windscreen, behind the rear view mirror.
Do not cover the rain/sunshine sensor.
When using an automatic car wash,
switch off the automatic wipers and the
ignition.
In winter, wait until the windscreen is
completely clear of ice before activating the
automatic wipers.
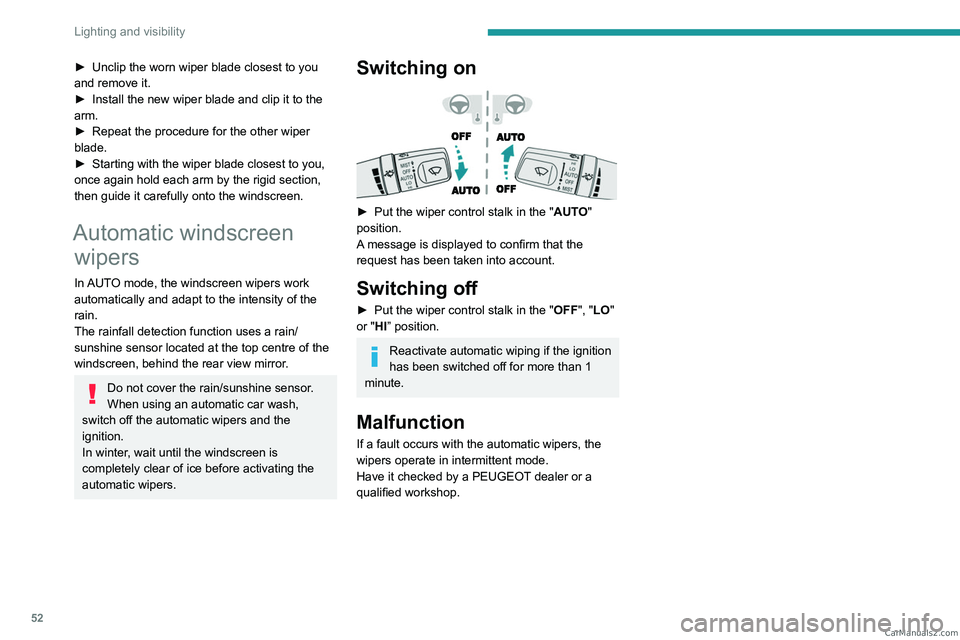
Switching on
► Put the wiper control stalk in the " AUT O"
position.
A message is displayed to confirm that the
request has been taken into account.
Switching off
► Put the wiper control stalk in the " OFF", " LO"
or "HI” position.
Reactivate automatic wiping if the ignition
has been switched off for more than 1
minute.
Malfunction
If a fault occurs with the automatic wipers, the
wipers operate in intermittent mode.
Have it checked by a PEUGEOT dealer or a
qualified workshop. CarM an uals 2 .c o m
Page 57 of 164
55
Safety
5In the event that a wheel has poor grip, anti-slip
regulation brakes the spinning wheel and returns
the engine torque to the wheel that has the best
grip in order to prevent being bogged down.
If there is a difference between the vehicle’s
trajectory and the path desired by the driver, the
dynamic stability control system automatically
uses engine braking and the brakes on one or
more wheels to return the vehicle to the desired
path, within the limits of the laws of physics.
These systems are activated automatically every
time the vehicle is started.
These systems are activated in the event of a problem with grip or trajectory
(confirmed by this warning lamp flashing on the
instrument panel).
Deactivation/Reactivation
In exceptional conditions (e.g. starting a vehicle
which is bogged down, stuck in snow, on soft
ground, etc.), it may be advisable to deactivate
the ASR and DSC systems, so that the wheels
can turn freely and regain grip.
Reactivate the systems as soon as the level of
grip permits.
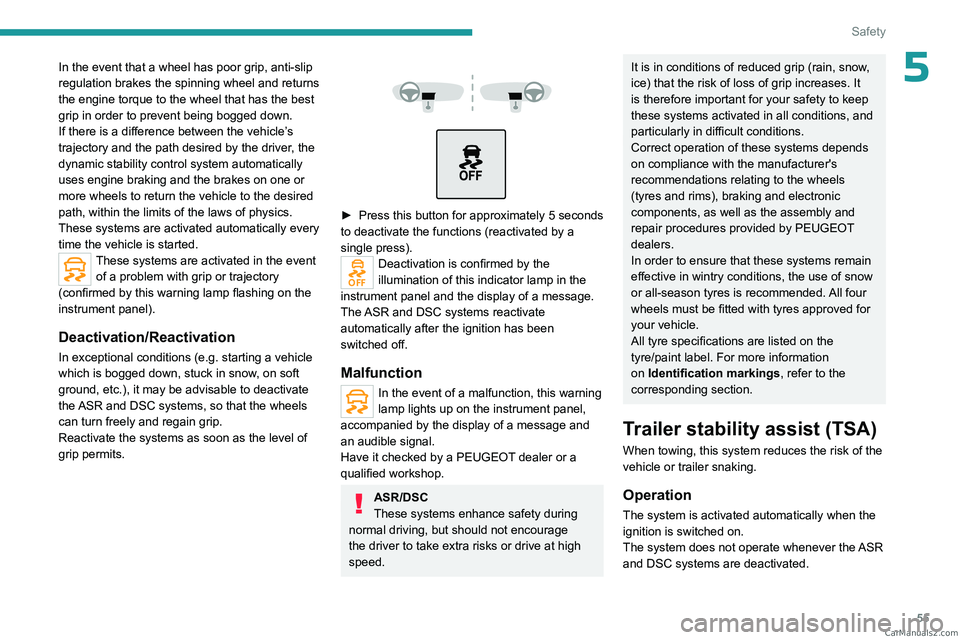
► Press this button for approximately 5 seconds
to deactivate the functions (reactivated by a
single press).
Deactivation is confirmed by the
illumination of this indicator lamp in the
instrument panel and the display of a message.
The ASR and DSC systems reactivate
automatically after the ignition has been
switched off.
Malfunction
In the event of a malfunction, this warning
lamp lights up on the instrument panel,
accompanied by the display of a message and
an audible signal.
Have it checked by a PEUGEOT dealer or a
qualified workshop.
ASR/DSC
These systems enhance safety during
normal driving, but should not encourage
the driver to take extra risks or drive at high
speed.
It is in conditions of reduced grip (rain, snow,
ice) that the risk of loss of grip increases. It
is therefore important for your safety to keep
these systems activated in all conditions, and
particularly in difficult conditions.
Correct operation of these systems depends
on compliance with the manufacturer's
recommendations relating to the wheels
(tyres and rims), braking and electronic
components, as well as the assembly and
repair procedures provided by PEUGEOT
dealers.
In order to ensure that these systems remain
effective in wintry conditions, the use of snow
or all-season tyres is recommended. All four
wheels must be fitted with tyres approved for
your vehicle.
All tyre specifications are listed on the
tyre/paint label. For more information
on Identification markings , refer to the
corresponding section.
Trailer stability assist (TSA)
When towing, this system reduces the risk of the
vehicle or trailer snaking.
Operation
The system is activated automatically when the
ignition is switched on.
The system does not operate whenever the ASR
and DSC systems are deactivated. CarM an uals 2 .c o m
Page 59 of 164
57
Safety
5– If the gearbox is in neutral or if the clutch
pedal is depressed, the speed decreases and
the indicator
lamp flashes slowly; in this case,
the maintained descent speed is lower.
Activation of the system may cause noise in the transmission. This is perfectly
normal and has no consequence on the
behaviour of the vehicle.
On a downward slope, with the vehicle
stationary, if the driver releases the accelerator
and brake pedals, the system will release the
brakes to set the vehicle gradually in motion.
The brake lamps light up automatically when the
system is regulating.
If the speed exceeds 22 mph (35
km/h),
regulation is paused automatically, but the
indicator lamp in the instrument panel remains
on.
Regulation resumes automatically when the
speed falls below 22 mph (35
km/h) again, if the
slope and pedal release conditions are met.
Depress the accelerator or brake pedal again to
pause the cruise control.
Switching off
► Press the button until the indicator lamp on
the instrument panel goes off.
At a speed of approximately 50 mph (80 km/h),
the system is automatically deactivated and the
indicator lamp on
the instrument panel goes off.
Malfunction
In the event of a malfunction, this warning
lamp comes on in green on the
instrument panel, accompanied by the display of
a message.
Have it checked by a PEUGEOT dealer or a
qualified workshop.
Seat belts
Inertia reel
The seat belts are equipped with an inertia
reel which allows the strap length to adjust
automatically to the shape of the user. The seat
belt returns to its storage automatically when it
is not used.
The inertia reels are fitted with a device which
automatically locks the strap in the event of a
collision, emergency braking or if the vehicle rolls
over. It can be released by pulling the strap firmly
and then releasing it so that it reels in slightly.
Pyrotechnic pretensioning
This system improves safety in the event of a
frontal or side impact.
Depending on the severity of the impact, the
pyrotechnic pretensioning system instantly
tightens the seat belts against the body of the
occupants.
The pyrotechnic pretensioning seat belts are
enabled when the ignition is on.
Force limiting system
This system reduces the pressure of the seat
belt on the chest of the occupant, thus improving
their protection.
In the event of an impact
Depending on the nature and
seriousness of the impacts, the pyrotechnic
device may trigger before and independently
of airbag deployment. Deployment of the
pretensioners is accompanied by a slight
discharge of harmless smoke and a noise,
due to the activation of the pyrotechnic
cartridge incorporated in the system.
In all cases, the airbag warning lamp comes
on.
Following an impact, have the seat belt
system checked, and if necessary replaced,
by a PEUGEOT dealer or a qualified
workshop.
Front seat belts
The front seat belts are fitted with a pyrotechnic
pretensioning system, depending on version,
and a force limiting system. CarM an uals 2 .c o m
Page 70 of 164
68
Driving
Do not exceed the maximum towable
weights.
At altitude: reduce the maximum load by
10% per 1,000 metres of altitude; the lower
air density at high altitudes decreases engine
performance.
New vehicle: do not tow a trailer until the
vehicle has driven at least 620 miles
(1,000 kilometres).
If the outside temperature is high, let the
engine idle for 1 to 2 minutes after the
vehicle comes to a stop, to help it to cool.
Before setting off
Nose weight
► Distribute the load in the trailer so that the
heaviest items are as close as possible to the
axle and the nose weight (at the point where it
joins your vehicle) approaches the maximum
permitted without exceeding it.
Tyres
► Check the tyre pressures of the towing
vehicle and of the trailer , observing the
recommended pressures.
Lighting
► Check the electrical signalling on the trailer
and the headlamp beam height of your vehicle.
If a genuine PEUGEOT towing device is
used, the rear parking sensors will be
deactivated automatically to avoid the audible
signal.
When driving
Cooling
Towing a trailer uphill causes the coolant
temperature to increase. The maximum towable
load depends on the gradient and the exterior
temperature. The fan’s cooling capacity does not
increase with engine speed.
►
Reduce speed and lower the engine speed to
limit the amount of heating produced.
►
Pay constant attention to the coolant
temperature.
If this warning lamp and the STOP
warning lamp come on, stop the vehicle
and switch off the engine as soon as possible.
Brakes
Using the engine brake is recommended to limit
the overheating of the brakes. Braking distances
are increased when towing a trailer.
Side wind
Bear in mind that the vehicle will be more
susceptible to wind when towing.
Anti-theft protection
Electronic immobiliser
The keys contain a code, which must be
recognised by the vehicle before starting is
possible.
If the system malfunctions, indicated by the
display of a message, the engine will not start.
Contact a PEUGEOT dealer.
Starting / Switching off the
engine with the key
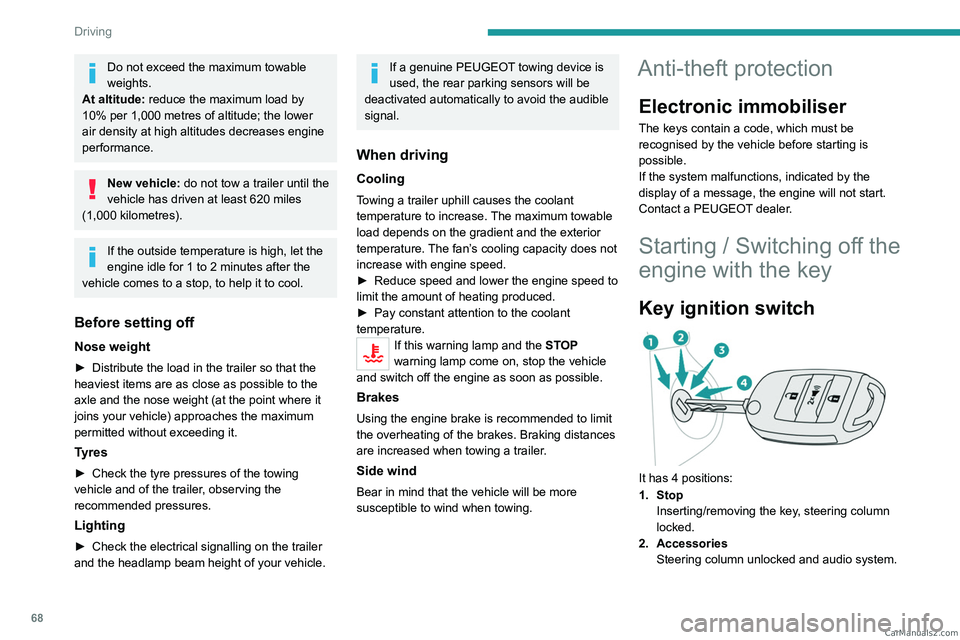
Key ignition switch
It has 4 positions:
1. Stop Inserting/removing the key, steering column
locked.
2. Accessories Steering column unlocked and audio system. CarM an uals 2 .c o m
Page 72 of 164
70
Driving
Never switch off the ignition before the
complete immobilisation of the vehicle.
With the engine off, the braking and steering
assistance systems are also cut off - risk of
loss of control of the vehicle!
Check that the parking brake is correctly
applied, particularly on sloping ground.
When leaving the vehicle, keep the key in
your possession and lock the vehicle.
Key left in
When the driver's door is opened, a
message is displayed, accompanied by an
audible signal, if the key has been left in the
ignition switch in position 1.
If the key has been left in the ignition switch
in position 3, the ignition will be switched off
automatically after one hour.
To switch the ignition back on, turn the key to
position 1, then back to position 3.
Starting/Switching off the
engine with Keyless Entry
and Start
The electronic key must be present in the
passenger compartment.
If the electronic key is not detected, a
message is displayed.
Move the electronic key so that the engine
can be started or switched off.
If there is still a problem, refer to the "Key
not detected - Back-up starting or Back-up
switch-off" section.
Starting
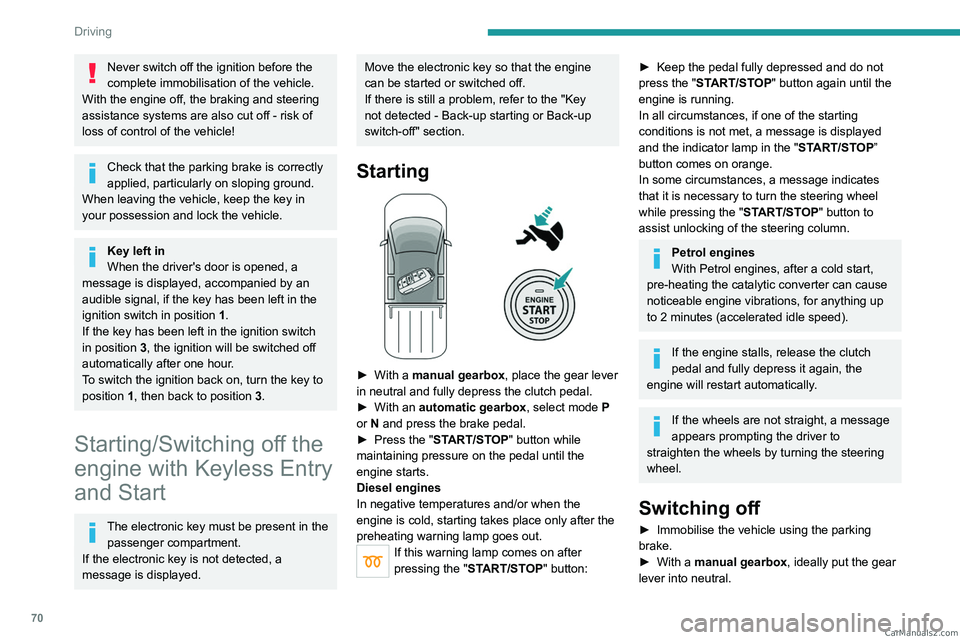
► With a manual gearbox, place the gear lever
in neutral and fully depress the clutch pedal.
►
With an
automatic gearbox, select mode P
or
N and press the brake pedal.
►
Press the "
START/STOP" button while
maintaining pressure on the pedal until the
engine starts.
Diesel engines
In negative temperatures and/or when the
engine is cold, starting takes place only after the
preheating warning lamp goes out.
If this warning lamp comes on after
pressing the " START/STOP" button:
► Keep the pedal fully depressed and do not
press the " START/STOP" button again until the
engine is running.
In all circumstances, if one of the starting
conditions is not met, a message is displayed
and the indicator lamp in the " START/STOP”
button comes on orange.
In some circumstances, a message indicates
that it is necessary to turn the steering wheel
while pressing the " START/STOP" button to
assist unlocking of the steering column.
Petrol engines
With Petrol engines, after a cold start,
pre-heating the catalytic converter can cause
noticeable engine vibrations, for anything up
to 2 minutes (accelerated idle speed).
If the engine stalls, release the clutch
pedal and fully depress it again, the
engine will restart automatically.
If the wheels are not straight, a message
appears prompting the driver to
straighten the wheels by turning the steering
wheel.
Switching off
► Immobilise the vehicle using the parking
brake.
►
With a
manual gearbox, ideally put the gear
lever into neutral. CarM an uals 2 .c o m
Page 74 of 164
72
Driving
Manual parking brake
Release
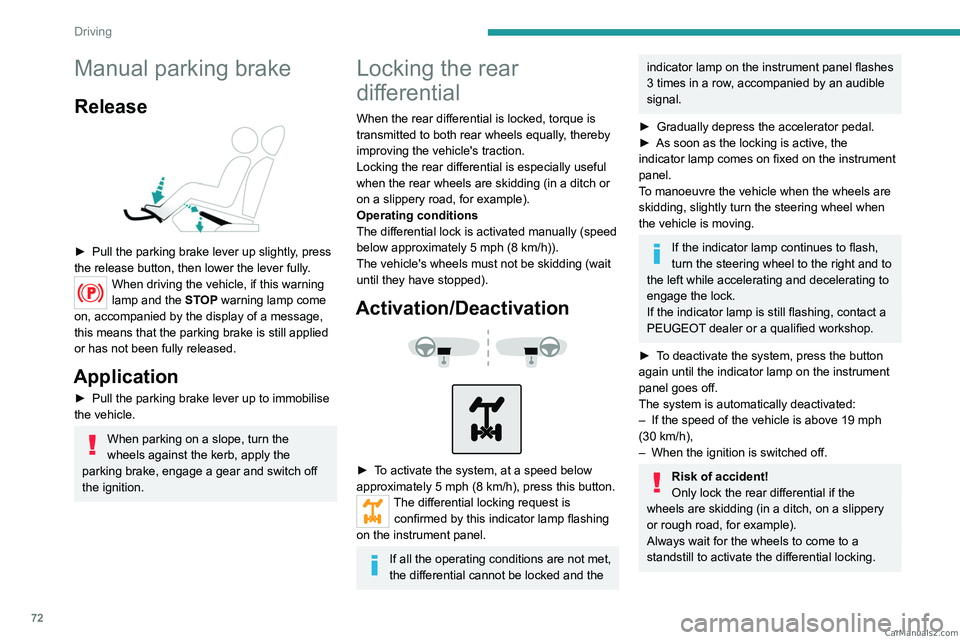
► Pull the parking brake lever up slightly, press
the release button, then lower the lever fully.
When driving the vehicle, if this warning
lamp and the STOP warning lamp come
on, accompanied by the display of a message,
this means that the parking brake is still applied
or has not been fully released.
Application
► Pull the parking brake lever up to immobilise
the vehicle.
When parking on a slope, turn the
wheels against the kerb, apply the
parking brake, engage a gear and switch off
the ignition.
Locking the rear
differential
When the rear differential is locked, torque is
transmitted to both rear wheels equally, thereby
improving the vehicle's traction.
Locking the rear differential is especially useful
when the rear wheels are skidding (in a ditch or
on a slippery road, for example).
Operating conditions
The differential lock is activated manually (speed
below approximately 5 mph (8 km/h)).
The vehicle's wheels must not be skidding (wait
until they have stopped).
Activation/Deactivation
► To activate the system, at a speed below
approximately 5 mph (8 km/h), press this button.
The differential locking request is confirmed by this indicator lamp flashing
on the instrument panel.
If all the operating conditions are not met,
the differential cannot be locked and the
indicator lamp on the instrument panel flashes
3 times in a row , accompanied by an audible
signal.
►
Gradually depress the accelerator pedal.
►
As soon as the locking is active, the
indicator
lamp comes on fixed on the instrument
panel.
To manoeuvre the vehicle when the wheels are
skidding, slightly turn the steering wheel when
the vehicle is moving.
If the indicator lamp continues to flash,
turn the steering wheel to the right and to
the left while accelerating and decelerating to
engage the lock.
If the indicator
lamp is still flashing, contact a
PEUGEOT dealer or a qualified workshop.
►
T
o deactivate the system, press the button
again until the indicator
lamp on the instrument
panel goes off.
The system is automatically deactivated:
–
If the speed of the vehicle is above 19 mph
(30
km/h),
–
When the ignition is switched off.
Risk of accident!
Only lock the rear differential if the
wheels are skidding (in a ditch, on a slippery
or rough road, for example).
Always wait for the wheels to come to a
standstill to activate the differential locking. CarM an uals 2 .c o m
Page 76 of 164
74
Driving
► With a manual gearbox, place the gear lever
in neutral, then fully depress the clutch pedal.
►
With an
automatic gearbox, move the gear
selector into position N.
►
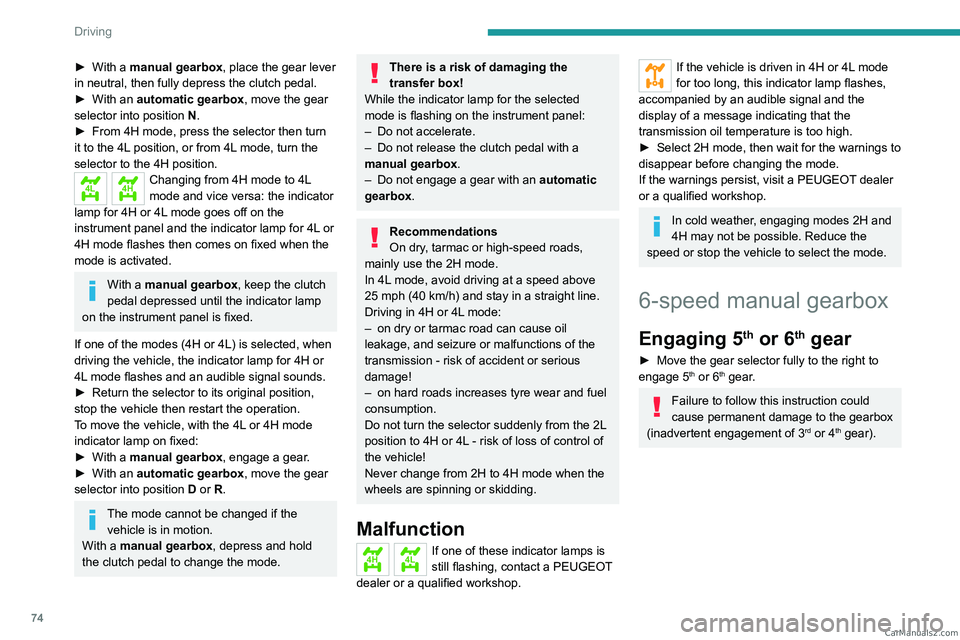
From 4H mode, press the selector then turn
it to the 4L
position, or from 4L mode, turn the
selector to the 4H position.
4L4HChanging from 4H mode to 4L
mode and vice versa: the indicator
lamp for 4H or 4L mode goes off on the
instrument panel and the indicator lamp for 4L or
4H mode flashes then comes on fixed when the
mode is activated.
With a manual gearbox, keep the clutch
pedal depressed until the indicator lamp
on the instrument panel is fixed.
If one of the modes (4H or 4L) is selected, when
driving the vehicle, the indicator lamp for 4H or
4L mode flashes and an audible signal sounds.
►
Return the selector to its original position,
stop the vehicle then restart the operation.
T
o move the vehicle, with the 4L or 4H mode
indicator lamp on fixed:
►
With a
manual gearbox, engage a gear.
►
With an
automatic gearbox, move the gear
selector into position D or R.
The mode cannot be changed if the
vehicle is in motion.
With a manual gearbox, depress and hold
the clutch pedal to change the mode.
There is a risk of damaging the
transfer box!
While the indicator lamp for the selected
mode is flashing on the instrument panel:
–
Do not accelerate.
–
Do not release the clutch pedal with a
manual gearbox
.
–
Do not engage a gear with an automatic
gearbox
.
Recommendations
On dry, tarmac or high-speed roads,
mainly use the 2H mode.
In 4L mode, avoid driving at a speed above
25 mph (40 km/h) and stay in a straight line.
Driving in 4H or 4L mode:
–
on dry or tarmac road can cause oil
leakage, and seizure or malfunctions of the
transmission
- risk of accident or serious
damage!
–
on hard roads increases tyre wear and fuel
consumption.
Do not turn the selector suddenly from the 2L
position to 4H or 4L - risk of loss of control of
the vehicle!
Never change from 2H to 4H mode when the
wheels are spinning or skidding.
Malfunction
4H4LIf one of these indicator lamps is
still flashing, contact a PEUGEOT
dealer or a qualified workshop.
If the vehicle is driven in 4H or 4L mode
for too long, this indicator lamp flashes,
accompanied by an audible signal and the
display of a message indicating that the
transmission oil temperature is too high.
►
Select 2H mode, then wait for the warnings to
disappear before changing the mode.
If the warnings persist, visit a PEUGEOT
dealer
or a qualified workshop.
In cold weather, engaging modes 2H and
4H may not be possible. Reduce the
speed or stop the vehicle to select the mode.
6-speed manual gearbox
Engaging 5th or 6th gear
► Move the gear selector fully to the right to
engage 5th or 6th gear.
Failure to follow this instruction could
cause permanent damage to the gearbox
(inadvertent engagement of 3
rd or 4th gear). CarM an uals 2 .c o m
Page 77 of 164
75
Driving
6Engaging reverse gear
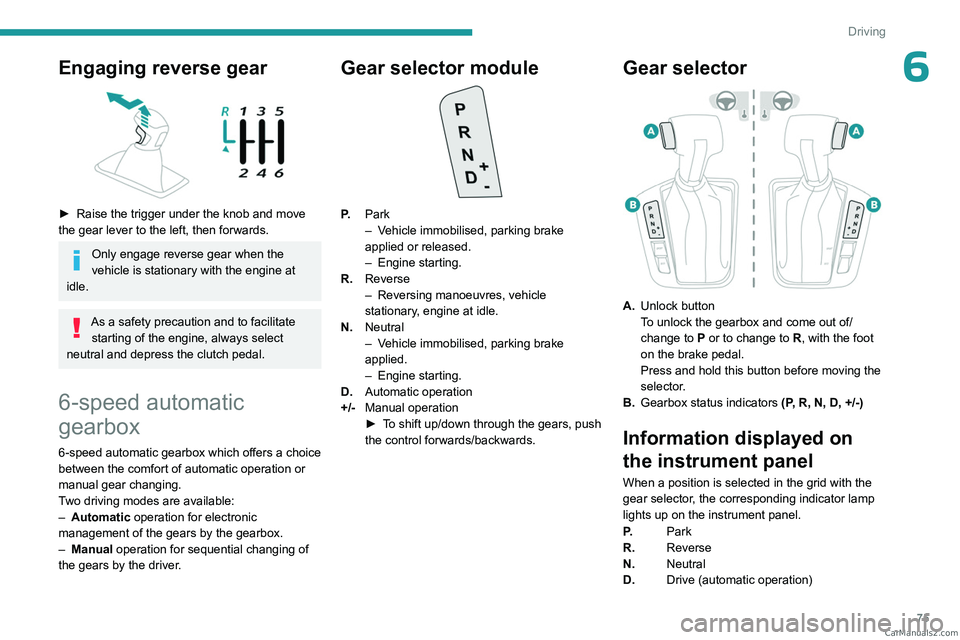
► Raise the trigger under the knob and move
the gear lever to the left, then forwards.
Only engage reverse gear when the
vehicle is stationary with the engine at
idle.
As a safety precaution and to facilitate starting of the engine, always select
neutral and depress the clutch pedal.
6-speed automatic
gearbox
6-speed automatic gearbox which offers a choice
between the comfort of automatic operation or
manual gear changing.
Two driving modes are available:
–
Automatic
operation for electronic
management of the gears by the gearbox.
–
Manual
operation for sequential changing of
the gears by the driver.
Gear selector module
P. Park
–
V ehicle immobilised, parking brake
applied or released.
–
Engine starting.
R. Reverse
–
Reversing manoeuvres, vehicle
stationary
, engine at idle.
N. Neutral
–
V
ehicle immobilised, parking brake
applied.
–
Engine starting.
D. Automatic operation
+/- Manual operation
►
T
o shift up/down through the gears, push
the control forwards/backwards.
Gear selector
A. Unlock button
To unlock the gearbox and come out of/
change to
P or to change to R, with the foot
on the brake pedal.
Press and hold this button before moving the
selector.
B. Gearbox status indicators (P, R, N, D, +/-)
Information displayed on
the instrument panel
When a position is selected in the grid with the
gear selector, the corresponding indicator lamp
lights up on the instrument panel.
P.Park
R. Reverse
N. Neutral
D. Drive (automatic operation) CarM an uals 2 .c o m