radio PEUGEOT LANDTREK 2023 Owners Manual
[x] Cancel search | Manufacturer: PEUGEOT, Model Year: 2023, Model line: LANDTREK, Model: PEUGEOT LANDTREK 2023Pages: 164, PDF Size: 6.1 MB
Page 5 of 164
3
Contents
Checks 100
AdBlue® (BlueHDi) 103
Maintenance 105
Free-wheeling 111
Advice on care and maintenance 111
8In the event of a breakdownWarning triangle 11 4
Fire extinguisher 11 4
Running out of fuel (Diesel) 11 5
Tool kit 11 5
Spare wheel 11 6
Changing a bulb 120
Fuses 124
12
V battery 124
Towing the vehicle 128
9Technical dataEngine technical data and towed loads 131
Petrol engines 132
Diesel engines 133
Dimensions 135
Identification markings 135
10Bluetooth® audio systemMenus 137
Steering mounted controls 138
Radio 138
Media 139
Telephone 139
11Peugeot Connect 10" TouchscreenFirst steps 141
Steering mounted controls 141
Menus 142
Navigation 143
Radio 143
Music player 143
Telephone 144
Applications 145
Settings 146
12Vehicle data recording and privacy
■
Alphabetical index CarM an uals 2 .c o m
Page 19 of 164
17
Dashboard instruments
1Trip reset
The reset is performed when the trip counter is
displayed.
► Press the control on the steering wheel and
select "Reinitialise".
Only the long trip can be reset; the short
trip is automatically reset after the vehicle
has been switched off for a few minutes.
Definitions
Range
(miles or km)Distance that can still be travelled with the
fuel remaining in the tank (based on the
average fuel consumption over the last few miles
(kilometres) travelled).
This value may vary following a change in driving
style or terrain, leading to a significant change in
current fuel consumption.
When the range falls below 19 miles (30
km),
dashes are displayed.
After filling with at least 5 litres of fuel, the range
is recalculated and is displayed if it exceeds 62
miles (100
km). Dashes appearing permanently in place of
numbers while driving indicates a malfunction.
Consult a PEUGEOT dealer or a qualified
workshop.
Average consumption
(mpg or l/100 km or km/l)
Calculated since the last trip computer reset.
Average speed
(mph or km/h)Calculated since the last trip computer
reset.
Distance travelled
(miles or km)Calculated since the last trip computer
reset.
Monochrome screen
Displays
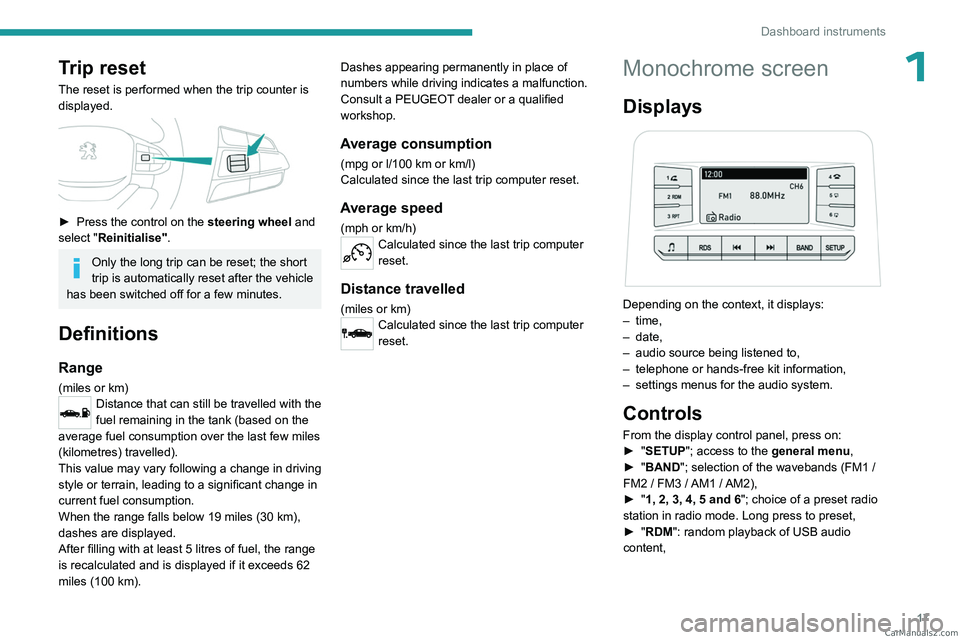
Depending on the context, it displays:
– time,
–
date,
–
audio source being listened to,
–
telephone or hands-free kit information,
–
settings menus for the audio system.
Controls
From the display control panel, press on:
► " SETUP"; access to the general menu,
►
"
BAND "; selection of the wavebands (FM1
/
FM2
/ FM3 / AM1 / AM2),
►
"
1, 2, 3, 4, 5 and 6"; choice of a preset radio
station in radio mode. Long press to preset,
►
"
RDM": random playback of USB audio
content, CarM an uals 2 .c o m
Page 20 of 164

18
Dashboard instruments
► "RDS"; selection of RDS mode (real-time
traffic information, automatic station tracking and
radio station titles),
►
"
RPT"; USB audio content repeat order,
► variation of a setting value, search for
a radio station or play next/previous for a
USB or Bluetooth
® source,
56► navigate between the menus
and the audio files for USB
playback,
► Audio; audio settings men u,
1► Answer; call in Bluetooth® mode,
4► End call; call in Bluetooth® mode.
For more information on the monochrome
screen, refer to the "Audio equipment and
telematics” section.
Touch screen
This system gives access to the following elements:
–
Permanent
display of the time.
–
Display and reminder of air conditioning
system settings.
–
V
ehicle functions and equipment setting
menus.
–
Audio system and telephone controls and
display of related information.
–
Display of visual manoeuvring aid functions
– Navigation system controls and
display of related information (depending on
version).
For safety reasons, always stop the
vehicle before performing operations
that require sustained attention.
Some functions are not accessible while
driving.
Recommendations
Do not use pointed objects on the touch screen.
Do not touch the touch screen with wet hands.
Use a soft, clean cloth to clean the touch screen.
Principles
Use the buttons indicated on the touch screen to
access the various menus.
After a few moments with no action on the second page, the first page is
displayed automatically.
To deactivate/activate a function, press the slider
that appears opposite the function. The slider
changes to orange to indicate that the function
is activated.
Return to the menu page.
Menus
It is possible to modify the appearance of
the touch screen by selecting a different
background and display mode ( Classic,
Sport or Technology ). Depending on the
selected mode, the menus can be displayed
in various locations and in different ways.
For more information on changing the
appearance of the touch screen, refer to the
Audio equipment and telematics section.
Example with the " Classic" display mode.
Media
Refer to the "Audio equipment and
telematics" section.
Radio
Refer to the "Audio equipment and
telematics" section.
Navigation
(Depending on version)
Refer to the "Audio equipment and telematics"
section.
Telephone
Refer to the "Audio equipment and
telematics" section.
Settings
Main system settings.
Vehicle settings CarM an uals 2 .c o m
Page 21 of 164

19
Dashboard instruments
1Activation, deactivation and settings for certain
functions.
File
Direct access to system content or USB
content.
Help
Access to system and vehicle usage
information.
Volume adjustment/Mute (short press).
Audio system on/off (long press).
Refer to the "Audio equipment and telematics"
section.
Information banners
Certain information is displayed permanently in
the touch screen banners.
Upper banner
– Time.
– Reminder of the information in the Radio,
Media
and Telephone menus.
–
Notifications.
–
Display and reminder of air conditioning
system settings.
–
Quick access to the
Settings for touch screen
brightness, call volume (telephone), Bluetooth
®
connection and media volume.
Lower banner
– Quick access to certain touch screen menus
(personalisation, Bluetooth, video, help, etc.).
–
Access to user profiles.
–
Access to voice recognition. CarM an uals 2 .c o m
Page 43 of 164
41
Ease of use and comfort
37.Retractable cup holder (press on it to
release)
8. USB socket and USB charger socket
9. Cigarette lighter/12
V (120 W) accessory
socket
10. Storage compartment
11 . Card holder
12. Cup holder and storage compartment
13. Front armrest with storage (depending on
version)
Ensure the retractable cup holder 7 is
clean before putting it back in its housing
- risk of jamming the mechanism.
Make sure you do not leave any item in
the passenger compartment which could
act like a magnifying glass under the effect of
the sun's rays and cause a fire - risk of fire or
damage to interior surfaces!
Glove box
► To open the glove box, lift the handle.
With the ignition on, the glove box is lit when
open.
Depending on version, it contains an adjustable
ventilation nozzle, distributing the same
conditioned air as the vents in the passenger
compartment.
Never drive with the glove box open
when a passenger is at the front. It may
cause injury during sharp deceleration!
Cigarette lighter/12 V
accessory socket(s)
► To use the cigarette lighter, press it in and
wait a few seconds until it pops out automatically.
►
T
o use a 12 V accessory (max. power:
120
W), remove the cigarette lighter and connect
a suitable adaptor.
You can use this socket to connect a telephone
charger, a bottle warmer, etc.
After use, put the cigarette lighter back into place
straight away.
The connection of an electrical device not approved by PEUGEOT, such as a
USB charger, may adversely affect the
operation of vehicle electrical systems,
causing faults such as poor radio reception or
interference with displays in the screens.
USB socket(s)
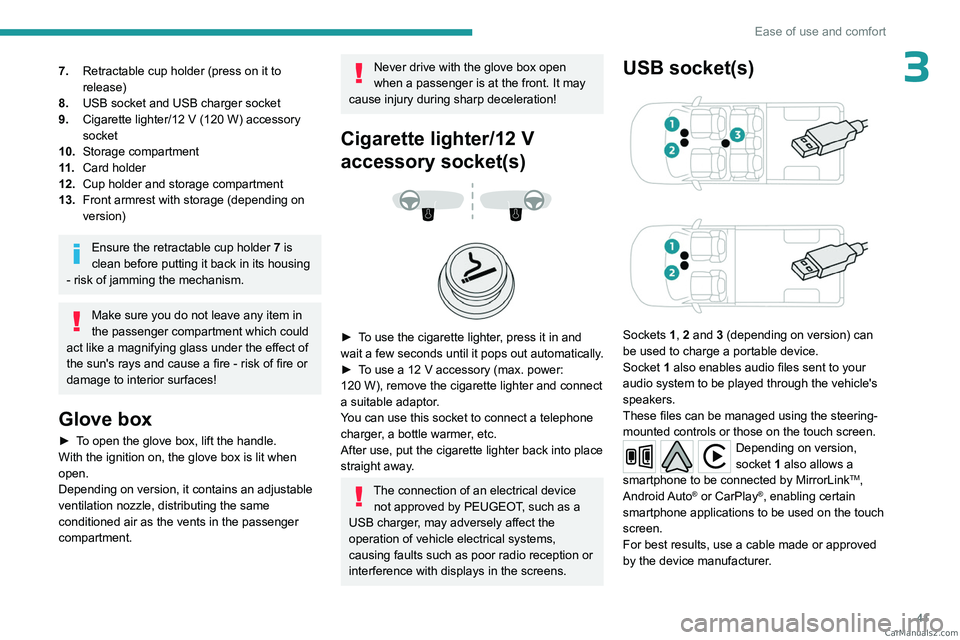
Sockets 1, 2 and 3 (depending on version) can
be used to charge a portable device.
Socket
1 also enables audio files sent to your
audio system to be played through the vehicle's
speakers.
These files can be managed using the steering-
mounted controls or those on the touch screen.
Depending on version,
socket 1 also allows a
smartphone to be connected by MirrorLink
TM,
Android Auto® or CarPlay®, enabling certain
smartphone applications to be used on the touch
screen.
For best results, use a cable made or approved
by the device manufacturer. CarM an uals 2 .c o m
Page 47 of 164

45
Ease of use and comfort
3Load retaining partition
On the structure of the loading bay, behind the
rear window, a vertical separation protects the
driver and passengers against the risk of load
movement.
Bars separate the loading area from the cab.
Retractable hooks, integrated into the upper bar,
are used to secure the loads in the loading bay.
Recommendations on
loading
The weight of the load must comply with the Gross Train Weight (GTW).
For more information on Engine technical
data and towed loads , refer to the
corresponding section.
Make sure that the size, shape and
volume of the loads carried are
compatible with the highway code and safety
regulations and do not impair the driver’s field
of vision.
The load must be evenly distributed in the loading area so as not to interfere
with driving the vehicle.
Place the load close to the side wall panels,
or push it against the side wall panels
between the wheel arches.
However, it is recommended that heavy
objects are placed as close to the cab as
possible as a precaution in case of sharp
braking.
Secure all loads firmly using the stowing
rings present on the side panels of the
loading bay.
For more information on the Loading bay
fittings, and in particular on the stowing
rings, refer to the corresponding section.
To avoid the risk of injury or accident, the load must be made stable so that it
cannot slide, tip over, fall or be projected. To
do this, use only retaining straps that conform
to current standards (DIN, for example).
For more information on putting straps in
place, refer to the manufacturer’s user guide.
To prevent the load from sliding, there must
not be any empty spaces between the load
items and the vehicle wall panels.
As well as the straps, optimise the stability
of the load with stable handling equipment
(wedges, rigid blocks of wood or padding).
When washing the vehicle, never clean
the interior directly with a water jet.
12 V accessory socket
(Depending on version)
► To connect a 12 V accessory (maximum
power: 120 W), lift the cover and plug in a
suitable adaptor.
►
Switch the ignition on.
The connection of an electrical device not approved by PEUGEOT, such as a
USB charger, may adversely affect the
operation of vehicle electrical systems,
causing faults such as poor radio reception or
interference with displays in the screens. CarM an uals 2 .c o m
Page 55 of 164
53
Safety
5General safety
recommendations
On and off-road driving
This commercial and all-terrain type
vehicle can be driven on roads and rough
terrain. The higher ground clearance and
centre of gravity make this vehicle more
likely to tip over. Refer to the Driving
recommendations.
Do not remove the labels attached in
different places on your vehicle. They
include safety warnings as well as
identification information for the vehicle.
For all work on your vehicle, use a
qualified workshop that has the technical
information, skills and equipment required, all
of which a PEUGEOT dealer is able to
provide.
Depending on country regulations,
certain safety equipment may be
mandatory: high visibility safety vests,
warning triangles, breathalysers, spare bulbs,
spare fuses, fire extinguisher, first aid kit, mud
flaps at the rear of the vehicle, etc.
Installing electrical accessories:
– The fitting of electrical equipment or
accessories not approved by PEUGEOT
may
cause excessive current consumption and
faults and failures with the electrical system
of your vehicle. Contact a PEUGEOT dealer
for information on the range of approved
accessories.
–
As a safety measure, access to the
diagnostic socket, used for the vehicle's
electronic systems, is reserved strictly for
PEUGEOT
dealers or qualified workshops,
equipped with the special tools required (risk
of malfunctions of the vehicle's electronic
systems that could cause breakdowns or
serious accidents). The Manufacturer cannot
be held responsible if this advice is not
followed.
–
Any modification or adaptation not intended
or authorised by PEUGEOT
or carried out
without meeting the technical requirements
defined by the Manufacturer will result in the
suspension of the commercial warranty.
Installation of accessory radio
communication transmitters
Before installing a radio communication
transmitter with an external aerial, you must
without fail contact a PEUGEOT dealer for
the specification of transmitters which can
be fitted (frequency, maximum power, aerial
position, specific installation requirements),
in line with the Vehicle Electromagnetic
Compatibility Directive (2004/104/EC).
Declarations of conformity for radio
equipment
The relevant certificates are available on the
brand website:
http://public.servicebox.peugeot.com/APddb/
Operating speed thresholds
The speed threshold values, for the
operation of certain systems, are given for
information purposes only. The thresholds
may be different under actual conditions of
use of the vehicle.
Hazard warning lamps
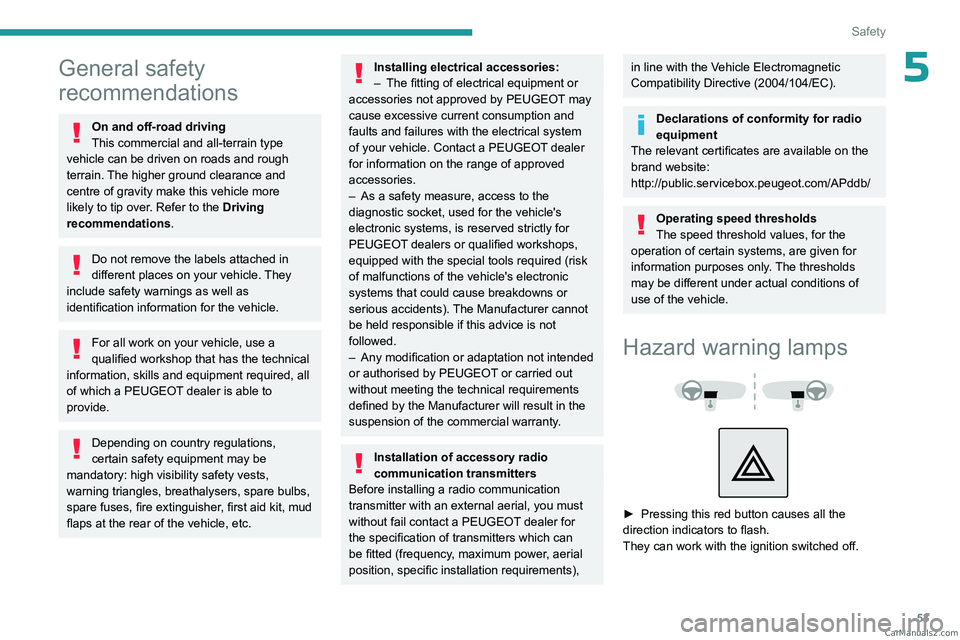
► Pressing this red button causes all the
direction indicators to flash.
They can work with the ignition switched off. CarM an uals 2 .c o m
Page 108 of 164
106
Practical information
Daily checks
Check that all vehicle lamps (front and
rear) are working properly.
Check the condition of the door mirrors and
the adjustment controls.
Check that all the doors can be opened,
closed and locked correctly.
Regularly check all levels, the condition of the
tyres and the bodywork.
Monthly checks
Check:
–
The engine coolant level.
–
The absence of leaks on all the pipes and
hoses visible on the vehicle as well as the
tanks.
–
The proper functioning of the elements of
the: •
Heating and ventilation system.
•
Air conditioning system.
•
Parking brake (application and release).
•
Horn.
–
The tightening of the wheel nuts (if
necessary
, retighten them to the specific
tightening values).
–
The good condition of the wipers.
–
The absence of significant play in the
steering wheel and steering.
–
The correct travel of the brake pedal as
well as the clutch pedal.
General recommendations
related to maintenance
operations
Electronic engine management
computer
The electronic computer is not completely
waterproof. When performing maintenance
in the rain or washing the engine, it must be
protected from water.
Never remove or disconnect any part of the
electronic injection system to avoid the entry
of moisture, oil or any other foreign body.
Do not install a radio antenna or other
equipment likely to generate interference near
the electronic computer.
Do not expose the electronic computer to a
temperature higher than 105°C.
Before any welding operation on the vehicle,
it is essential to disconnect the electronic
computer - risk of damage to the electronic
system components.
Fuel system
All work on the fuel system must be
carried out only by a PEUGEOT dealer or a
qualified workshop.
Electrical system
Never:
– disconnect the battery cables or the
electrical wiring harness connectors when the
engine is running.
–
reverse the polarities when reconnecting
the battery (risk of damage to electronic
components).
–
pierce the insulation of the electrical wires
during an electrical check or diagnosis.
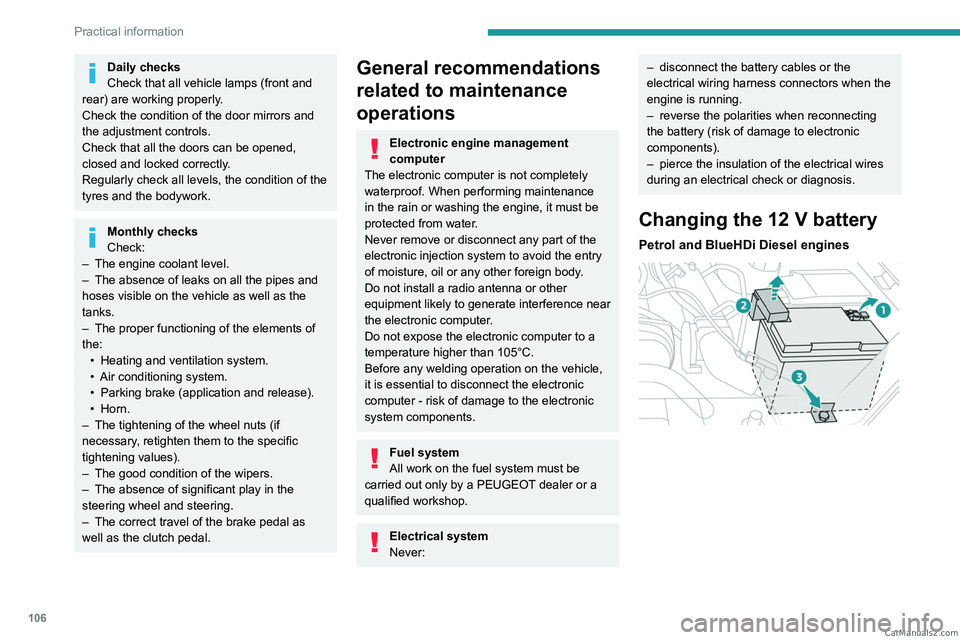
Changing the 12 V battery
Petrol and BlueHDi Diesel engines
CarM an uals 2 .c o m
Page 130 of 164
128
In the event of a breakdown
► Switch off all electricity-consuming devices
(audio system, wipers, lamps, etc.).
►
Switch off the ignition and wait for 4
minutes.
After accessing the battery, it is only necessary
to disconnect the (+) terminal.
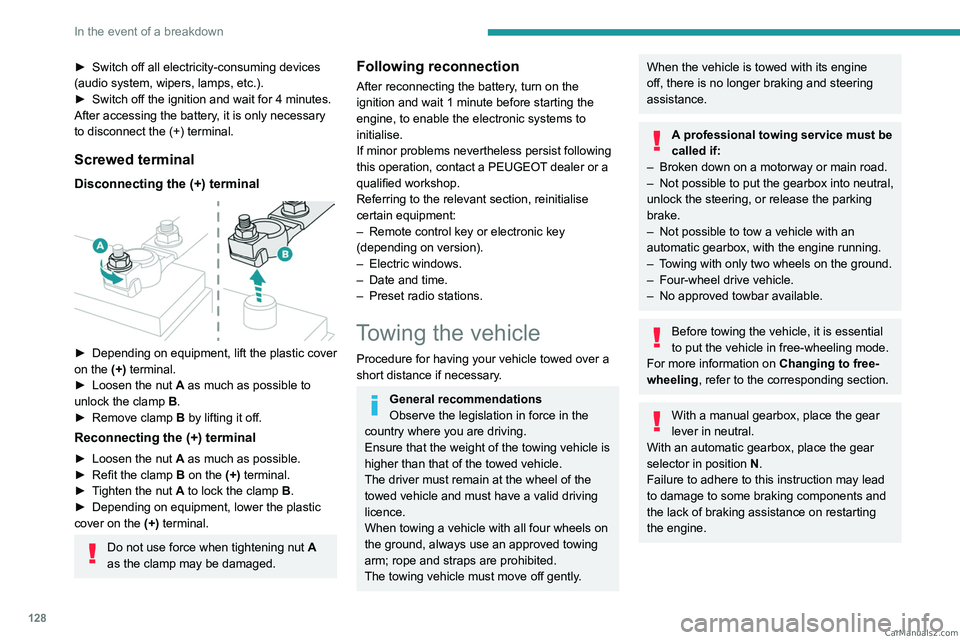
Screwed terminal
Disconnecting the (+) terminal
► Depending on equipment, lift the plastic cover
on the (+) terminal.
►
Loosen the nut
A as much as possible to
unlock the clamp B.
►
Remove clamp
B
by lifting it off.
Reconnecting the (+) terminal
► Loosen the nut A as much as possible.
► Refit the clamp B on the (+) terminal.
►
T
ighten the nut A to lock the clamp B.
►
Depending on equipment, lower the plastic
cover on the
(+) terminal.
Do not use force when tightening nut A
as the clamp may be damaged.
Following reconnection
After reconnecting the battery, turn on the
ignition and wait 1 minute before starting the
engine, to enable the electronic systems to
initialise.
If minor problems nevertheless persist following
this operation, contact a PEUGEOT dealer or a
qualified workshop.
Referring to the relevant section, reinitialise
certain equipment:
–
Remote control key or electronic key
(depending on version).
–
Electric windows.
–
Date and time.
–
Preset radio stations.
Towing the vehicle
Procedure for having your vehicle towed over a
short distance if necessary.
General recommendations
Observe the legislation in force in the
country where you are driving.
Ensure that the weight of the towing vehicle is
higher than that of the towed vehicle.
The driver must remain at the wheel of the
towed vehicle and must have a valid driving
licence.
When towing a vehicle with all four wheels on
the ground, always use an approved towing
arm; rope and straps are prohibited.
The towing vehicle must move off gently.
When the vehicle is towed with its engine
off, there is no longer braking and steering
assistance.
A professional towing service must be
called if:
–
Broken down on a motorway or main road.
–
Not possible to put
the gearbox into neutral,
unlock the steering, or release the parking
brake.
–
Not possible to tow a vehicle with an
automatic gearbox, with the engine running.
–
T
owing with only two wheels on the ground.
–
Four-wheel drive vehicle.
–
No approved towbar available.
Before towing the vehicle, it is essential
to put the vehicle in free-wheeling mode.
For more information on Changing to free-
wheeling , refer to the corresponding section.
With a manual gearbox, place the gear
lever in neutral.
With an automatic gearbox, place the gear
selector in position N.
Failure to adhere to this instruction may lead
to damage to some braking components and
the lack of braking assistance on restarting
the engine. CarM an uals 2 .c o m
Page 139 of 164
137
Bluetooth® audio system
10Bluetooth® audio system
The different functions and settings described vary according to the version
and configuration of your vehicle.
As a safety measure and because it requires sustained attention by the driver,
the pairing of a Bluetooth
® mobile telephone
with the Bluetooth® hands-free system of your
audio system must be done with the vehicle
stationary and the ignition on.
Your audio system is coded in such a way that it will only operate in your
vehicle.
All work on the system must be carried out
exclusively by a dealer or qualified workshop,
to avoid any risk of electrocution, fire or
mechanical faults.
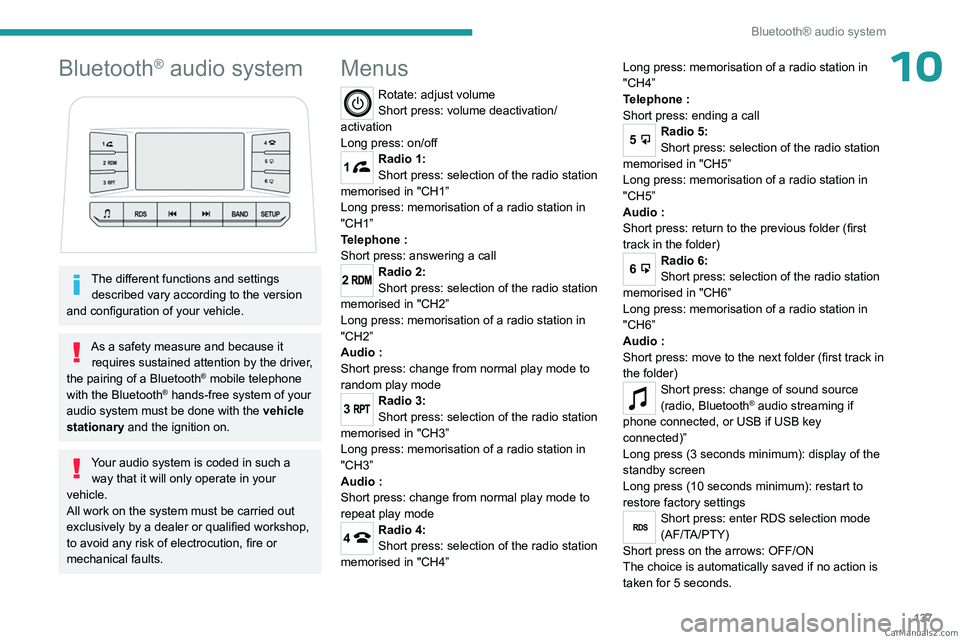
Menus
Rotate: adjust volume
Short press: volume deactivation/
activation
Long press: on/off
1Radio 1:
Short press: selection of the radio station
memorised in "CH1”
Long press: memorisation of a radio station in
"CH1”
Telephone
:
Short press: answering a call
2Radio 2:
Short press: selection of the radio station
memorised in "CH2”
Long press: memorisation of a radio station in
"CH2”
Audio
:
Short press: change from normal play mode to
random play mode
3Radio 3:
Short press: selection of the radio station
memorised in "CH3”
Long press: memorisation of a radio station in
"CH3”
Audio
:
Short press: change from normal play mode to
repeat play mode
4Radio 4:
Short press: selection of the radio station
memorised in "CH4” Long press: memorisation of a radio station in
"CH4”
Telephone
:
Short press: ending a call
5Radio 5:
Short press: selection of the radio station
memorised in "CH5”
Long press: memorisation of a radio station in
"CH5”
Audio
:
Short press: return to the previous folder (first
track in the folder)
6Radio 6:
Short press: selection of the radio station
memorised in "CH6”
Long press: memorisation of a radio station in
"CH6”
Audio
:
Short press: move to the next folder (first track in
the folder)
Short press: change of sound source
(radio, Bluetooth® audio streaming if
phone connected, or USB if USB key
connected)”
Long press (3 seconds minimum): display of the
standby screen
Long press (10 seconds minimum): restart to
restore factory settings
RDSShort press: enter RDS selection mode
(AF/TA/PTY)
Short press on the arrows: OFF/ON
The choice is automatically saved if no action is
taken for 5 seconds. CarM an uals 2 .c o m