Break Peugeot Partner 2020 User Guide
[x] Cancel search | Manufacturer: PEUGEOT, Model Year: 2020, Model line: Partner, Model: Peugeot Partner 2020Pages: 260, PDF Size: 7.76 MB
Page 107 of 260
105
Driving
6Under-inflation alert
This is signalled by the fixed illumination of this warning lamp, accompanied by an
audible signal and, depending on equipment, the
display of a message.
►
Reduce speed immediately
, avoid excessive
steering movements and avoid sudden braking.
►
Stop the vehicle as soon as it is safe to do
so.
The loss of pressure detected does not always cause visible bulging of the tyre.
Do not rely on just a visual check.
►
Using a compressor
, such as the one in
the temporary puncture repair kit, check the
pressures of the four tyres when cold.
►
If it is not possible to make this check
immediately
, drive carefully at reduced speed.
►
In the event of a puncture, use the
temporary puncture repair kit or the spare wheel
(depending on equipment).
The alert is kept active until the system is reinitialised.
Reinitialisation
Reinitialise the system after adjusting one or
more tyre pressures and after changing one or
more wheels.
Before reinitialising the system, make
sure that the pressures of the four tyres
are correct for the conditions of use of the
vehicle and conform to the values written on
the tyre pressure label.
Check the pressures of the four tyres before
performing the reinitialisation.
The system does not advise if a pressure is
incorrect at the time of reinitialisation.
Without audio system
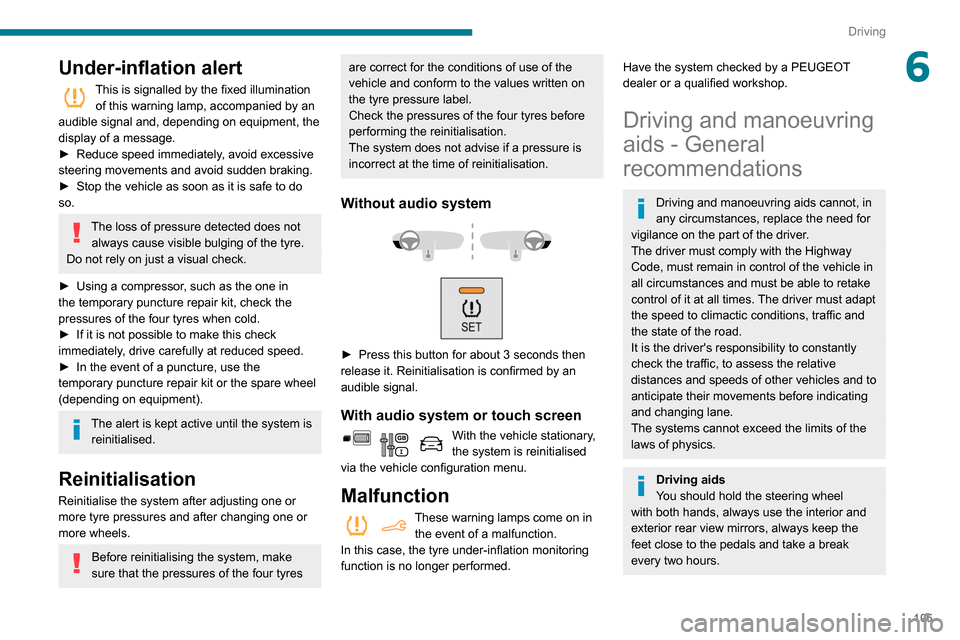
► Press this button for about 3 seconds then
release it. Reinitialisation is confirmed by an
audible signal.
With audio system or touch screen
With the vehicle stationary,
the system is reinitialised
via the vehicle configuration menu.
Malfunction
These warning lamps come on in the event of a malfunction.
In this case, the tyre under-inflation monitoring
function is no longer performed.
Have the system checked by a PEUGEOT
dealer or a qualified workshop.
Driving and manoeuvring
aids - General
recommendations
Driving and manoeuvring aids cannot, in
any circumstances, replace the need for
vigilance on the part of the driver.
The driver must comply with the Highway
Code, must remain in control of the vehicle in
all circumstances and must be able to retake
control of it at all times. The driver must adapt
the speed to climactic conditions, traffic and
the state of the road.
It is the driver's responsibility to constantly
check the traffic, to assess the relative
distances and speeds of other vehicles and to
anticipate their movements before indicating
and changing lane.
The systems cannot exceed the limits of the
laws of physics.
Driving aids
You should hold the steering wheel
with both hands, always use the interior and
exterior rear view mirrors, always keep the
feet close to the pedals and take a break
every two hours.
Page 118 of 260
11 6
Driving
Cruise control remains active after
changing gear regardless of the gearbox
type.
When the driver attempts to reactivate
cruise control which was paused, the
message "Activation not possible, unsuitable
conditions" is briefly displayed if reactivation
is not possible (safety conditions not met).
Modifying the programmed speed setting
with the Speed Limit Recognition and
Recommendation function
► Press 5 to accept the speed suggested by
the function in the instrument panel, then press
again to confirm.
To prevent any sudden acceleration or deceleration of the vehicle, select a
speed setting fairly close to the current speed
of the vehicle.
Changing the inter-vehicle distance
► Press 6 to display the distance setting
thresholds (“Distant”, “Normal”, “Close“), then
press again to select a threshold.
After a few seconds, the option is accepted and
will be memorised when the ignition is switched
off.
Temporarily exceeding the speed setting
► Press the accelerator pedal fully . Distance
monitoring and cruise control are deactivated as long as acceleration is maintained. "Cruise
control suspended" is displayed.
System deactivation
► Turn knob 1 upwards to the OFF position.
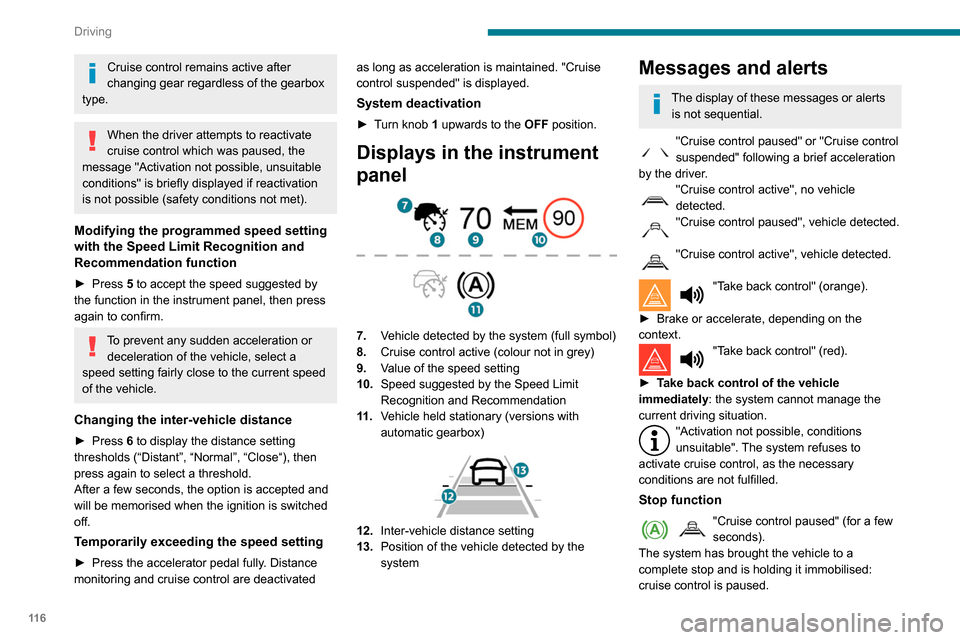
Displays in the instrument
panel
7.
Vehicle detected by the system (full symbol)
8. Cruise control active (colour not in grey)
9. Value of the speed setting
10. Speed suggested by the Speed Limit
Recognition and Recommendation
11 . Vehicle held stationary (versions with
automatic gearbox)
12.Inter-vehicle distance setting
13. Position of the vehicle detected by the
system
Messages and alerts
The display of these messages or alerts
is not sequential.
"Cruise control paused" or "Cruise control
suspended" following a brief acceleration
by the driver.
"Cruise control active", no vehicle
detected.
"Cruise control paused", vehicle detected.
"Cruise control active", vehicle detected.
"Take back control" (orange).
►
Brake or accelerate, depending on the
context.
"Take back control" (red).
►
T
ake back control of the vehicle
immediately: the system cannot manage the
current driving situation.
"Activation not possible, conditions
unsuitable". The system refuses to
activate cruise control, as the necessary
conditions are not fulfilled.
Stop function
"Cruise control paused" (for a few
seconds).
The system has brought the vehicle to a
complete stop and is holding it immobilised:
cruise control is paused.
The driver must accelerate to move off again,
then reactivate cruise control.
Operating limits
Cruise control operates by day and night, in fog
or moderate rainfall.
Certain situations cannot be managed by the
system and require driver intervention.
Elements not detected by the system:
– Pedestrians, some cyclists, animals.
– Stationary vehicles (traffic jam, breakdown,
etc.).
– Vehicles crossing your lane.
– Vehicles driving in the opposite direction.
Situations in which the driver must pause the
cruise control system:
– Vehicles in a tight bend.
– When approaching a roundabout.
Page 119 of 260
11 7
Driving
6The driver must accelerate to move off again,
then reactivate cruise control.
Operating limits
Cruise control operates by day and night, in fog
or moderate rainfall.
Certain situations cannot be managed by the
system and require driver intervention.
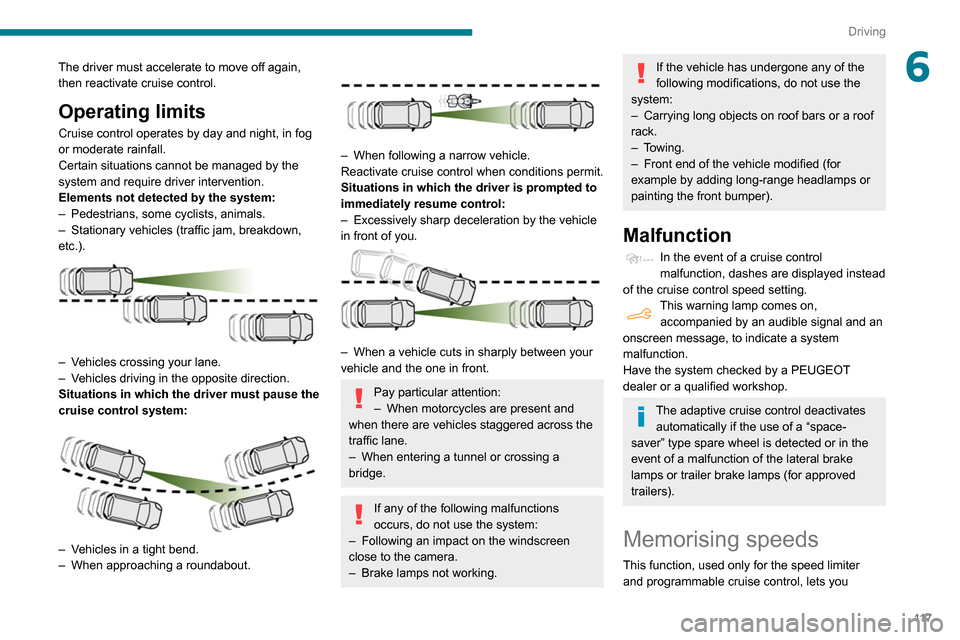
Elements not detected by the system:
–
Pedestrians, some cyclists, animals.
–
Stationary vehicles (traffic jam, breakdown,
etc.).
– Vehicles crossing your lane.
– V ehicles driving in the opposite direction.
Situations in which the driver must pause the
cruise control system:
– Vehicles in a tight bend.
– When approaching a roundabout.
– When following a narrow vehicle.
Reactivate cruise control when conditions permit.
Situations in which the driver is prompted to
immediately resume control:
–
Excessively sharp deceleration by the vehicle
in front of you.
– When a vehicle cuts in sharply between your
vehicle and the one in front.
Pay particular attention:
– When motorcycles are present and
when there are vehicles staggered across the
traffic lane.
–
When entering a tunnel or crossing a
bridge.
If any of the following malfunctions
occurs, do not use the system:
–
Following an impact on the windscreen
close to the camera.
–
Brake lamps not working.
If the vehicle has undergone any of the
following modifications, do not use the
system:
–
Carrying long objects on roof bars or a roof
rack.
–
Towing.
–
Front end of the vehicle modified (for
example by adding long-range headlamps or
painting the front bumper).
Malfunction
In the event of a cruise control
malfunction, dashes are displayed instead
of the cruise control speed setting.
This warning lamp comes on, accompanied by an audible signal and an
onscreen message, to indicate a system
malfunction.
Have the system checked by a PEUGEOT
dealer or a qualified workshop.
The adaptive cruise control deactivates automatically if the use of a “space-
saver” type spare wheel is detected or in the
event of a malfunction of the lateral brake
lamps or trailer brake lamps (for approved
trailers).
Memorising speeds
This function, used only for the speed limiter
and programmable cruise control, lets you
Page 128 of 260
126
Driving
The speed of the vehicle must be between 40
and 87 mph (65 and 140 km/h) inclusive.
These functions are especially suitable for
driving on motorways and main roads.
For more information on the Active Lane
Keeping Assistance and Blind Spot
Monitoring System , refer to the corresponding
sections.
This system is a driving aid which cannot, in any circumstances, replace
the need for vigilance on the part of the driver.
Distraction detection
Refer to the General recommendations on the
use of driving and manoeuvring aids .
Take a break in case of feeling tired or at least
every 2 hours.
Depending on version, the function comprises
either the "Driver Attention Alert" system alone
or combined with the "Driver Attention Alert by
camera" system.
These systems are in no way designed to keep the driver awake or to prevent
the driver from falling asleep at the wheel.
It is the driver’s responsibility to stop if feeling
tired.
Activation/Deactivation
The function is activated or deactivated via the vehicle
configuration menu.
The state of the system stays in the memory
when the ignition is switched off.
Driver Attention Alert
The system triggers an alert as soon as it detects that the driver has not taken a
break after two hours of driving at a speed above
40 mph (65
km/h).
This alert is issued via the display of a message
encouraging you to take a break, accompanied
by an audible signal.
If the driver does not follow this advice, the alert
is repeated hourly until the vehicle is stopped.
The system resets itself if one of the following
conditions is met:
–
engine running, the vehicle has been
stationary for more than 15 minutes,
–
the ignition has been switched off for a few
minutes,
–
the driver's seat belt is unfastened and their
door is opened.
As soon as the speed of the vehicle drops below 40 mph (65 km/h), the
system goes into standby.
The driving time is counted again once the
speed is above 40 mph (65
km/h).
Driver Attention Alert by
camera
Depending on version, the "Driver Attention Alert"
may be combined with the "Driver Attention Alert
by camera".
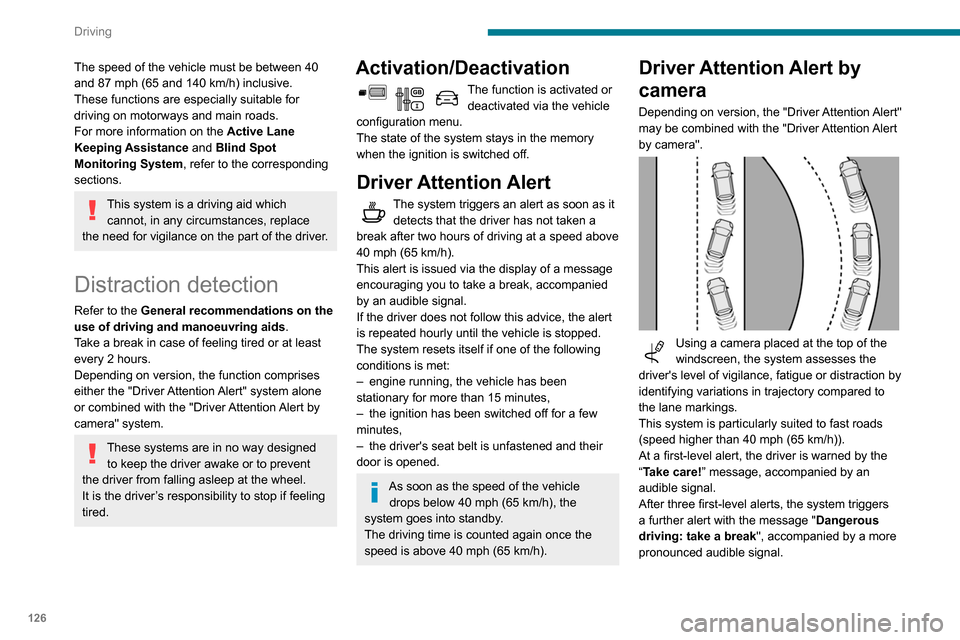
Using a camera placed at the top of the
windscreen, the system assesses the
driver's level of vigilance, fatigue or distraction by
identifying variations in trajectory compared to
the lane markings.
This system is particularly suited to fast roads
(speed higher than 40 mph (65
km/h)).
At a first-level alert, the driver is warned by the
“Take care! ” message, accompanied by an
audible signal.
After three first-level alerts, the system triggers
a further alert with the message " Dangerous
driving: take a break", accompanied by a more
pronounced audible signal.
The following situations may interfere with the operation of the system or
prevent it from working:
– poor visibility (inadequate lighting of the
road, falling snow, heavy rain, dense fog,
etc.);
– dazzle (headlamps of an oncoming vehicle,
low sun, reflections on a damp road, leaving a
tunnel, alternating shade and light, etc.);
– windscreen area located in front of the
camera: dirty, misted, frost-covered, snow-
covered, damaged or covered by a sticker.
– lane markings absent, worn, hidden (snow,
mud) or multiple (roadworks, etc.);
– close to the vehicle ahead (lane markings
not detected);
– roads that are narrow, winding, etc.
In certain driving conditions (poor road
surface or strong winds), the system may
give alerts independent of the driver's level of
vigilance.
The following situations may interfere with the operation of the system or
prevent it from working:
– lane markings absent, worn, hidden (snow,
mud) or multiple (roadworks),
– close to the vehicle ahead (lane markings
not detected),
– roads that are narrow, winding, etc.
Page 149 of 260
147
Practical information
7Precautions for use
AdBlue® is a urea-based solution. This fluid is
non-flammable, colourless and odourless (when
kept in a cool place).
In the event of contact with the skin, wash the
affected area with soap and running water. In the
event of contact with the eyes, immediately rinse
the eyes with large amounts of water or with an
eye wash solution for at least 15 minutes. Seek
medical attention if you feel a persistent burning
sensation or irritation.
If swallowed, immediately wash out the mouth
with clean water and then drink plenty of water.
In certain conditions (high temperature, for
example), the risk of release of ammonia cannot
be excluded: do not inhale the fluid. Ammonia
vapours have an irritant effect on mucous
membranes (eyes, nose and throat).
Store AdBlue® out of the reach of
children, in its original container.
Procedure
Before starting the top-up procedure, ensure that
the vehicle is parked on a flat and level surface.
In wintry conditions, ensure that the temperature
of the vehicle is above -11
°C. Otherwise the
AdBlue
® may be frozen and so cannot be poured
into its tank. Park the vehicle in a warmer area
for a few hours to allow the top-up to be carried
out.
Never put the AdBlue® into the Diesel
fuel tank.
If any AdBlue® is splashed, or if there are
any spillages on the bodywork, rinse
immediately with cold water or wipe with a
damp cloth.
If the fluid has crystallised, clean it off using a
sponge and hot water.
Important: in the event of a top-up after
a breakdown because of a lack of
AdBlue, it is essential to wait around 5
minutes before switching on the ignition,
without opening the driver’s door,
unlocking the vehicle, introducing the key
into the ignition switch, or introducing the
key of the “Keyless Entry and Starting
”
system into the passenger compartment
.
Switch on the ignition, then wait for 10
seconds before starting the engine.
►
Switch off the ignition and remove the key
from the switch to switch off the engine.
or
►
With Keyless Entry and Starting, press the
"
START/STOP" button to switch off the engine.
► With the vehicle unlocked and the fuel filler
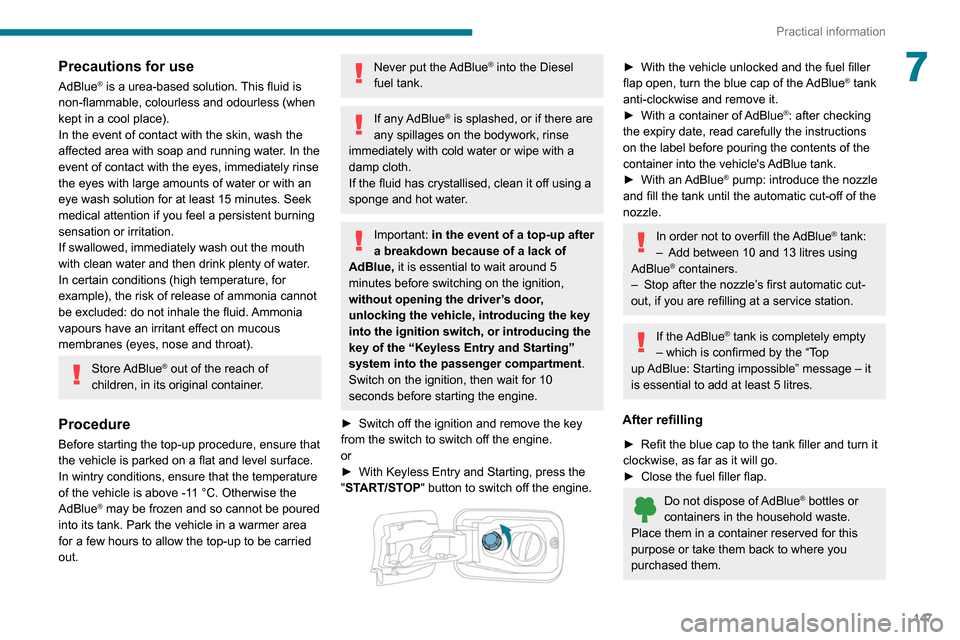
flap open, turn the blue cap of the AdBlue® tank
anti-clockwise and remove it.
►
With a container of
AdBlue
®: after checking
the expiry date, read carefully the instructions
on the label before pouring the contents of the
container
into the vehicle's AdBlue tank.
►
With an
AdBlue® pump: introduce the nozzle
and fill the tank until the automatic cut-off of the
nozzle.
In order not to overfill the AdBlue® tank:
–
Add between 10 and 13 litres using
AdBlue® containers.
–
Stop after the nozzle’ s first automatic cut-
out, if you are refilling at a service station.
If the AdBlue® tank is completely empty
– which is confirmed by the “Top
up
AdBlue: Starting impossible” message – it
is essential to add at least 5 litres.
After refilling
► Refit the blue cap to the tank filler and turn it
clockwise, as far as it will go.
►
Close the fuel filler flap.
Do not dispose of AdBlue® bottles or
containers in the household waste.
Place them in a container reserved for this
purpose or take them back to where you
purchased them.
Page 152 of 260
150
In the event of a breakdown
Running out of fuel
(Diesel)
On vehicles fitted with Diesel engines, the fuel
system must be primed if you run out of fuel.
If the engine does not start first time, do not keep
trying, but start the procedure again from the
beginning.
For more information on Misfuel
prevention (Diesel), refer to the
corresponding section.
With 1.6 BlueHDi (Euro 6.1)
► Switch on the ignition (without starting the
engine).
►
W
ait around 6 seconds and switch off the
ignition.
►
Repeat the operation 10
times.
►
Operate the starter motor to start the engine.
If the engine does not start at the first attempt,
do not keep trying, but restart the procedure.
With 1.5 BlueHDi (Euro 6.2/6.3)
► Switch on the ignition (without starting the
engine).
►
W
ait around 1 minute and switch off the
ignition.
►
Operate the starter motor to start the engine.
If the engine does not start at the first attempt,
do not keep trying, but restart the procedure.
Non-BlueHDi engines
► Open the bonnet and then, if necessary ,
unclip the cover to access the priming pump.
► Operate the priming pump repeatedly
until resistance is felt (resistance may be
felt at the first press).
►
Operate the starter motor to start the engine
(if the engine does not start at the first attempt,
wait around 15 seconds before trying again).
►
If the engine does not start after a few
attempts, operate the priming pump again, then
the starter motor
.
►
Put the cover back in place and clip it in, then
close the bonnet.
Tool kit
► For easier access, move the seat(s) forward.
Accessing the tools
With a temporary puncture repair kit
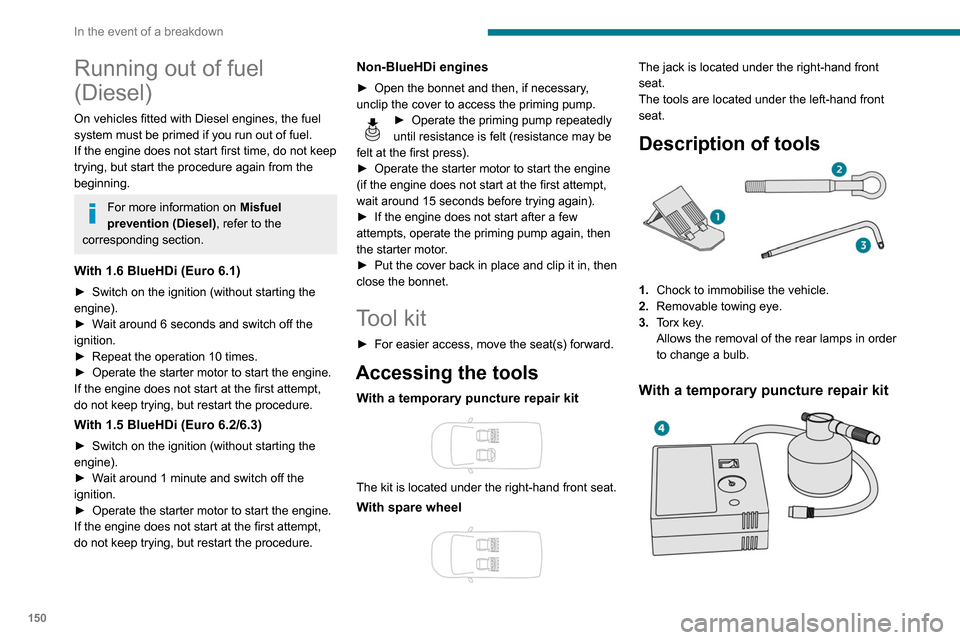
The kit is located under the right-hand front seat.
With spare wheel
The jack is located under the right-hand front
seat.
The tools are located under the left-hand front
seat.
Description of tools
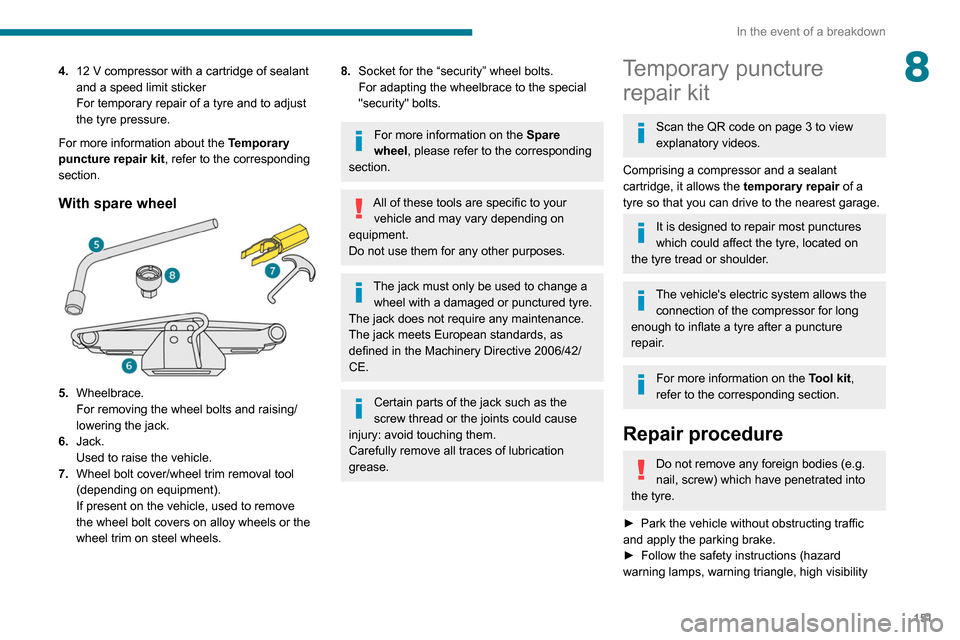
1. Chock to immobilise the vehicle.
2. Removable towing eye.
3. Torx key.
Allows the removal of the rear lamps in order
to change a bulb.
With a temporary puncture repair kit
4.12 V compressor with a cartridge of sealant
and a speed limit sticker
For temporary repair of a tyre and to adjust
the tyre pressure.
For more information about the Temporary
puncture repair kit, refer to the corresponding
section.
With spare wheel
5. Wheelbrace.
For removing the wheel bolts and raising/
lowering the jack.
6. Jack.
Used to raise the vehicle.
7. Wheel bolt cover/wheel trim removal tool
(depending on equipment).
If present on the vehicle, used to remove
the wheel bolt covers on alloy wheels or the
wheel trim on steel wheels.
Page 153 of 260
151
In the event of a breakdown
84.12 V compressor with a cartridge of sealant
and a speed limit sticker
For temporary repair of a tyre and to adjust
the tyre pressure.
For more information about the Temporary
puncture repair kit, refer to the corresponding
section.
With spare wheel
5. Wheelbrace.
For removing the wheel bolts and raising/
lowering the jack.
6. Jack.
Used to raise the vehicle.
7. Wheel bolt cover/wheel trim removal tool
(depending on equipment).
If present on the vehicle, used to remove
the wheel bolt covers on alloy wheels or the
wheel trim on steel wheels.
8.Socket for the “security” wheel bolts.
For adapting the wheelbrace to the special
"security" bolts.
For more information on the Spare
wheel, please refer to the corresponding
section.
All of these tools are specific to your vehicle and may vary depending on
equipment.
Do not use them for any other purposes.
The jack must only be used to change a wheel with a damaged or punctured tyre.
The jack does not require any maintenance.
The jack meets European standards, as
defined in the Machinery Directive 2006/42/
CE.
Certain parts of the jack such as the
screw thread or the joints could cause
injury: avoid touching them.
Carefully remove all traces of lubrication
grease.
Temporary puncture repair kit
Scan the QR code on page 3 to view
explanatory videos.
Comprising a compressor and a sealant
cartridge, it allows the temporary repair of a
tyre so that you can drive to the nearest garage.
It is designed to repair most punctures
which could affect the tyre, located on
the tyre tread or shoulder.
The vehicle's electric system allows the connection of the compressor for long
enough to inflate a tyre after a puncture
repair.
For more information on the Tool kit,
refer to the corresponding section.
Repair procedure
Do not remove any foreign bodies (e.g.
nail, screw) which have penetrated into
the tyre.
►
Park the vehicle without obstructing traffic
and apply the parking brake.
►
Follow the safety instructions (hazard
warning lamps, warning triangle, high visibility
Page 154 of 260
152
In the event of a breakdown
vest, etc.) according to the legislation in force in
the country of driving.
►
Switch off the ignition.
►
Remove the valve cap from the tyre to be
repaired, and place it in a clean area.
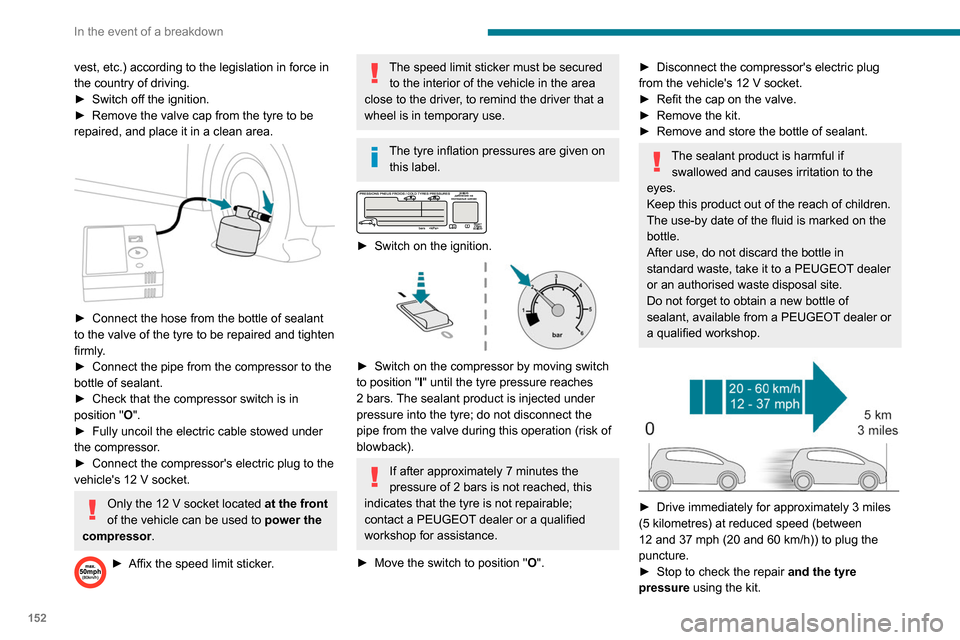
► Connect the hose from the bottle of sealant
to the valve of the tyre to be repaired and tighten
firmly
.
►
Connect the pipe from the compressor to the
bottle of sealant.
►
Check that the compressor switch is in
position
"O".
►
Fully uncoil the electric cable stowed under
the compressor
.
►
Connect the compressor's electric plug to the
vehicle's 12
V socket.
Only the 12 V socket located at the front
of the vehicle can be used to power the
compressor .
► Affix the speed limit sticker .
The speed limit sticker must be secured
to the interior of the vehicle in the area
close to the driver, to remind the driver that a
wheel is in temporary use.
The tyre inflation pressures are given on this label.
► Switch on the ignition.
► Switch on the compressor by moving switch
to position " I" until the tyre pressure reaches
2 bars. The sealant product is injected under
pressure into the tyre; do not disconnect the
pipe from the valve during this operation (risk of
blowback).
If after approximately 7 minutes the
pressure of 2 bars is not reached, this
indicates that the tyre is not repairable;
contact a PEUGEOT dealer or a qualified
workshop for assistance.
►
Move the switch to position " O
".
► Disconnect the compressor's electric plug
from the vehicle's 12 V socket.
►
Refit the cap on the valve.
►
Remove the kit.
►
Remove and store the bottle of sealant.
The sealant product is harmful if swallowed and causes irritation to the
eyes.
Keep this product out of the reach of children.
The use-by date of the fluid is marked on the
bottle.
After use, do not discard the bottle in
standard waste, take it to a PEUGEOT dealer
or an authorised waste disposal site.
Do not forget to obtain a new bottle of
sealant, available from a PEUGEOT dealer or
a qualified workshop.
► Drive immediately for approximately 3 miles
(5 kilometres) at reduced speed (between
12 and 37 mph (20 and 60
km/h)) to plug the
puncture.
►
Stop to check the repair
and the tyre
pressure using the kit.
With a tyre repaired using this type of kit,
do not exceed a speed of 50 mph
(80 km/h) and do not drive more than
125 miles (200 km).
Contact a PEUGEOT dealer or a qualified
workshop to have the tyre changed.
Checking / adjusting tyre
pressures
The compressor can be used, without injecting
sealant, to check and, if necessary, adjust the
tyre pressures.
► Remove the valve cap from the tyre and keep
it in a clean place.
► Uncoil the pipe stowed under the compressor.
► Screw the pipe onto the valve and tighten
firmly.
► Check that the compressor switch is in
position " O".
► Fully uncoil the electric cable stowed under
the compressor.
► Connect the compressor's electric plug to the
vehicle's 12 V socket.
► Switch on the ignition.
Only the 12 V socket located at the front
of the vehicle can be used to power the
compressor .
The tyre inflation pressures are given on
this label.
Page 155 of 260
153
In the event of a breakdown
8With a tyre repaired using this type of kit,
do not exceed a speed of 50 mph
(80
km/h) and do not drive more than
125
miles (200 km).
Contact a PEUGEOT dealer or a qualified
workshop to have the tyre changed.
Checking / adjusting tyre
pressures
The compressor can be used, without injecting
sealant, to check and, if necessary, adjust the
tyre pressures.
►
Remove the valve cap from the tyre and keep
it in a clean place.
►
Uncoil
the pipe stowed under the compressor.
►
Screw the pipe onto the valve and tighten
firmly
.
►
Check that the compressor switch is in
position " O
".
►
Fully uncoil the electric cable stowed under
the compressor
.
►
Connect the compressor's electric plug to the
vehicle's 12
V socket.
►
Switch on the ignition.
Only the 12 V socket located at the front
of the vehicle can be used to power the
compressor .
The tyre inflation pressures are given on
this label.
► Start the compressor by placing the switch at
position " I
" and adjust the pressure to the value
shown on the vehicle's tyre pressure label. To
deflate: press the black button located on the
compressor pipe, near the valve connection.
If after 7 minutes the pressure of 2 bars
is not reached, this indicates that the tyre
is damaged; contact a PEUGEOT
dealer or a
qualified workshop for assistance.
►
Once the correct pressure is reached, put the
switch in position " O
".
►
Remove the kit and stow it.
Should the pressure of one or more tyres
be adjusted, it is necessary to reinitialise
the under-inflation detection system.
For more information on Tyre under-inflation
detection, refer to the corresponding section.
Spare wheel
Scan the QR code on page 3 to view
explanatory videos.
Procedure for changing a damaged wheel with
the spare wheel using the tools provided with the
vehicle.
For more information on the Tool kit,
refer to the corresponding section.
►
Park the vehicle, taking care to avoid
obstructing traffic, and apply the parking brake.
►
Follow the safety instructions (hazard
warning lamps, warning triangle, wearing high
visibility vest, etc.) according to the legislation in
force in the country where you are driving.
►
Switch off the ignition.
Access to the spare wheel
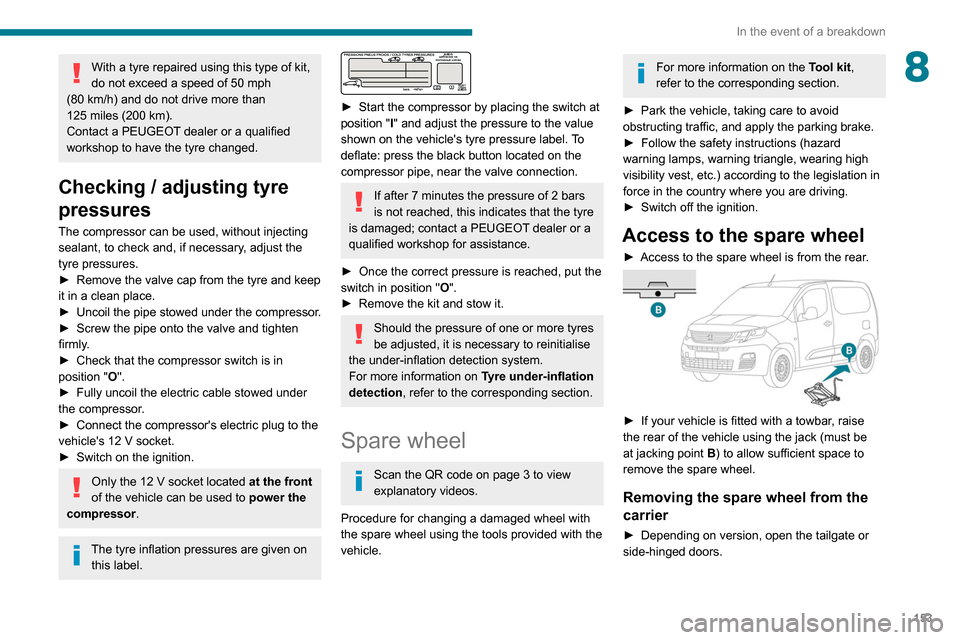
► Access to the spare wheel is from the rear .
► If your vehicle is fitted with a towbar, raise
the rear of the vehicle using the jack (must be
at jacking point B) to allow sufficient space to
remove the spare wheel.
Removing the spare wheel from the
carrier
► Depending on version, open the tailgate or
side-hinged doors.
Page 156 of 260
154
In the event of a breakdown
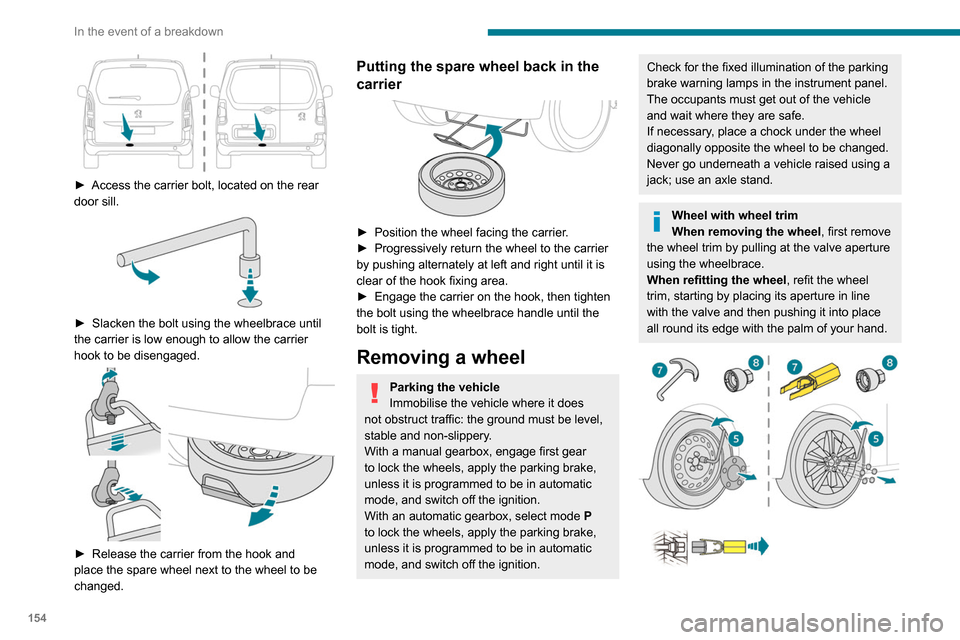
► Access the carrier bolt, located on the rear
door sill.
► Slacken the bolt using the wheelbrace until
the carrier is low enough to allow the carrier
hook to be disengaged.
► Release the carrier from the hook and
place the spare wheel next to the wheel to be
changed.
Putting the spare wheel back in the
carrier
► Position the wheel facing the carrier .
► Progressively return the wheel to the carrier
by pushing alternately at left and right until it is
clear of the hook fixing area.
►
Engage the carrier on the hook, then tighten
the bolt using the wheelbrace handle until the
bolt is tight.
Removing a wheel
Parking the vehicle
Immobilise the vehicle where it does
not obstruct traffic: the ground must be level,
stable and non-slippery.
With a manual gearbox, engage first gear
to lock the wheels, apply the parking brake,
unless it is programmed to be in automatic
mode, and switch off the ignition.
With an automatic gearbox, select mode
P
to lock the wheels, apply the parking brake,
unless it is programmed to be in automatic
mode, and switch off the ignition.
Check for the fixed illumination of the parking
brake warning lamps in the instrument panel.
The occupants must get out of the vehicle
and wait where they are safe.
If necessary, place a chock under the wheel
diagonally opposite the wheel to be changed.
Never go underneath a vehicle raised using a
jack; use an axle stand.
Wheel with wheel trim
When removing the wheel , first remove
the wheel trim by pulling at the valve aperture
using the wheelbrace.
When refitting the wheel , refit the wheel
trim, starting by placing its aperture in line
with the valve and then pushing it into place
all round its edge with the palm of your hand.