ESP Peugeot Partner Tepee 2017 Owner's Manual
[x] Cancel search | Manufacturer: PEUGEOT, Model Year: 2017, Model line: Partner Tepee, Model: Peugeot Partner Tepee 2017Pages: 292, PDF Size: 10.49 MB
Page 5 of 292
3
Partner2VP_en_Chap00a_Sommaire_ed02-2016
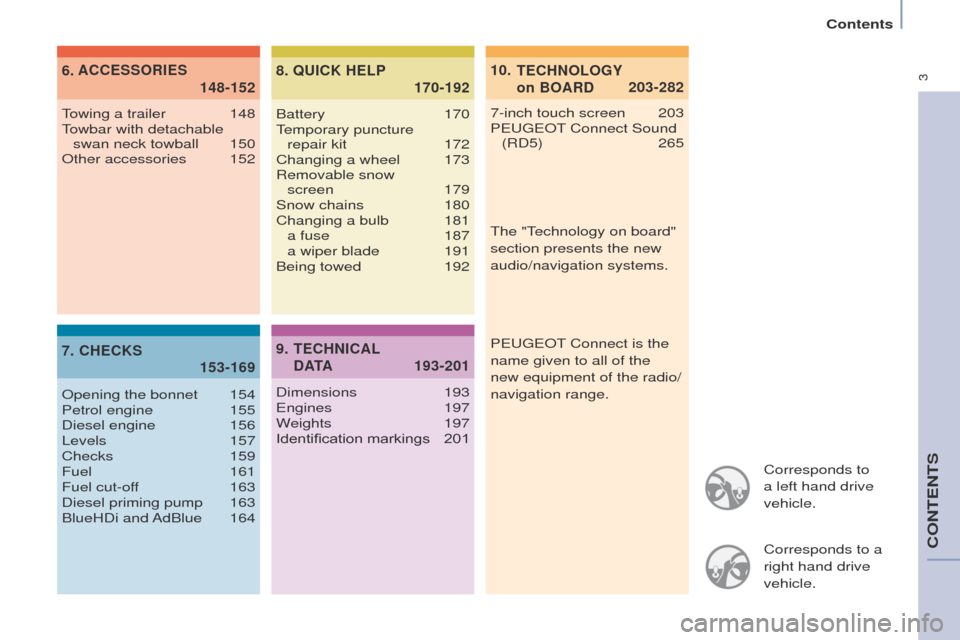
Corresponds to
a left hand drive
vehicle.
Corresponds to a
right hand drive
vehicle.
TECHNOLOGY
on BOARD
10.
203-282
ACCESSORIES
6
.
148-152
CHECKS
7
.
153-169 QUICK HELP
8
.
170-192
7-inch touch screen 203
P EUGEOT Connect Sound
(RD5)
265
Towing a trailer
148
T
owbar with detachable swan neck towball
150
Other accessories
152
Opening the bonnet
154
Petrol engine
155
Diesel engine
156
Levels
157
Checks
159
Fuel
161
Fuel cut-off
163
Diesel priming pump
163
BlueHDi
and AdBlue
164 Battery
170
Temporary puncture repair kit
172
Changing a wheel
173
Removable snow
screen
179
Snow chains
180
Changing a bulb
181 a fuse
187 a wiper blade
191
Being towed
192
TECHNICAL
D ATA
9.
193-201
Dimensions 193
Engines 197
Weights
197
Identification markings
201The "T
echnology on board"
section presents the new
audio/navigation systems.
PEUGEOT Connect is the
name given to all of the
new equipment of the radio/
navigation range.
Contents
CONTENTS
Page 39 of 292
37
Partner2VP_en_Chap03_Pret-a-partir_ed02-2016Partner2VP_en_Chap03_Pret-a-partir_ed02-2016
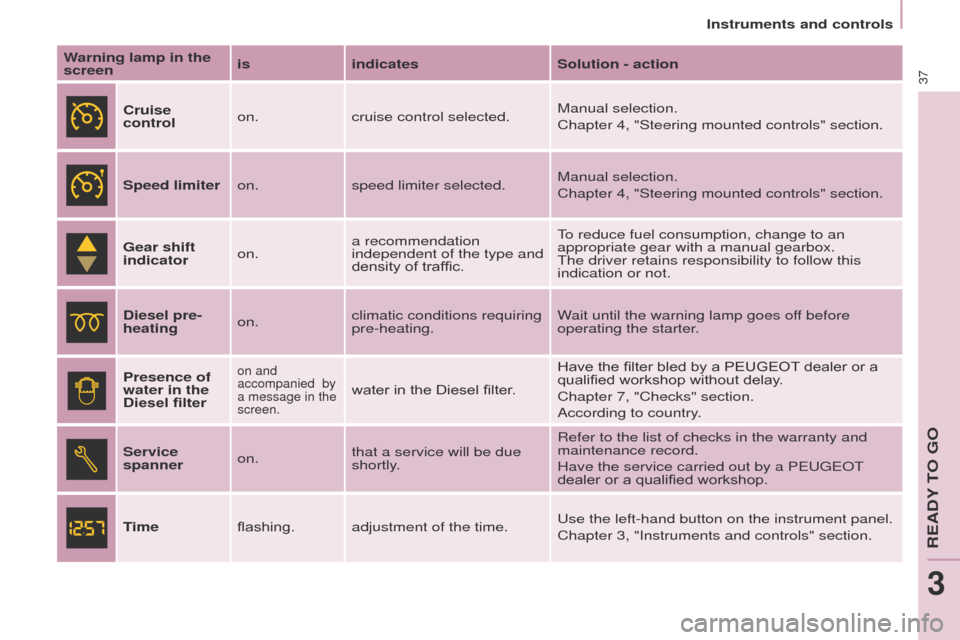
Warning lamp in the
screenis
indicates Solution - action
Cruise
control on.
cruise control selected. Manual selection.
Chapter 4, "Steering mounted controls" section.
Speed limiter on.speed limiter selected. Manual selection.
Chapter 4, "Steering mounted controls" section.
Gear shift
indicator on.a recommendation
independent of the type and
density of traffic. To reduce fuel consumption, change to an
appropriate gear with a manual gearbox.
The driver retains responsibility to follow this
indication or not.
Diesel pre-
heating on.climatic conditions requiring
pre-heating. Wait until the warning lamp goes off before
operating the starter.
Presence of
water in the
Diesel filter
on and
accompanied by
a message in the
screen.
water in the Diesel filter. Have the filter bled by a PEUGEOT dealer or a
qualified workshop without delay.
Chapter 7, "Checks" section.
According to country.
Service
spanner on.that a service will be due
shortly. Refer to the list of checks in the warranty and
maintenance record.
Have the service carried out by a PEUGEOT
dealer or a qualified workshop.
Time flashing.adjustment of the time. Use the left-hand button on the instrument panel.
Chapter 3, "Instruments and controls" section.
READY TO GO
3
Instruments and controls
Page 45 of 292
43
Partner2VP_en_Chap03_Pret-a-partir_ed02-2016Partner2VP_en_Chap03_Pret-a-partir_ed02-2016
UNDER-INFLATION DETECTION WITH REINITIALISATION
System which automatically checks the
pressures of the tyres while driving.
The system monitors the pressures
in the four tyres, once the vehicle is
moving.
It compares the information given by
the four wheel speed sensors with
reference values, which must be
reinitialised every time the tyre
pressures are adjusted or a wheel
changed.
The system triggers an alert as soon
as it detects a drop in the inflation
pressure of one or more tyres.The under-inflation detection
system does not replace the
need for vigilance on the part of
the
driver.
This system does not avoid the need to
check the tyre pressures (including the
spare wheel) every month as well as
before a long journey.
Driving with under-inflated tyres
impairs road holding, extends braking
distances and causes premature
tyre wear, particularly under arduous
condition (high loading, high speed,
long journey).
Driving with under-inflated tyres
increases fuel consumption. The inflation pressures defined for
your vehicle can be found on the
tyre pressure label.
For more information on the
identification markings, refer to the
corresponding section.
Tyre pressures should be checked
when the tyres are "cold" (vehicle
stopped for 1 hour or after a journey of
less than 6 miles (10 km) at moderate
speeds).
Otherwise (when hot), add 0.3 bar to
the pressures shown on the label.
READY TO GO
3
Instruments and controls
Page 52 of 292
50
Partner2VP_en_Chap03_Pret-a-partir_ed02-2016Partner2VP_en_Chap03_Pret-a-partir_ed02-2016
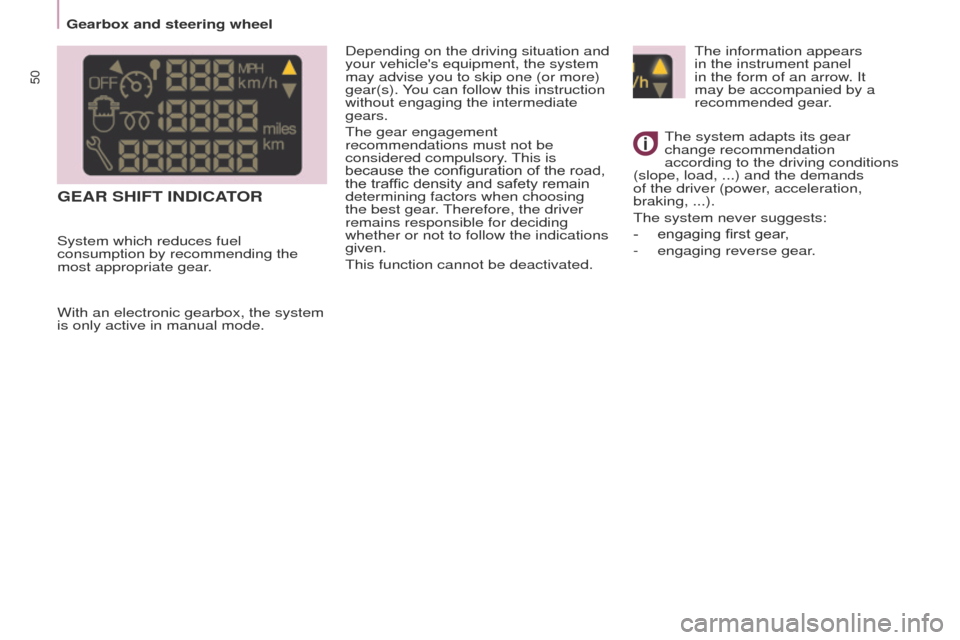
The information appears
in the instrument panel
in the form of an arrow. It
may be accompanied by a
recommended gear.
The system adapts its gear
change recommendation
according to the driving conditions
(slope, load,
...) and the demands
of the driver (power, acceleration,
braking,
...).
The system never suggests:
-
engaging first gear
,
-
engaging reverse gear
.
With an electronic gearbox, the system
is only active in manual mode.
GEAR SHIFT INDICATOR
Depending on the driving situation and
your vehicle's equipment, the system
may advise you to skip one (or more)
gear(s). You can follow this instruction
without engaging the intermediate
gears.
The gear engagement
recommendations must not be
considered compulsory. This is
because the configuration of the road,
the traffic density and safety remain
determining factors when choosing
the best gear. Therefore, the driver
remains responsible for deciding
whether or not to follow the indications
given.
This function cannot be deactivated.
System which reduces fuel
consumption by recommending the
most appropriate gear.
Gearbox and steering wheel
Page 57 of 292

55
Partner2VP_en_Chap03_Pret-a-partir_ed02-2016Partner2VP_en_Chap03_Pret-a-partir_ed02-2016
The Stop & Start system
requires a battery of specific
characteristics. All work on this
type of battery must be done only
by a PEUGEOT dealer or a qualified
workshop.
For more information on the 12 V
battery, refer to "Battery" in section 8.
Good practice when stopping Good practice when starting
Diesel pre-heating warning
lamp
If the temperature is high
enough, the warning lamp
comes on for less than
one
second, you can start
without waiting.
In cold weather, wait for this warning
lamp to go off then operate the starter
(Starting position) until the engine
starts.
Door or bonnet open warning lamp
If this comes on, a door or
the bonnet is not closed
correctly, check!
Minimise engine and gearbox wear
When switching off the ignition, let the
engine run for a few seconds to allow
the turbocharger (Diesel engine) to
return to idle.
Do not press the accelerator when
switching off the ignition.
There is no need to engage a gear
after parking the vehicle.
STARTING AND ST OPPING
Running and accessories position.
To unlock the steering, turn the
steering wheel gently while turning the
key, without forcing. In this position,
certain accessories can be used.
Starting position.
The starter is operated, the engine
turns over, release the key.
STOP position: steering lock.
The ignition is off. Turn the steering
wheel until the steering locks. Remove
the key.
Opening the bonnet
Before doing anything under the
bonnet, deactivate the Stop & Start
system to avoid the risk of injury
related to an automatic change to
START mode.
Driving on flooded roads
Before driving through a flooded road,
it is strongly recommended that you
deactivate the Stop & Start system.
For more advice on driving, particularly
on flooded roads, refer to the
corresponding section.
READY TO GO
3
Stop & Start
Page 60 of 292
58
Partner2VP_en_Chap04_Ergonomie_ed02-2016
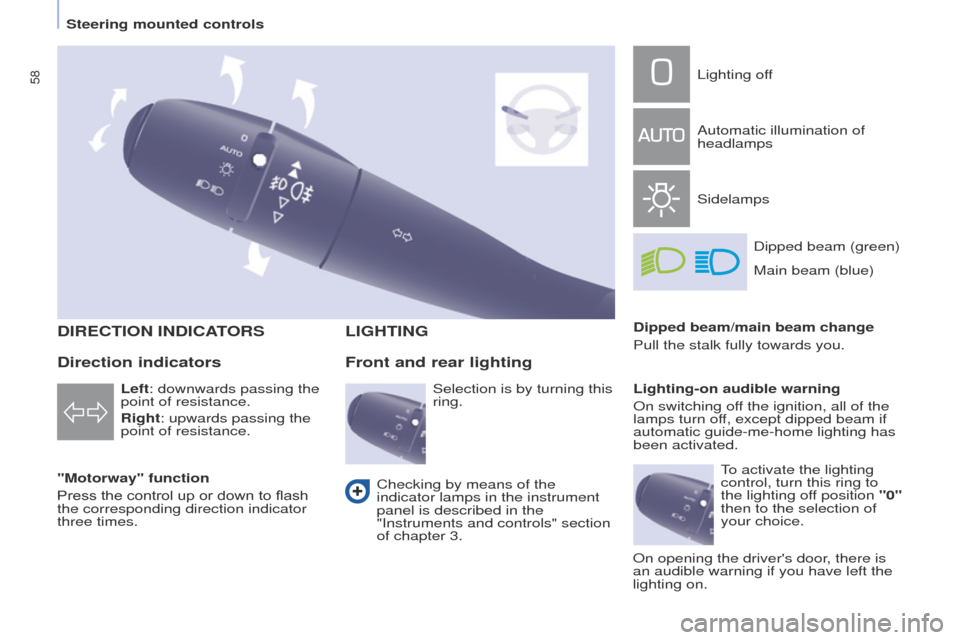
DIRECTION INDICATORS
"Motorway" function
Press the control up or down to flash
the corresponding direction indicator
three times.
LIGHTING
Left: downwards passing the
point of resistance.
Right: upwards passing the
point of resistance.
Front and rear lighting
Lighting off
Automatic illumination of
headlamps
SidelampsDipped beam (green)
Dipped beam/main beam change
Pull the stalk fully towards you.
Lighting-on audible warning
On switching off the ignition, all of the
lamps turn off, except dipped beam if
automatic guide-me-home lighting has
been activated.
Checking by means of the
indicator lamps in the instrument
panel is described in the
"Instruments and controls" section
of chapter 3.
Direction indicators
Selection is by turning this
ring. Main beam (blue)
To activate the lighting
control, turn this ring to
the lighting off position "0"
then to the selection of
your choice.
On opening the driver's door, there is
an audible warning if you have left the
lighting on.
Steering mounted controls
Page 62 of 292
60
Partner2VP_en_Chap04_Ergonomie_ed02-2016
If the sunshine sensor
does not function correctly,
the lighting comes on
accompanied by the service
warning lamp, an audible
signal and a message in the screen.
Contact a PEUGEOT dealer or a
qualified workshop.
Guide-me-home lighting
Keeping the dipped beam headlamps
on temporarily with the ignition off,
makes the driver's exit easier when the
light is poor.
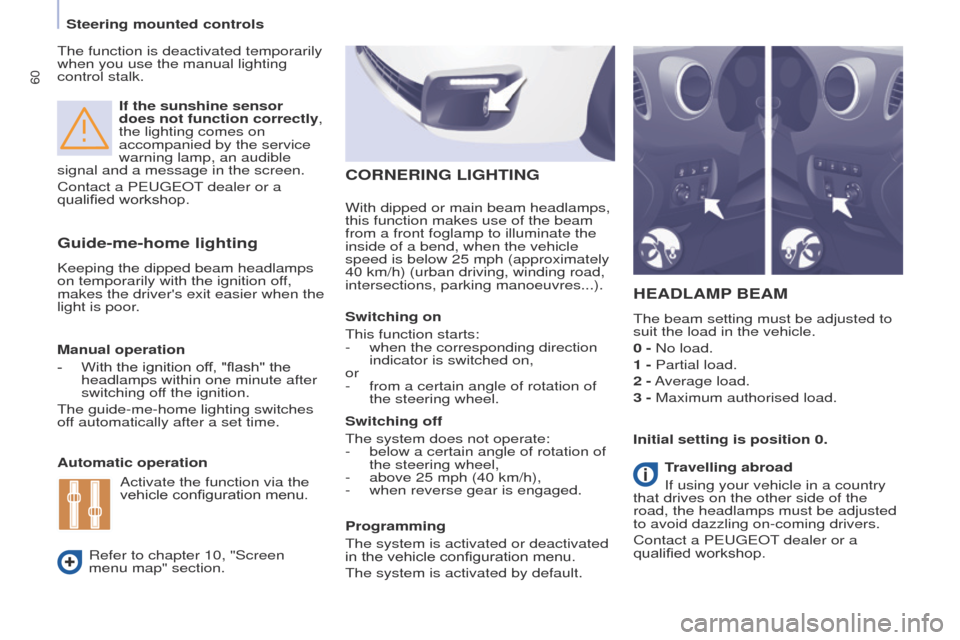
HEADLAMP BEAM
The beam setting must be adjusted to
suit the load in the vehicle.
0 - No load.
1 - Partial load.
2 - Average load.
3 - Maximum authorised load.
Manual operation
-
With the ignition of
f, "flash" the
headlamps within one minute after
switching off the ignition.
The guide-me-home lighting switches
off automatically after a set time.
Automatic operation
Refer to chapter 10, "Screen
menu map" section. Initial setting is position 0.
Activate the function via the
vehicle configuration menu. Programming
The system is activated or deactivated
in the vehicle configuration menu.
The system is activated by default. Switching off
The system does not operate:
-
below a certain angle of rotation of
the steering wheel,
-
above 25 mph (40 km/h),
-
when reverse gear is engaged.
Switching on
This function starts:
-
when the corresponding direction
indicator is switched on,
or
-
from a certain angle of rotation of
the steering wheel.
With dipped or main beam headlamps,
this function makes use of the beam
from a front foglamp to illu
minate the
inside of a bend, when the vehicle
speed is below 25 mph (approximately
40 km/h) (urban driving, winding road,
intersections, parking manoeuvres...).
CORNERING LIGHTING
Travelling abroad
If using your vehicle in a country
that drives on the other side of the
road, the headlamps must be adjusted
to avoid dazzling on-coming drivers.
Contact a PEUGEOT dealer or a
qualified workshop.
The function is deactivated temporarily
when you use the manual lighting
control stalk.
Steering mounted controls
Page 69 of 292
67
Partner2VP_en_Chap04_Ergonomie_ed02-2016
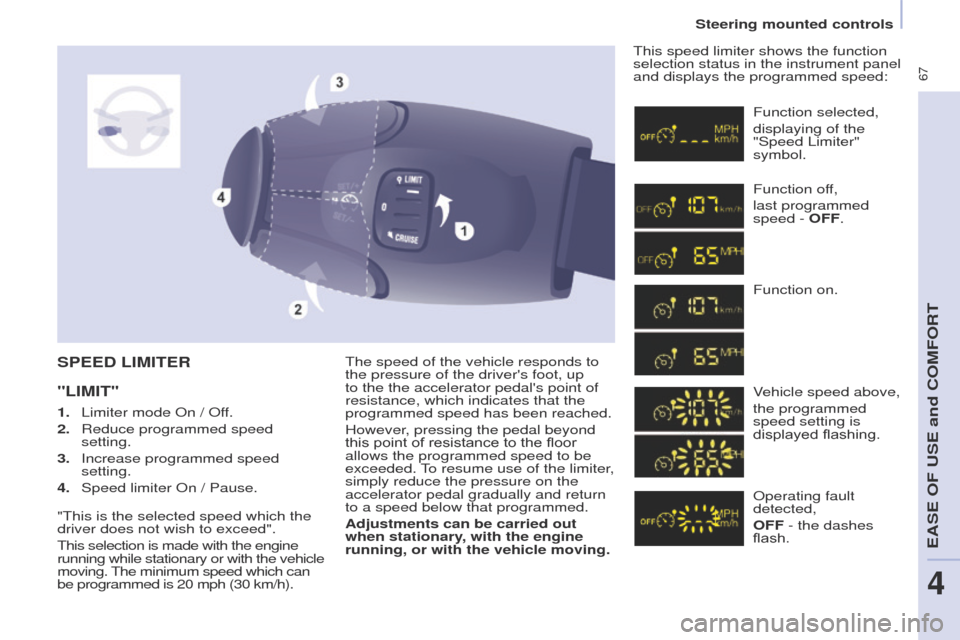
The speed of the vehicle responds to
the pressure of the driver's foot, up
to the the accelerator pedal's point of
resistance, which indicates that the
programmed speed has been reached.
However, pressing the pedal beyond
this point of resistance to the floor
allows the programmed speed to be
exceeded. To resume use of the limiter,
simply reduce the pressure on the
accelerator pedal gradually and return
to a speed below that programmed.
Adjustments can be carried out
when stationary, with the engine
running, or with the vehicle moving.This speed limiter shows the function
selection status in the instrument panel
and displays the programmed speed:SPEED LIMITER
"LIMIT"
Function selected,
displaying of the
"Speed Limiter"
symbol.
Function off,
last programmed
speed - OFF.
Function on.
Vehicle speed above,
the programmed
speed setting is
displayed flashing.
Operating fault
detected,
OFF - the dashes
flash.
1.
Limiter mode On
/ Off.
2.
Reduce programmed speed
setting.
3.
Increase programmed speed
setting.
4.
Speed limiter On
/ Pause.
"This is the selected speed which the
driver does not wish to exceed".
This selection is made with the engine
running while stationary or with the vehicle
moving. The minimum speed which can
be programmed is 20 mph (30 km/h).
Steering mounted controls
EASE OF USE and COMFORT
4
Page 74 of 292
72
Partner2VP_en_Chap04_Ergonomie_ed02-2016Partner2VP_en_Chap04_Ergonomie_ed02-2016
Good practice
For maximum cooling or heating of the
passenger compartment, it is possible
to exceed the value 15 by turning until
LO is displayed or the value 27 by
turning until HI is displayed.
On entering the vehicle, the inside
temperature may be much colder
(or warmer) than is comfortable. There
is no advantage in changing the value
displayed in order to quickly reach the
level of comfort required. The system
will use its maximum performance to
reach the comfort value set.
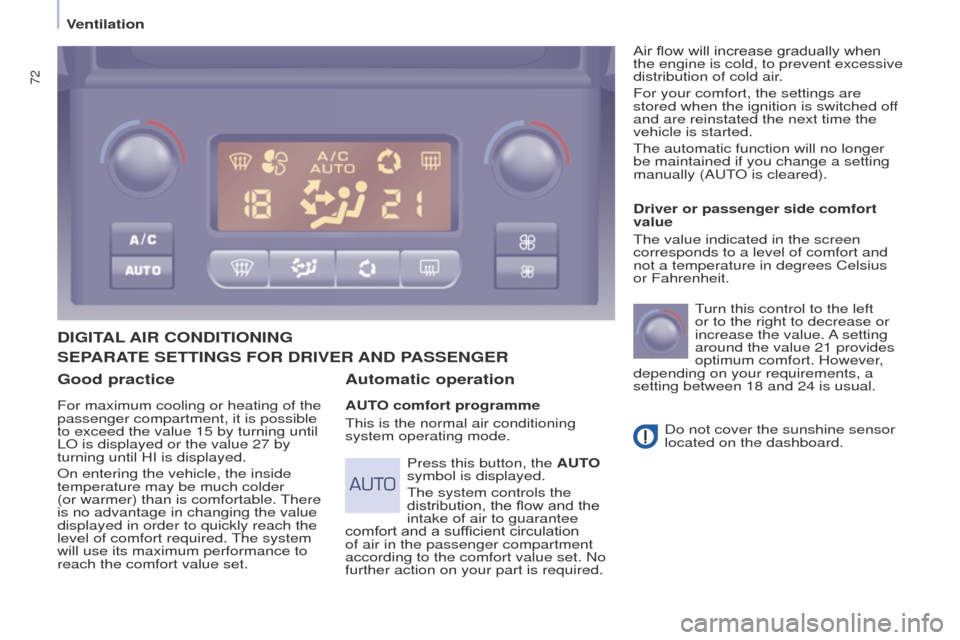
DIGITAL AIR CONDITIONING
Automatic operation
AUTO comfort programme
This is the normal air conditioning
system operating mode. Driver or passenger side comfort
value
The value indicated in the screen
corresponds to a level of comfort and
not a temperature in degrees Celsius
or Fahrenheit.
Turn this control to the left
or to the right to decrease or
increase the value. A setting
around the value 21 provides
optimum comfort. However,
depending on your requirements, a
setting between 18 and 24 is usual.
Do not cover the sunshine sensor
located on the dashboard.
Press this button, the AUTO
symbol is displayed.
The system controls the
distribution, the flow and the
intake of air to guarantee
comfort and a sufficient circulation
of air in the passenger compartment
according to the comfort value set. No
further action on your part is required. Air flow will increase gradually when
the engine is cold, to prevent excessive
distribution of cold air.
For your comfort, the settings are
stored when the ignition is switched off
and are reinstated the next time the
vehicle is started.
The automatic function will no longer
be maintained if you change a setting
manually (AUTO is cleared).
SEPARATE SETTINGS FOR DRIVER AND
PASSENGER
Ventilation
Page 76 of 292
74
Partner2VP_en_Chap04_Ergonomie_ed02-2016Partner2VP_en_Chap04_Ergonomie_ed02-2016
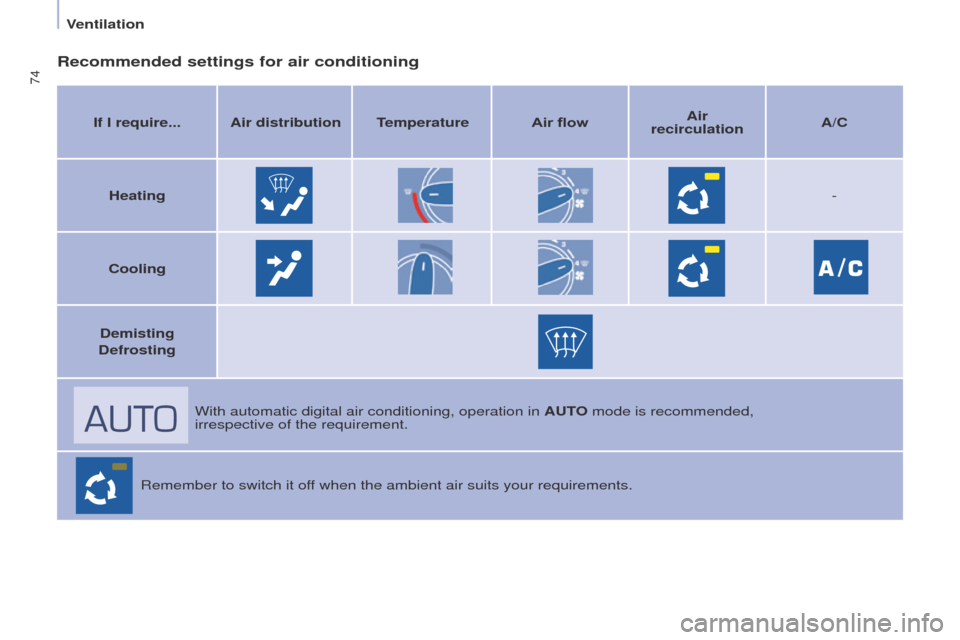
Recommended settings for air conditioning
If I require... Air distribution TemperatureAir flowAir
recirculation A/C
Heating -
Cooling
Demisting
Defrosting
With automatic digital air conditioning, operation in AUTO mode is recommended,
irrespective of the requirement.
Remember to switch it off when the ambient air suits your requirements.
Ventilation