display PEUGEOT PARTNER TEPEE 2020 User Guide
[x] Cancel search | Manufacturer: PEUGEOT, Model Year: 2020, Model line: PARTNER TEPEE, Model: PEUGEOT PARTNER TEPEE 2020Pages: 216, PDF Size: 8.46 MB
Page 22 of 216

20
For more information on Fuel, refer to the
corresponding section.
Coolant temperature
If the needle is positioned before the red
zone: normal operation.
In arduous conditions of use or hot climatic
conditions, the needle may move close to the
red graduations.
What to do if the needle goes into the red
zone:
F
s
low down the vehicle or let the engine idle. What to do if the warning lamp lights up:
F
s
top immediately, switch off the ignition. The
fan may continue to operate for a certain
time up to approximately ten minutes,
F
w
ait for the engine to cool down in order
to check the coolant level and top it up if
necessary.
Since the cooling system is under pressure,
follow these instructions to avoid any risk of
burns:
F
w
ait at least one hour after the engine stops
to intervene,
F
u
nscrew the cap by 1/4 of a turn to allow the
pressure to drop,
F
w
hen the pressure has dropped, check the
level in the expansion bottle,
F
i
f necessary, remove the cap to top up.
If the needle remains in the red zone, have
it checked by a PEUGEOT dealer or by a
qualified workshop.
For more information on Levels , refer to
the corresponding section.
AdBlue® fluid range
indicators
Alert settings and display
Different levels of alert are triggered according
to the remaining driving range threshold.
You will be informed as each mileage threshold
is reached and the alerts will change from
temporary to permanent.
-
T
he 1
st alert is triggered at a remaining
driving range of 1,500 miles (2,400 km).
-
T
he 2
nd alert is triggered at a remaining
driving range of 375 miles (600 km).
Up to 0
miles, at which point it will be
impossible to restart the engine after a stop.
Driving range
F Press this button to display the information.
With the touch screen: F
s
elect the "Driving assistance"
menu,
F
s
elect "Diagnostic",
F
s
elect CHECK.
Above 3,000
miles (5,000 km), the value is not
defined.
Instruments
Page 23 of 216
21
In the event of the risk of non-
starting related to a lack of
AdBlue
®
The engine starting inhibition system
required by regulations is activated
automatically once the AdBlue
® tank is
e m pt y.
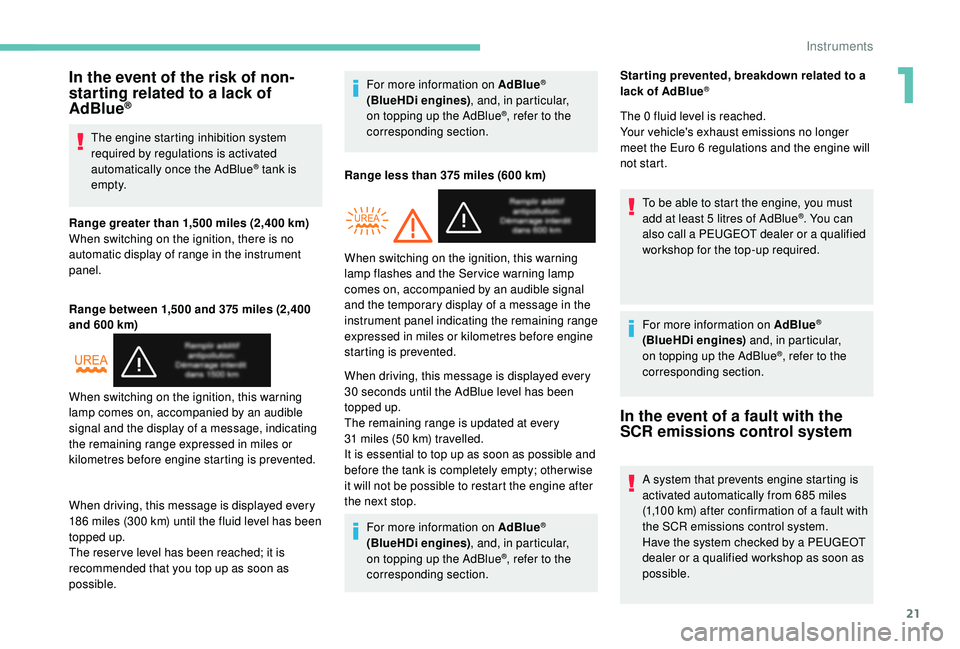
Range greater than 1,500
miles (2,400 km)
When switching on the ignition, there is no
automatic display of range in the instrument
panel.
Range between 1,500 and 375
miles (2,400
and 600
km)
When driving, this message is displayed every
186
miles (300
km) until the fluid level has been
topped up.
The reser ve level has been reached; it is
recommended that you top up as soon as
possible. For more information on AdBlue
®
(BlueHDi engines)
, and, in particular,
on topping up the AdBlue®, refer to the
corresponding section.
Range less than 375
miles (600 km)
When driving, this message is displayed every
30
seconds until the AdBlue level has been
topped up.
The remaining range is updated at every
31
miles (50
km) travelled.
It is essential to top up as soon as possible and
before the tank is completely empty; other wise
it will not be possible to restart the engine after
the next stop.
For more information on AdBlue
®
(BlueHDi engines) , and, in particular,
on topping up the AdBlue
®, refer to the
corresponding section.
When switching on the ignition, this warning
lamp comes on, accompanied by an audible
signal and the display of a message, indicating
the remaining range expressed in miles or
kilometres before engine starting is prevented. When switching on the ignition, this warning
lamp flashes and the Service warning lamp
comes on, accompanied by an audible signal
and the temporary display of a message in the
instrument panel indicating the remaining range
expressed in miles or kilometres before engine
starting is prevented.Star ting prevented, breakdown related to a
lack of AdBlue
®
The 0 fluid level is reached.
Your vehicle's exhaust emissions no longer
meet the Euro 6 regulations and the engine will
not start.
To be able to start the engine, you must
add at least 5
litres of AdBlue
®. You can
also call a PEUGEOT dealer or a qualified
workshop for the top-up required.
For more information on AdBlue
®
(BlueHDi engines) and, in particular,
on topping up the AdBlue
®, refer to the
corresponding section.
In the event of a fault with the
SCR emissions control system
A system that prevents engine starting is
activated automatically from 685 miles
(1,100
km) after confirmation of a fault with
the SCR emissions control system.
Have the system checked by a PEUGEOT
dealer or a qualified workshop as soon as
possible.
1
Instruments
Page 24 of 216

22
Trip computer
In the event of the detection of a faultIf it is a temporary fault, the alert
disappears during the next journey,
after self-diagnostic checks of the SCR
emissions control system.
These warning lamps come on, accompanied
by an audible signal and the display of the
"Emissions fault" message.
The alert is triggered while driving as soon
as the fault is detected for the first time, then
when switching on the ignition for subsequent
journeys, while the fault persists.
During the permitted driving phase (between
685 and 0
miles (1,100 and 0 km))If a fault with the SCR system is confirmed (after
31
miles (50 km) covered with the permanent
display of the message signalling a fault), these
warning lamps come on and the UREA warning
lamp flashes, accompanied by an audible
signal and the display of a message indicating
the remaining range expressed in miles or
kilometres.
While driving, the message is displayed every
30 seconds while the fault with the SCR
emission control system persists.
The alert is repeated when switching on the
ignition.
You should go to a PEUGEOT dealer or a
qualified workshop as soon as possible.
Other wise you will not be able to restart the
vehicle.
Starting prevented
Each time the ignition is switched on, these
warning lamps come on and the UREA
warning lamp flashes, accompanied by an
audible signal and the display of the message
"Emissions fault: Starting prevented". You have exceeded the authorised driving
limit: the starting inhibition system does
not allow the engine to be started.
To be able to restart the engine, you must call
on a PEUGEOT dealer or a qualified workshop.Lighting dimmer
F With the lighting on, press the button to adjust
the brightness of the
instruments and controls.
When the lighting reaches
the minimum (or maximum)
setting, release this
button, then press again to
increase (or decrease) it.
Release the button when the desired level is
reached.
Instruments
Page 25 of 216
23
Each press of the button on the end of the
wiper control stalk allows you to scroll through
the various trip computer information displays,
depending on the screen.
The "vehicle" tab with the range, current fuel
consumption and remaining distance to travel.
The "1" tab (trip 1) with the average speed,
average fuel consumption and distance
travelled in trip 1 .
The "2" tab (trip 2) with the same information
for a 2
nd trip.
Zero reset
F When the desired trip is displayed, press the control for more than two seconds.
A few definitions
Range: displays the distance that can still be
travelled with the fuel detected in the tank on
the basis of the average consumption over the
last few miles (kilometres) travelled. If dashes instead of figures continue to
be displayed when driving, contact a
PEUGEOT dealer.
This displayed value can vary greatly
following a change in the vehicle's driving
conditions or the terrain. When the range falls below 19
miles (30 km),
dashes are displayed. After filling with at least
10 litres of fuel, the range is recalculated and is
displayed if it exceeds 62 miles (100 km).
Current fuel consumption: calculated
and displayed only when exceeding 19 mph
(30
km/h).
Average consumption: this is the average
fuel consumption since the last trip computer
zero reset.
Distance travelled: calculated from the last
trip computer zero reset.
Remaining distance: calculated according
to the final destination entered by the user. If
navigation is activated, the navigation system
calculates it instantaneously.
Average speed: this is the average speed
calculated since the last trip computer zero
reset (with the ignition on).
Date and time setting
Centre console without
screen
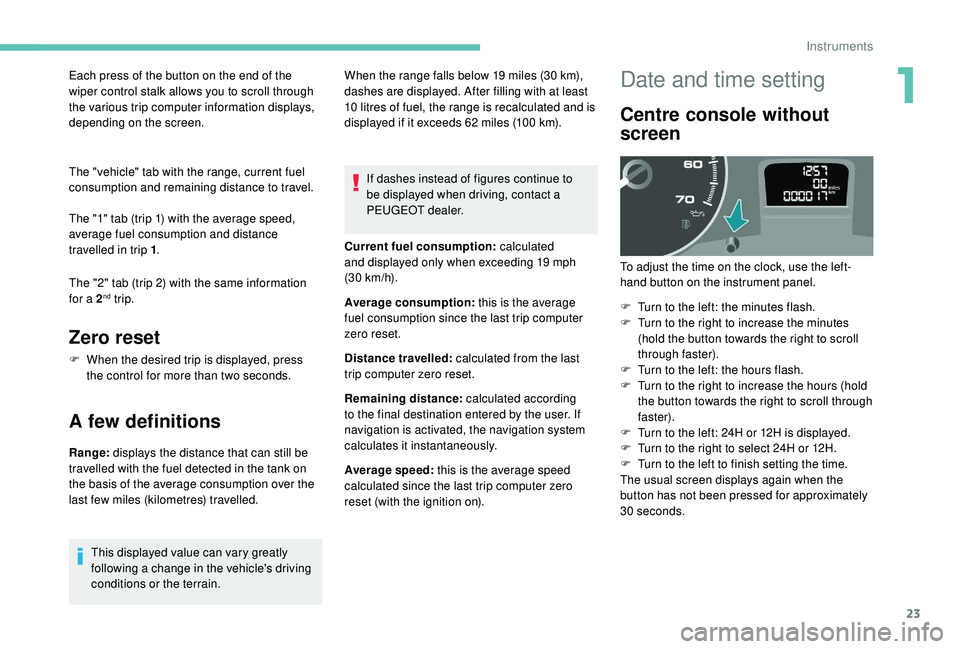
To adjust the time on the clock, use the left-
hand button on the instrument panel.
F
T
urn to the left: the minutes flash.
F
T
urn to the right to increase the minutes
(hold the button towards the right to scroll
through faster).
F
T
urn to the left: the hours flash.
F
T
urn to the right to increase the hours (hold
the button towards the right to scroll through
faster).
F
T
urn to the left: 24H or 12H is displayed.
F
T
urn to the right to select 24H or 12H.
F
T
urn to the left to finish setting the time.
The usual screen displays again when the
button has not been pressed for approximately
30
seconds.
1
Instruments
Page 26 of 216
24
Centre console with screen
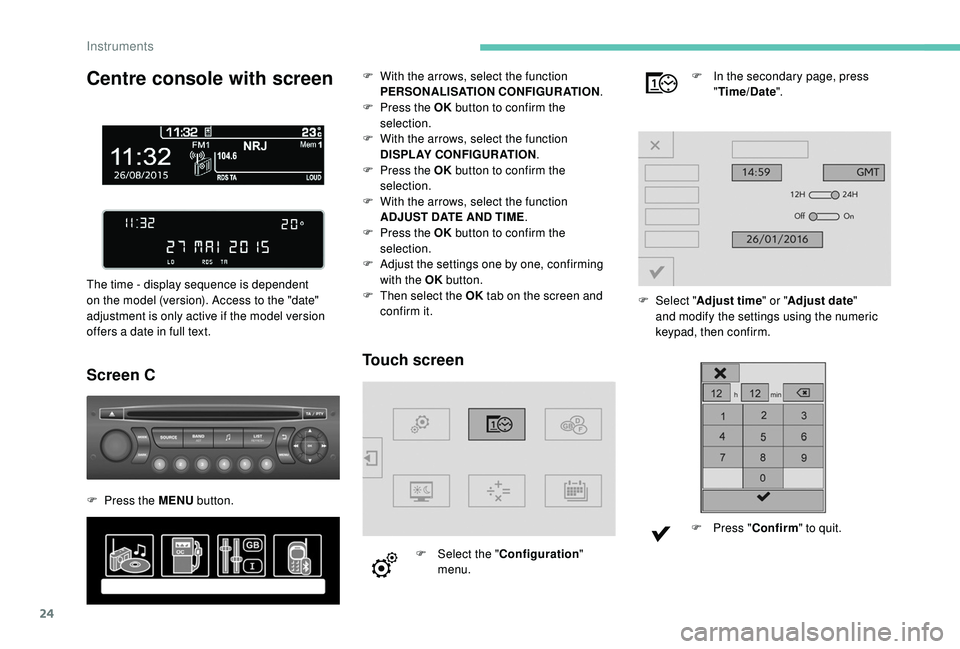
The time - display sequence is dependent
on the model (version). Access to the "date"
adjustment is only active if the model version
offers a date in full text.
Screen C
F Press the MENU button.
Touch screen
F Select the "Configuration"
menu. F
I
n the secondary page, press
" Time/Date ".
F
Sel
ect "
Adjust time" or " Adjust date"
and modify the settings using the numeric
keypad, then confirm.
F
P
ress "
Confirm " to quit.
F
W
ith the arrows, select the function
PERSONALISATION CONFIGURATION .
F
P
ress the OK
button to confirm the
selection.
F
W
ith the arrows, select the function
DISPLAY CONFIGURATION .
F
P
ress the OK
button to confirm the
selection.
F
W
ith the arrows, select the function
ADJUST DATE AND TIME .
F
P
ress the OK
button to confirm the
selection.
F
A
djust the settings one by one, confirming
with the OK button.
F
T
hen select the OK
tab on the screen and
confirm it.
Instruments
Page 63 of 216
61
The connection of an electrical device
not approved by PEUGEOT, such as a
USB charger, may adversely affect the
operation of vehicle electrical systems,
causing faults such as poor radio
reception or inter ference with displays in
the screens.
Stowing rings
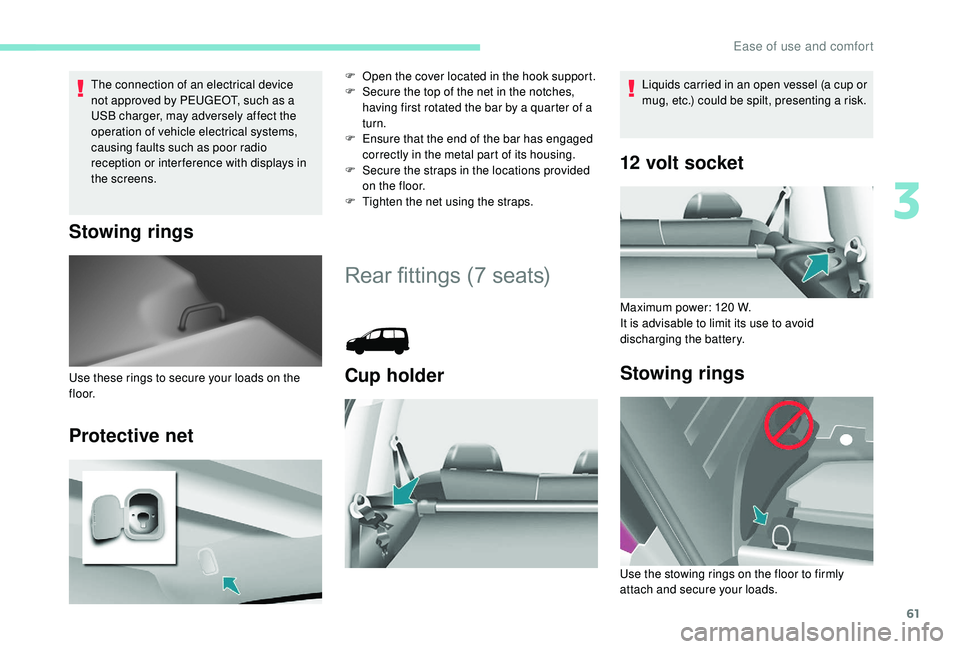
Protective net
F Open the cover located in the hook support.
F S ecure the top of the net in the notches,
having first rotated the bar by a quarter of a
turn.
F
E
nsure that the end of the bar has engaged
correctly in the metal part of its housing.
F
S
ecure the straps in the locations provided
on the floor.
F
T
ighten the net using the straps.
Rear fittings (7 seats)
Cup holderUse these rings to secure your loads on the
f l o o r.
12 volt socket
Maximum power: 120 W.
I t is advisable to limit its use to avoid
discharging the battery.
Stowing rings
Liquids carried in an open vessel (a cup or
mug, etc.) could be spilt, presenting a risk.
Use the stowing rings on the floor to firmly
attach and secure your loads.
3
Ease of use and comfort
Page 66 of 216
64
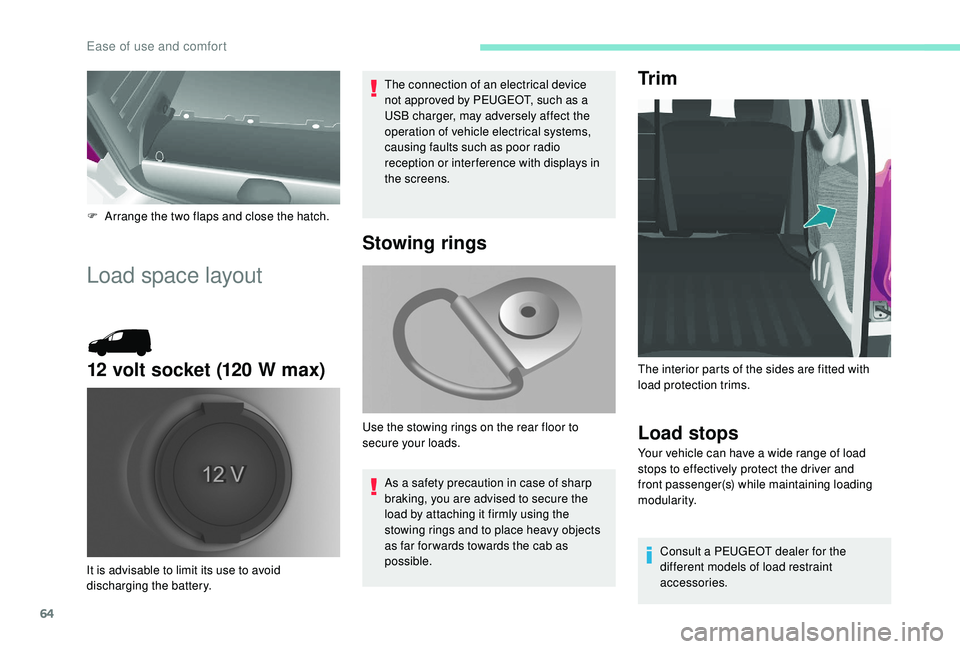
F Arrange the two flaps and close the hatch.
Load space layout
12 volt socket (120 W max)
The connection of an electrical device
not approved by PEUGEOT, such as a
USB charger, may adversely affect the
operation of vehicle electrical systems,
causing faults such as poor radio
reception or inter ference with displays in
the screens.
It is advisable to limit its use to avoid
discharging the battery.
Stowing rings
As a safety precaution in case of sharp
braking, you are advised to secure the
load by attaching it firmly using the
stowing rings and to place heavy objects
as far for wards towards the cab as
possible.
Use the stowing rings on the rear floor to
secure your loads.
Tr i m
Load stops
Your vehicle can have a wide range of load
stops to effectively protect the driver and
front passenger(s) while maintaining loading
modularity.
Consult a PEUGEOT dealer for the
different models of load restraint
accessories.
The interior parts of the sides are fitted with
load protection trims.
Ease of use and comfort
Page 69 of 216
67
Air conditioning A/C
The air conditioning only works with the engine
running.Pressing the button switches the air
conditioning on; the LED comes on.
Pressing the button again switches
the function off; the LED goes off.
The air conditioning cannot operate when the
air flow is set to 0.
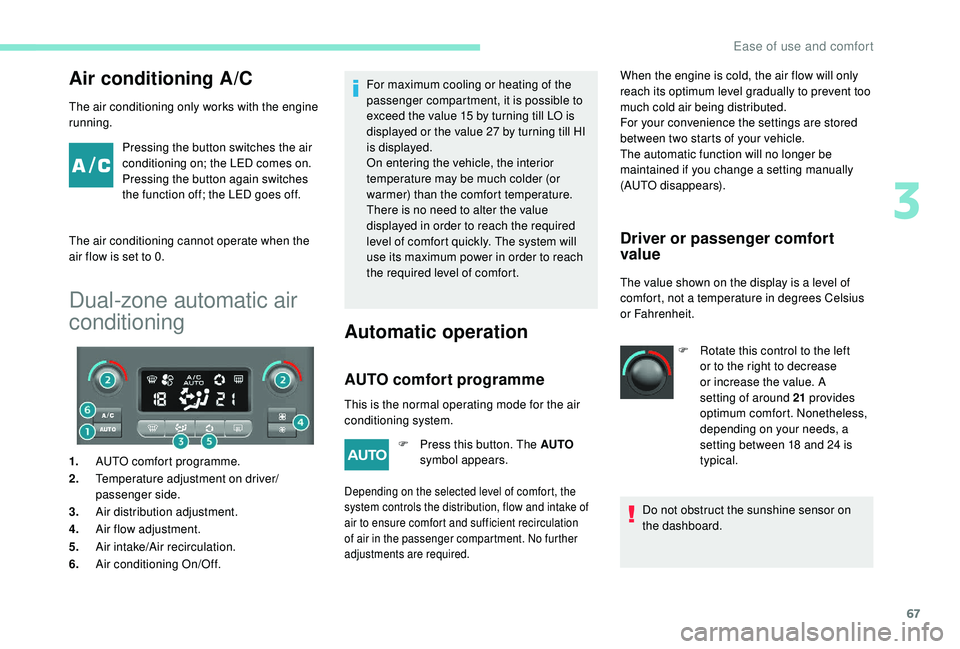
Dual-zone automatic air
conditioning
1. AUTO comfort programme.
2. Temperature adjustment on driver/
passenger side.
3. Air distribution adjustment.
4. Air flow adjustment.
5. Air intake/Air recirculation.
6. Air conditioning On/Off. For maximum cooling or heating of the
passenger compartment, it is possible to
exceed the value 15 by turning till LO is
displayed or the value 27 by turning till HI
is displayed.
On entering the vehicle, the interior
temperature may be much colder (or
warmer) than the comfort temperature.
There is no need to alter the value
displayed in order to reach the required
level of comfort quickly. The system will
use its maximum power in order to reach
the required level of comfort.
Automatic operation
AUTO comfort programme
Driver or passenger comfort
value
The value shown on the display is a level of
comfort, not a temperature in degrees Celsius
or Fahrenheit.
This is the normal operating mode for the air
conditioning system. F
P
ress this button. The AUTO
symbol appears. When the engine is cold, the air flow will only
reach its optimum level gradually to prevent too
much cold air being distributed.
For your convenience the settings are stored
between two starts of your vehicle.
The automatic function will no longer be
maintained if you change a setting manually
(AUTO disappears).
Depending on the selected level of comfort, the
system controls the distribution, flow and intake of
air to ensure comfort and sufficient recirculation
of air in the passenger compartment. No further
adjustments are required.
F Rotate this control to the left
or to the right to decrease
or increase the value. A
setting of around 21 provides
optimum comfort. Nonetheless,
depending on your needs, a
setting between 18 and 24 is
typical.
Do not obstruct the sunshine sensor on
the dashboard.
3
Ease of use and comfort
Page 70 of 216
68
Manual operation
If you wish, you can make a different choice
from that offered by the system by changing a
setting. The other functions are still managed
automatically. Pressing the AUTO button
returns the system to full automatic operation.
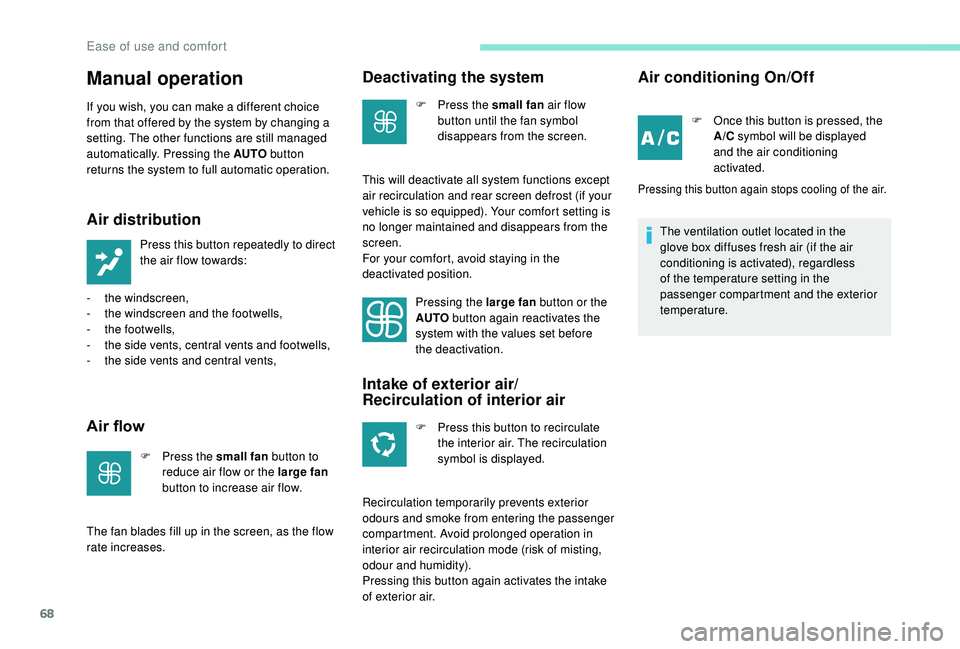
Air distribution
Press this button repeatedly to direct
the air flow towards:
-
t
he windscreen,
-
t
he windscreen and the footwells,
-
t
he footwells,
-
t
he side vents, central vents and footwells,
-
t
he side vents and central vents,
Air flow
F Press the small fan button to
reduce air flow or the large fan
button to increase air flow.
The fan blades fill up in the screen, as the flow
rate increases.
Deactivating the system
F Press the small fan air flow
button until the fan symbol
disappears from the screen.
This will deactivate all system functions except
air recirculation and rear screen defrost (if your
vehicle is so equipped). Your comfort setting is
no longer maintained and disappears from the
screen.
For your comfort, avoid staying in the
deactivated position. Pressing the large fan button or the
AUTO button again reactivates the
system with the values set before
the deactivation.
Intake of exterior air/
Recirculation of interior air
F Press this button to recirculate the interior air. The recirculation
symbol is displayed.
Recirculation temporarily prevents exterior
odours and smoke from entering the passenger
compartment. Avoid prolonged operation in
interior air recirculation mode (risk of misting,
odour and humidity).
Pressing this button again activates the intake
of exterior air.
Air conditioning On/Off
F Once this button is pressed, the A/C symbol will be displayed
and the air conditioning
activated.
Pressing this button again stops cooling of the air.
The ventilation outlet located in the
glove box diffuses fresh air (if the air
conditioning is activated), regardless
of the temperature setting in the
passenger compartment and the exterior
temperature.
Ease of use and comfort
Page 111 of 216
109
With a 6 -speed electronic gearbox, for
your convenience when parking, the
STOP mode is not available for the few
seconds that follow disengagement of
reverse gear.
The Stop & Start system does not affect
the vehicle's functions, such as, for
example, braking, power steering, etc.
Never refuel with the engine in STOP
mode; you must switch off the ignition
using the key.
Special cases: STOP mode not
available
STOP mode is not triggered when:
- t he vehicle is on a steep slope (uphill or
downhill),
-
t
he driver's door is open,
-
t
he driver's seat belt is not fastened,
-
t
he vehicle has not exceeded 6 mph
(10
km/h) since the last engine start using
t h e key,
-
t
he engine is needed to maintain a
comfortable temperature in the passenger
compartment,
-
d
emisting is on, -
s
ome special conditions (battery charge,
engine temperature, braking assistance,
ambient temperature, etc.) are present
which require the engine to be running to
assure control of the system.
In this case, the " ECO" indicator
lamp flashes for a few seconds then
goes off.
This operation is perfectly normal.
Going into engine START mode
The " ECO" indicator lamp goes off
and the engine restarts:
-
w
ith a manual gearbox , when you fully
press the clutch pedal,
-
w
ith a 6-speed electronic gearbox
•
g
ear lever in position A or M , when you
release the brake pedal,
•
o
r gear lever in position N and the brake
pedal released, when you move the gear
selector to position A or M ,
•
o
r when you engage reverse gear. With a manual gearbox in STOP mode, if
a gear is engaged without fully pressing
the clutch pedal, a message is displayed
asking you to press the clutch pedal to
restart the engine.
Special cases: START mode
activated automatically
As a safety measure or to maintain comfort
levels in the vehicle, START mode is activated
automatically when:
-
y
ou open the driver's door,
-
y
ou unfasten the driver's seat belt,
-
t
he speed of the vehicle exceeds 16 mph
(25
km/h) with a manual gearbox or 7 mph
(11
km/h) with an electronic 6 -speed
gearbox,
-
s
ome special conditions (battery charge,
engine temperature, braking assistance,
ambient temperature, etc.) are present
which require the engine to be running to
assure control of the system or vehicle.
In this case, the " ECO" indicator
lamp flashes for a few seconds then
goes off.
This operation is perfectly normal.
6
Driving