parking brake PONTIAC GRAND PRIX 2004 User Guide
[x] Cancel search | Manufacturer: PONTIAC, Model Year: 2004, Model line: GRAND PRIX, Model: PONTIAC GRAND PRIX 2004Pages: 432, PDF Size: 2.99 MB
Page 250 of 432
Steering
Power Steering
If you lose power steering assist because the engine
stops or the system is not functioning, you can steer but it
will take much more effort.
Variable Effort Steering
If your vehicle has this steering system, the system
provides less steering effort for parking and when driving
at speeds below 20 mph (32 km/h). Steering effort will
increase at higher speeds for improved road feel.
Steering Tips
Driving on Curves
It's important to take curves at a reasonable speed.
A lot of the ªdriver lost controlº accidents mentioned on
the news happen on curves. Here's why:
Experienced driver or beginner, each of us is subject
to the same laws of physics when driving on curves.
The traction of the tires against the road surface makes it
possible for the vehicle to change its path when you turn
the front wheels. If there's no traction, inertia will keep the
vehicle going in the same direction. If you've ever tried to
steer a vehicle on wet ice, you'll understand this.
The traction you can get in a curve depends on the
condition of your tires and the road surface, the angle at
which the curve is banked, and your speed. While you're
in a curve, speed is the one factor you can control.Suppose you're steering through a sharp curve.
Then you suddenly apply the brakes. Both control
systems Ð steering and braking Ð have to do their
work where the tires meet the road. Unless you have
four-wheel anti-lock brakes, adding the hard braking can
demand too much of those places. You can lose control.
The same thing can happen if you're steering through a
sharp curve and you suddenly accelerate. Those two
control systems Ð steering and acceleration Ð can
overwhelm those places where the tires meet the road
and make you lose control. See
Traction Control System
(TCS) on page 4-10orEnhanced Traction System (ETS)
on page 4-11.
What should you do if this ever happens? Ease up on
the brake or accelerator pedal, steer the vehicle the way
you want it to go, and slow down.
Speed limit signs near curves warn that you should
adjust your speed. Of course, the posted speeds
are based on good weather and road conditions.
Under less favorable conditions you'll want to go slower.
If you need to reduce your speed as you approach a
curve, do it before you enter the curve, while your front
wheels are straight ahead.
Try to adjust your speed so you can ªdriveº through the
curve. Maintain a reasonable, steady speed. Wait to
accelerate until you are out of the curve, and then
accelerate gently into the straightaway.
4-14
Page 270 of 432
Here are some important things to consider before you
do recreational vehicle towing:
·What's the towing capacity of the towing vehicle?
Be sure you read the tow vehicle manufacturer's
recommendations.
·How far will you tow? Some vehicles have
restrictions on how far and how long they can tow.
·Do you have the proper towing equipment?
See your dealer or trailering professional for
additional advice and equipment recommendations.
·Is your vehicle ready to be towed? Just as you
would prepare your vehicle for a long trip, you'll
want to make sure your vehicle is prepared to be
towed. See
Before Leaving on a Long Trip on
page 4-25.
Dinghy Towing
Notice:Towing your vehicle with all four wheels on
the ground will damage drivetrain components.
Your vehicle was not designed to be towed with all four
wheels on the ground. If your vehicle must be towed,
you should use a dolly. See ªDolly Towingº following for
more information.
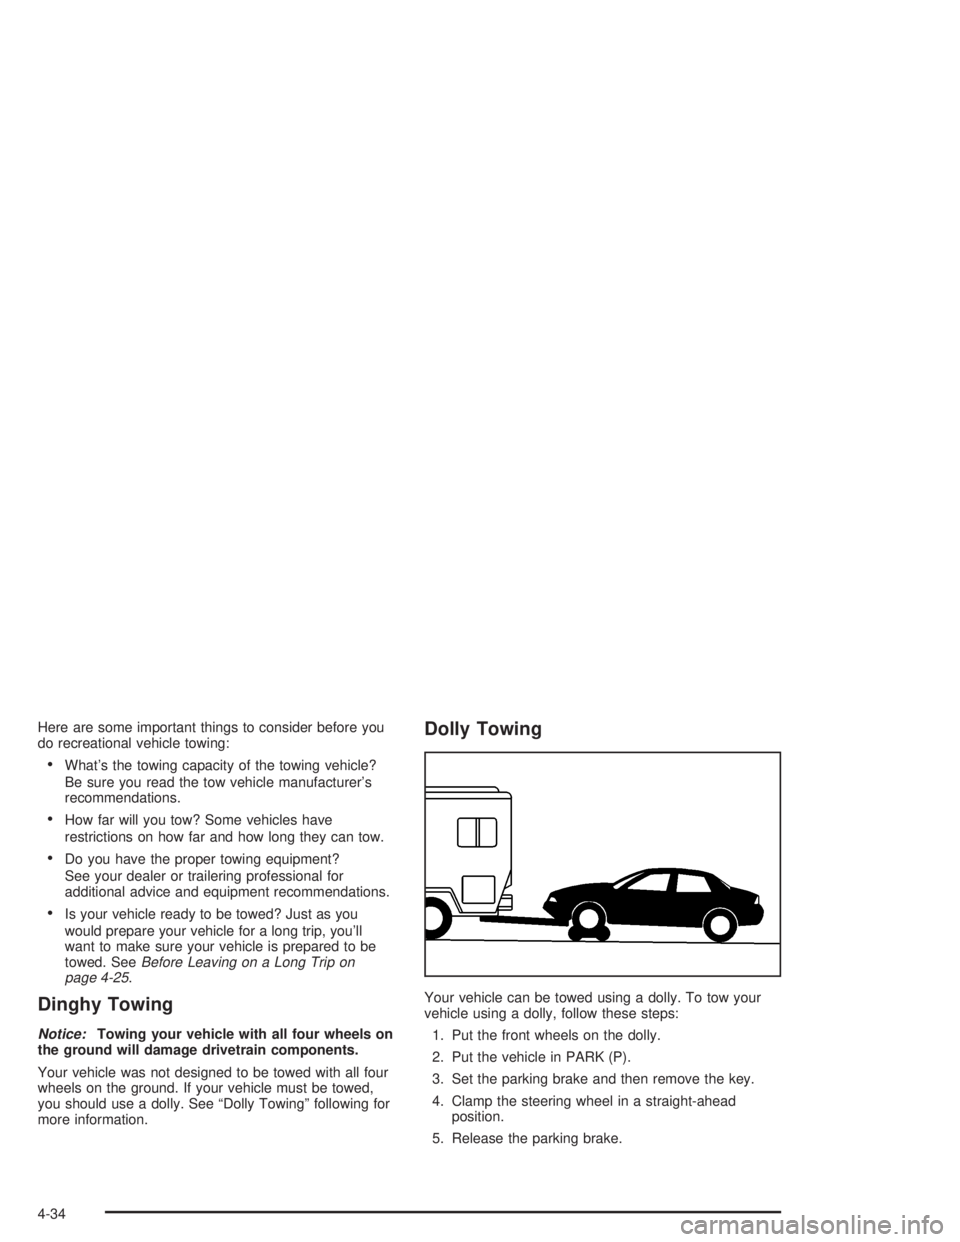
Dolly Towing
Your vehicle can be towed using a dolly. To tow your
vehicle using a dolly, follow these steps:
1. Put the front wheels on the dolly.
2. Put the vehicle in PARK (P).
3. Set the parking brake and then remove the key.
4. Clamp the steering wheel in a straight-ahead
position.
5. Release the parking brake.
4-34
Page 279 of 432
Parking on Hills
{CAUTION:
You really should not park your vehicle, with a
trailer attached, on a hill. If something goes
wrong, your rig could start to move. People
can be injured, and both your vehicle and the
trailer can be damaged.
But if you ever have to park your rig on a hill,
here's how to do it:
1. Apply your regular brakes, but don't shift into
PARK (P) yet.
2. Have someone place chocks under the trailer
wheels.
3. When the wheel chocks are in place, release the
regular brakes until the chocks absorb the load.
4. Reapply the regular brakes. Then apply your
parking brake, and then shift to PARK (P).
5. Release the regular brakes.
When You Are Ready to Leave After
Parking on a Hill
1. Apply your regular brakes and hold the pedal down
while you:
·start your engine,
·shift into a gear, and
·release the parking brake.
2. Let up on the brake pedal.
3. Drive slowly until the trailer is clear of the chocks.
4. Stop and have someone pick up and store the
chocks.
4-43
Page 281 of 432
Service............................................................5-3
Doing Your Own Service Work.........................5-3
Adding Equipment to the Outside
of Your Vehicle...........................................5-4
Fuel................................................................5-4
Gasoline Octane............................................5-4
Gasoline Speci®cations....................................5-5
California Fuel...............................................5-5
Additives.......................................................5-6
Fuels in Foreign Countries...............................5-7
Filling Your Tank............................................5-7
Filling a Portable Fuel Container.....................5-10
Checking Things Under the Hood....................5-10
Hood Release..............................................5-11
Engine Compartment Overview.......................5-12
Engine Oil...................................................5-16
Supercharger Oil..........................................5-21
Engine Air Cleaner/Filter................................5-22
Automatic Transaxle Fluid..............................5-24
Engine Coolant.............................................5-26
Radiator Pressure Cap..................................5-29
Engine Overheating.......................................5-29
Cooling System............................................5-32
Power Steering Fluid.....................................5-42
Windshield Washer Fluid................................5-43Brakes........................................................5-45
Battery........................................................5-48
Jump Starting...............................................5-49
Headlamp Aiming...........................................5-56
Bulb Replacement..........................................5-59
Halogen Bulbs..............................................5-59
Headlamps and Sidemarker Lamps.................5-60
Front Turn Signal, Parking and
Fog Lamps...............................................5-62
Center High-Mounted Stoplamp (CHMSL).........5-64
Taillamps, Turn Signal, and Stoplamps............5-64
Back-Up Lamps............................................5-65
Replacement Bulbs.......................................5-66
Windshield Wiper Blade Replacement..............5-67
Tires..............................................................5-68
In¯ation -- Tire Pressure................................5-69
Tire Pressure Monitor System.........................5-70
Tire Inspection and Rotation...........................5-71
When It Is Time for New Tires.......................5-72
Buying New Tires.........................................5-73
Uniform Tire Quality Grading..........................5-74
Wheel Alignment and Tire Balance..................5-75
Wheel Replacement......................................5-75
Tire Chains..................................................5-77
Section 5 Service and Appearance Care
5-1
Page 291 of 432
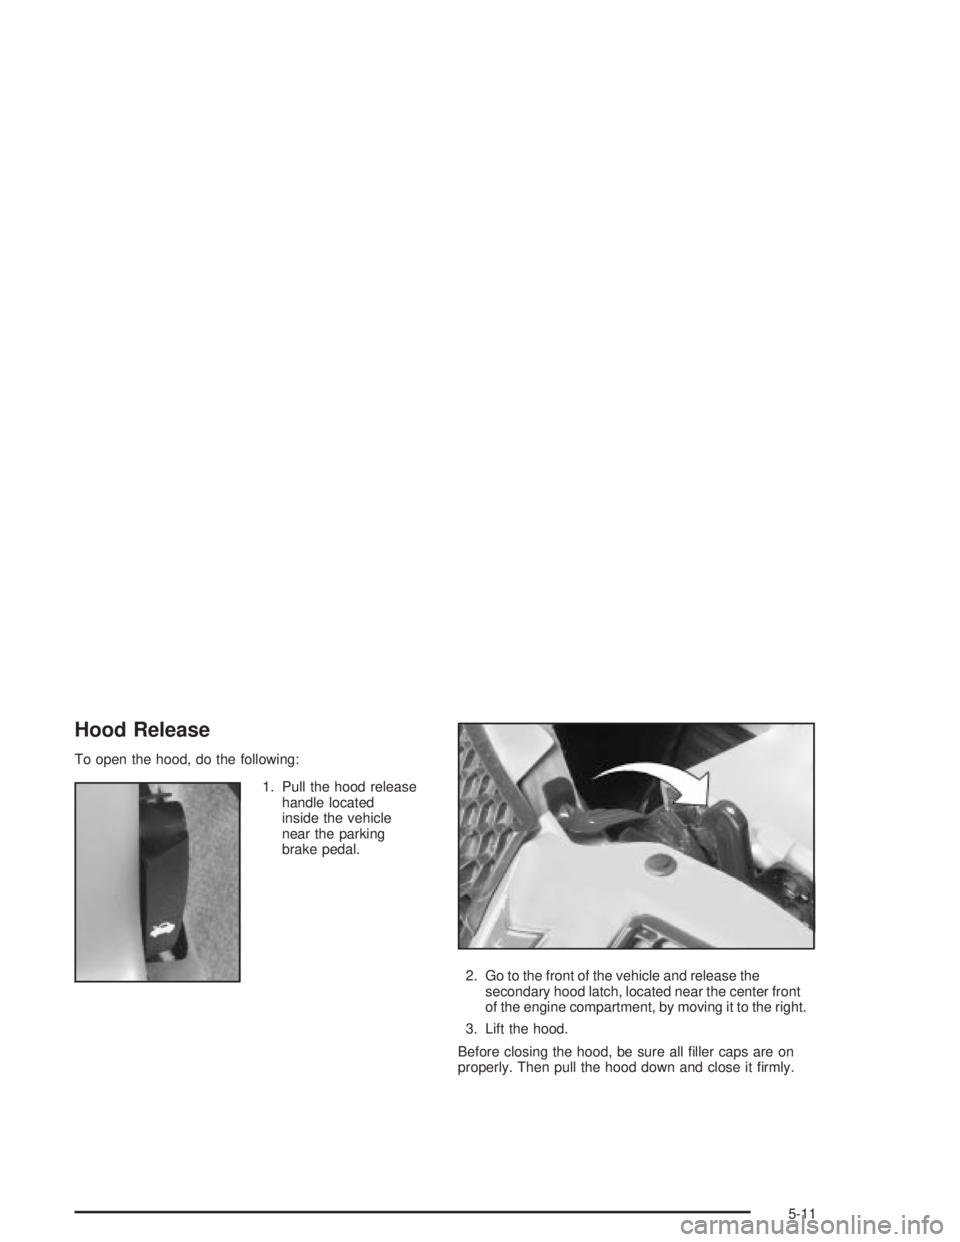
Hood Release
To open the hood, do the following:
1. Pull the hood release
handle located
inside the vehicle
near the parking
brake pedal.
2. Go to the front of the vehicle and release the
secondary hood latch, located near the center front
of the engine compartment, by moving it to the right.
3. Lift the hood.
Before closing the hood, be sure all ®ller caps are on
properly. Then pull the hood down and close it ®rmly.
5-11
Page 305 of 432
To get the right reading, the ¯uid should be at normal
operating temperature, which is 180ÉF to 200ÉF
(82ÉC to 93ÉC).
Get the vehicle warmed up by driving about 15 miles
(24 km) when outside temperatures are above 50ÉF
(10ÉC). If it's colder than 50ÉF (10ÉC), you may have to
drive longer.
Checking the Fluid Level
Prepare your vehicle as follows:
·Park your vehicle on a level place. Keep the engine
running.
·With the parking brake applied, place the shift lever
in PARK (P).
·With your foot on the brake pedal, move the shift
lever through each gear range, pausing for about
three seconds in each range. Then, position the shift
lever in PARK (P).
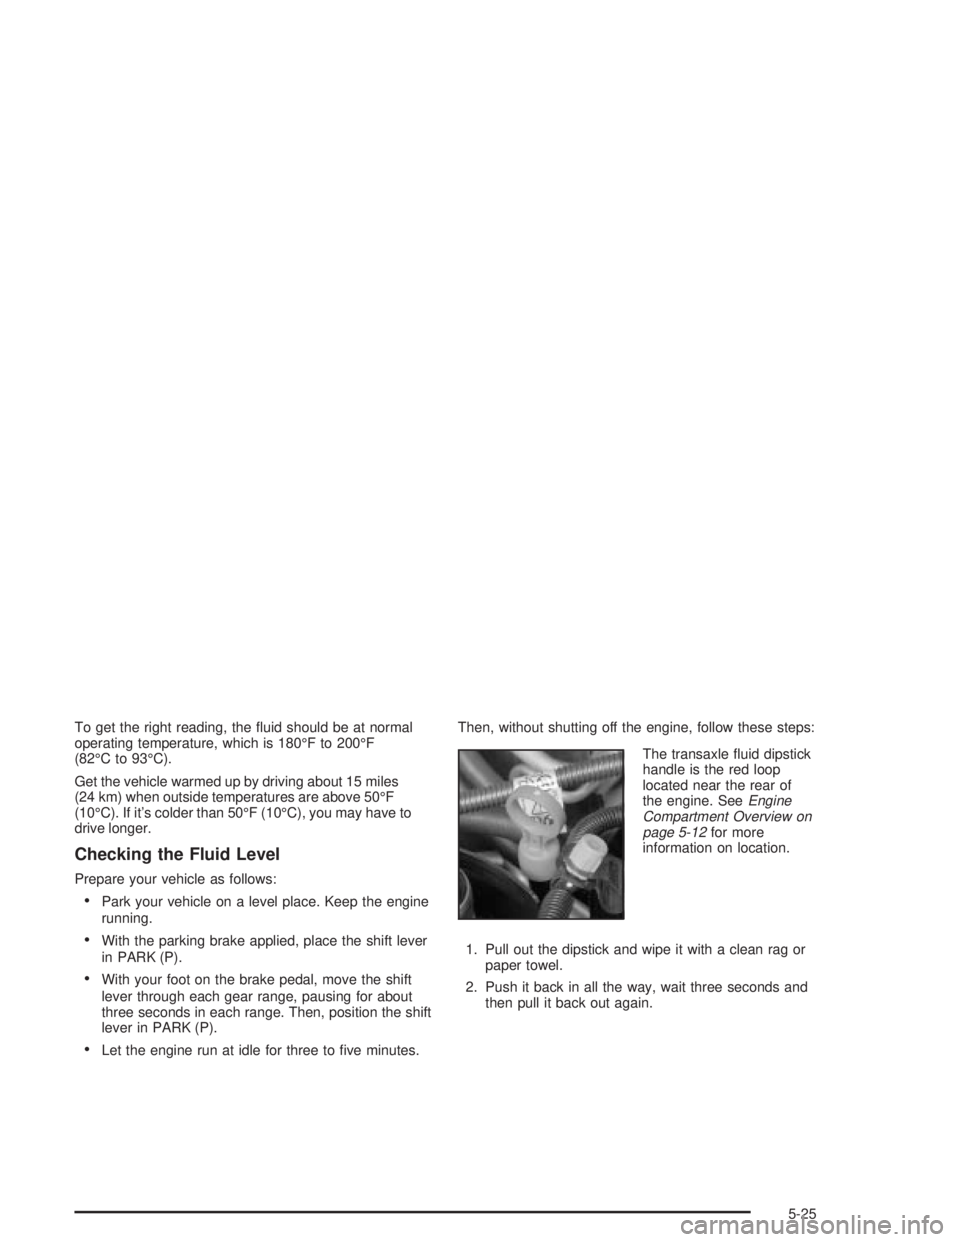
·Let the engine run at idle for three to ®ve minutes.Then, without shutting off the engine, follow these steps:
The transaxle ¯uid dipstick
handle is the red loop
located near the rear of
the engine. See
Engine
Compartment Overview on
page 5-12
for more
information on location.
1. Pull out the dipstick and wipe it with a clean rag or
paper towel.
2. Push it back in all the way, wait three seconds and
then pull it back out again.
5-25
Page 329 of 432
Jump Starting
If your battery has run down, you may want to use
another vehicle and some jumper cables to start your
vehicle. Be sure to follow the steps listed below to do it
safely.
{CAUTION:
Batteries can hurt you. They can be dangerous
because:
·They contain acid that can burn you.
·They contain gas that can explode or
ignite.
·They contain enough electricity to
burn you.
If you don't follow these steps exactly, some
or all of these things can hurt you.
Notice:Ignoring these steps could result in costly
damage to your vehicle that wouldn't be covered
by your warranty.
Trying to start your vehicle by pushing or pulling it
won't work, and it could damage your vehicle.
Notice:If the other system isn't a 12-volt system
with a negative ground, both vehicles can be
damaged.
1. Check the other vehicle. It must have a 12-volt
battery with a negative ground system.
2. Get the vehicles close enough so the jumper cables
can reach, but be sure the vehicles aren't touching
each other. If they are, it could cause a ground
connection you don't want. You wouldn't be able to
start your vehicle, and the bad grounding could
damage the electrical systems.
To avoid the possibility of the vehicles rolling, set
the parking brake ®rmly on both vehicles involved in
the jump start procedure. Put an automatic
transaxle in PARK (P) or a manual transaxle in
NEUTRAL (N) before setting the parking brake.
5-49
Page 358 of 432
If a Tire Goes Flat
It's unusual for a tire to ªblowoutº while you're driving,
especially if you maintain your tires properly. If air goes
out of a tire, it's much more likely to leak out slowly.
But if you should ever have a ªblowoutº, here are a few
tips about what to expect and what to do:
If a front tire fails, the ¯at tire will create a drag that
pulls the vehicle toward that side. Take your foot off the
accelerator pedal and grip the steering wheel ®rmly.
Steer to maintain lane position, and then gently brake to
a stop well out of the traffic lane.
A rear blowout, particularly on a curve, acts much like a
skid and may require the same correction you'd use
in a skid. In any rear blowout, remove your foot from the
accelerator pedal. Get the vehicle under control by
steering the way you want the vehicle to go. It may be
very bumpy and noisy, but you can still steer. Gently
brake to a stop Ð well off the road if possible.
If a tire goes ¯at, the next part shows how to use your
jacking equipment to change a ¯at tire safely.
Changing a Flat Tire
If a tire goes ¯at, avoid further tire and wheel damage
by driving slowly to a level place. Turn on your
hazard warning ¯ashers.
{CAUTION:
Changing a tire can cause an injury. The
vehicle can slip off the jack and roll over you
or other people. You and they could be badly
injured. Find a level place to change your tire.
To help prevent the vehicle from moving:
1. Set the parking brake ®rmly.
2. Put the shift lever in PARK (P).
3. Turn off the engine.
CAUTION: (Continued)
5-78
Page 398 of 432
Starter Switch Check
{CAUTION:
When you are doing this check, the vehicle
could move suddenly. If it does, you or others
could be injured. Follow the steps below.
1. Before you start, be sure you have enough room
around the vehicle.
2. Firmly apply both the parking brake and the regular
brake. See
Parking Brake on page 2-27if
necessary.
Do not use the accelerator pedal, and be ready to
turn off the engine immediately if it starts.
3. Try to start the engine in each gear. The starter
should work only in PARK (P) or NEUTRAL (N).
If the starter works in any other position, your
vehicle needs service.
Automatic Transaxle Shift Lock Control
System Check
{CAUTION:
When you are doing this check, the vehicle
could move suddenly. If it does, you or others
could be injured. Follow the steps below.
1. Before you start, be sure you have enough room
around the vehicle. It should be parked on a level
surface.
2. Firmly apply the parking brake. See
Parking Brake
on page 2-27if necessary.
Be ready to apply the regular brake immediately if
the vehicle begins to move.
3. With the engine off, turn the key to the RUN
position, but don't start the engine. Without applying
the regular brake, try to move the shift lever out
of PARK (P) with normal effort. If the shift lever
moves out of PARK (P), your vehicle needs service.
6-12
Page 399 of 432
Ignition Transaxle Lock Check
While parked, and with the parking brake set, try to turn
the ignition key to LOCK in each shift lever position.
·The key should turn to LOCK only when the
shift lever is in PARK (P).
·The key should come out only in LOCK.
Parking Brake and Automatic Transaxle
Park (P) Mechanism Check
{CAUTION:
When you are doing this check, your vehicle
could begin to move. You or others could be
injured and property could be damaged. Make
sure there is room in front of your vehicle in
case it begins to roll. Be ready to apply the
regular brake at once should the vehicle begin
to move.Park on a fairly steep hill, with the vehicle facing
downhill. Keeping your foot on the regular brake, set the
parking brake.
·To check the parking brake's holding ability: With
the engine running and transaxle in NEUTRAL
(N), slowly remove foot pressure from the regular
brake pedal. Do this until the vehicle is held by the
parking brake only.
·To check the PARK (P) mechanism's holding
ability: With the engine running, shift to PARK (P).
Then release the parking brake followed by the
regular brake.
Underbody Flushing Service
At least every spring, use plain water to ¯ush any
corrosive materials from the underbody. Take care to
clean thoroughly any areas where mud and other debris
can collect.
6-13