radio PONTIAC VIBE 2007 Owners Manual
[x] Cancel search | Manufacturer: PONTIAC, Model Year: 2007, Model line: VIBE, Model: PONTIAC VIBE 2007Pages: 432, PDF Size: 2.54 MB
Page 89 of 432
Remote Keyless Entry (RKE)
System
If the vehicle has the Remote Keyless Entry (RKE)
system, it operates on a radio frequency subject
to Federal Communications Commission (FCC)
Rules and with Industry Canada.
This device complies with Part 15 of the FCC
Rules. Operation is subject to the following
two conditions:
1. This device may not cause interference.
2. This device must accept any interference
received, including interference that may
cause undesired operation of the device.
This device complies with RSS-210 of Industry
Canada. Operation is subject to the following
two conditions:
1. This device may not cause interference.
2. This device must accept any interference
received, including interference that may
cause undesired operation of the device.Changes or modi�cations to this system by other
than an authorized service facility could void
authorization to use this equipment.
At times you may notice a decrease in range. This
is normal for any RKE system. If the transmitter
does not work or if you have to stand closer
to your vehicle for the transmitter to work, try this:
Check the distance. You may be too far
from your vehicle. You may need to stand
closer during rainy or snowy weather.
Check the location. Other vehicles or objects
may be blocking the signal. Take a few steps
to the left or right, hold the transmitter
higher, and try again.
Check to determine if battery replacement is
necessary. See “Battery Replacement”
underRemote Keyless Entry (RKE) System
Operation on page 90.
If you are still having trouble, see your dealer
or a quali�ed technician for service.
89
Page 103 of 432
Ignition Positions
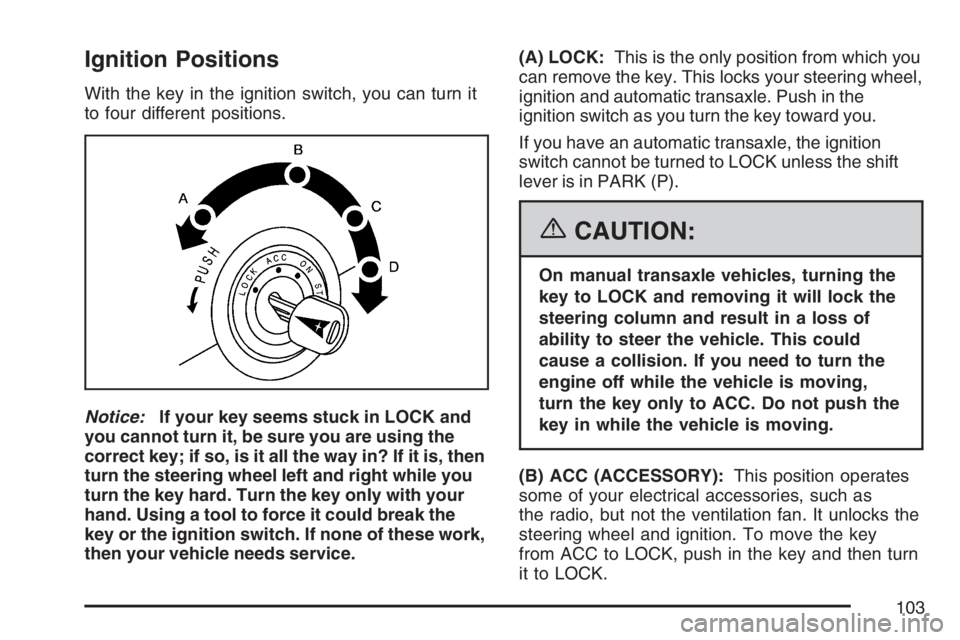
With the key in the ignition switch, you can turn it
to four different positions.
Notice:If your key seems stuck in LOCK and
you cannot turn it, be sure you are using the
correct key; if so, is it all the way in? If it is, then
turn the steering wheel left and right while you
turn the key hard. Turn the key only with your
hand. Using a tool to force it could break the
key or the ignition switch. If none of these work,
then your vehicle needs service.(A) LOCK:This is the only position from which you
can remove the key. This locks your steering wheel,
ignition and automatic transaxle. Push in the
ignition switch as you turn the key toward you.
If you have an automatic transaxle, the ignition
switch cannot be turned to LOCK unless the shift
lever is in PARK (P).
{CAUTION:
On manual transaxle vehicles, turning the
key to LOCK and removing it will lock the
steering column and result in a loss of
ability to steer the vehicle. This could
cause a collision. If you need to turn the
engine off while the vehicle is moving,
turn the key only to ACC. Do not push the
key in while the vehicle is moving.
(B) ACC (ACCESSORY):This position operates
some of your electrical accessories, such as
the radio, but not the ventilation fan. It unlocks the
steering wheel and ignition. To move the key
from ACC to LOCK, push in the key and then turn
it to LOCK.
103
Page 126 of 432
How OnStar®Service Works
In order to provide you with OnStar®services,
your vehicle’s OnStar®system has the capability
of recording and transmitting vehicle information.
This information is automatically sent to an
OnStar
®Call Center at the time of an OnStar®
button press, Emergency button press or if
your airbags or AACN system deploys. The vehicle
information usually includes your GPS location
and, in the event of a crash, additional information
regarding the accident that your vehicle has
been involved in (e.g. the direction from which
your vehicle was hit). When you use the Virtual
Advisor feature of OnStar
®Hands-Free Calling,
your vehicle also sends OnStar®your GPS
location so that we can provide you with
location-based services.
OnStar
®service cannot work unless your vehicle
is in a place where OnStar®has an agreement
with a wireless service provider for service in that
area. OnStar
®service also cannot work unless
you are in a place where the wireless service
provider OnStar
®has hired for that area
has coverage, network capacity and reception
when the service is needed, and technology that
is compatible with the OnStar
®service.Not all services are available everywhere,
particularly in remote or enclosed areas, or
at all times.
OnStar
®service that involves location information
about your vehicle cannot work unless GPS
satellite signals are unobstructed and available in
that place as well.
Your vehicle must have a working electrical
system (including adequate battery power) for the
OnStar
®equipment to operate. There are other
problems OnStar®cannot control that may prevent
OnStar®from providing OnStar®service to you
at any particular time or place. Some examples are
damage to important parts of your vehicle in an
accident, hills, tall buildings, tunnels, weather
or wireless phone network congestion.
Your Responsibility
You may need to increase the volume of your
radio to hear the OnStar®advisor. If the light next
to the OnStar®buttons is red, this means that
your system is not functioning properly and should
be checked by a dealer. If the light appears
clear (no light is appearing), your OnStar
®
subscription has expired. You can always press
the blue OnStar®button to con�rm that your
OnStar®equipment is active.
126
Page 134 of 432
Engine Coolant Temperature Gage............ 169
Malfunction Indicator Lamp........................ 170
Oil Pressure Light..................................... 173
Lights On Reminder.................................. 174
Taillamp Indicator Light............................. 174
Cruise Control Light.................................. 174
Overdrive Off Light.................................... 174
Highbeam On Light................................... 175
Low Washer Fluid Warning Light............... 175
Door Ajar Light.......................................... 175
Fuel Gage................................................. 176
Low Fuel Warning Light............................ 177Audio System(s)......................................... 177
Setting the Time........................................ 178
Radio with CD (Base Level)...................... 179
Radio with CD (MP3)................................ 188
Radio with Six-Disc CD............................. 198
Using an MP3........................................... 210
XM Radio Messages................................. 216
Radio Reception........................................ 218
Care of Your CDs..................................... 219
Care of the CD Player.............................. 219
Fixed Mast Antenna.................................. 219
XM™ Satellite Radio Antenna System....... 219
Section 3 Instrument Panel
134
Page 148 of 432
If you are driving through a parking garage,
overcast weather, or a tunnel, the automatic
headlamp system may turn on the low-beam
headlamps at a normal brightness along with the
taillamps, sidemarker, parking lamps and the
instrument panel lights. The radio lights will be
dimmer, and the instrument panel cluster
lights may dim. There will be a delay before the
lights will turn on when starting the car at night.
Fog Lamps
-(Fog Lamps):Turn the band on the turn
signal/multifunction lever to the fog lamp symbol to
turn the fog lamps on. They will come on only
when the headlamps are on low beam.
Some localities have laws that require the
headlamps to be on along with the fog lamps.
Instrument Panel Brightness
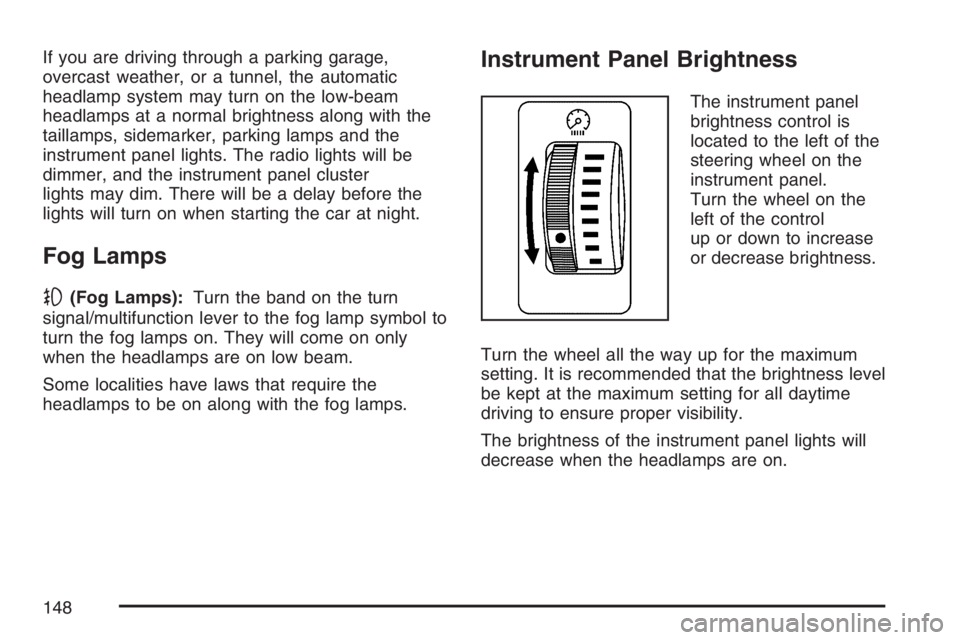
The instrument panel
brightness control is
located to the left of the
steering wheel on the
instrument panel.
Turn the wheel on the
left of the control
up or down to increase
or decrease brightness.
Turn the wheel all the way up for the maximum
setting. It is recommended that the brightness level
be kept at the maximum setting for all daytime
driving to ensure proper visibility.
The brightness of the instrument panel lights will
decrease when the headlamps are on.
148
Page 165 of 432
If the word OFF is lit on the passenger airbag status
indicator, it means that the passenger sensing
system has turned off the right front passenger’s
frontal airbag and seat-mounted side impact airbag
(if equipped). SeePassenger Sensing System on
page 74for information about the conditions that
may affect the airbag system and also important
safety information.
If, after several seconds, all status indicator lights
remain on, or if there are no lights at all, there
may be a problem with the lights or the passenger
sensing system. See your dealer for service.
{CAUTION:
If the off indicator and the airbag readiness
light ever come on together, it means that
something may be wrong with the airbag
system. If this ever happens, have the
vehicle serviced promptly, because an
adult-size person sitting in the right front
passenger seat may not have the
protection of an airbag. SeeAirbag
Readiness Light on page 162.
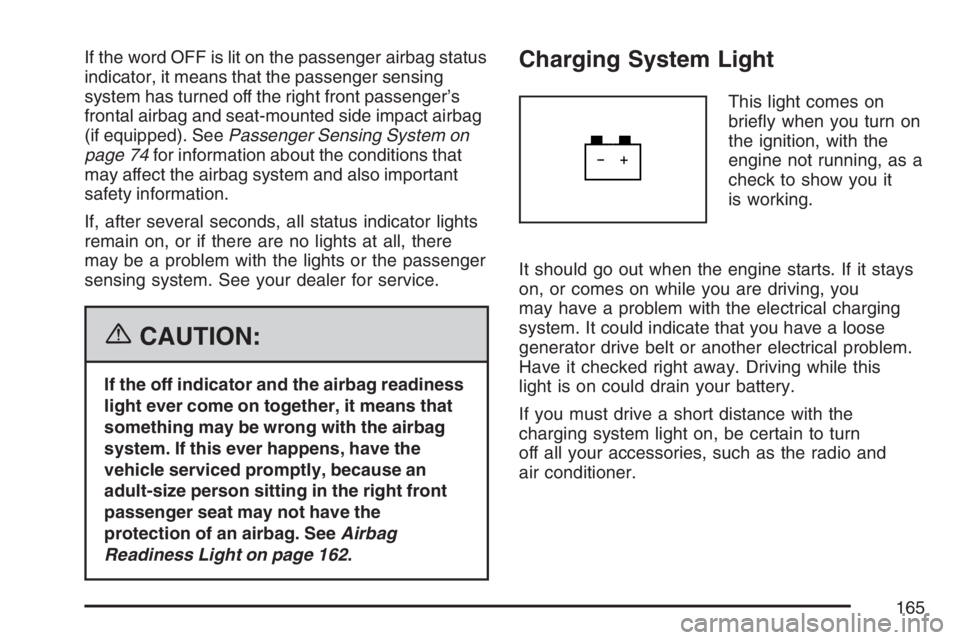
Charging System Light
This light comes on
brie�y when you turn on
the ignition, with the
engine not running, as a
check to show you it
is working.
It should go out when the engine starts. If it stays
on, or comes on while you are driving, you
may have a problem with the electrical charging
system. It could indicate that you have a loose
generator drive belt or another electrical problem.
Have it checked right away. Driving while this
light is on could drain your battery.
If you must drive a short distance with the
charging system light on, be certain to turn
off all your accessories, such as the radio and
air conditioner.
165
Page 177 of 432
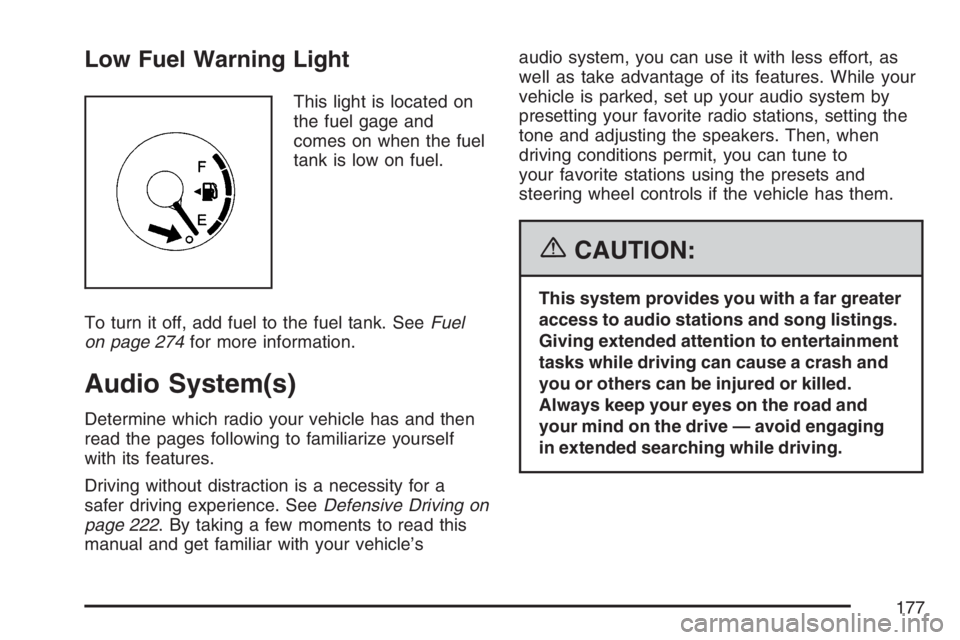
Low Fuel Warning Light
This light is located on
the fuel gage and
comes on when the fuel
tank is low on fuel.
To turn it off, add fuel to the fuel tank. SeeFuel
on page 274for more information.
Audio System(s)
Determine which radio your vehicle has and then
read the pages following to familiarize yourself
with its features.
Driving without distraction is a necessity for a
safer driving experience. SeeDefensive Driving on
page 222. By taking a few moments to read this
manual and get familiar with your vehicle’saudio system, you can use it with less effort, as
well as take advantage of its features. While your
vehicle is parked, set up your audio system by
presetting your favorite radio stations, setting the
tone and adjusting the speakers. Then, when
driving conditions permit, you can tune to
your favorite stations using the presets and
steering wheel controls if the vehicle has them.
{CAUTION:
This system provides you with a far greater
access to audio stations and song listings.
Giving extended attention to entertainment
tasks while driving can cause a crash and
you or others can be injured or killed.
Always keep your eyes on the road and
your mind on the drive — avoid engaging
in extended searching while driving.
177
Page 178 of 432
Keeping your mind on the drive is important for
safe driving. Here are some ways in which you can
help avoid distraction while driving.
While your vehicle is parked:
Familiarize yourself with all of its controls.
Familiarize yourself with its operation.
Set up your audio system by presetting your
favorite radio stations, setting the tone, and
adjusting the speakers. Then, when driving
conditions permit, you can tune to your favorite
radio stations using the presets and steering
wheel controls if the vehicle has them.
Notice:Before adding any sound equipment to
your vehicle, such as an audio system, CD
player, CB radio, mobile telephone, or two-way
radio, make sure that it can be added by
checking with your dealer. Also, check federal
rules covering mobile radio and telephone
units. If sound equipment can be added, it is
very important to do it properly. Added sound
equipment can interfere with the operation of
your vehicle’s engine, radio, or other systems,
and even damage them. Your vehicle’s systems
can interfere with the operation of sound
equipment that has been added.
Setting the Time
The radio might have a button marked with an
H or HR to represent hours and an M or MIN to
represent minutes.
Press and hold the hour button until the correct
hour displays. AM appears for morning hours.
Press and hold the minute button until the correct
minute displays. The time can be set with the
ignition on or off.
To synchronize the time with an FM station
broadcasting Radio Data System (RDS)
information, press and hold the hour and minute
buttons at the same time until UPDATED displays.
If the time is not available from the station, NO
UPDATE displays.
RDS time is broadcast once a minute. After tuning
to an RDS broadcast station, it could take a
few minutes for the time to update.
178
Page 179 of 432
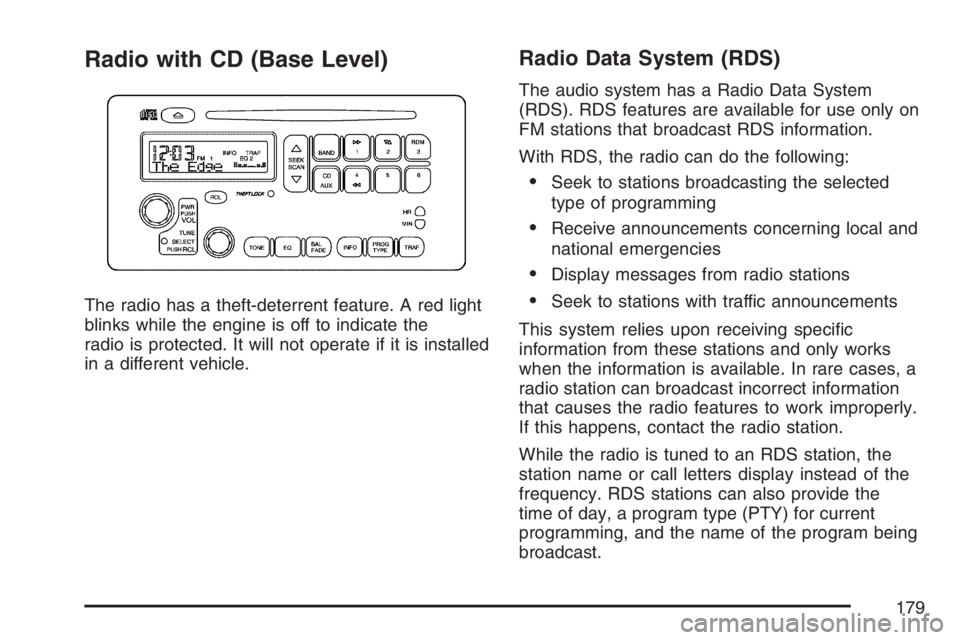
Radio with CD (Base Level)
The radio has a theft-deterrent feature. A red light
blinks while the engine is off to indicate the
radio is protected. It will not operate if it is installed
in a different vehicle.
Radio Data System (RDS)
The audio system has a Radio Data System
(RDS). RDS features are available for use only on
FM stations that broadcast RDS information.
With RDS, the radio can do the following:
Seek to stations broadcasting the selected
type of programming
Receive announcements concerning local and
national emergencies
Display messages from radio stations
Seek to stations with traffic announcements
This system relies upon receiving speci�c
information from these stations and only works
when the information is available. In rare cases, a
radio station can broadcast incorrect information
that causes the radio features to work improperly.
If this happens, contact the radio station.
While the radio is tuned to an RDS station, the
station name or call letters display instead of the
frequency. RDS stations can also provide the
time of day, a program type (PTY) for current
programming, and the name of the program being
broadcast.
179
Page 180 of 432
XM™ Satellite Radio Service
XM™ is a satellite radio service that is based in
the 48 contiguous United States and Canada.
XM™ offers a large variety of coast-to-coast
channels including music, news, sports, talk,
traffic/weather (U.S. subscribers), and children’s
programming. XM™ provides digital quality
audio and text information that includes song title
and artist name. A service fee is required in
order to receive the XM™ service. For more
information, contact XM™; In the U.S. at
www.xmradio.com or call 1-800-852-XMXM (9696)
or in Canada at www.xmradio.ca or call
1-877-GET-XMSR (438-9677).
Playing the Radio
PWR (Power):Push this knob to turn the system
on and off.
VOL (Volume):Turn this knob clockwise or
counterclockwise to increase or to decrease the
volume.RCL (Recall):Push this button to display the time
with the ignition off.
For RDS, push the RCL button to change what
displays while using RDS. The display options are
station, RDS station frequency, PTY (program
type), and the name of the program (if available).
For XM™ (if equipped), push the RCL button
while in XM™ mode to retrieve four different
categories of information related to the current
song or channel: Artist, Song Title, Category
or PTY, Channel Number/Channel Name.
To change the default on the display, push the
RCL button until the desired option displays, then
hold the button until the display �ashes. The
selected display becomes the default.Finding a Station
BAND:Press this button to switch between FM1,
FM2, AM, or XM1 or XM2 (if equipped). The
display shows the selection.
TUNE:Turn this knob to select radio stations.
180