display Ram 1500 2020 Owner's Manual
[x] Cancel search | Manufacturer: RAM, Model Year: 2020, Model line: 1500, Model: Ram 1500 2020Pages: 674, PDF Size: 32.69 MB
Page 608 of 674

606 MULTIMEDIA
Lane Sense Warning — If Equipped Early
MedLate
NOTE:
Sets what distance the steering wheel provides feedback for potential lane departures. Lane Sense Strength — If Equipped Low
MedHigh
ParkSense Sound Only Sound & Display
NOTE:
The Rear Park Assist system scans for objects behind the vehicle when the transmission gear selector is in REVERSE and the
vehicle speed is less than 7 mph (11 km/h). Front ParkSense Volume LowMedHigh
Rear ParkSense Volume LowMedHigh
Rear ParkSense Braking Assist On
Off
NOTE:
Brakes the vehicle while in reverse if potential rear collision is detected. Blind Spot Alert OffLightsLights & Chime
Trailer Length For Blind Spot Alert Auto
Max (39.5 feet)
NOTE:
Auto detects the length of the trailer. Max sets all trailers to 39.5 ft (12 m). Setting Name
Selectable Options
2020_DT_1500_OM_US.book Page 606
Page 610 of 674

608 MULTIMEDIA
Brakes
After pressing the Brake button on the touchscreen, the following settings will be available:
Lights
After pressing the Lights button on the touchscreen, the following settings will be available:Setting Name
Selectable Options
Brake Service YesNo
NOTE:
Selecting the “Brake Service” feature will display a pop-up asking whether or you would like to retract the park brakes to all
break system service. Auto Park Brake OnOff
Setting Name Selectable Options
Headlight Off Delay -+
NOTE:
When the “Headlight Off Delay” feature is selected, the driver can choose to have the headlights remain on for 0, 30, 60, or
90 seconds when exiting the vehicle. Headlight Illumination On Approach –+
NOTE:
When the “Headlight Illumination On Approach” feature is selected, the headlights will activate and remain on for 0, 30, 60,
or 90 seconds when the doors are unlocked with the key fob.
2020_DT_1500_OM_US.book Page 608
Page 616 of 674

614 MULTIMEDIA
Suspension — If Equipped
After pressing the Suspension button on the touchscreen, the following settings will be available:Setting Name Selectable Options
Sound Horn With Lower On Off
NOTE:
When the “Sound Horn With Lower” feature is selected, a short horn sound will occur when the key fob remote lower button
is pushed. Flash Lights With Lower On Off
NOTE:
When the “Flash Lights With Lower” feature is selected, the front and rear turn signals will flash when the key fob remote
lower button is pressed twice. This feature may be selected with or without the Sound Horn on Lower feature selected. Display Suspension Messages All
Warning Only
Aero Mode On Off
NOTE:
When the “Aero Mode” feature is selected, the Ride Height will automatically be adjusted depending on the vehicle speed. Tire Jack Mode On Off
NOTE:
When the “Tire Jack Mode” feature is selected, the air suspension system is disabled to assist with changing a spare tire.
2020_DT_1500_OM_US.book Page 614
Page 619 of 674
MULTIMEDIA 617
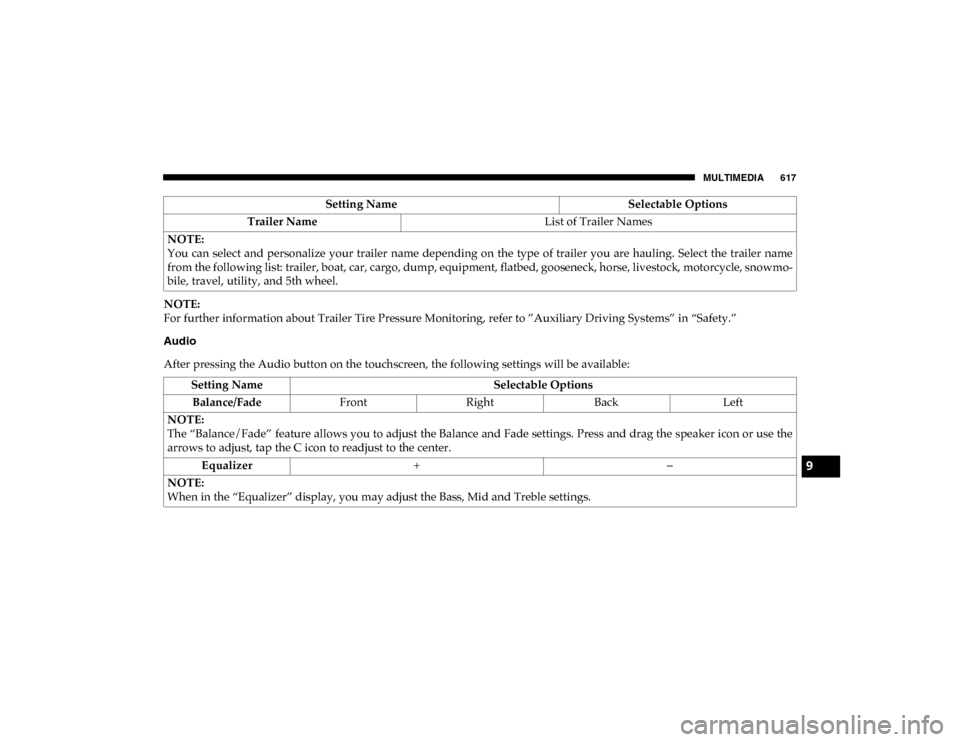
NOTE:
For further information about Trailer Tire Pressure Monitoring, refer to ”Auxiliary Driving Systems” in “Safety.”
Audio
After pressing the Audio button on the touchscreen, the following settings will be available:Trailer Name
List of Trailer Names
NOTE:
You can select and personalize your trailer name depending on the type of trailer you are hauling. Select the trailer name
from the following list: trailer, boat, car, cargo, dump, equipment, flatbed, gooseneck, horse, livestock, motorcycle, snowmo -
bile, travel, utility, and 5th wheel. Setting Name
Selectable Options
Setting NameSelectable Options
Balance/Fade FrontRight Back Left
NOTE:
The “Balance/Fade” feature allows you to adjust the Balance and Fade settings. Press and drag the speaker icon or use the
arrows to adjust, tap the C icon to readjust to the center. Equalizer + –
NOTE:
When in the “Equalizer” display, you may adjust the Bass, Mid and Treble settings.
9
2020_DT_1500_OM_US.book Page 617
Page 621 of 674
MULTIMEDIA 619
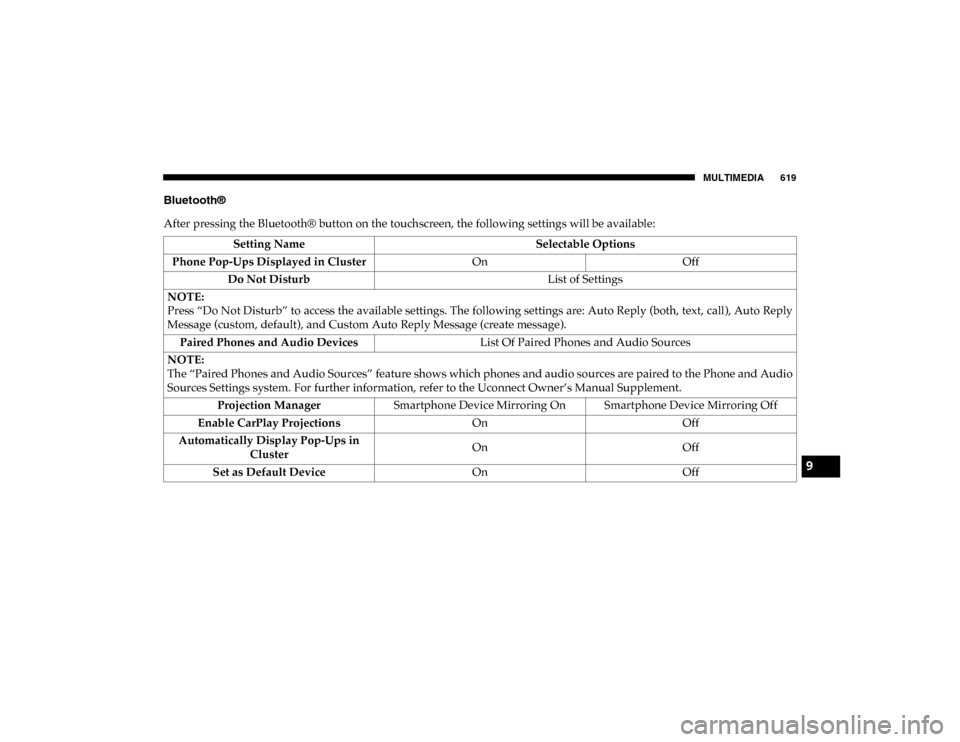
Bluetooth®
After pressing the Bluetooth® button on the touchscreen, the following settings will be available:Setting Name Selectable Options
Phone Pop-Ups Displayed in Cluster OnOff
Do Not Disturb List of Settings
NOTE:
Press “Do Not Disturb” to access the available settings. The following settings are: Auto Reply (both, text, call), Auto Reply
Message (custom, default), and Custom Auto Reply Message (create message). Paired Phones and Audio Devices List Of Paired Phones and Audio Sources
NOTE:
The “Paired Phones and Audio Sources” feature shows which phones and audio sources are paired to the Phone and Audio
Sources Settings system. For further information, refer to the Uconnect Owner’s Manual Supplement. Projection Manager Smartphone Device Mirroring On Smartphone Device Mirroring Off
Enable CarPlay Projections OnOff
Automatically Display Pop-Ups in Cluster On
Off
Set as Default Device OnOff
9
2020_DT_1500_OM_US.book Page 619
Page 630 of 674

628 MULTIMEDIA
La operación de este equipo está sujeta a las siguientes dos
condiciones:
1. es posible que este equipo o dispositivo no cause interfer-
encia perjudicial y
2. este equipo o dispositivo debe aceptar cualquier interfer- encia, incluyendo la que pueda causar su operación no
deseada.
NOTE:
Changes or modifications not expressly approved by the
party responsible for compliance could void the user’s
authority to operate the equipment.
NOTE:
• This equipment has been tested and found to comply with the limits for a Class B digital device, pursuant to Part 15
of the FCC Rules. These limits are designed to provide
reasonable protection against harmful interference in a
residential installation. This equipment generates, uses
and can radiate radio frequency energy and, if not
installed and used in accordance with the instructions,
may cause harmful interference to radio communications.
However, there is no guarantee that interference will not
occur in a particular installation. • If this equipment does cause harmful interference to radio
or television reception, which can be determined by
turning the equipment off and on, the user is encouraged
to try to correct the interference by one or more of the
following measures:
1. Increase the separation between the equipment and receiver.
2. Consult an authorized dealer or an experienced radio technician for help.
UCONNECT VOICE RECOGNITION QUICK TIPS
Introducing Uconnect
Start using Uconnect Voice Recognition (VR) with these
helpful quick tips. It provides the key Voice Commands and
tips you need to know to control your Uconnect system.
If you see the NAV icon on the bottom bar, or in the Apps
menus, of your touchscreen, you have the Uconnect 4C NAV
With 8.4-inch Display or the Uconnect 4C NAV With 12-inch
Display system. If not, you have a Uconnect 4C With 8.4-inch
Display system.
2020_DT_1500_OM_US.book Page 628
Page 631 of 674
MULTIMEDIA 629
Get Started
All you need to control your Uconnect system with your
voice are the buttons on your steering wheel.
1. Visit UconnectPhone.com to check mobile device and
feature compatibility and to find phone pairing instruc -
tions.
2. Reduce background noise. Wind noise and passenger conversations are examples of noise that may impact
recognition.
3. Speak clearly at a normal pace and volume while facing straight ahead. The microphone is located in the head -
liner and aimed at the driver.
4. Each time you give a Voice Command, you must first push either the VR or Phone button, wait until after the
beep, then say your Voice Command.
5. You can interrupt the help message or system prompts by pushing the VR or Phone button and saying a Voice
Command from current category.
Basic Voice Commands
The basic Voice Commands below can be given at any point
while using your Uconnect system.
Push the VR button . After the beep, say:
• “Cancel ” to stop a current voice session.
• “Help ” to hear a list of suggested Voice Commands.
• “Repeat ” to listen to the system prompts again.
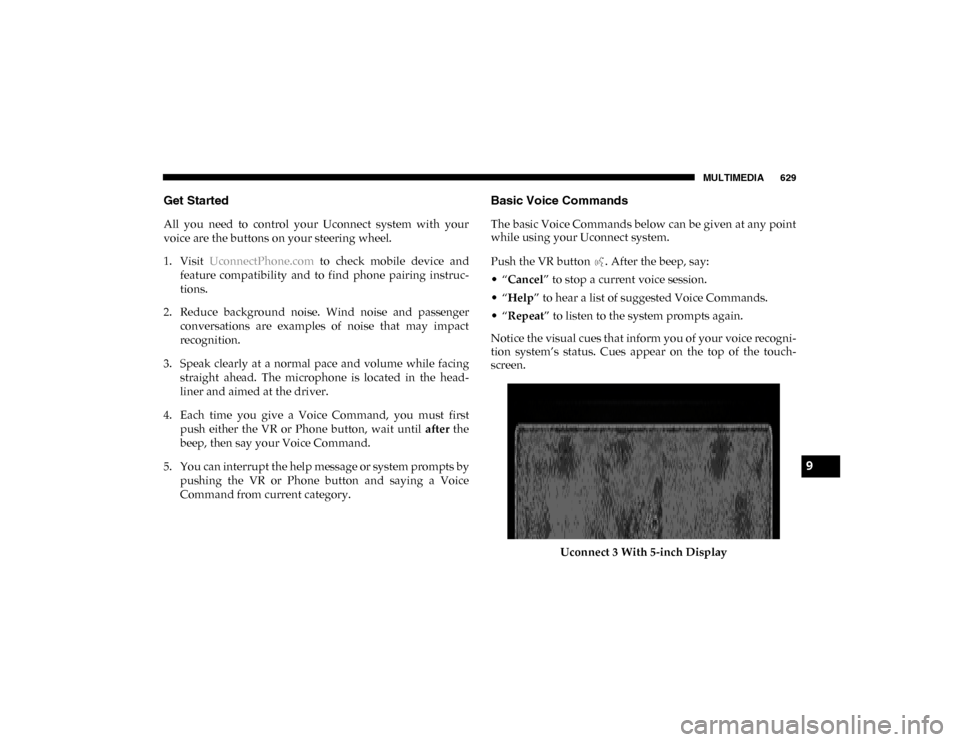
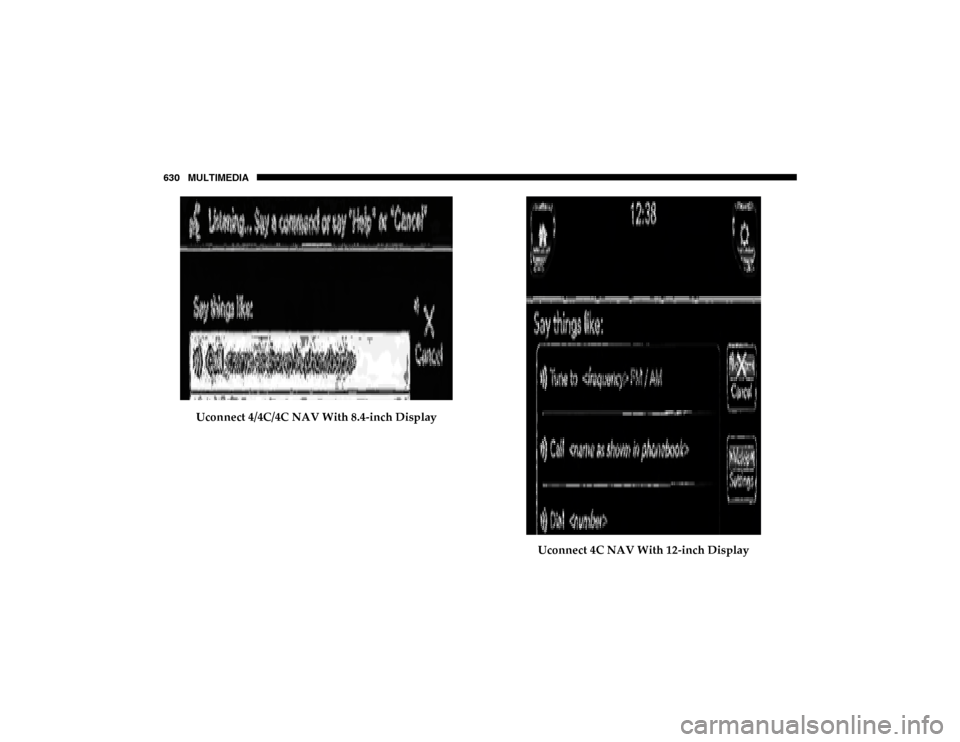
Notice the visual cues that inform you of your voice recogni -
tion system’s status. Cues appear on the top of the touch -
screen.
Uconnect 3 With 5-inch Display
9
2020_DT_1500_OM_US.book Page 629
Page 632 of 674
630 MULTIMEDIA
Uconnect 4/4C/4C NAV With 8.4-inch DisplayUconnect 4C NAV With 12-inch Display
2020_DT_1500_OM_US.book Page 630
Page 633 of 674
MULTIMEDIA 631
Radio
Use your voice to quickly get to the AM, FM or SiriusXM®
Satellite Radio stations you would like to hear. (Subscription
or included SiriusXM® Satellite Radio trial required.)
Push the VR button . After the beep, say:
• “Tune to ninety-five-point-five FM”.
• “Tune to Satellite Channel Hits 1”.
TIP:
At any time, if you are not sure of what to say or want to
learn a Voice Command, push the VR button and say
“Help .” The system provides you with a list of commands.
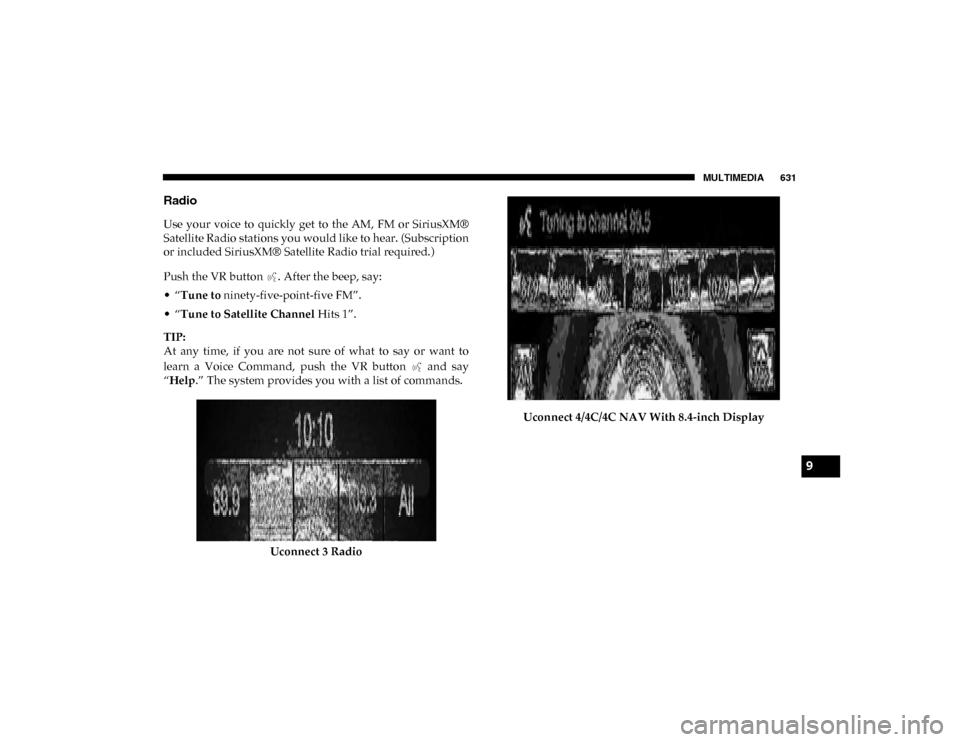
Uconnect 3 Radio Uconnect 4/4C/4C NAV With 8.4-inch Display
9
2020_DT_1500_OM_US.book Page 631
Page 634 of 674
632 MULTIMEDIA
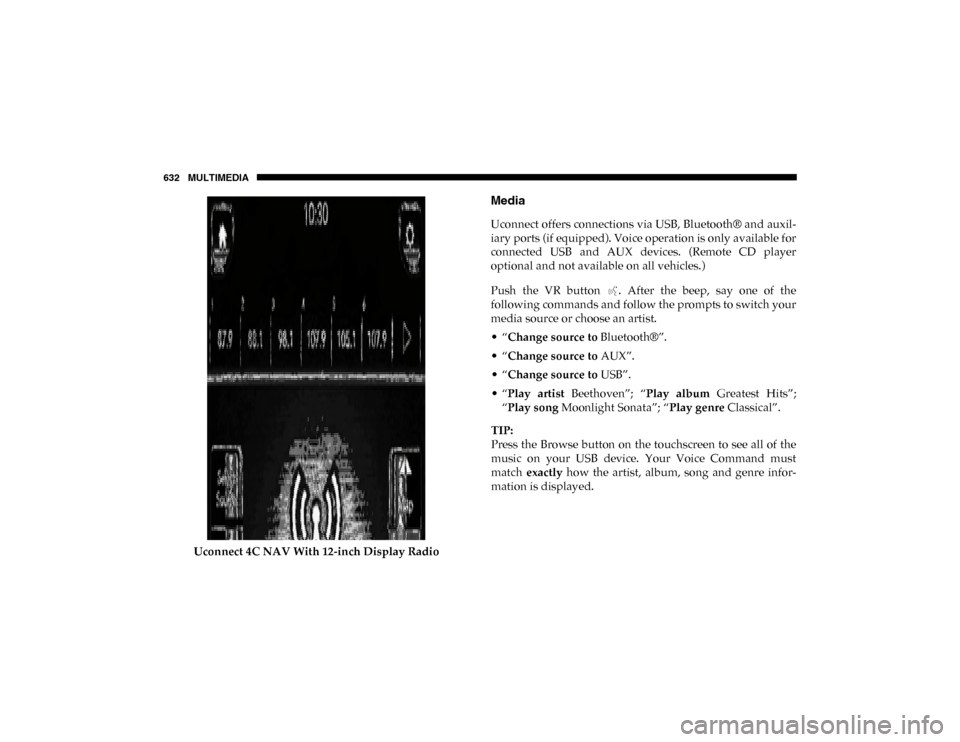
Uconnect 4C NAV With 12-inch Display Radio
Media
Uconnect offers connections via USB, Bluetooth® and auxil-
iary ports (if equipped). Voice operation is only available for
connected USB and AUX devices. (Remote CD player
optional and not available on all vehicles.)
Push the VR button . After the beep, say one of the
following commands and follow the prompts to switch your
media source or choose an artist.
• “Change source to Bluetooth®”.
• “Change source to AUX”.
• “Change source to USB”.
• “Play artist Beethoven”; “ Play album Greatest Hits”;
“Play song Moonlight Sonata”; “ Play genre Classical”.
TIP:
Press the Browse button on the touchscreen to see all of the
music on your USB device. Your Voice Command must
match exactly how the artist, album, song and genre infor -
mation is displayed.
2020_DT_1500_OM_US.book Page 632