RAM 1500 2021 Owners Manual
Manufacturer: RAM, Model Year: 2021, Model line: 1500, Model: RAM 1500 2021Pages: 496, PDF Size: 20.89 MB
Page 231 of 496

STARTING AND OPERATING229
OVER THE ROAD OPERATION WITH
S
NOWPLOW ATTACHED
The blade restricts air flow to the radiator and
causes the engine to operate at higher than
normal temperatures. Therefore, when
transporting the plow, angle the blade
completely and position it as low as road or
surface conditions permit. Do not exceed
40 mph (64 km/h). The operator should always
maintain a safe stopping distance and allow
adequate passing clearance.
OPERATING TIPS
Under ideal snow plowing conditions, 20 mph
(32 km/h) should be maximum operating
speed. The operator should be familiar with the
area and surface to be cleaned. Reduce speed
and use extreme caution when plowing
unfamiliar areas or under poor visibility.
GENERAL MAINTENANCE
Snowplows should be maintained in
accordance with the plow manufacturer's
instructions.
Keep all snowplow electrical connections and
battery terminals clean and free of corrosion.
When plowing snow, to avoid transmission and
drivetrain damage, the following precautions
should be observed:
Operate with transfer case in 4WD Low when
plowing small or congested areas where
speeds are not likely to exceed 15 mph
(24 km/h). At higher speeds operate in 4WD
High.
Vehicles with automatic transmissions
should use 4WD Low when plowing deep or
heavy snow for extended periods of time to
avoid transmission overheating.
Do not shift the transmission unless the
engine has returned to idle and wheels have
stopped. Make a practice of stepping on the
brake pedal while shifting the transmission.
4
21_DT_OM_EN_USC_t.book Page 229
Page 232 of 496
230STARTING AND OPERATING
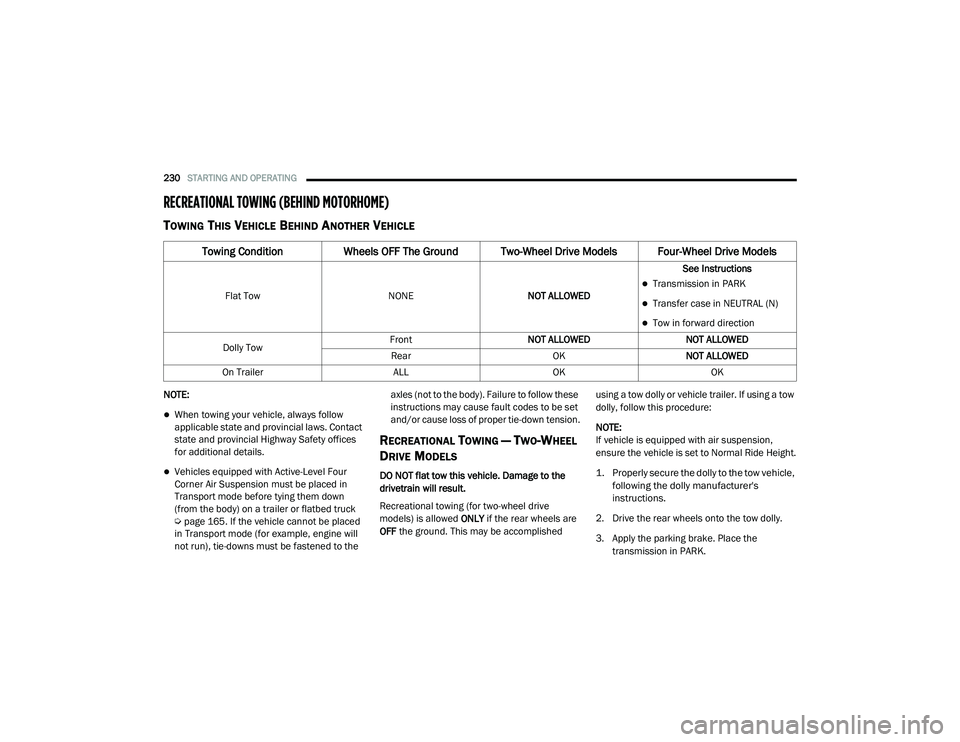
RECREATIONAL TOWING (BEHIND MOTORHOME)
TOWING THIS VEHICLE BEHIND ANOTHER VEHICLE
NOTE:
When towing your vehicle, always follow
applicable state and provincial laws. Contact
state and provincial Highway Safety offices
for additional details.
Vehicles equipped with Active-Level Four
Corner Air Suspension must be placed in
Transport mode before tying them down
(from the body) on a trailer or flatbed truck
Úpage 165. If the vehicle cannot be placed
in Transport mode (for example, engine will
not run), tie-downs must be fastened to the axles (not to the body). Failure to follow these
instructions may cause fault codes to be set
and/or cause loss of proper tie-down tension.
RECREATIONAL TOWING — TWO-WHEEL
D
RIVE MODELS
DO NOT flat tow this vehicle. Damage to the
drivetrain will result.
Recreational towing (for two-wheel drive
models) is allowed ONLY if the rear wheels are
OFF the ground. This may be accomplished using a tow dolly or vehicle trailer. If using a tow
dolly, follow this procedure:
NOTE:
If vehicle is equipped with air suspension,
ensure the vehicle is set to Normal Ride Height.
1. Properly secure the dolly to the tow vehicle,
following the dolly manufacturer's
instructions.
2. Drive the rear wheels onto the tow dolly.
3. Apply the parking brake. Place the transmission in PARK.
Towing Condition Wheels OFF The Ground Two-Wheel Drive Models Four-Wheel Drive Models
Flat Tow NONENOT ALLOWED See InstructionsTransmission in PARK
Transfer case in NEUTRAL (N)
Tow in forward direction
Dolly Tow Front
NOT ALLOWED NOT ALLOWED
Rear OKNOT ALLOWED
On Trailer ALLOKOK
21_DT_OM_EN_USC_t.book Page 230
Page 233 of 496
STARTING AND OPERATING231
(Continued)
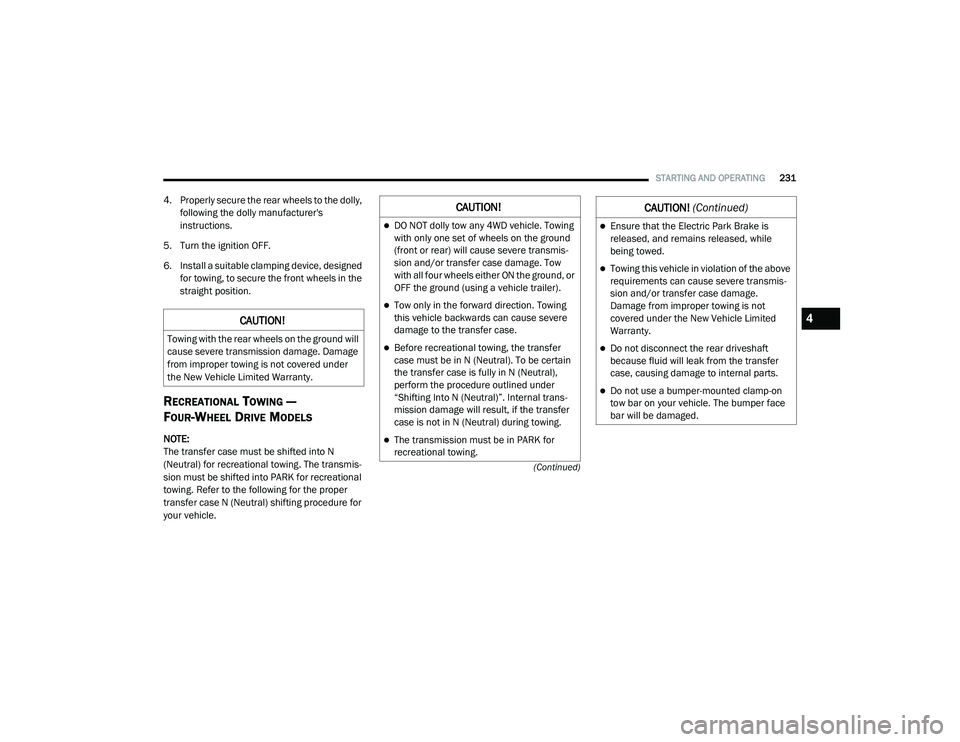
4. Properly secure the rear wheels to the dolly, following the dolly manufacturer's
instructions.
5. Turn the ignition OFF.
6. Install a suitable clamping device, designed for towing, to secure the front wheels in the
straight position.
RECREATIONAL TOWING —
F
OUR-WHEEL DRIVE MODELS
NOTE:
The transfer case must be shifted into N
(Neutral) for recreational towing. The transmis -
sion must be shifted into PARK for recreational
towing. Refer to the following for the proper
transfer case N (Neutral) shifting procedure for
your vehicle.
CAUTION!
Towing with the rear wheels on the ground will
cause severe transmission damage. Damage
from improper towing is not covered under
the New Vehicle Limited Warranty.
CAUTION!
DO NOT dolly tow any 4WD vehicle. Towing
with only one set of wheels on the ground
(front or rear) will cause severe transmis -
sion and/or transfer case damage. Tow
with all four wheels either ON the ground, or
OFF the ground (using a vehicle trailer).
Tow only in the forward direction. Towing
this vehicle backwards can cause severe
damage to the transfer case.
Before recreational towing, the transfer
case must be in N (Neutral). To be certain
the transfer case is fully in N (Neutral),
perform the procedure outlined under
“Shifting Into N (Neutral)”. Internal trans -
mission damage will result, if the transfer
case is not in N (Neutral) during towing.
The transmission must be in PARK for
recreational towing.
Ensure that the Electric Park Brake is
released, and remains released, while
being towed.
Towing this vehicle in violation of the above
requirements can cause severe transmis -
sion and/or transfer case damage.
Damage from improper towing is not
covered under the New Vehicle Limited
Warranty.
Do not disconnect the rear driveshaft
because fluid will leak from the transfer
case, causing damage to internal parts.
Do not use a bumper-mounted clamp-on
tow bar on your vehicle. The bumper face
bar will be damaged.
CAUTION! (Continued)
4
21_DT_OM_EN_USC_t.book Page 231
Page 234 of 496
232STARTING AND OPERATING
Shifting Into N (Neutral)
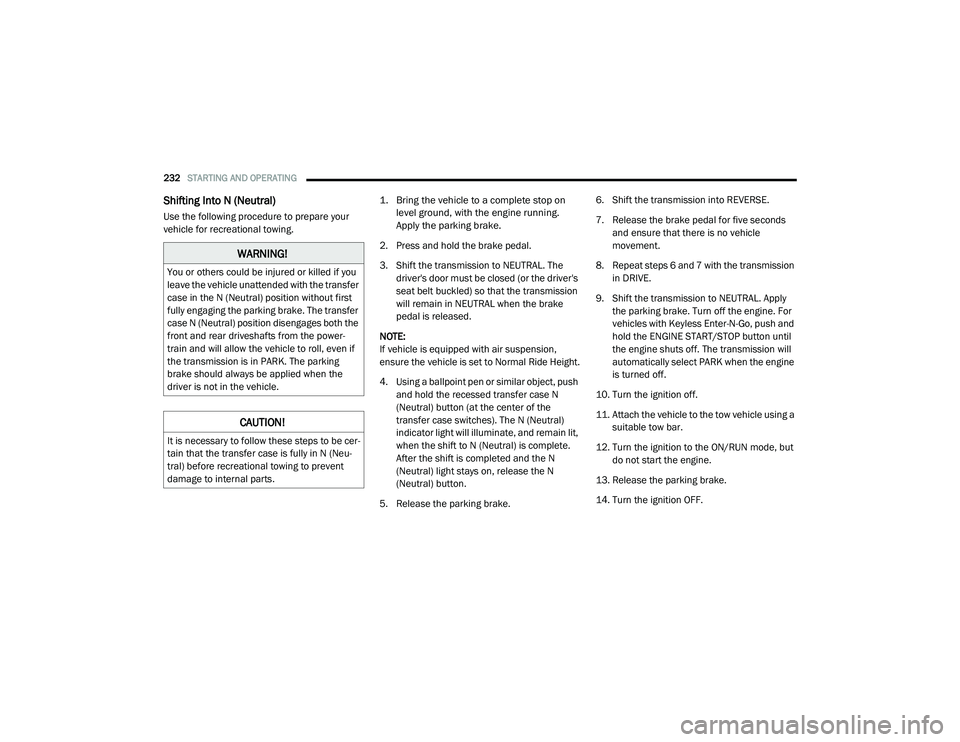
Use the following procedure to prepare your
vehicle for recreational towing.
1. Bring the vehicle to a complete stop on
level ground, with the engine running.
Apply the parking brake.
2. Press and hold the brake pedal.
3. Shift the transmission to NEUTRAL. The driver's door must be closed (or the driver's
seat belt buckled) so that the transmission
will remain in NEUTRAL when the brake
pedal is released.
NOTE:
If vehicle is equipped with air suspension,
ensure the vehicle is set to Normal Ride Height.
4. Using a ballpoint pen or similar object, push and hold the recessed transfer case N
(Neutral) button (at the center of the
transfer case switches). The N (Neutral)
indicator light will illuminate, and remain lit,
when the shift to N (Neutral) is complete.
After the shift is completed and the N
(Neutral) light stays on, release the N
(Neutral) button.
5. Release the parking brake. 6. Shift the transmission into REVERSE.
7. Release the brake pedal for five seconds
and ensure that there is no vehicle
movement.
8. Repeat steps 6 and 7 with the transmission in DRIVE.
9. Shift the transmission to NEUTRAL. Apply the parking brake. Turn off the engine. For
vehicles with Keyless Enter-N-Go, push and
hold the ENGINE START/STOP button until
the engine shuts off. The transmission will
automatically select PARK when the engine
is turned off.
10. Turn the ignition off.
11. Attach the vehicle to the tow vehicle using a suitable tow bar.
12. Turn the ignition to the ON/RUN mode, but do not start the engine.
13. Release the parking brake.
14. Turn the ignition OFF.
WARNING!
You or others could be injured or killed if you
leave the vehicle unattended with the transfer
case in the N (Neutral) position without first
fully engaging the parking brake. The transfer
case N (Neutral) position disengages both the
front and rear driveshafts from the power -
train and will allow the vehicle to roll, even if
the transmission is in PARK. The parking
brake should always be applied when the
driver is not in the vehicle.
CAUTION!
It is necessary to follow these steps to be cer -
tain that the transfer case is fully in N (Neu -
tral) before recreational towing to prevent
damage to internal parts.
21_DT_OM_EN_USC_t.book Page 232
Page 235 of 496
STARTING AND OPERATING233
NOTE:
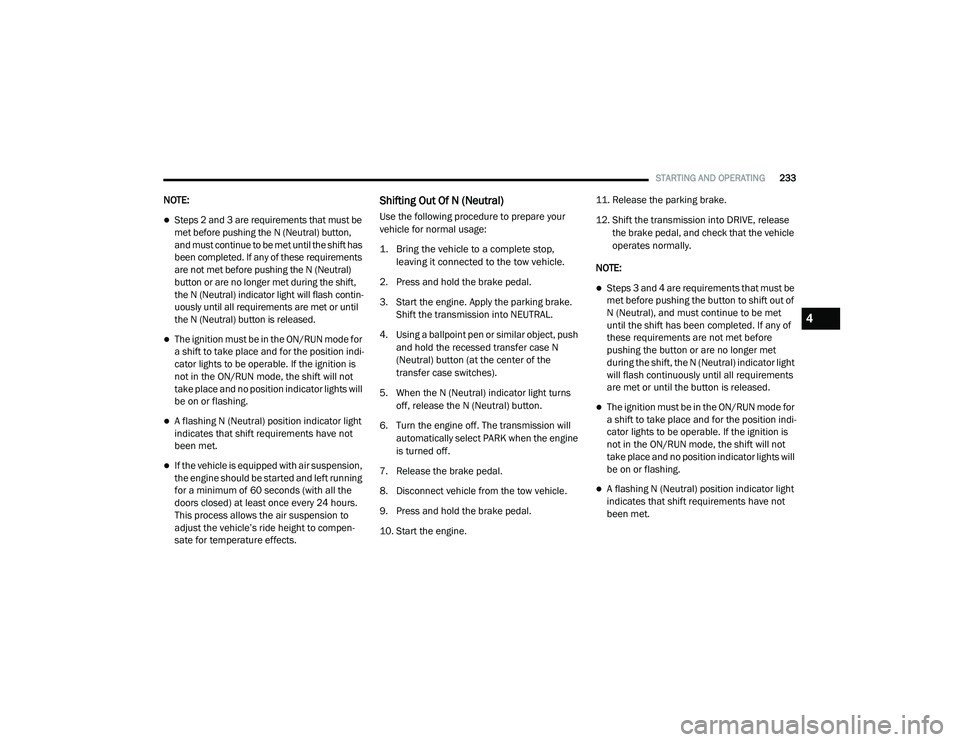
Steps 2 and 3 are requirements that must be
met before pushing the N (Neutral) button,
and must continue to be met until the shift has
been completed. If any of these requirements
are not met before pushing the N (Neutral)
button or are no longer met during the shift,
the N (Neutral) indicator light will flash contin -
uously until all requirements are met or until
the N (Neutral) button is released.
The ignition must be in the ON/RUN mode for
a shift to take place and for the position indi -
cator lights to be operable. If the ignition is
not in the ON/RUN mode, the shift will not
take place and no position indicator lights will
be on or flashing.
A flashing N (Neutral) position indicator light
indicates that shift requirements have not
been met.
If the vehicle is equipped with air suspension,
the engine should be started and left running
for a minimum of 60 seconds (with all the
doors closed) at least once every 24 hours.
This process allows the air suspension to
adjust the vehicle’s ride height to compen -
sate for temperature effects.
Shifting Out Of N (Neutral)
Use the following procedure to prepare your
vehicle for normal usage:
1. Bring the vehicle to a complete stop,
leaving it connected to the tow vehicle.
2. Press and hold the brake pedal.
3. Start the engine. Apply the parking brake. Shift the transmission into NEUTRAL.
4. Using a ballpoint pen or similar object, push and hold the recessed transfer case N
(Neutral) button (at the center of the
transfer case switches).
5. When the N (Neutral) indicator light turns off, release the N (Neutral) button.
6. Turn the engine off. The transmission will automatically select PARK when the engine
is turned off.
7. Release the brake pedal.
8. Disconnect vehicle from the tow vehicle.
9. Press and hold the brake pedal.
10. Start the engine. 11. Release the parking brake.
12. Shift the transmission into DRIVE, release
the brake pedal, and check that the vehicle
operates normally.
NOTE:
Steps 3 and 4 are requirements that must be
met before pushing the button to shift out of
N (Neutral), and must continue to be met
until the shift has been completed. If any of
these requirements are not met before
pushing the button or are no longer met
during the shift, the N (Neutral) indicator light
will flash continuously until all requirements
are met or until the button is released.
The ignition must be in the ON/RUN mode for
a shift to take place and for the position indi -
cator lights to be operable. If the ignition is
not in the ON/RUN mode, the shift will not
take place and no position indicator lights will
be on or flashing.
A flashing N (Neutral) position indicator light
indicates that shift requirements have not
been met.
4
21_DT_OM_EN_USC_t.book Page 233
Page 236 of 496

234STARTING AND OPERATING
(Continued)
(Continued)
DRIVING TIPS
DRIVING ON SLIPPERY SURFACES
Acceleration
Rapid acceleration on snow covered, wet, or
other slippery surfaces may cause the driving
wheels to pull erratically to the right or left. This
phenomenon occurs when there is a difference
in the surface traction under the rear (driving)
wheels.
DRIVING THROUGH WATER
Driving through water more than a few inches/
centimeters deep will require extra caution to
ensure safety and prevent damage to your
vehicle.
Flowing/Rising Water
Shallow Standing Water
Although your vehicle is capable of driving
through shallow standing water, consider the
following Cautions and Warnings before doing
so.
WARNING!
Rapid acceleration on slippery surfaces is
dangerous. Unequal traction can cause sud
-
den pulling of the rear wheels. You could lose
control of the vehicle and possibly have a col -
lision. Accelerate slowly and carefully when -
ever there is likely to be poor traction (ice,
snow, wet, mud, loose sand, etc.).
WARNING!
Do not drive on or across a road or path
where water is flowing and/or rising (as in
storm run-off). Flowing water can wear away
the road or path's surface and cause your
vehicle to sink into deeper water. Further -
more, flowing and/or rising water can carry
your vehicle away swiftly. Failure to follow this
warning may result in injuries that are serious
or fatal to you, your passengers, and others
around you.
WARNING!
Driving through standing water limits your
vehicle’s traction capabilities. Do not
exceed 5 mph (8 km/h) when driving
through standing water.
Driving through standing water limits your
vehicle’s braking capabilities, which
increases stopping distances. Therefore,
after driving through standing water, drive
slowly and lightly press on the brake pedal
several times to dry the brakes.
Failure to follow these warnings may result
in injuries that are serious or fatal to you,
your passengers, and others around you.
CAUTION!
Always check the depth of the standing
water before driving through it. Never drive
through standing water that is deeper than
the bottom of the tire rims mounted on the
vehicle.
Determine the condition of the road or the
path that is under water and if there are any
obstacles in the way before driving through
the standing water.
Do not exceed 5 mph (8 km/h) when
driving through standing water. This will
minimize wave effects.
WARNING! (Continued)
21_DT_OM_EN_USC_t.book Page 234
Page 237 of 496
STARTING AND OPERATING235
OFF-ROAD DRIVING TIPS
Care should be taken when attempting to climb
steep hills or driving diagonally across a hill or
slope. If natural obstacles force you to travel
diagonally up or down a hill, choose a mild angle
and keep as little side tilt as possible. Keep the
vehicle moving and make turns slowly and
cautiously. If you must back down a hill, back straight down
using REVERSE gear. Never back down in
NEUTRAL or diagonally across the hill.
When driving over sand, mud, and other soft
terrain, shift to low gear and drive steadily.
Apply the accelerator slowly to avoid spinning
the wheels.
Do not reduce the tire pressures for this type of
driving.
After Driving Off-Road
Off-road operation puts more stress on your
vehicle than does most on-road driving. After
going off-road, it is always a good idea to check
for damage. That way you can get any problems
taken care of right away and have your vehicle
ready when you need it.
Completely inspect the underbody of your
vehicle. Check tires, body structure, steering,
suspension, and exhaust system for damage.
Inspect the radiator for mud and debris and
clean as required.
Check threaded fasteners for looseness,
particularly on the chassis, drivetrain compo
-
nents, steering, and suspension. Retighten
them, if required, and torque to the values
specified in the Service Manual.
Check for accumulations of plants or brush.
These things could be a fire hazard. They
might hide damage to fuel lines, brake hoses,
axle pinion seals, and propeller shafts.
After extended operation in mud, sand,
water, or similar dirty conditions, have the
radiator, fan, brake rotors, wheels, brake
linings, and axle yokes inspected and
cleaned as soon as possible.
If you experience unusual vibration after
driving in mud, slush or similar conditions,
check the wheels for impacted material.
Impacted material can cause a wheel imbal-
ance and freeing the wheels of it will correct
the situation.
Driving through standing water may cause
damage to your vehicle’s drivetrain compo -
nents. Always inspect your vehicle’s fluids
(i.e., engine oil, transmission, axle, etc.) for
signs of contamination (i.e., fluid that is
milky or foamy in appearance) after driving
through standing water. Do not continue to
operate the vehicle if any fluid appears
contaminated, as this may result in further
damage. Such damage is not covered by
the New Vehicle Limited Warranty.
Getting water inside your vehicle’s engine
can cause it to lock up and stall out, and
cause serious internal damage to the
engine. Such damage is not covered by the
New Vehicle Limited Warranty.
CAUTION! (Continued)
WARNING!
Abrasive material in any part of the brakes
may cause excessive wear or unpredictable
braking. You might not have full braking
power when you need it to prevent a collision.
If you have been operating your vehicle in
dirty conditions, get your brakes checked and
cleaned as necessary.
4
21_DT_OM_EN_USC_t.book Page 235
Page 238 of 496
236 (Continued)
MULTIMEDIA
UCONNECT SYSTEMS For detailed information about your Uconnect
4C/4C NAV with 8.4-inch Display system or your
Uconnect 4C NAV with 12-inch Display system,
refer to your Uconnect Owner’s Manual
Supplement.
NOTE:
Uconnect screen images are for illustration
purposes only and may not reflect exact soft-
ware for your vehicle.
CYBERSECURITY Your vehicle may be a connected vehicle and
may be equipped with both wired and wireless
networks. These networks allow your vehicle to
send and receive information. This information
allows systems and features in your vehicle to
function properly.
Your vehicle may be equipped with certain
security features to reduce the risk of
unauthorized and unlawful access to vehicle
systems and wireless communications. Vehicle
software technology continues to evolve over
time and FCA US LLC, working with its suppliers,
evaluates and takes appropriate steps as
needed. Similar to a computer or other devices, your vehicle may require software updates to
improve the usability and performance of your
systems or to reduce the potential risk of
unauthorized and unlawful access to your
vehicle systems.
The risk of unauthorized and unlawful access to
your vehicle systems may still exist, even if the
most recent version of vehicle software (such as
Uconnect software) is installed.
NOTE:
FCA US LLC or your dealer may contact you
directly regarding software updates.
To help further improve vehicle security and
minimize the potential risk of a security
breach, vehicle owners should:
Routinely check www.driveuconnect.com
(US Residents) or www.driveuconnect.ca
(Canadian Residents) to learn about
available Uconnect software updates.
Only connect and use trusted media
devices (e.g. personal mobile phones,
USBs, CDs).
Privacy of any wireless and wired
communications cannot be assured. Third
parties may unlawfully intercept information and
private communications without your consent.
For further information, refer to “Data Collection
& Privacy” in your Uconnect Owner’s Manual
Supplement or Ú page 137.
WARNING!
It is not possible to know or to predict all of the
possible outcomes if your vehicle’s systems
are breached. It may be possible that vehicle
systems, including safety related systems,
could be impaired or a loss of vehicle control
could occur that may result in an accident
involving serious injury or death.
ONLY insert media (e.g., USB, SD card, or CD)
into your vehicle if it came from a trusted
source. Media of unknown origin could
possibly contain malicious software, and if
installed in your vehicle, it may increase the
possibility for vehicle systems to be breached.
As always, if you experience unusual
vehicle behavior, take your vehicle to your
nearest authorized dealer immediately.
WARNING! (Continued)
21_DT_OM_EN_USC_t.book Page 236
Page 239 of 496
MULTIMEDIA237
UCONNECT SETTINGS
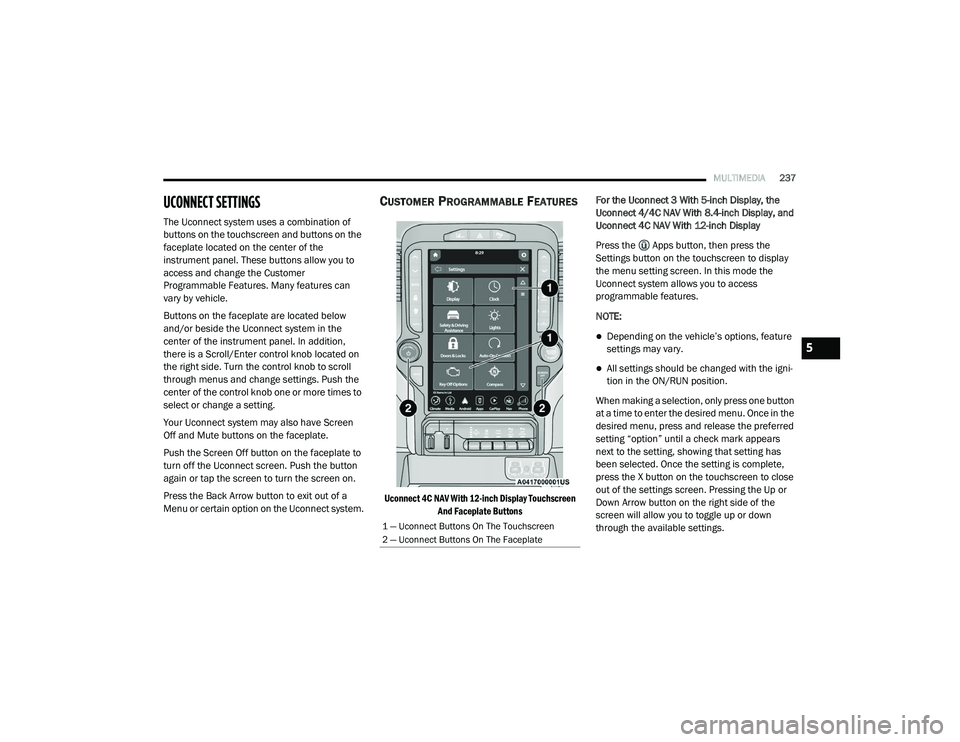
The Uconnect system uses a combination of
buttons on the touchscreen and buttons on the
faceplate located on the center of the
instrument panel. These buttons allow you to
access and change the Customer
Programmable Features. Many features can
vary by vehicle.
Buttons on the faceplate are located below
and/or beside the Uconnect system in the
center of the instrument panel. In addition,
there is a Scroll/Enter control knob located on
the right side. Turn the control knob to scroll
through menus and change settings. Push the
center of the control knob one or more times to
select or change a setting.
Your Uconnect system may also have Screen
Off and Mute buttons on the faceplate.
Push the Screen Off button on the faceplate to
turn off the Uconnect screen. Push the button
again or tap the screen to turn the screen on.
Press the Back Arrow button to exit out of a
Menu or certain option on the Uconnect system.
CUSTOMER PROGRAMMABLE FEATURES
Uconnect 4C NAV With 12-inch Display Touchscreen
And Faceplate Buttons
For the Uconnect 3 With 5-inch Display, the
Uconnect 4/4C NAV With 8.4-inch Display, and
Uconnect 4C NAV With 12-inch Display
Press the Apps button, then press the
Settings button on the touchscreen to display
the menu setting screen. In this mode the
Uconnect system allows you to access
programmable features.
NOTE:
Depending on the vehicle’s options, feature
settings may vary.
All settings should be changed with the igni
-
tion in the ON/RUN position.
When making a selection, only press one button
at a time to enter the desired menu. Once in the
desired menu, press and release the preferred
setting “option” until a check mark appears
next to the setting, showing that setting has
been selected. Once the setting is complete,
press the X button on the touchscreen to close
out of the settings screen. Pressing the Up or
Down Arrow button on the right side of the
screen will allow you to toggle up or down
through the available settings.
1 — Uconnect Buttons On The Touchscreen
2 — Uconnect Buttons On The Faceplate
5
21_DT_OM_EN_USC_t.book Page 237
Page 240 of 496

238MULTIMEDIA
Language
When the Language button is pressed on the touchscreen, the system displays the different language options. Once an option is selected, the system
will display in the chosen language. The available setting is:
Display
When the Display button is pressed on the touchscreen, the system will display the options related to the theme (if equipped), brightness, and color of
the touchscreen. The available settings are:
Setting Name Description
Language This setting will change the language of the Uconnect system. The
available languages are English, Français, and Español.
Setting Name
Description
Display Mode This setting will allow you to set the brightness manually or have the
system set it automatically. The “Auto” setting has the system
automatically adjust the display brightness. The “Manual” setting will
allow the user to adjust the brightness of the display.
Display Brightness With Headlights ON/Brightness This setting will allow you to set the brightness when the headlights are
on. To access this setting, Display Mode must be set to Manual. The “+”
setting will increase the brightness; the “-” will decrease the brightness.
Display Brightness With Headlights OFF/Brightness This setting will allow you to set the brightness when the headlights are
off. To access this setting, Display Mode must be set to Manual. The “+”
setting will increase the brightness; the “-” will decrease the brightness.
Set Theme — If Equipped This setting will allow you to change the display theme.
21_DT_OM_EN_USC_t.book Page 238