phone Ram 2500 2020 User Guide
[x] Cancel search | Manufacturer: RAM, Model Year: 2020, Model line: 2500, Model: Ram 2500 2020Pages: 553, PDF Size: 21.99 MB
Page 245 of 553
STARTING AND OPERATING243
Torque Converter Clutch
A feature designed to improve fuel economy
has been included in the automatic transmis -
sion on your vehicle. A clutch within the torque
converter engages automatically at calibrated
speeds. This may result in a slightly different
feeling or response during normal operation in
the upper gears. When the vehicle speed drops
or during some accelerations, the clutch auto -
matically disengages.
NOTE:
The torque converter clutch will not engage,
until the transmission fluid and engine
coolant are warm [usually after 1 to 3 miles
(2 to 5 km) of driving]. Because engine speed
is higher when the torque converter clutch is
not engaged, it may seem as if the transmis -
sion is not shifting properly when cold. This is normal. Using the Electronic Range Select
(ERS) shift control, when the transmission is
sufficiently warm, will demonstrate that the
transmission is able to shift into and out of
Overdrive.
If the vehicle has not been driven for several
days, the first few seconds of operation after
shifting the transmission into gear may seem
sluggish. This is due to the fluid partially
draining from the torque converter into the
transmission. This condition is normal and
will not cause damage to the transmission.
The torque converter will refill within five
seconds after starting the engine.
AUXILIARY SWITCHES — IF EQUIPPED
There can be up to six auxiliary switches located
in the lower switch bank of the instrument panel
which can be used to power various electronic
devices and PTO (Power Take Off) – If Equipped.
If Power Take Off is equipped, it will take the
place of the sixth Auxiliary switch. Connections
to the switches are found under the hood in the
connectors attached to the auxiliary Power
Distribution Center.
You have the ability to configure the function
-
ality of the auxiliary switches via the instrument cluster display. All switches can now be config
-
ured for setting the switch type operation to
latching or momentary, power source of either
battery or ignition, and ability to hold last state
across key cycles.
NOTE:
Holding last state conditions are met when
switch type is set to latching and power source
is set to ignition.
For further information on using the auxiliary
switches, please refer to the Ram Body Builders
Guide by accessing www.rambodybuilder.com
and choosing the appropriate links.
ACTIVE NOISE CANCELLATION
Your vehicle is equipped with an Active Noise
Cancellation system that cannot be turned off.
This system is designed to address exhaust and
engine noise. The system relies on four micro -
phones embedded in the headliner, which
monitor exhaust and engine noise, and assists
an onboard frequency generator, which creates
counteracting sound waves in the audio
system’s speakers. This helps keep the vehicle
quiet at idle and during drive. The system is
deactivated when the windows are rolled down.
WARNING!
Do not use the “TOW/HAUL” feature when
driving in icy or slippery conditions. The
increased engine braking can cause the rear
wheels to slide, and the vehicle to swing
around with the possible loss of vehicle
control, which may cause an accident
possibly resulting in personal injury or death.
5
20_DJD2_OM_EN_USC_t.book Page 243
Page 461 of 553
MULTIMEDIA459
NOTE:
FCA US LLC or your dealer may contact you
directly regarding software updates.
To help further improve vehicle security and
minimize the potential risk of a security
breach, vehicle owners should:
Routinely check www.driveuconnect.com
(US Residents) or www.driveuconnect.ca
(Canadian Residents) to learn about
available Uconnect software updates.
Only connect and use trusted media devices (e.g. personal mobile phones,
USBs, CDs).
Privacy of any wireless and wired communica -
tions cannot be assured. Third parties may
unlawfully intercept information and private
communications without your consent. For
further information, refer to “Data Collection &
Privacy” in your Uconnect Owner’s Manual
Supplement or “Onboard Diagnostic System
(OBD II) Cybersecurity” in “Getting To Know Your
Instrument Panel”.
UCONNECT SETTINGS
The Uconnect system uses a combination of
buttons on the touchscreen and buttons on the
faceplate located on the center of the instru -
ment panel. These buttons allow you to access
and change the customer programmable
features. Many features can vary by vehicle.
Buttons on the faceplate are located below
and/or beside the Uconnect system in the
center of the instrument panel. In addition,
there is a Scroll/Enter control knob located on
the right side. Turn the control knob to scroll
through menus and change settings. Push the
center of the control knob one or more times to
select or change a setting.
Your Uconnect system may also have Screen
Off and Mute buttons on the faceplate.
Push the Screen Off button on the faceplate to
turn off the Uconnect screen. Push the button
again or tap the screen to turn the screen on.
Push the Back Arrow button to exit out of a
Menu or certain option on the Uconnect system.
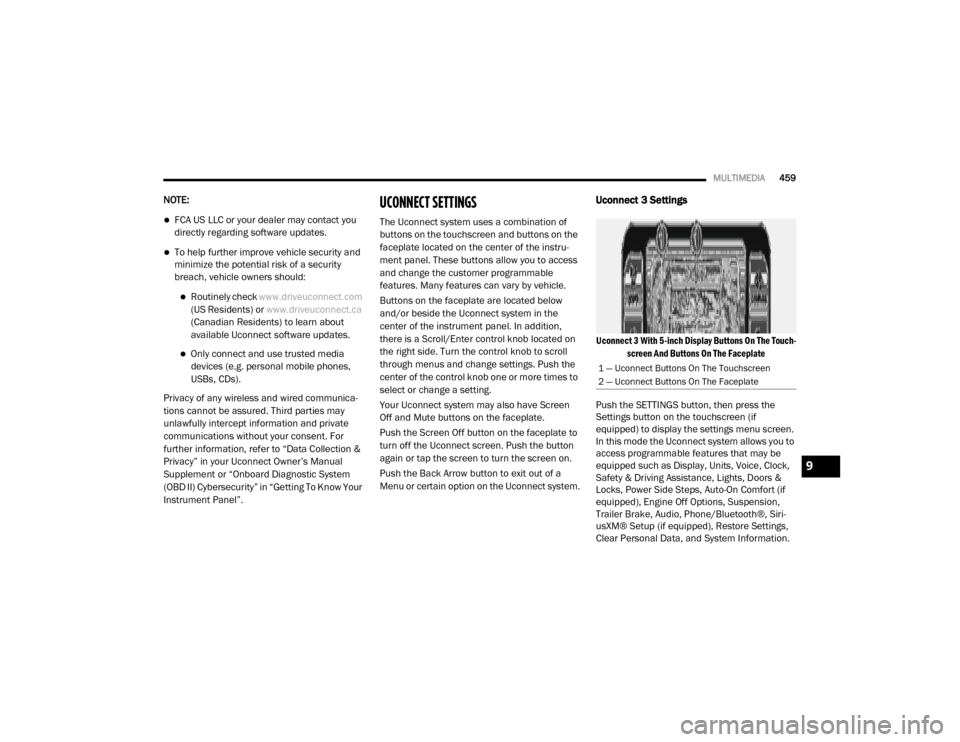
Uconnect 3 Settings
Uconnect 3 With 5-inch Display Buttons On The Touch -
screen And Buttons On The Faceplate
Push the SETTINGS button, then press the
Settings button on the touchscreen (if
equipped) to display the settings menu screen.
In this mode the Uconnect system allows you to
access programmable features that may be
equipped such as Display, Units, Voice, Clock,
Safety & Driving Assistance, Lights, Doors &
Locks, Power Side Steps, Auto-On Comfort (if
equipped), Engine Off Options, Suspension,
Trailer Brake, Audio, Phone/Bluetooth®, Siri -
usXM® Setup (if equipped), Restore Settings,
Clear Personal Data, and System Information.
1 — Uconnect Buttons On The Touchscreen
2 — Uconnect Buttons On The Faceplate
9
20_DJD2_OM_EN_USC_t.book Page 459
Page 473 of 553
MULTIMEDIA471
Phone/Bluetooth®
After pressing the Phone/Bluetooth® button on the touchscreen, the following settings will be available:
SiriusXM® Setup — If Equipped
After pressing the SiriusXM® Setup button on the touchscreen, the following settings will be available:
Setting Name Selectable Options
Paired Phones List of Paired Phones
NOTE:
The “Paired Phones” feature shows which phones are paired to the Phone/Bluetooth® system. For further information, refer to “Phone Operation” in
“Uconnect 3 with 5-inch Display” section for further details.
Setting Name Selectable Options
Tune StartOnOff
Channel Skip List of Channels
NOTE:
SiriusXM® can be programmed to exclude undesirable channels while scanning. To make your selection, press the Channel Skip button on the touch -
screen, select the channels you would like to skip.
Subscription Info Sirius ID
NOTE:
New vehicle purchasers or lessees will receive a free limited time subscription to SiriusXM® Satellite Radio with your radio. Following the expiration
of the free services, it will be necessary to access the information on the Subscription Information screen to re-subscribe.
1. Press the Subscription Info button on the touchscreen to access the Subscription Information screen.
2. Write down the SIRIUS ID numbers for your receiver. To reactivate your service, either call the number listed on the screen or visit the provider online.
9
20_DJD2_OM_EN_USC_t.book Page 471
Page 475 of 553
MULTIMEDIA473
Uconnect 4/4C/4C NAV Settings
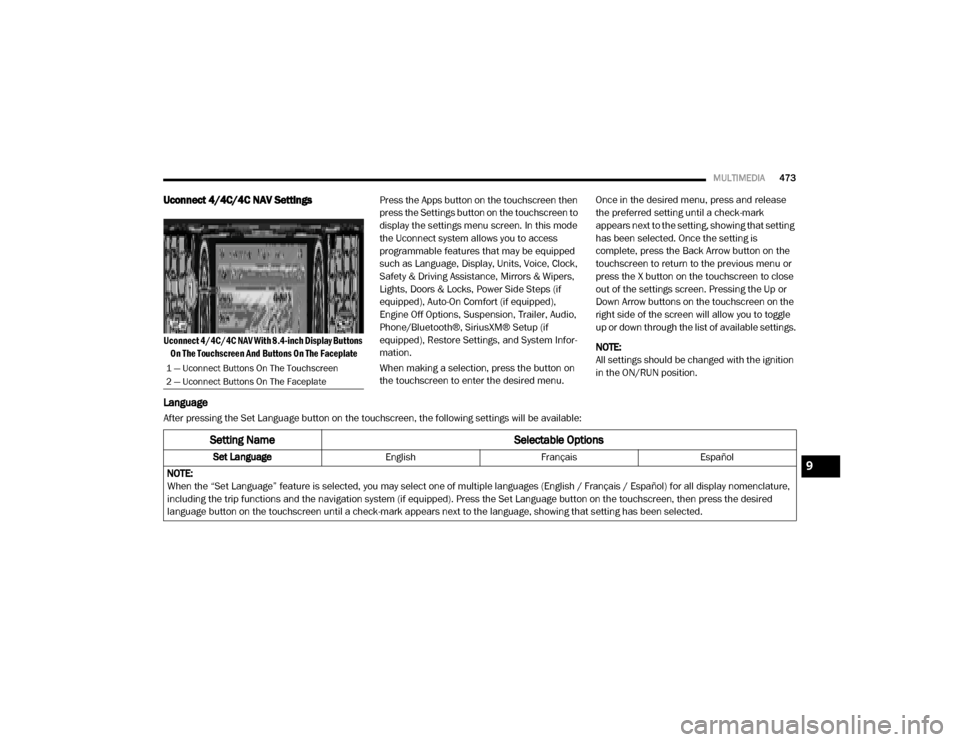
Uconnect 4/4C/4C NAV With 8.4-inch Display Buttons
On The Touchscreen And Buttons On The Faceplate
Press the Apps button on the touchscreen then
press the Settings button on the touchscreen to
display the settings menu screen. In this mode
the Uconnect system allows you to access
programmable features that may be equipped
such as Language, Display, Units, Voice, Clock,
Safety & Driving Assistance, Mirrors & Wipers,
Lights, Doors & Locks, Power Side Steps (if
equipped), Auto-On Comfort (if equipped),
Engine Off Options, Suspension, Trailer, Audio,
Phone/Bluetooth®, SiriusXM® Setup (if
equipped), Restore Settings, and System Infor
-
mation.
When making a selection, press the button on
the touchscreen to enter the desired menu. Once in the desired menu, press and release
the preferred setting until a check-mark
appears next to the setting, showing that setting
has been selected. Once the setting is
complete, press the Back Arrow button on the
touchscreen to return to the previous menu or
press the X button on the touchscreen to close
out of the settings screen. Pressing the Up or
Down Arrow buttons on the touchscreen on the
right side of the screen will allow you to toggle
up or down through the list of available settings.
NOTE:
All settings should be changed with the ignition
in the ON/RUN position.
Language
After pressing the Set Language button on the touchscreen, the following settings will be available:
1 — Uconnect Buttons On The Touchscreen
2 — Uconnect Buttons On The Faceplate
Setting Name
Selectable Options
Set LanguageEnglishFrançais Español
NOTE:
When the “Set Language” feature is selected, you may select one of multiple languages (English / Français / Español) for all display nomenclature,
including the trip functions and the navigation system (if equipped). Press the Set Language button on the touchscreen, then press the desired
language button on the touchscreen until a check-mark appears next to the language, showing that setting has been selected.9
20_DJD2_OM_EN_USC_t.book Page 473
Page 476 of 553
474MULTIMEDIA
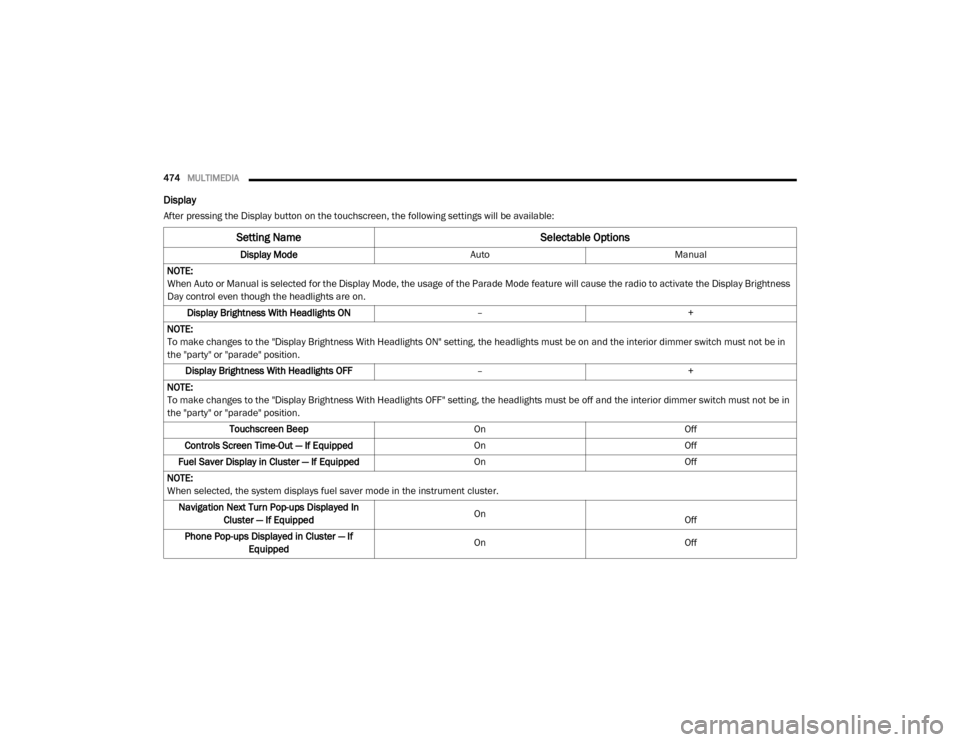
Display
After pressing the Display button on the touchscreen, the following settings will be available:
Setting Name Selectable Options
Display ModeAutoManual
NOTE:
When Auto or Manual is selected for the Display Mode, the usage of the Parade Mode feature will cause the radio to activate the Display Brightness
Day control even though the headlights are on. Display Brightness With Headlights ON –+
NOTE:
To make changes to the "Display Brightness With Headlights ON" setting, the headlights must be on and the interior dimmer switch must not be in
the "party" or "parade" position. Display Brightness With Headlights OFF –+
NOTE:
To make changes to the "Display Brightness With Headlights OFF" setting, the headlights must be off and the interior dimmer switch must not be in
the "party" or "parade" position. Touchscreen Beep OnOff
Controls Screen Time-Out — If Equipped OnOff
Fuel Saver Display in Cluster — If Equipped OnOff
NOTE:
When selected, the system displays fuel saver mode in the instrument cluster. Navigation Next Turn Pop-ups Displayed In Cluster — If Equipped On
Off
Phone Pop-ups Displayed in Cluster — If Equipped On
Off
20_DJD2_OM_EN_USC_t.book Page 474
Page 487 of 553
MULTIMEDIA485
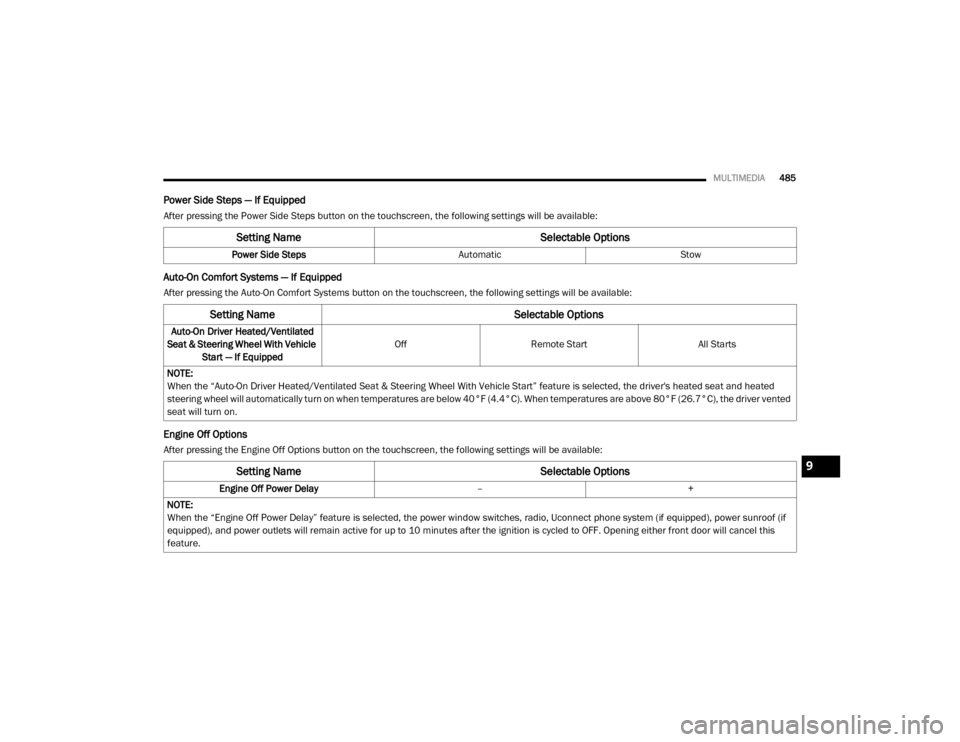
Power Side Steps — If Equipped
After pressing the Power Side Steps button on the touchscreen, the following settings will be available:
Auto-On Comfort Systems — If Equipped
After pressing the Auto-On Comfort Systems button on the touchscreen, the following settings will be available:
Engine Off Options
After pressing the Engine Off Options button on the touchscreen, the following settings will be available:
Setting Name Selectable Options
Power Side StepsAutomaticStow
Setting Name Selectable Options
Auto-On Driver Heated/Ventilated
Seat & Steering Wheel With Vehicle Start — If Equipped Off
Remote Start All Starts
NOTE:
When the “Auto-On Driver Heated/Ventilated Seat & Steering Wheel With Vehicle Start” feature is selected, the driver's heated seat and heated
steering wheel will automatically turn on when temperatures are below 40°F (4.4°C). When temperatures are above 80°F (26.7°C), the driver vented
seat will turn on.
Setting Name Selectable Options
Engine Off Power Delay–+
NOTE:
When the “Engine Off Power Delay” feature is selected, the power window switches, radio, Uconnect phone system (if equipped), power sunroof (if
equipped), and power outlets will remain active for up to 10 minutes after the ignition is cycled to OFF. Opening either front door will cancel this
feature.
9
20_DJD2_OM_EN_USC_t.book Page 485
Page 491 of 553
MULTIMEDIA489
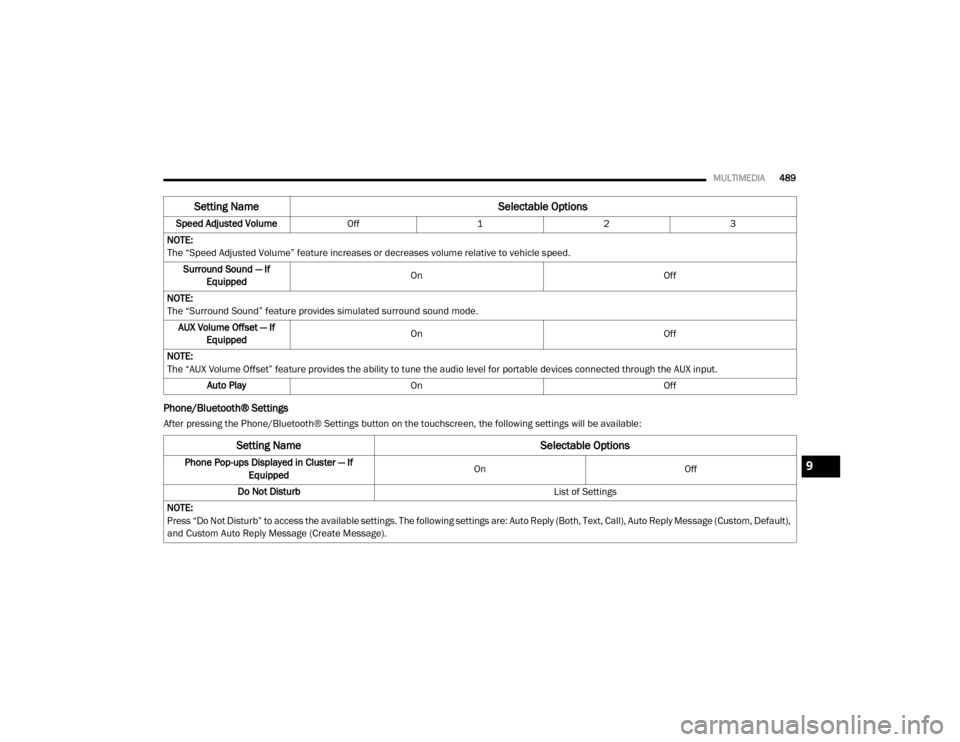
Phone/Bluetooth® Settings
After pressing the Phone/Bluetooth® Settings button on the touchscreen, the following settings will be available:Speed Adjusted Volume
Off123
NOTE:
The “Speed Adjusted Volume” feature increases or decreases volume relative to vehicle speed. Surround Sound — If Equipped On
Off
NOTE:
The “Surround Sound” feature provides simulated surround sound mode. AUX Volume Offset — If Equipped On
Off
NOTE:
The “AUX Volume Offset” feature provides the ability to tune the audio level for portable devices connected through the AUX input. Auto Play On Off
Setting Name Selectable Options
Setting NameSelectable Options
Phone Pop-ups Displayed in Cluster — If
Equipped On
Off
Do Not Disturb List of Settings
NOTE:
Press “Do Not Disturb” to access the available settings. The following settings are: Auto Reply (Both, Text, Call), Auto Reply Message (Custom, Default),
and Custom Auto Reply Message (Create Message).9
20_DJD2_OM_EN_USC_t.book Page 489
Page 492 of 553
490MULTIMEDIA
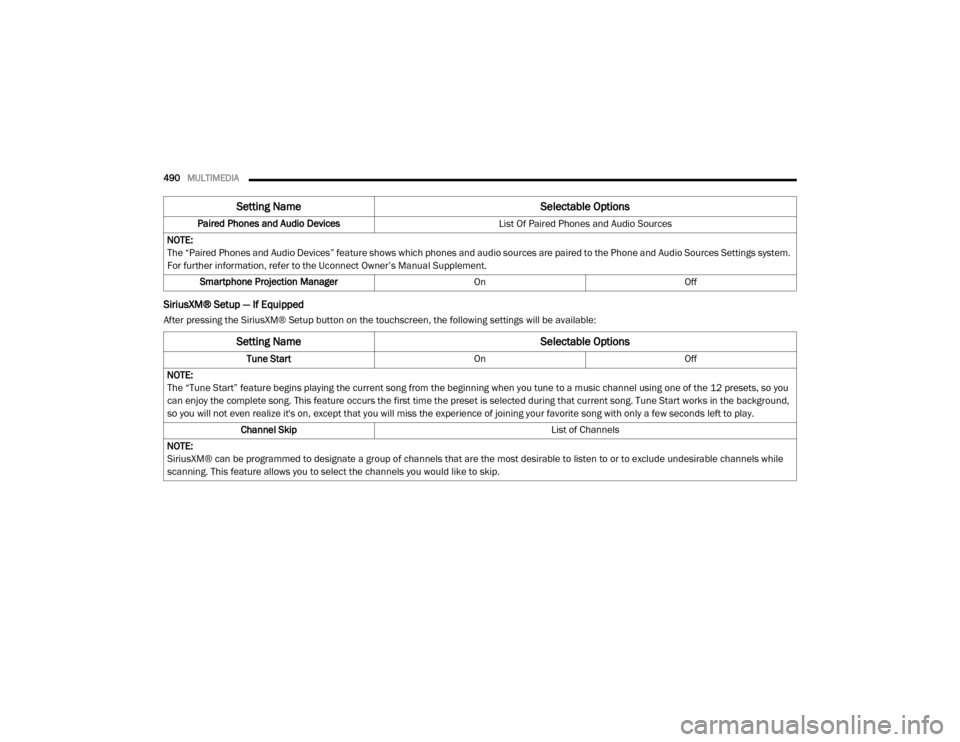
SiriusXM® Setup — If Equipped
After pressing the SiriusXM® Setup button on the touchscreen, the following settings will be available:Paired Phones and Audio Devices
List Of Paired Phones and Audio Sources
NOTE:
The “Paired Phones and Audio Devices” feature shows which phones and audio sources are paired to the Phone and Audio Sources Settings system.
For further information, refer to the Uconnect Owner’s Manual Supplement. Smartphone Projection Manager OnOff
Setting Name Selectable Options
Setting NameSelectable Options
Tune StartOnOff
NOTE:
The “Tune Start” feature begins playing the current song from the beginning when you tune to a music channel using one of the 12 presets, so you
can enjoy the complete song. This feature occurs the first time the preset is selected during that current song. Tune Start works in the background,
so you will not even realize it's on, except that you will miss the experience of joining your favorite song with only a few seconds left to play. Channel Skip List of Channels
NOTE:
SiriusXM® can be programmed to designate a group of channels that are the most desirable to listen to or to exclude undesirable channels while
scanning. This feature allows you to select the channels you would like to skip.
20_DJD2_OM_EN_USC_t.book Page 490
Page 497 of 553
MULTIMEDIA495
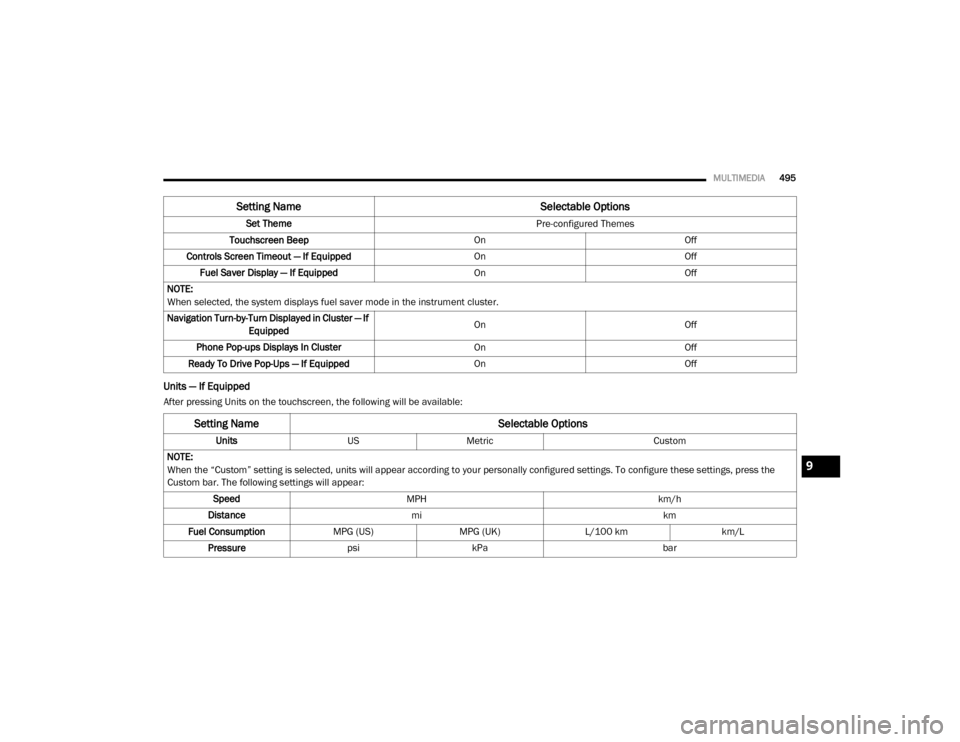
Units — If Equipped
After pressing Units on the touchscreen, the following will be available: Set Theme
Pre-configured Themes
Touchscreen Beep OnOff
Controls Screen Timeout — If Equipped OnOff
Fuel Saver Display — If Equipped OnOff
NOTE:
When selected, the system displays fuel saver mode in the instrument cluster.
Navigation Turn-by-Turn Displayed in Cluster — If Equipped On
Off
Phone Pop-ups Displays In Cluster OnOff
Ready To Drive Pop-Ups — If Equipped OnOff
Setting Name Selectable Options
Setting NameSelectable Options
UnitsUSMetric Custom
NOTE:
When the “Custom” setting is selected, units will appear according to your personally configured settings. To configure these settings, press the
Custom bar. The following settings will appear: Speed MPH km/h
Distance mi km
Fuel Consumption MPG (US)MPG (UK)L/100 km km/L
Pressure psikPa bar
9
20_DJD2_OM_EN_USC_t.book Page 495
Page 506 of 553
504MULTIMEDIA
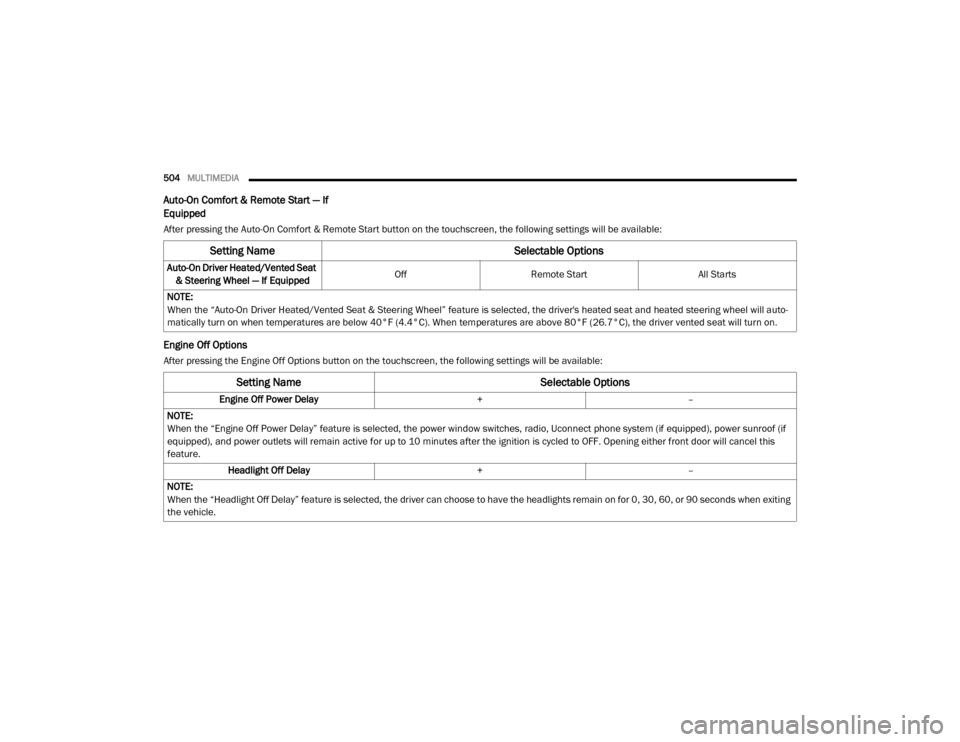
Auto-On Comfort & Remote Start — If
Equipped
After pressing the Auto-On Comfort & Remote Start button on the touchscreen, the following settings will be available:
Engine Off Options
After pressing the Engine Off Options button on the touchscreen, the following settings will be available:
Setting Name Selectable Options
Auto-On Driver Heated/Vented Seat
& Steering Wheel — If Equipped Off
Remote Start All Starts
NOTE:
When the “Auto-On Driver Heated/Vented Seat & Steering Wheel” feature is selected, the driver's heated seat and heated steering wheel will auto -
matically turn on when temperatures are below 40°F (4.4°C). When temperatures are above 80°F (26.7°C), the driver vented seat will turn on.
Setting Name Selectable Options
Engine Off Power Delay+–
NOTE:
When the “Engine Off Power Delay” feature is selected, the power window switches, radio, Uconnect phone system (if equipped), power sunroof (if
equipped), and power outlets will remain active for up to 10 minutes after the ignition is cycled to OFF. Opening either front door will cancel this
feature. Headlight Off Delay +–
NOTE:
When the “Headlight Off Delay” feature is selected, the driver can choose to have the headlights remain on for 0, 30, 60, or 90 seconds when exiting
the vehicle.
20_DJD2_OM_EN_USC_t.book Page 504