run flat Ram 2500 2020 User Guide
[x] Cancel search | Manufacturer: RAM, Model Year: 2020, Model line: 2500, Model: Ram 2500 2020Pages: 553, PDF Size: 21.99 MB
Page 212 of 553
210SAFETY
(Continued)
Periodic Safety Checks You Should Make
Outside The Vehicle
Tires
Examine tires for excessive tread wear and
uneven wear patterns. Check for stones, nails,
glass, or other objects lodged in the tread or
sidewall. Inspect the tread for cuts and cracks.
Inspect sidewalls for cuts, cracks, and bulges.
Check the wheel bolts for tightness. Check the
tires (including spare) for proper cold inflation
pressure.
Lights
Have someone observe the operation of brake
lights and exterior lights while you work the
controls. Check turn signal and high beam indi -
cator lights on the instrument panel.
Door Latches
Check for proper closing, latching, and locking.
Fluid Leaks
Check area under the vehicle after overnight
parking for fuel, coolant, oil, or other fluid leaks.
Also, if gasoline fumes are detected or if fuel, or
brake fluid leaks are suspected, the cause
should be located and corrected immediately.
ONLY install floor mats designed to fit your
vehicle. NEVER install a floor mat that
cannot be properly attached and secured to
your vehicle. If a floor mat needs to be
replaced, only use a FCA approved floor
mat for the specific make, model, and year
of your vehicle.
ONLY use the driver’s side floor mat on the
driver’s side floor area. To check for inter -
ference, with the vehicle properly parked
with the engine off, fully depress the accel-
erator, the brake, and the clutch pedal (if
present) to check for interference. If your
floor mat interferes with the operation of
any pedal, or is not secure to the floor,
remove the floor mat from the vehicle and
place the floor mat in your trunk.
ONLY use the passenger’s side floor mat on
the passenger’s side floor area.
WARNING! (Continued)
ALWAYS make sure objects cannot fall or
slide into the driver’s side floor area when
the vehicle is moving. Objects can become
trapped under accelerator, brake, or clutch
pedals and could cause a loss of vehicle
control.
NEVER place any objects under the floor
mat (e.g., towels, keys, etc.). These objects
could change the position of the floor mat
and may cause interference with the accel -
erator, brake, or clutch pedals.
If the vehicle carpet has been removed and
re-installed, always properly attach carpet
to the floor and check the floor mat
fasteners are secure to the vehicle carpet.
Fully depress each pedal to check for inter -
ference with the accelerator, brake, or
clutch pedals then re-install the floor mats.
It is recommended to only use mild soap
and water to clean your floor mats. After
cleaning, always check your floor mat has
been properly installed and is secured to
your vehicle using the floor mat fasteners
by lightly pulling mat.
WARNING! (Continued)
20_DJD2_OM_EN_USC_t.book Page 210
Page 249 of 553

STARTING AND OPERATING247
2WD Or 4WD HIGH To 4WD LOW
NOTE:
When shifting into or out of 4WD LOW some
gear noise may be heard. This noise is normal
and is not detrimental to the vehicle or occu -
pants.
Shifting can be performed with the vehicle
rolling 2 to 3 mph (3 to 5 km/h) or completely
stopped. You can use either of the following
procedures:
Preferred Procedure
1. With the engine running, slow the vehicle to 2 to 3 mph (3 to 5 km/h).
2. Shift the transmission into NEUTRAL.
3. While still rolling, push the desired position on the transfer case control switch.
4. After the desired position indicator light is on (not flashing), shift the transmission
back into gear. Alternate Procedure
1. Bring the vehicle to a complete stop.
2. With the ignition switch in the ON position
and the engine running, shift the transmis -
sion into NEUTRAL.
3. Push the desired position on the transfer case control switch.
4. After the desired position indicator light is on (not flashing), shift the transmission
back into gear.
NOTE:
If Steps 1 or 2 of either the Preferred or Alter -
nate Procedure are not satisfied prior to
attempting the shift, then the desired posi -
tion indicator light will flash continuously
while the original position indicator light is
on, until all requirements have been met.
The ignition switch must be in the ON position
for a shift to take place and for the position
indicator lights to be operable. If the ignition
switch is not in the ON position, the shift will
not take place and no position indicator lights
will be on or flashing.
Manually Shifted Transfer Case — If
Equipped
The transfer case provides four mode positions:
Two-Wheel Drive High Range (2H)
Four-Wheel Drive Lock High Range (4H)
N (Neutral)
Four-Wheel Drive Low Range (4L)
For additional information on the appropriate
use of each transfer case mode position, see
the information below:
2H
Two-Wheel Drive High Range — This range is for
normal street and highway driving on dry, hard
surfaced roads.
4H
Four-Wheel Drive Lock High Range — This range
locks the front and rear driveshafts together
forcing the front and rear wheels to rotate at the
same speed. Additional traction for loose, slip -
pery road surfaces only.
N (Neutral)
N (Neutral) — This range disengages both the
front and rear driveshafts from the powertrain.
To be used for flat towing behind another
5
20_DJD2_OM_EN_USC_t.book Page 247
Page 331 of 553
STARTING AND OPERATING329
Speed Control — If Equipped
Do not use on hilly terrain or with heavy
loads.
When using the Speed Control, if you experi -
ence speed drops greater than 10 mph
(16 km/h), disengage until you can get back
to cruising speed.
Use Speed Control in flat terrain and with
light loads to maximize fuel efficiency.
Cooling System
To reduce potential for engine and transmission
overheating, take the following actions:
City Driving
In city traffic — while stopped, place the trans -
mission in NEUTRAL, but do not increase
engine idle speed.
Highway Driving
Reduce speed.
Temporarily turn off air conditioning.
Air Suspension System
To aid in attaching/detaching the trailer from
the vehicle, the air suspension system can be
used. Refer to “Air Suspension System” in “Starting And Operating” for further informa
-
tion.
NOTE:
The vehicle must remain in the engine running
position while attaching a trailer for proper
leveling of the air suspension system.
SNOWPLOW
Snowplow Prep Packages are available as a
factory installed option. These packages
include components necessary to equip your
vehicle with a snowplow.
NOTE:
Before installation of a snowplow it is highly
recommended that the owner/installer obtain
and follow the recommendations contained
within the current Body Builders Guide. See
your authorized dealer, installer or snowplow
manufacturer for this information. There are
unique electrical systems that must be
connected to properly ensure operator safety
and prevent overloading vehicle systems.
Before Plowing
Check the hydraulic system for leaks and
proper fluid level.
Check the mounting bolts and nuts for proper
tightness.
Check the runners and cutting edge for
excessive wear. The cutting edge should be
¼ to ½ inches (6 cm to 1.2 cm) above ground
in snow plowing position.
Check that snowplow lighting is connected
and functioning properly.
WARNING!
Attaching a snowplow to this vehicle could
adversely affect performance of the airbag
system in a collision. Do not expect that the
airbag will perform as described earlier in this
manual.
CAUTION!
The “Lamp Out” indicator could illuminate if
exterior lamps are not properly installed.
5
20_DJD2_OM_EN_USC_t.book Page 329
Page 333 of 553

STARTING AND OPERATING331
RECREATIONAL TOWING (BEHIND MOTORHOME, ETC.)
Towing This Vehicle Behind Another Vehicle
NOTE:
When towing your vehicle, always follow
applicable state and provincial laws. Contact
state and provincial Highway Safety offices
for additional details.
Vehicles equipped with air suspension must
be placed in Transport mode before tying
them down (from the body) on a trailer or
flatbed truck. Refer to “Air Suspension – If
Equipped” for more information. If the
vehicle cannot be placed in Transport mode (for example, engine will not run), tie-downs
must be fastened to the axles (not to the
body). Failure to follow these instructions
may cause fault codes to be set and/or
cause loss of proper tie-down tension.Recreational Towing — Two-Wheel Drive
Models
DO NOT flat tow this vehicle. Damage to the
drivetrain will result.
Recreational towing (for two-wheel drive
models) is allowed
ONLY if the rear wheels are OFF
the ground. This may be accomplished
using a tow dolly or vehicle trailer. If using a tow
dolly, follow this procedure:
NOTE:
If vehicle is equipped with air suspension,
ensure the vehicle is set to Normal Ride Height.
1. Properly secure the dolly to the tow vehicle, following the dolly manufacturer's instruc -
tions.
2. Drive the rear wheels onto the tow dolly.
Towing Condition Wheels OFF The
Ground Two-Wheel Drive
Models Four-Wheel Drive Models
Flat Tow
NONENOT ALLOWED See Instructions
Automatic transmission in PARK
Transfer case in NEUTRAL (N)
Tow in forward direction
Dolly Tow Front
NOT ALLOWED NOT ALLOWED
Rear OK NOT ALLOWED
On Trailer ALLOK OK
5
20_DJD2_OM_EN_USC_t.book Page 331
Page 349 of 553
IN CASE OF EMERGENCY347
(Continued)
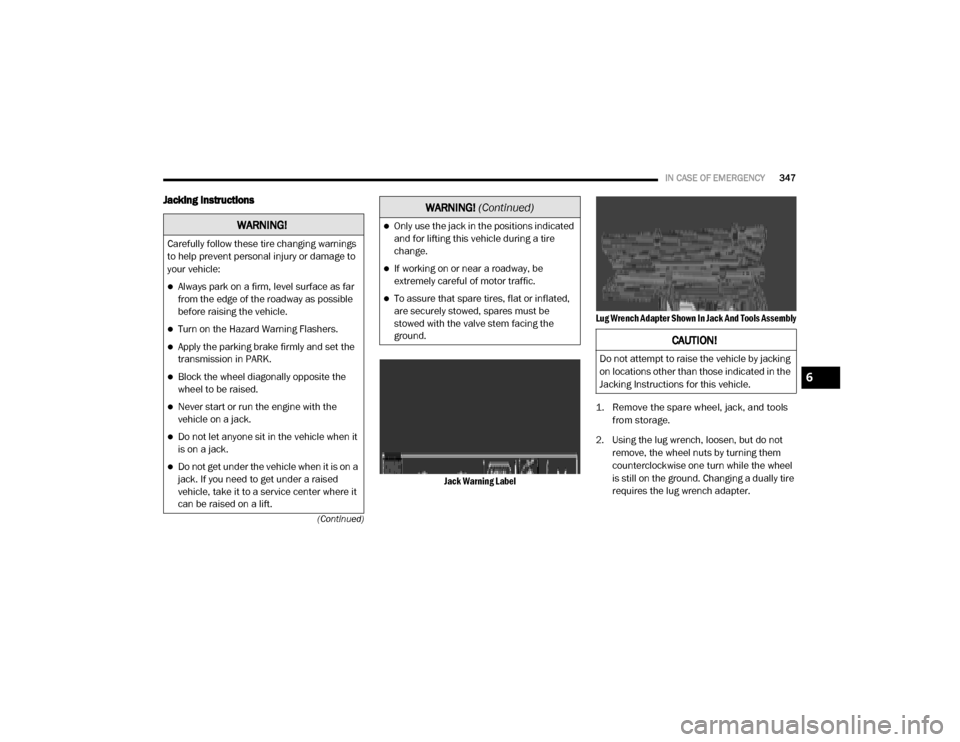
Jacking Instructions
Jack Warning Label Lug Wrench Adapter Shown In Jack And Tools Assembly
1. Remove the spare wheel, jack, and tools
from storage.
2. Using the lug wrench, loosen, but do not remove, the wheel nuts by turning them
counterclockwise one turn while the wheel
is still on the ground. Changing a dually tire
requires the lug wrench adapter.
WARNING!
Carefully follow these tire changing warnings
to help prevent personal injury or damage to
your vehicle:
Always park on a firm, level surface as far
from the edge of the roadway as possible
before raising the vehicle.
Turn on the Hazard Warning Flashers.
Apply the parking brake firmly and set the
transmission in PARK.
Block the wheel diagonally opposite the
wheel to be raised.
Never start or run the engine with the
vehicle on a jack.
Do not let anyone sit in the vehicle when it
is on a jack.
Do not get under the vehicle when it is on a
jack. If you need to get under a raised
vehicle, take it to a service center where it
can be raised on a lift.
Only use the jack in the positions indicated
and for lifting this vehicle during a tire
change.
If working on or near a roadway, be
extremely careful of motor traffic.
To assure that spare tires, flat or inflated,
are securely stowed, spares must be
stowed with the valve stem facing the
ground.
WARNING! (Continued)
CAUTION!
Do not attempt to raise the vehicle by jacking
on locations other than those indicated in the
Jacking Instructions for this vehicle.
6
20_DJD2_OM_EN_USC_t.book Page 347
Page 371 of 553
IN CASE OF EMERGENCY369
TOWING A DISABLED VEHICLE
This section describes procedures for towing a
disabled vehicle using a commercial towing
service.
If the transmission and drivetrain are operable,
disabled vehicles may also be towed as
described under “Recreational Towing” in the
“Starting And Operating” section. NOTE:
Vehicles equipped with the Air Suspension
System must be placed in Transport mode,
before tying them down (from the body) on a
trailer or flatbed truck. If the vehicle cannot be
placed in Transport mode (for example, engine
will not run), tie-downs must be fastened to the
axles (not to the body). Failure to follow these
instructions may cause fault codes to be set
and/or cause loss of proper tie-down tension.
Refer to “Air Suspension System — If Equipped”
in “Starting And Operating” for more informa
-
tion.
Proper towing or lifting equipment is required to
prevent damage to your vehicle. Use only tow
bars and other equipment designed for this
purpose, following equipment manufacturer’s
instructions. Use of safety chains is mandatory. Attach a tow bar or other towing device to main
structural members of the vehicle, not to
bumpers or associated brackets. State and
local laws regarding vehicles under tow must be
observed.If you must use the accessories (wipers,
defrosters, etc.) while being towed, the ignition
must be in the ON/RUN mode, not the ACC
mode.
Towing Condition
Wheels OFF The
Ground 2WD Models
4WD Models
Flat Tow NONE If transmission is operable:
• Transmission in NEUTRAL
• 30 mph (48 km/h) max speed
• 15 miles (24 km) max distance (6–speed
transmission)
• 30 miles (48 km) max distance (8–speed
transmission) See instructions in “Recreational Towing” under
“Starting And Operating”
Automatic Transmission in
PARK
Transfer Case in NEUTRAL (N)
Tow in forward direction
Wheel Lift Or Dolly Tow Front
NOT ALLOWED
Rear OK NOT ALLOWED
Flatbed ALL BEST METHOD BEST METHOD
6
20_DJD2_OM_EN_USC_t.book Page 369
Page 432 of 553

430SERVICING AND MAINTENANCE
Tire Repair
If your tire becomes damaged, it may be
repaired if it meets the following criteria:
The tire has not been driven on when flat.
The damage is only on the tread section of
your tire (sidewall damage is not repairable).
The puncture is no greater than a ¼ of an
inch (6 mm).
Consult an authorized tire dealer for tire repairs
and additional information.
Damaged Run Flat tires, or Run Flat tires that
have experienced a loss of pressure should be
replaced immediately with another Run Flat tire
of identical size and service description (Load
Index and Speed Symbol). Replace the tire pres -
sure sensor as well as it is not designed to be
reused.
Run Flat Tires — If Equipped
Run Flat tires allow you the capability to drive
50 miles (80 km) at 50 mph (80 km/h) after a rapid loss of inflation pressure. This rapid loss
of inflation is referred to as the Run Flat mode.
A Run Flat mode occurs when the tire inflation
pressure is of/or below 14 psi (96 kPa). Once a
Run Flat tire reaches the run flat mode it has limited driving capabilities and needs to be
replaced immediately. A Run Flat tire is not
repairable. When a run flat tire is changed after
driving with underinflated tire condition, please
replace the TPM sensor as it is not designed to
be reused when driven under run flat mode 14
psi (96 kPa) condition.
NOTE:
TPM Sensor must be replaced after driving the
vehicle on a flat tire condition.
It is not recommended driving a vehicle loaded
at full capacity or to tow a trailer while a tire is in
the run flat mode.
See the tire pressure monitoring section for
more information.
Tire Spinning
When stuck in mud, sand, snow, or ice condi
-
tions, do not spin your vehicle's wheels above
30 mph (48 km/h) or for longer than 30
seconds continuously without stopping.
Refer to “Freeing A Stuck Vehicle” in “In Case Of
Emergency” for further information.
Tread Wear Indicators
Tread wear indicators are in the original equip -
ment tires to help you in determining when your
tires should be replaced.
Tire Tread
WARNING!
Fast spinning tires can be dangerous. Forces
generated by excessive wheel speeds may
cause tire damage or failure. A tire could
explode and injure someone. Do not spin your
vehicle's wheels faster than 30 mph (48 km/h)
for more than 30 seconds continuously when
you are stuck, and do not let anyone near a
spinning wheel, no matter what the speed.
1 — Worn Tire
2 — New Tire
20_DJD2_OM_EN_USC_t.book Page 430
Page 441 of 553
SERVICING AND MAINTENANCE439
Standard No. 109. Grades B and A repre -
sent higher levels of performance on the
laboratory test wheel, than the minimum
required by law.
STORING THE VEHICLE
If you are storing your vehicle for more than
21 days, we recommend that you take the
following steps to minimize the drain on your
vehicle's battery:
Disconnect the negative cable from battery.
Any time you store your vehicle or keep it out
of service (i.e., vacation) for two weeks or
more, run the air conditioning system at idle
for about five minutes in the fresh air and high blower setting. This will ensure
adequate system lubrication to minimize the
possibility of compressor damage when the
system is started again.
BODYWORK
Protection From Atmospheric Agents
Vehicle body care requirements vary according
to geographic locations and usage. Chemicals
that make roads passable in snow and ice and
those that are sprayed on trees and road
surfaces during other seasons are highly corro
-
sive to the metal in your vehicle. Outside
parking, which exposes your vehicle to airborne
contaminants, road surfaces on which the
vehicle is operated, extreme hot or cold weather
and other extreme conditions will have an
adverse effect on paint, metal trim, and under -
body protection.
The following maintenance recommendations
will enable you to obtain maximum benefit from
the corrosion resistance built into your vehicle.
What Causes Corrosion?
Corrosion is the result of deterioration or
removal of paint and protective coatings from
your vehicle. The most common causes are:
Road salt, dirt and moisture accumulation.
Stone and gravel impact.
Insects, tree sap and tar.
Salt in the air near seacoast localities.
Atmospheric fallout/industrial pollutants.
Body And Underbody Maintenance
Cleaning Headlights
Your vehicle is equipped with plastic headlights
and fog lights that are lighter and less suscep
-
tible to stone breakage than glass headlights.
Plastic is not as scratch resistant as glass and
therefore different lens cleaning procedures
must be followed.
To minimize the possibility of scratching the
lenses and reducing light output, avoid wiping
with a dry cloth. To remove road dirt, wash with
a mild soap solution followed by rinsing.
Do not use abrasive cleaning components,
solvents, steel wool or other aggressive mate -
rial to clean the lenses.
WARNING!
The temperature grade for this tire is
established for a tire that is properly inflated
and not overloaded. Excessive speed,
under-inflation, or excessive loading, either
separately or in combination, can cause heat
buildup and possible tire failure.
7
20_DJD2_OM_EN_USC_t.book Page 439
Page 544 of 553

542
Differential, Limited Slip
................................ 264
Disabled Vehicle Towing................................ 369
Disposal Antifreeze (Engine Coolant)
....................... 414
Do Not Disturb............................................... 532
Door Ajar........................................................ 133
Door Ajar Light............................................... 133Door LocksAutomatic
.................................................... 31
Doors............................................................... 27Draining Fuel/Water Separator Filter............ 403
Driver’s Seat Back Tilt..................................... 32
DrivingOff-Pavement
............................................ 255
Off-Road.................................................... 255Through Flowing, Rising, Or Shallow Standing Water
..................................... 335
Dual Rear Wheels................................ 437, 444
E
Electric Brake Control System
....................... 145
Anti-Lock Brake System............................. 144
Electronic Roll Mitigation................. 149, 153
Electrical Power Outlets................................... 88Electronic Range Select (ERS)............. 236, 241
Electronic Stability Control (ESC)...................146
Electronic Throttle Control Warning Light...... 132
Electronically Shifted Transfer Case.............. 244
Emergency Braking........................................ 229
Emergency, In Case OfFreeing Vehicle When Stuck
..................... 367
Hazard Warning Flasher........................... 338
Jump Starting........................................... 362
Emission Control System Maintenance........ 142
Engine......................................... 391, 392, 393
Air Cleaner................................................ 398Block Heater.................................... 218, 227
Break-In Recommendations..................... 228
Compartment.................................. 392, 393Compartment Identification...................... 391
Coolant (Antifreeze)......................... 452, 454
Exhaust Gas Caution....................... 208, 448
Fails To Start............................................ 214
Flooded, Starting...................................... 214Fuel Requirements.......................... 446, 451
Identifcation.................................... 392, 393
Idling........................................................ 224
Jump Starting........................................... 362Oil..................................396, 451, 452, 454
Oil Filler Cap.................................... 391, 397
Oil Filter.................................................... 398
Oil Reset................................................... 119
Oil Selection.................................... 396, 451
Oil Synthetic............................................. 398
Overheating.............................................. 367
Runaway................................................... 312
Starting..................................................... 212
Engine Oil Viscosity....................................... 397
Enhanced Accident Response
Feature
................................................ 189, 371
Entry System, Illuminated................................55
Ethanol.......................................................... 446
Exhaust Brake............................................... 230
Exhaust Gas Cautions.......................... 208, 448
Exhaust System..........................208, 410, 419Exterior Lighting...............................................49
Exterior Lights........................................ 49, 210
F
FiltersAir Cleaner
................................................ 398
Air Conditioning................................. 70, 401
Engine Fuel............................................... 403
Engine Oil...............................398, 452, 454
Engine Oil Disposal................................... 398
FlashersTurn Signals
.............................. 52, 140, 210
Flash-To-Pass...................................................51
Flat Tire Stowage.......................................... 350
Fluid Capacities............................................ 451
Fluid Leaks.................................................... 210
Fluid Level ChecksBrake........................................................ 415
Fluid, Brake................................................... 454
Fluids And Lubricants........................... 452, 454
Fog Lights.............................................. 52, 376
Fold Flat Load Floor.........................................86
Fold-Flat Seats.................................................32
20_DJD2_OM_EN_USC_t.book Page 542