Ram 2500 2020 Owner's Manual
Manufacturer: RAM, Model Year: 2020, Model line: 2500, Model: Ram 2500 2020Pages: 553, PDF Size: 21.99 MB
Page 371 of 553
IN CASE OF EMERGENCY369
TOWING A DISABLED VEHICLE
This section describes procedures for towing a
disabled vehicle using a commercial towing
service.
If the transmission and drivetrain are operable,
disabled vehicles may also be towed as
described under “Recreational Towing” in the
“Starting And Operating” section. NOTE:
Vehicles equipped with the Air Suspension
System must be placed in Transport mode,
before tying them down (from the body) on a
trailer or flatbed truck. If the vehicle cannot be
placed in Transport mode (for example, engine
will not run), tie-downs must be fastened to the
axles (not to the body). Failure to follow these
instructions may cause fault codes to be set
and/or cause loss of proper tie-down tension.
Refer to “Air Suspension System — If Equipped”
in “Starting And Operating” for more informa
-
tion.
Proper towing or lifting equipment is required to
prevent damage to your vehicle. Use only tow
bars and other equipment designed for this
purpose, following equipment manufacturer’s
instructions. Use of safety chains is mandatory. Attach a tow bar or other towing device to main
structural members of the vehicle, not to
bumpers or associated brackets. State and
local laws regarding vehicles under tow must be
observed.If you must use the accessories (wipers,
defrosters, etc.) while being towed, the ignition
must be in the ON/RUN mode, not the ACC
mode.
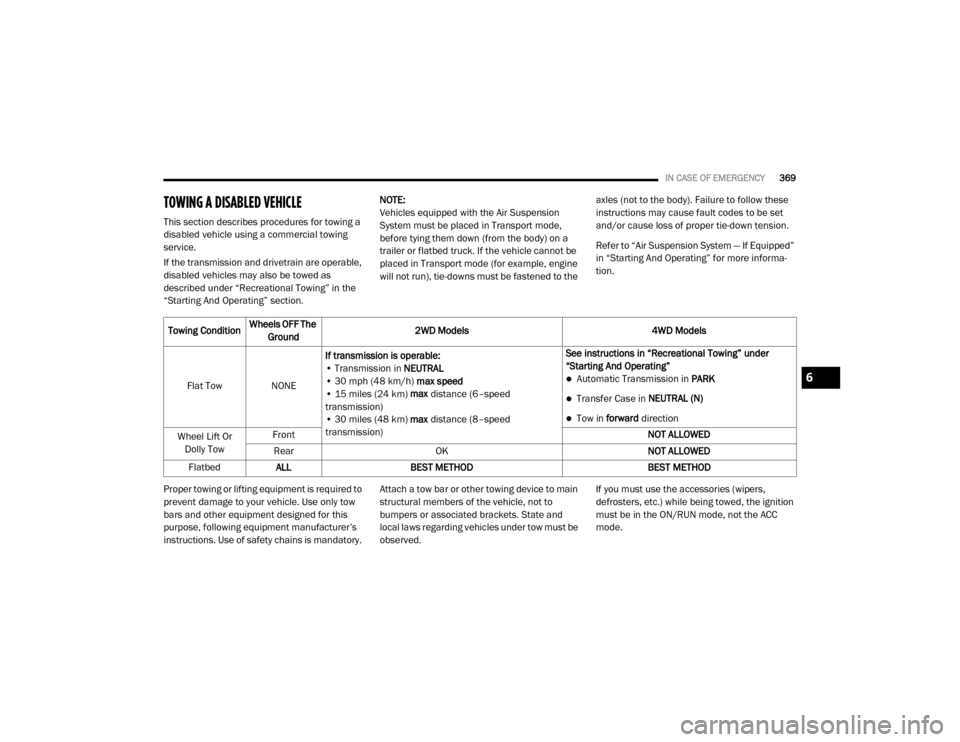
Towing Condition
Wheels OFF The
Ground 2WD Models
4WD Models
Flat Tow NONE If transmission is operable:
• Transmission in NEUTRAL
• 30 mph (48 km/h) max speed
• 15 miles (24 km) max distance (6–speed
transmission)
• 30 miles (48 km) max distance (8–speed
transmission) See instructions in “Recreational Towing” under
“Starting And Operating”
Automatic Transmission in
PARK
Transfer Case in NEUTRAL (N)
Tow in forward direction
Wheel Lift Or Dolly Tow Front
NOT ALLOWED
Rear OK NOT ALLOWED
Flatbed ALL BEST METHOD BEST METHOD
6
20_DJD2_OM_EN_USC_t.book Page 369
Page 372 of 553

370IN CASE OF EMERGENCY
If the key fob is unavailable or the vehicle's
battery is discharged, refer to ”Manual Park
Release” in this section for instructions on
shifting the transmission out of PARK for
towing.
Two-Wheel Drive Models
The manufacturer recommends towing your
vehicle with all four wheels OFF the ground
using a flatbed.
If flatbed equipment is not available, and the
transmission is operable, the vehicle may be
towed (with rear wheels ON the ground) under
the following conditions:
The transmission must be in NEUTRAL. NOTE:
Refer to “Manual Park Release” in this section
for instructions on shifting the transmission to
NEUTRAL when the engine is OFF.
The towing speed must not exceed 30 mph
(48 km/h).
The towing distance must not exceed
30 miles (48 km) for 8–speed transmission.
The towing distance must not exceed
15 miles (24 km) for 6–speed transmission.
If the transmission is not operable, or the
vehicle must be towed faster than 30 mph
(48 km/h) or farther than 30 miles (48 km) for 8–speed transmission, tow with the rear wheels
OFF the ground. Acceptable methods are to tow
the vehicle on a flatbed, or with the front wheels
raised and the rear wheels on a towing dolly, or
(when using a suitable steering wheel stabilizer
to hold the front wheels in the straight position)
with the rear wheels raised and the front wheels
on the ground.
Four-Wheel Drive Models
The manufacturer recommends towing with all
wheels OFF the ground. Acceptable methods
are to tow the vehicle on a flatbed or with one
end of vehicle raised and the opposite end on a
towing dolly.
If flatbed equipment is not available, and the
transfer case is operable, the vehicle may be
towed (in the forward direction, with ALL wheels
on the ground), IF the transfer case is in
NEUTRAL (N) and the transmission is in PARK.
Refer to “Recreational Towing” in “Starting And
Operating” for further information and detailed
instructions.
CAUTION!
Do not use sling type equipment when
towing. Vehicle damage may occur.
When securing the vehicle to a flat bed
truck, do not attach to front or rear suspen -
sion components. Damage to your vehicle
may result from improper towing.
CAUTION!
Towing this vehicle in violation of the above
requirements can cause severe transmission
damage. Damage from improper towing is not
covered under the New Vehicle Limited
Warranty.
20_DJD2_OM_EN_USC_t.book Page 370
Page 373 of 553

IN CASE OF EMERGENCY371
Emergency Tow Hooks — If Equipped
Your vehicle may be equipped with emergency
tow hooks.
NOTE:
For off-road recovery, it is recommended to use
both of the front tow hooks to minimize the risk
of damage to the vehicle.
Front Tow Hooks
ENHANCED ACCIDENT RESPONSE SYSTEM
(EARS)
This vehicle is equipped with an Enhanced Acci
-
dent Response System.
Please refer to “Occupant Restraint Systems” in
“Safety” for further information on the
Enhanced Accident Response System (EARS)
function.
EVENT DATA RECORDER (EDR)
This vehicle is equipped with an Event Data
Recorder (EDR). The main purpose of an EDR is
to record data that will assist in understanding
how a vehicle’s systems performed under
certain crash or near crash-like situations, such
as an air bag deployment or hitting a road
obstacle.
Please refer to “Occupant Restraint Systems” in
“Safety” for further information on the Event
Data Recorder (EDR).
CAUTION!
Front or rear wheel lifts must not be used (if
the remaining wheels are on the ground).
Internal damage to the transmission or
transfer case will occur if a front or rear
wheel lift is used when towing.
Towing this vehicle in violation of the above
requirements can cause severe transmis -
sion and/or transfer case damage.
Damage from improper towing is not
covered under the New Vehicle Limited
Warranty.
WARNING!
Do not use a chain for freeing a stuck
vehicle. Chains may break, causing serious
injury or death.
Stand clear of vehicles when pulling with
tow hooks. Tow straps may become disen -
gaged, causing serious injury.
CAUTION!
Tow hooks are for emergency use only, to
rescue a vehicle stranded off road. Do not
use tow hooks for tow truck hookup or
highway towing. You could damage your
vehicle.
6
20_DJD2_OM_EN_USC_t.book Page 371
Page 374 of 553
372IN CASE OF EMERGENCY
BULB REPLACEMENT
Replacement Bulbs
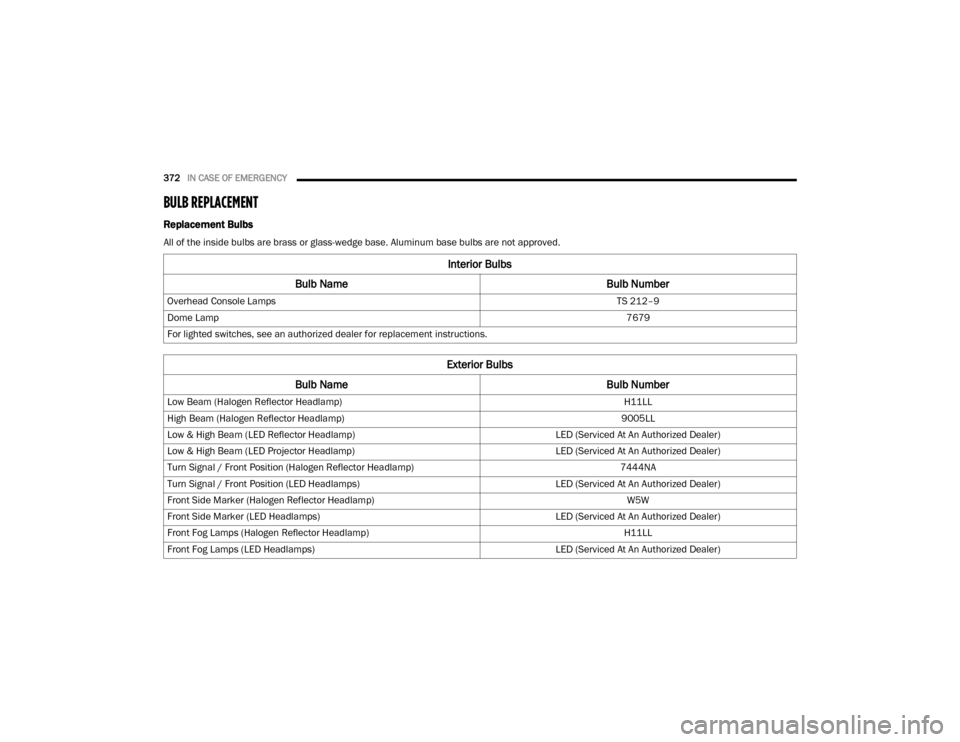
All of the inside bulbs are brass or glass-wedge base. Aluminum base bulbs are not approved.
Interior Bulbs
Bulb Name Bulb Number
Overhead Console Lamps TS 212–9
Dome Lamp 7679
For lighted switches, see an authorized dealer for replacement instructions.
Exterior Bulbs
Bulb Name Bulb Number
Low Beam (Halogen Reflector Headlamp) H11LL
High Beam (Halogen Reflector Headlamp) 9005LL
Low & High Beam (LED Reflector Headlamp) LED (Serviced At An Authorized Dealer)
Low & High Beam (LED Projector Headlamp) LED (Serviced At An Authorized Dealer)
Turn Signal / Front Position (Halogen Reflector Headlamp) 7444NA
Turn Signal / Front Position (LED Headlamps) LED (Serviced At An Authorized Dealer)
Front Side Marker (Halogen Reflector Headlamp) W5W
Front Side Marker (LED Headlamps) LED (Serviced At An Authorized Dealer)
Front Fog Lamps (Halogen Reflector Headlamp) H11LL
Front Fog Lamps (LED Headlamps) LED (Serviced At An Authorized Dealer)
20_DJD2_OM_EN_USC_t.book Page 372
Page 375 of 553
IN CASE OF EMERGENCY373
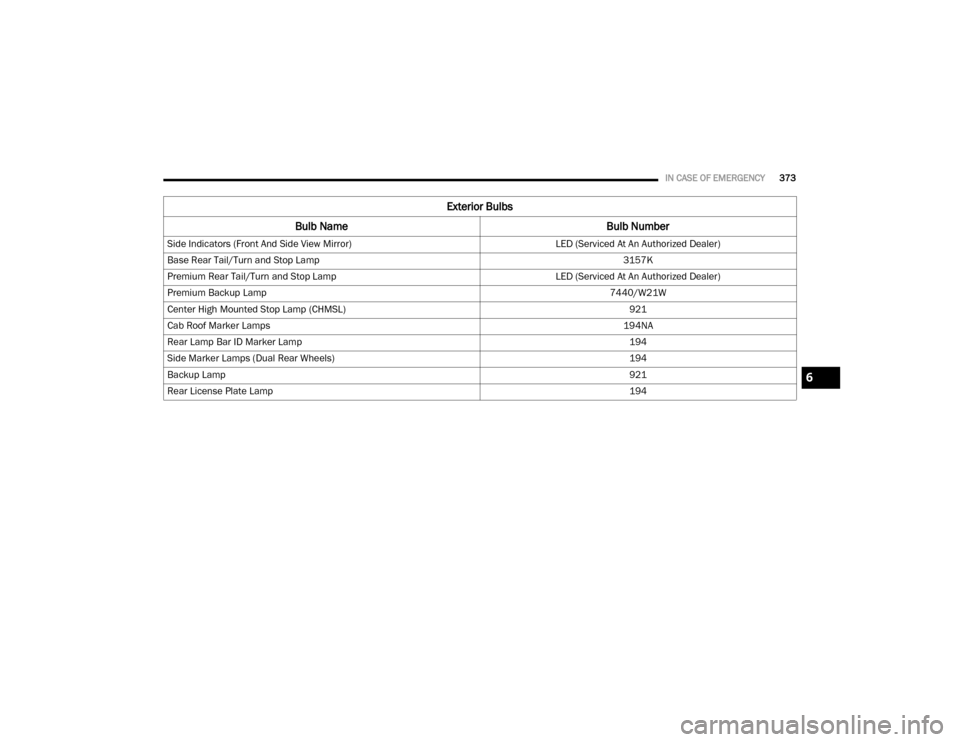
Side Indicators (Front And Side View Mirror) LED (Serviced At An Authorized Dealer)
Base Rear Tail/Turn and Stop Lamp 3157K
Premium Rear Tail/Turn and Stop Lamp LED (Serviced At An Authorized Dealer)
Premium Backup Lamp 7440/W21W
Center High Mounted Stop Lamp (CHMSL) 921
Cab Roof Marker Lamps 194NA
Rear Lamp Bar ID Marker Lamp 194
Side Marker Lamps (Dual Rear Wheels) 194
Backup Lamp 921
Rear License Plate Lamp 194
Exterior Bulbs
Bulb Name Bulb Number
6
20_DJD2_OM_EN_USC_t.book Page 373
Page 376 of 553
374IN CASE OF EMERGENCY
Replacing Exterior Bulbs
Base Quad: Low Beam Headlamp, High
Beam Headlamp, Front Park And Turn — If
Equipped
Low Beam
1. Open the hood.
2. Disconnect and isolate the negative battery
cable.
3. Reach into the front wheel house ahead of the front wheel, remove the fastener, and
lift the cover over the access hole in the
front of the wheel house splash shield.
Access to the rear of the lamp can be gained
through this access hole.
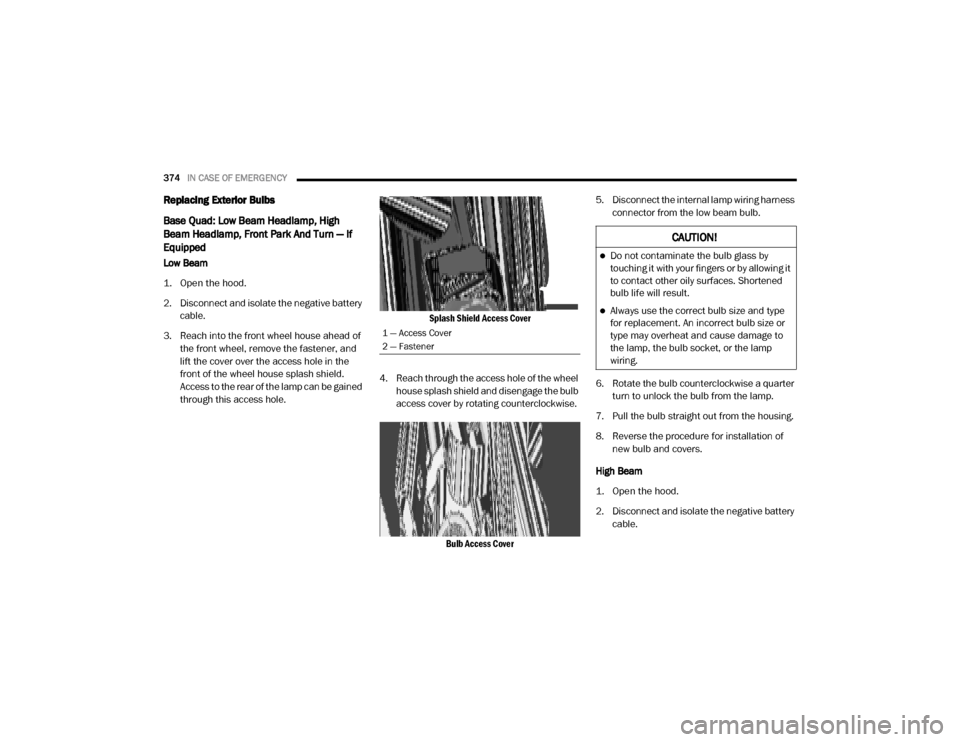
Splash Shield Access Cover
4. Reach through the access hole of the wheel house splash shield and disengage the bulb
access cover by rotating counterclockwise.
Bulb Access Cover
5. Disconnect the internal lamp wiring harness
connector from the low beam bulb.
6. Rotate the bulb counterclockwise a quarter turn to unlock the bulb from the lamp.
7. Pull the bulb straight out from the housing.
8. Reverse the procedure for installation of new bulb and covers.
High Beam
1. Open the hood.
2. Disconnect and isolate the negative battery cable.
1 — Access Cover
2 — Fastener
CAUTION!
Do not contaminate the bulb glass by
touching it with your fingers or by allowing it
to contact other oily surfaces. Shortened
bulb life will result.
Always use the correct bulb size and type
for replacement. An incorrect bulb size or
type may overheat and cause damage to
the lamp, the bulb socket, or the lamp
wiring.
20_DJD2_OM_EN_USC_t.book Page 374
Page 377 of 553
IN CASE OF EMERGENCY375
3. Look under the hood and behind the head -
lamp to find the high beam bulb access
cover.
4. Reach behind the headlamp and disengage the access cover by rotating counterclock -
wise.
5. Disconnect the internal lamp wiring harness connector from the high beam bulb.
6. Rotate the bulb counterclockwise a quarter turn to unlock the bulb from the lamp.
7. Pull the bulb straight out from the housing.
8. Reverse the procedure for installation of new bulb and covers. Front Park And Turn
1. Open the hood.
2. Disconnect and isolate the negative battery
cable.
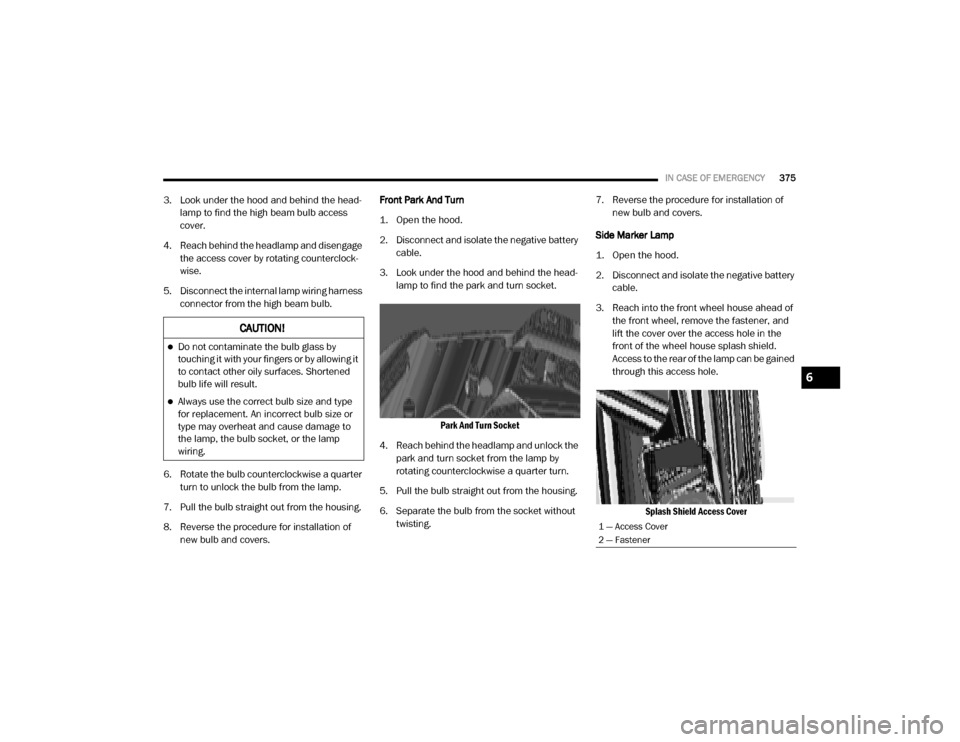
3. Look under the hood and behind the head -
lamp to find the park and turn socket.
Park And Turn Socket
4. Reach behind the headlamp and unlock the park and turn socket from the lamp by
rotating counterclockwise a quarter turn.
5. Pull the bulb straight out from the housing.
6. Separate the bulb from the socket without twisting. 7. Reverse the procedure for installation of
new bulb and covers.
Side Marker Lamp
1. Open the hood.
2. Disconnect and isolate the negative battery cable.
3. Reach into the front wheel house ahead of the front wheel, remove the fastener, and
lift the cover over the access hole in the
front of the wheel house splash shield.
Access to the rear of the lamp can be gained
through this access hole.
Splash Shield Access Cover
CAUTION!
Do not contaminate the bulb glass by
touching it with your fingers or by allowing it
to contact other oily surfaces. Shortened
bulb life will result.
Always use the correct bulb size and type
for replacement. An incorrect bulb size or
type may overheat and cause damage to
the lamp, the bulb socket, or the lamp
wiring.
1 — Access Cover
2 — Fastener
6
20_DJD2_OM_EN_USC_t.book Page 375
Page 378 of 553
376IN CASE OF EMERGENCY
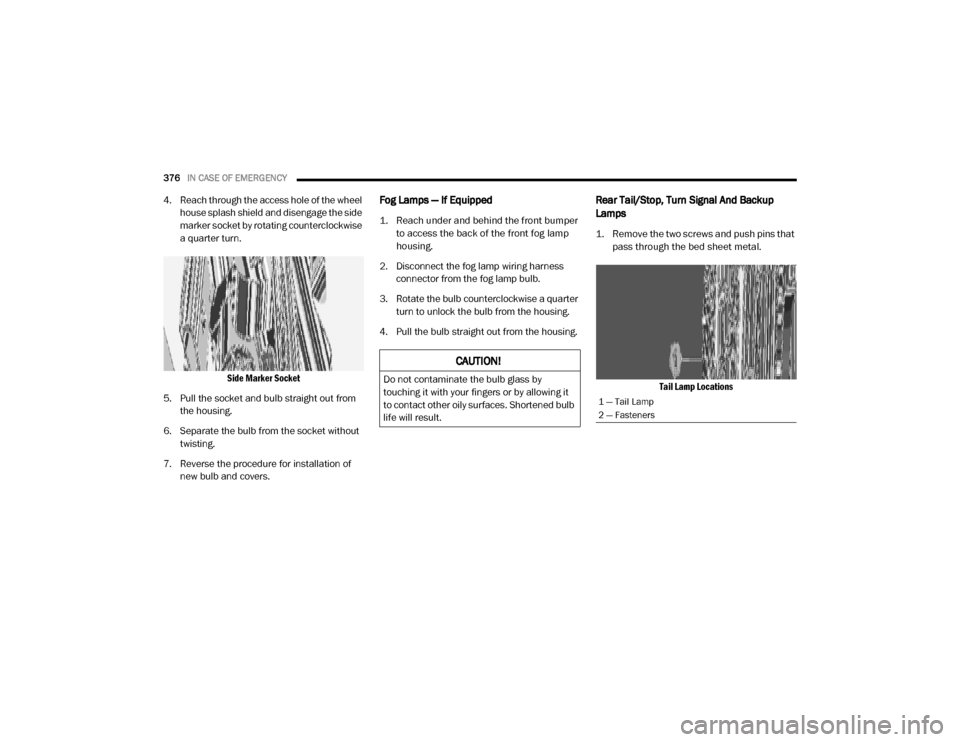
4. Reach through the access hole of the wheel
house splash shield and disengage the side
marker socket by rotating counterclockwise
a quarter turn.
Side Marker Socket
5. Pull the socket and bulb straight out from the housing.
6. Separate the bulb from the socket without twisting.
7. Reverse the procedure for installation of new bulb and covers.Fog Lamps — If Equipped
1. Reach under and behind the front bumper to access the back of the front fog lamp
housing.
2. Disconnect the fog lamp wiring harness connector from the fog lamp bulb.
3. Rotate the bulb counterclockwise a quarter turn to unlock the bulb from the housing.
4. Pull the bulb straight out from the housing.
Rear Tail/Stop, Turn Signal And Backup
Lamps
1. Remove the two screws and push pins that pass through the bed sheet metal.
Tail Lamp Locations
CAUTION!
Do not contaminate the bulb glass by
touching it with your fingers or by allowing it
to contact other oily surfaces. Shortened bulb
life will result.
1 — Tail Lamp
2 — Fasteners
20_DJD2_OM_EN_USC_t.book Page 376
Page 379 of 553

IN CASE OF EMERGENCY377
2. Pull the outboard side of the lamp rearward
far enough to unsnap the two receptacles
on the outboard side of the lamp housing
from the two plastic snap post retainers in
the outer box side panel.
Tail Lamp Removed
3. Disconnect the wiring harness connectors from the bulb socket.
4. Rotate the bulb socket counterclockwise a quarter turn to unlock it from the housing.
5. Pull the bulb straight out of the socket. 6. Reverse the procedure to install the bulb
and housing.
Center High Mounted Stop Lamp (CHMSL)
With Cargo Lamp
1. Remove the two screws holding the housing/lens to the body as shown.
CHMSL Mounting Screw Locations
2. Separate the connector holding the housing and wiring harness to the body.
CHMSL Connector Location
3. Turn the desired bulb socket a quarter turn and remove the socket and bulb from
housing.
4. Pull the desired bulb straight from the socket.
CHMSL Bulb And Socket
1 — Tail Lamp Housing
2 — Bulb Socket Locations
CAUTION!
Do not contaminate the bulb glass by
touching it with your fingers or by allowing it
to contact other oily surfaces. Shortened bulb
life will result.
6
20_DJD2_OM_EN_USC_t.book Page 377
Page 380 of 553

378IN CASE OF EMERGENCY
Outside Bulbs: Cargo Lamps
Inside Bulb: Center High Mounted Stop
Lamp
5. Reverse the procedure for installation of bulbs and housing.
Cab Top Clearance Lamps — If Equipped
1. Remove the screws from the top of the lamp.
Removing Rear Screw From Clearance Lamp
2. Rotate the bulb socket a quarter turn and
pull it from the lamp assembly.
Removing Bulb Socket From Clearance Lamp
3. Pull the bulb straight from it's socket and replace.
Removing The Bulb From The Bulb Socket
Rear Lamp Bar ID Marker (Dual Rear Wheels)
— If Equipped
1. Loosen the two screws and the housing to gain access to the bulb sockets.
Screw Locations
2. Turn the socket a quarter turn counterclock -
wise to access the bulb.
3. Pull the bulb straight out from the socket.
4. Reverse the procedure for installation of the bulbs and housing.
CAUTION!
Do not contaminate the bulb glass by
touching it with your fingers or by allowing it
to contact other oily surfaces. Shortened bulb
life will result.
20_DJD2_OM_EN_USC_t.book Page 378