buttons Ram 2500 2020 Service Manual
[x] Cancel search | Manufacturer: RAM, Model Year: 2020, Model line: 2500, Model: Ram 2500 2020Pages: 553, PDF Size: 21.99 MB
Page 515 of 553

MULTIMEDIA513
4 — MORE
Push the MORE button on the faceplate to
access additional options.
5 — ENTER/BROWSE & TUNE/SCROLL
Push the ENTER/BROWSE button to accept a
highlighted selection on the screen. Rotate the
TUNE/SCROLL rotary knob to scroll through a
list or tune to a radio station.
6 — SCREEN OFF
Push the SCREEN OFF button to turn the touch -
screen off. To turn the touchscreen back on,
press the screen.
7 — MUTE
Push the MUTE button to turn off the audio of
the radio system. Press it again to turn the
audio back on.
8 — VOLUME/POWER
Rotate the rotary knob to adjust the Volume.
Push the VOLUME/POWER button to turn the
system ON or OFF.
9 — PHONE
Push the PHONE button on the faceplate to
access the Uconnect Phone feature. 10 — MEDIA
Pushing the MEDIA button on the faceplate will
allow you to switch to Media mode: CD (if
equipped), USB, AUX, and Bluetooth®.
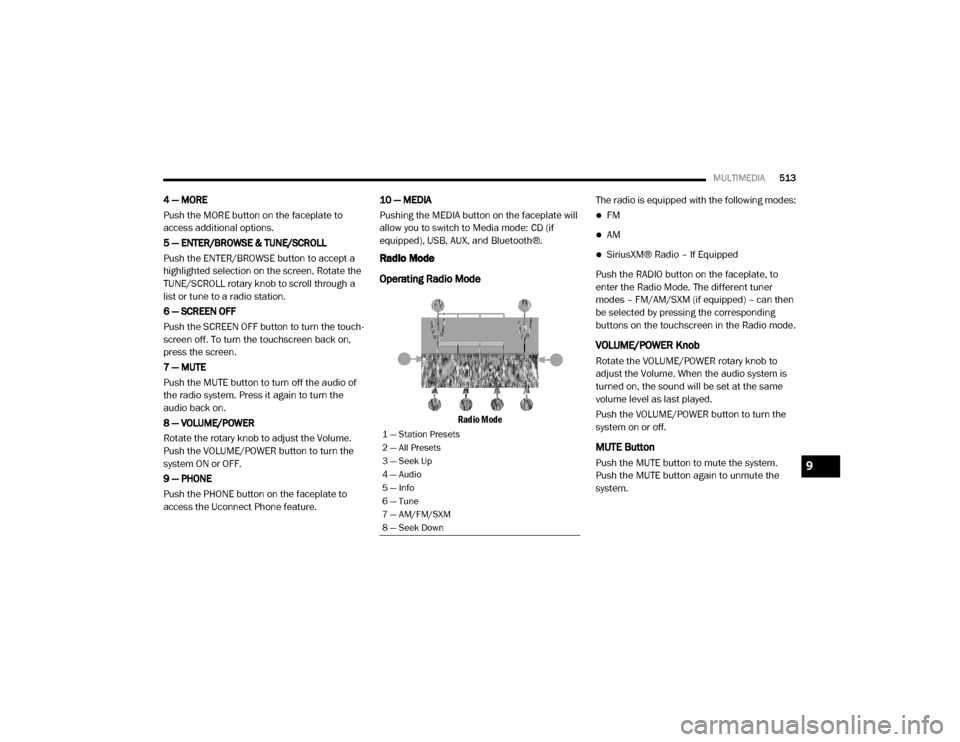
Radio Mode
Operating Radio Mode
Radio Mode
The radio is equipped with the following modes:
FM
AM
SiriusXM® Radio – If Equipped
Push the RADIO button on the faceplate, to
enter the Radio Mode. The different tuner
modes – FM/AM/SXM (if equipped) – can then
be selected by pressing the corresponding
buttons on the touchscreen in the Radio mode.
VOLUME/POWER Knob
Rotate the VOLUME/POWER rotary knob to
adjust the Volume. When the audio system is
turned on, the sound will be set at the same
volume level as last played.
Push the VOLUME/POWER button to turn the
system on or off.
MUTE Button
Push the MUTE button to mute the system.
Push the MUTE button again to unmute the
system.
1 — Station Presets
2 — All Presets
3 — Seek Up
4 — Audio
5 — Info
6 — Tune
7 — AM/FM/SXM
8 — Seek Down
9
20_DJD2_OM_EN_USC_t.book Page 513
Page 517 of 553

MULTIMEDIA515
usXM® and all related marks and logos are
trademarks of SiriusXM® Radio Inc.
This functionality is only available for radios
equipped with a Satellite receiver. To receive
satellite radio, the vehicle needs to be outside
with a clear view to the sky.
If the screen displays Acquiring Signal, you may
need to change the vehicle’s position to receive
a signal. In most cases, the satellite radio does
not receive a signal in underground parking
garages or tunnels.
Setting Presets
The Presets are available for all Radio Modes
and are activated by pressing any of the four
Preset buttons on the touchscreen, located at
the top of the screen.
When you are receiving a station that you wish
to commit into memory, press and hold the
desired numbered button on the touchscreen
for more than two seconds or until you hear a
confirmation beep.
The Radio stores up to 12 presets in each of the
Radio modes. Four presets are visible at the top
of the radio screen.
Audio Settings
1. Push the SETTINGS button on the right side
of the radio faceplate. If the settings button
is not present, push the MORE button on
the faceplate, then the Settings button on
the touchscreen.
2. Scroll down and press the Audio button on the touchscreen to open the Audio menu.
3. The Audio Menu shows the following options for you to customize your audio
settings:
Auto Play — Press the Auto Play button on
the touchscreen to select between ON or
OFF. This feature determines if music
automatically starts playing from a device
when it is first connected to the Media
hub’s USB port.
Equalizer — Press the Equalizer button on
the touchscreen to adjust the Bass, Mid
and Treble. Use the + or – buttons on the
touchscreen to adjust the equalizer to
your desired settings. Press the Back Arrow button on the touchscreen when
done.
Balance/Fade
— Press the Balance/Fade
button on the touchscreen to adjust the
sound from the speakers. Use the arrow
button on the touchscreen to adjust the
sound level from the front and rear or
right and left side speakers. Press the
Center C button on the touchscreen to
reset the balance and fade to the factory
setting. Press the Back Arrow button on
the touchscreen when done.
Speed Adjust Volume — Press the Speed
Adjusted Volume button on the touch -
screen to select between OFF, 1, 2 or 3.
This will decrease the radio volume rela -
tive to a decrease in vehicle speed. Press
the Back Arrow button on the touch-
screen when done.
Loudness — Press the Loudness button
on the touchscreen to select the Loud -
ness feature. When this feature is acti -
vated, it improves sound quality at lower
volumes.9
20_DJD2_OM_EN_USC_t.book Page 515
Page 521 of 553

MULTIMEDIA519
The Uconnect Phone is a voice-activated,
hands-free, in-vehicle communications system
with voice command capability. Refer to Voice
Recognition (VR) within this publication for
further information.
The Uconnect Phone allows you to dial a phone
number with your mobile phone using simple
voice commands.
NOTE:
The Uconnect Phone requires a mobile phone
equipped with the Bluetooth® Hands-Free
Profile. To check mobile phone compatibility,
please visit UconnectPhone.com .
For Uconnect customer support:
US residents - visit UconnectPhone.com or
call 1-877-855-8400
Canadian residents - visit Uconnect-
Phone.com or call 1-800-465-2001 (English)
or 1-800-387-9983 (French)
Phone Mode Activation
Press the PHONE button on the front panel to
activate the Phone mode.
Main Functions
The buttons on the display can be used to:
Compose phone numbers using the graphic
keypad on the display.
Display and call the contacts in the mobile
phone phonebook.
Display and call contacts from the Recent
Calls menu.
Pair up to 10 phones/audio devices to make
access and connection easier and quicker.
Transfer calls from the system to the mobile
phone and vice versa.
Deactivate the microphone audio for privacy.
The mobile phone audio is transmitted through
the vehicle’s audio system. The system auto -
matically mutes the radio when the Phone func -
tion is used.
Connecting/Disconnecting A Mobile Phone
Or Bluetooth® Device
Pairing A Phone
To begin using your Uconnect Phone, you must
pair your compatible Bluetooth®-enabled
mobile phone. Mobile phone pairing is the process of establishing a wireless connection
between a cellular phone and the Uconnect
system.
To complete the pairing process, you need to
reference your mobile phone Owner's Manual.
Please visit
UconnectPhone.com for complete
mobile phone compatibility information.
NOTE:
You must have Bluetooth® enabled on your
phone to complete this procedure.
The vehicle must be in PARK.
1. Place the ignition in the ACC or ON/RUN position.
2. Push the PHONE button on the faceplate.
If there are no phones currently connected with the system, a pop-up
appears asking if you would like to pair a
mobile phone.
3. Select “Yes” to begin the pairing process.
9
20_DJD2_OM_EN_USC_t.book Page 519
Page 525 of 553

MULTIMEDIA523
Making A Phone Call
Dialing The Phone Number Using The
"Keyboard" Icon On The Display
Enter the phone number using the graphic
keypad displayed.
Proceed as follows:
1. Press the Keyboard icon on the display and
use the number buttons to enter the
number.
2. Press the Call button to make a call.
Call By Saying A Phonebook Name Or Phone
Number
1. Push the PHONE button on the steering wheel.
2. After the beep, say “dial” (or “call” a full name or phone number).
Recent Calls
The list of the last calls made for each of the
following call types can be displayed:
Calls received
Calls made
Calls without a reply
All calls
To access these types of calls, press the Recent
Calls button on the Phone menu main screen.
Making A Second Call While Current Call Is In
Progress
When a phone conversation is active, a second
phone call can be made as follows:
Select the number/contact from the list of
recent calls.
Select the contact from the phonebook.
Press the Hold button and dial the number
using the graphic keyboard of the display.
Redial
To call the number/contact of last call made,
press the Redial button.
Answering An Incoming Call
Call Controls
The buttons on the display allow the following
phone call functions to be managed:
Answer
End
Ignore
Put on hold/resume
Deactivate/activate the microphone
Transfer the call
Switch from one call to the other
Conference/merge two active calls
Answering Or Ignoring A Call With No Call
Currently In Progress
When an incoming call rings or is announced on
the Uconnect system, push the Answer button
on the touchscreen, or push the PHONE button
on the steering wheel.
Answering Or Ignoring An Incoming Call With A
Call Currently In Progress
When an incoming call rings or is announced on
the Uconnect system, push the Answer button
on the touchscreen, or push the PHONE button
on the steering wheel to answer the call and put
the ongoing call on hold.
NOTE:
Not all mobile phones may support the manage -
ment of an incoming call when another phone
conversation is active.
9
20_DJD2_OM_EN_USC_t.book Page 523
Page 531 of 553

MULTIMEDIA529
VOICE RECOGNITION QUICK TIPS
Introducing Uconnect
Start using Uconnect Voice Recognition (VR)
with these helpful quick tips. It provides the key
Voice Commands and tips you need to know to
control your Uconnect system.
If you see the NAV icon on the bottom bar, or in
the Apps menus, of your touchscreen, you have
the Uconnect 4C NAV With 8.4-inch Display or
the Uconnect 4C NAV With 12-inch Display
system. If not, you have a Uconnect 4C With
8.4-inch Display system.
Get Started
All you need to control your Uconnect system
with your voice are the buttons on your steering
wheel.
1. Visit
UconnectPhone.com
to check mobile
device and feature compatibility and to
find phone pairing instructions.
2. Reduce background noise. Wind noise and passenger conversations are examples of
noise that may impact recognition. 3. Speak clearly at a normal pace and volume
while facing straight ahead. The micro -
phone is located in the headliner and aimed
at the driver.
4. Each time you give a Voice Command, you must first push either the VR or Phone
button, wait until after the beep, then say
your Voice Command.
5. You can interrupt the help message or system prompts by pushing the VR or Phone
button and saying a Voice Command from
current category.
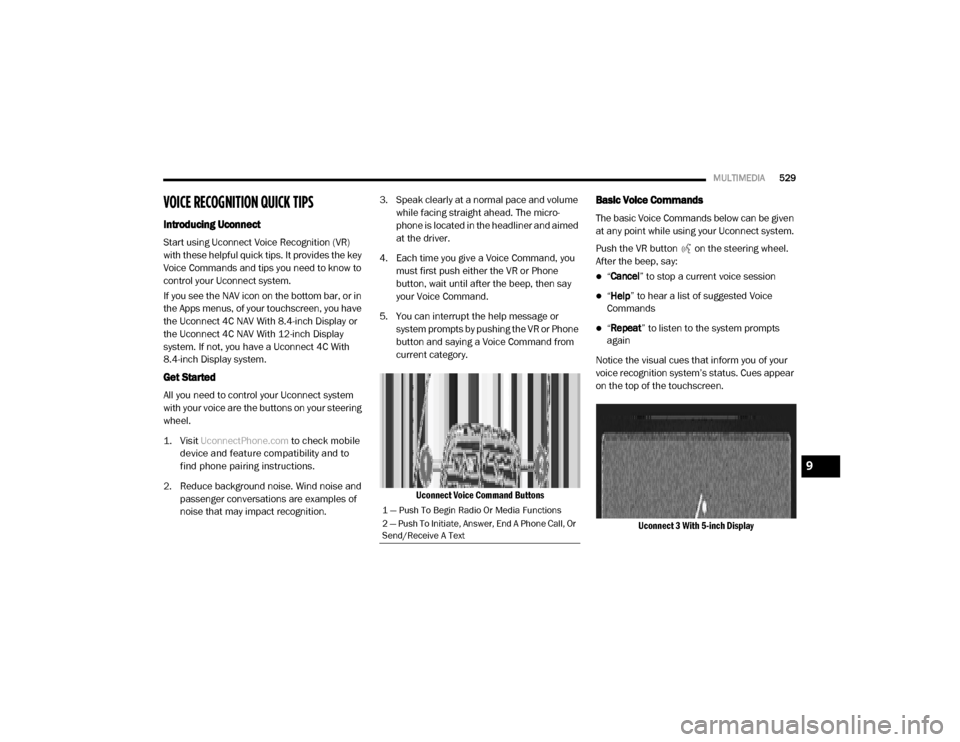
Uconnect Voice Command Buttons
Basic Voice Commands
The basic Voice Commands below can be given
at any point while using your Uconnect system.
Push the VR button on the steering wheel.
After the beep, say:
“Cancel ” to stop a current voice session
“Help ” to hear a list of suggested Voice
Commands
“ Repeat ” to listen to the system prompts
again
Notice the visual cues that inform you of your
voice recognition system’s status. Cues appear
on the top of the touchscreen.
Uconnect 3 With 5-inch Display
1 — Push To Begin Radio Or Media Functions
2 — Push To Initiate, Answer, End A Phone Call, Or
Send/Receive A Text
9
20_DJD2_OM_EN_USC_t.book Page 529