heating Ram 3500 2018 Owner's Manual
[x] Cancel search | Manufacturer: RAM, Model Year: 2018, Model line: 3500, Model: Ram 3500 2018Pages: 372, PDF Size: 7.1 MB
Page 148 of 372

• A Diesel Pre-Heat system both improvesengine starting and reduces the amount of
white smoke generated by a warming
engine.
STARTING THE ENGINE — 6.7L
DIESEL ENGINE
Before starting your vehicle, adjust your seat,
adjust both inside and outside mirrors, and
fasten your seat belts.
The starter should not be operated for more
than 15-second intervals. Waiting a few min-
utes between such intervals will protect the
starter from overheating.
WARNING!
• Do not leave children or animals inside parked vehicles in hot weather. Interior
heat build up may cause serious injury
or death.
• When leaving the vehicle, always make
sure the keyless ignition node is in the
“OFF” mode, remove the key fob from
the vehicle and lock the vehicle.
WARNING!
• Never leave children alone in a vehicle,or with access to an unlocked vehicle.
Allowing children to be in a vehicle un-
attended is dangerous for a number of
reasons. A child or others could be seri-
ously or fatally injured. Children should
be warned not to touch the parking
brake, brake pedal or the gear selector.
• Do not leave the key fob in or near the
vehicle, or in a location accessible to
children, and do not leave the ignition of
a vehicle equipped with Keyless Enter-
N-Go in the ACC or ON/RUN mode. A
child could operate power windows,
other controls, or move the vehicle.
Keyless Enter-N-Go — Ignition
This feature allows the driver to operate the
ignition switch with the push of a button, as
long as the Remote Start/Keyless Enter-N-Go
key fob is in the passenger compartment.
Normal Starting
Using The ENGINE START/STOP Button
1. The transmission must be in PARK or
NEUTRAL.
2. Press and hold the brake pedal while pushing the ENGINE START/STOP button
once.
3. The system takes over and attempts to start the vehicle. If the vehicle fails to
start, the starter will disengage automati-
cally after 25 seconds.
4. If you wish to stop the cranking of the engine prior to the engine starting, re-
move your foot from the brake pedal and
push the button again.
NOTE:
• Normal starting of either a cold or a warm engine is obtained without pumping or
pressing the accelerator pedal.
• Under cold weather conditions, the engine may not immediately crank if the "Wait To
Start" telltale is illuminated. This is normal
operation. For vehicles equipped with Key-
less Enter-N-Go, the vehicle will automati-
STARTING AND OPERATING
146
Page 151 of 372

NOTE:
The engine block heater cord is a factory
installed option. If your vehicle is not
equipped, heater cords are available from
your authorized Mopar dealer.
• A 12 Volt heater built into the fuel filterhousings aid in preventing fuel gelling. It is
controlled by a built-in thermostat.
• A heated intake air system both improves engine starting and reduces the amount of
white smoke generated by a warming
engine.NORMAL OPERATION — 3.0L DIESEL
ENGINE
Observe the following when the diesel engine
is operating.
• All message center lights are off.
• Malfunction Indicator Light (MIL) is off.
• Engine Oil Pressure telltale is not illumi-nated.
• Voltmeter operation:
The voltmeter may show a gauge fluctuation
at various engine temperatures. This is
caused by the glow plug heating system. The
number of cycles and the length of the cy-
cling operation is controlled by the engine
control module. Glow plug heater operation
can run for several minutes, once the heater
operation is complete the voltmeter needle
will stabilize.
Cold Weather Precautions
Operation in ambient temperature below
32°F (0°C) may require special consider-
ations. The following charts suggest these
options:
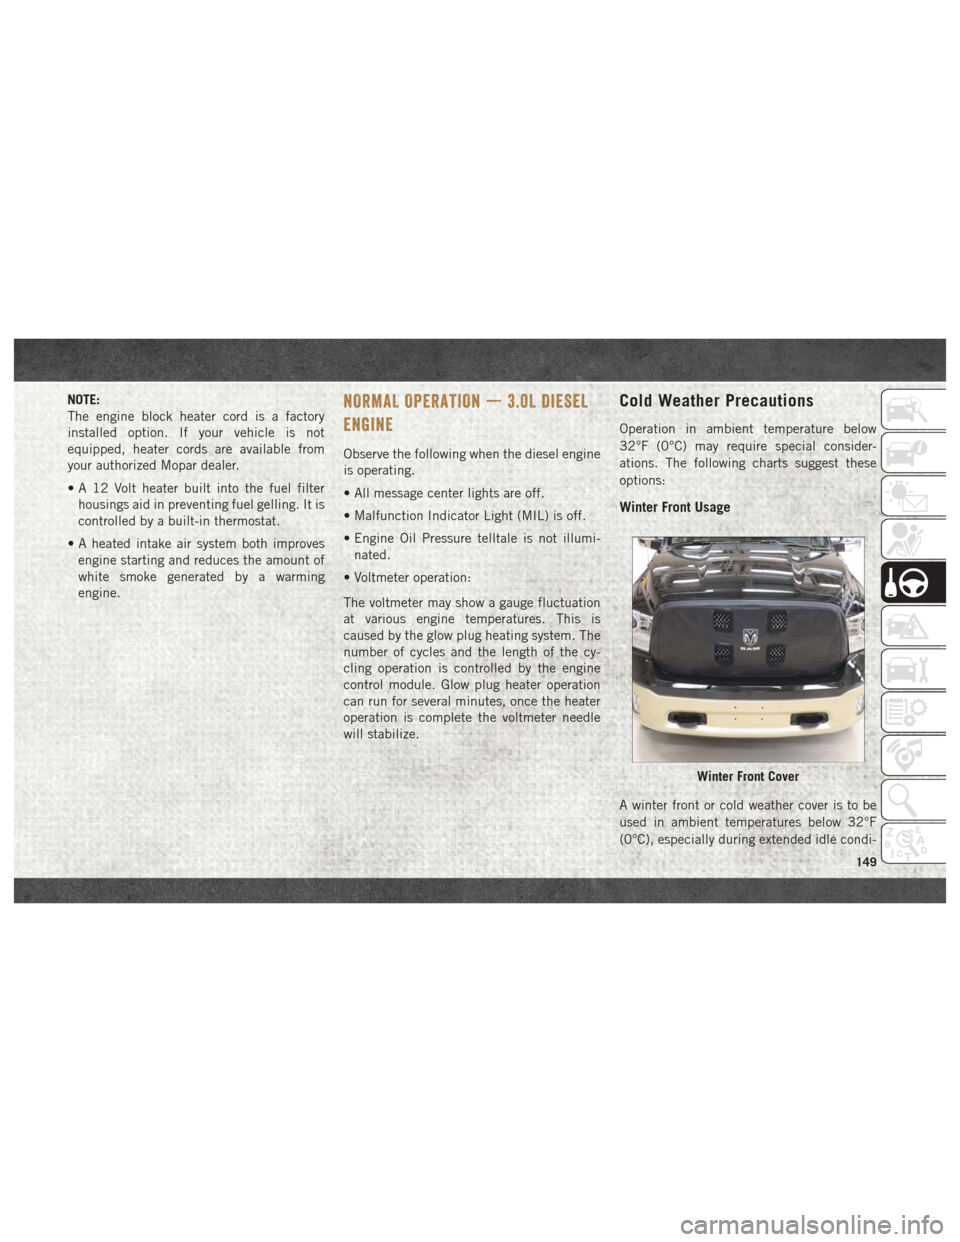
Winter Front Usage
A winter front or cold weather cover is to be
used in ambient temperatures below 32°F
(0°C), especially during extended idle condi-
Winter Front Cover
149
Page 188 of 372

CAUTION!
• Never add anything other than DEF tothe tank – especially any form of hydro-
carbon such as diesel fuel, fuel system
additives, gasoline, or any other
petroleum-based product. Even a very
small amount of these, less than
100 parts per million or less than 1 oz.
per 78 gallons (295 liters) will contami-
nate the entire DEF system and will
require replacement. If owners use a
container, funnel or nozzle when refilling
the tank, it should either be new or one
that is has only been used for adding
DEF. Mopar provides an attachable
nozzle with its DEF for this purpose.
3. Stop filling the DEF tank immediately when any of the following happen: DEF
stops flowing from the fill bottle into the
DEF tank, DEF splashes out the filler
neck, or a DEF pump nozzle automatically
shuts off.
4. Reinstall cap onto DEF tank. Filling The Def Tank In Cold Climates
Since DEF will begin to freeze at 12°F
(-11°C), your vehicle is equipped with an
automatic DEF heating system. This allows
the DEF injection system to operate properly
at temperatures below 12°F (-11°C). If your
vehicle is not in operation for an extended
period of time with temperatures below 12°F
(-11°C), the DEF in the tank may freeze. If
the tank is overfilled and freezes, it could be
damaged. Therefore, do not overfill the DEF
tank.
Extra care should be taken when filling with
portable containers to avoid overfilling. Note
the level of the DEF gauge in your instrument
cluster. You may safely add a maximum of
2 gallons (7.5 Liters) of DEF from portable
containers when your DEF gauge is reading ½
full.
REFUELING THE VEHICLE —
2500/3500 DIESEL MODELS
1. Open the fuel filler door.
NOTE:
There is no fuel filler cap. A flapper door
inside the filler pipe seals the system.
Fill Locations
1 — Diesel Exhaust Fluid (DEF) Fill
Location
2 — Diesel Fuel Fill Location
STARTING AND OPERATING
186
Page 192 of 372

CAUTION!
• DO NOT OVERFILL. DEF will freeze be-low 12ºF (-11ºC). The DEF system is
designed to work in temperatures below
the DEF freezing point, however, if the
tank is overfilled and freezes, the system
could be damaged.
• When DEF is spilled, clean the area immediately with water and use an ab-
sorbent material to soak up the spills on
the ground.
• Do not attempt to start your engine if DEF is accidentally added to the diesel
fuel tank as it can result in severe dam-
age to your engine, including but not
limited to failure of the fuel pump and
injectors.
CAUTION!
• Never add anything other than DEF tothe tank – especially any form of hydro-
carbon such as diesel fuel, fuel system
additives, gasoline, or any other
petroleum-based product. Even a very
small amount of these, less than
100 parts per million or less than 1 oz.
per 78 gallons (295 liters) will contami-
nate the entire DEF system and will
require replacement. If owners use a
container, funnel or nozzle when refilling
the tank, it should either be new or one
that is has only been used for adding
DEF. Mopar provides an attachable
nozzle with its DEF for this purpose.
3. Stop filling the DEF tank immediately when any of the following happen: DEF
stops flowing from the fill bottle into the
DEF tank, DEF splashes out the filler
neck, or a DEF pump nozzle automatically
shuts off.
4. Reinstall cap onto DEF tank. Filling The Def Tank In Cold Climates
Since DEF will begin to freeze at 12°F
(-11°C), your vehicle is equipped with an
automatic DEF heating system. This allows
the DEF injection system to operate properly
at temperatures below 12°F (-11°C). If your
vehicle is not in operation for an extended
period of time with temperatures below 12°F
(-11°C), the DEF in the tank may freeze. If
the tank is overfilled and freezes, it could be
damaged. Therefore, do not overfill the DEF
tank.
Extra care should be taken when filling with
portable containers to avoid overfilling. Note
the level of the DEF gauge in your instrument
cluster. You may safely add a maximum of
2 gallons (7.5 Liters) of DEF from portable
containers when your DEF gauge is reading ½
full.
STARTING AND OPERATING
190
Page 222 of 372

WARNING!
personal injury. Only use the specific
ground point, do not use any other exposed
metal parts.
5. Start the engine in the vehicle that has the booster battery, let the engine idle a
few minutes, and then start the engine in
the vehicle with the discharged battery.
CAUTION!
Do not connect jumper cable to any of the
fuses on the positive battery terminal. The
resulting electrical current will blow the
fuse.
6. Once the engine is started, remove the jumper cables in the reverse sequence:
Disconnecting The Jumper Cables
1. Disconnect the negative (-)end of the
jumper cable from the engine ground of
the vehicle with the discharged battery. 2. Disconnect the opposite end of the nega-
tive (-)jumper cable from the negative (-)
post of the booster battery.
3. Disconnect the positive (+)end of the
jumper cable from the positive (+)post of
the booster battery.
4. Disconnect the opposite end of the posi- tive (+)jumper cable from the positive (+)
post of the vehicle with the discharged
battery.
If frequent jump starting is required to start
your vehicle you should have the battery and
charging system inspected at an authorized
dealer.
CAUTION!
Accessories plugged into the vehicle
power outlets draw power from the vehi-
cle’s battery, even when not in use (i.e.,
cellular devices, etc.). Eventually, if
plugged in long enough without engine
operation, the vehicle’s battery will dis-
charge sufficiently to degrade battery life
and/or prevent the engine from starting.
IF YOUR ENGINE OVERHEATS
In any of the following situations, you can
reduce the potential for overheating by taking
the appropriate action.
• On the highways — slow down.
• In city traffic — while stopped, place the transmission in NEUTRAL, but do not in-
crease the engine idle speed while prevent-
ing vehicle motion with the brakes.
NOTE:
There are steps that you can take to slow
down an impending overheat condition:
• If your air conditioner (A/C) is on, turn it off. The A/C system adds heat to the engine
cooling system and turning the A/C off can
help remove this heat.
• You can also turn the temperature control to maximum heat, the mode control to floor
and the blower control to high. This allows
the heater core to act as a supplement to
the radiator and aids in removing heat from
the engine cooling system.
IN CASE OF EMERGENCY
220
Page 226 of 372

2. Rotate the Manual Park Release leverforward to its original position, until the
locking tab snaps into place to secure the
lever.
3. Pull gently on the tether strap to confirm that the lever is locked in its stowed
position.
4. Re-install the access cover.
FREEING A STUCK VEHICLE
If your vehicle becomes stuck in mud, sand,
or snow, it can often be moved using a rock-
ing motion. Turn the steering wheel right and
left to clear the area around the front wheels.
Then shift back and forth between DRIVE
and REVERSE (with automatic transmission)
or SECOND GEAR and REVERSE (with
manual transmission), while gently pressing
the accelerator. Use the least amount of ac-
celerator pedal pressure that will maintain
the rocking motion, without spinning the
wheels or racing the engine. NOTE:
For trucks equipped with 8-speed automatic
transmission: Shifts between DRIVE and RE-
VERSE can only be achieved at wheel speeds
of 5 mph (8 km/h) or less. Whenever the
transmission remains in NEUTRAL for more
than two seconds, you must press the brake
pedal to engage DRIVE or REVERSE.
NOTE:
Push the "ESC Off" switch, to place the Elec-
tronic Stability Control (ESC) system in "Par-
tial Off" mode, before rocking the vehicle.
Refer to “Electronic Brake Control” in
“Safety” in the Owner’s Manual for further
information. Once the vehicle has been
freed, push the "ESC Off" switch again to
restore "ESC On" mode.
WARNING!
Fast spinning tires can be dangerous.
Forces generated by excessive wheel
speeds may cause damage, or even failure,
of the axle and tires. A tire could explode
and injure someone. Do not spin your
vehicle's wheels faster than 30 mph
(48 km/h) or for longer than 30 seconds
continuously without stopping when you
WARNING!
are stuck and do not let anyone near a
spinning wheel, no matter what the speed.
CAUTION!
• Racing the engine or spinning the
wheels may lead to transmission over-
heating and failure. Allow the engine to
idle with the transmission in NEUTRAL
for at least one minute after every five
rocking-motion cycles. This will mini-
mize overheating and reduce the risk of
clutch or transmission failure during
prolonged efforts to free a stuck vehicle.
• When “rocking” a stuck vehicle by shift- ing between DRIVE/2nd gear and RE-
VERSE, do not spin the wheels faster
than 15 mph (24 km/h), or drivetrain
damage may result.
• Revving the engine or spinning the wheels too fast may lead to transmission
overheating and failure. It can also dam-
age the tires. Do not spin the wheels
above 30 mph (48 km/h) while in gear
(no transmission shifting occurring).
IN CASE OF EMERGENCY
224
Page 266 of 372

WARNING!
Overloading of your tires is dangerous.
Overloading can cause tire failure, affect
vehicle handling, and increase your stop-
ping distance. Use tires of the recom-
mended load capacity for your vehicle.
Never overload them.
Tires — General Information
Tire Pressure
Proper tire inflation pressure is essential to
the safe and satisfactory operation of your
vehicle. Four primary areas are affected by
improper tire pressure:
• Safety and Vehicle Stability
• Economy
• Tread Wear
• Ride ComfortSafety
WARNING!
• Improperly inflated tires are dangerous
and can cause collisions.
• Underinflation increases tire flexing and
can result in overheating and tire failure.
• Overinflation reduces a tire's ability to cushion shock. Objects on the road and
chuckholes can cause damage that re-
sult in tire failure.
• Overinflated or underinflated tires can
affect vehicle handling and can fail sud-
denly, resulting in loss of vehicle con-
trol.
• Unequal tire pressures can cause steer-
ing problems. You could lose control of
your vehicle.
• Unequal tire pressures from one side of
the vehicle to the other can cause the
vehicle to drift to the right or left.
• Always drive with each tire inflated to
the recommended cold tire inflation
pressure. Both under-inflation and over-inflation affect
the stability of the vehicle and can produce a
feeling of sluggish response or over respon-
siveness in the steering.
NOTE:
• Unequal tire pressures from side to side
may cause erratic and unpredictable steer-
ing response.
• Unequal tire pressure from side to side may cause the vehicle to drift left or right.
Fuel Economy
Underinflated tires will increase tire rolling
resistance resulting in higher fuel consump-
tion.
Tread Wear
Improper cold tire inflation pressures can
cause abnormal wear patterns and reduced
tread life, resulting in the need for earlier tire
replacement.
Ride Comfort And Vehicle Stability
Proper tire inflation contributes to a comfort-
able ride. Over-inflation produces a jarring
and uncomfortable ride.
SERVICING AND MAINTENANCE
264
Page 360 of 372

Infants And Child Restraints.....117
Locating The LATCH Anchorages . .123
Lower Anchors And Tethers For
Children .................120
Older Children And Child Restraints .118
Seating Positions ............119
Cleaning Wheels ..................271
Climate Control ................36
Manual ...................36
Clock .....................299
Clock Setting .................299
Compact Spare Tire .............269
Contract, Service ..............353
Cooling System Coolant Capacity ........278, 279
Selection Of Coolant
(Antifreeze) .....278, 280, 283, 285
Cruise Light ................83, 84
Customer Assistance ............352
Customer Programmable Features . . . .324
Daytime Running Lights ...........32
Dealer Service ............249, 252
Defroster, Windshield ............135
Delay (Intermittent) Wipers .........35
Diagnostic System, Onboard ........84Diesel Fuel System, Re-Priming . .251, 256
Dimmer Switch, Headlight
.........32
Disturb ....................338
Door Ajar ....................78
Door Ajar Light ................78
Draining Fuel/Water Separator Filter . .249,
253
Driver's Seat Back Tilt ............22
Dual Rear Wheels ..............276
Electrical Power Outlets ...........55
Electronically Shifted Transfer Case ..........162, 164, 166, 168
Electronic Range Select (ERS) .............158, 159, 161
Electronic Speed Control (Cruise Control) ..................176
Electronic Throttle Control Warning Light .....................77
Emergency, In Case Of Freeing Vehicle When Stuck .....224
Hazard Warning Flasher ........202
Jump Starting ..............218
Towing ..................225
Engine . . .243, 244, 245, 246, 247, 248 Air
Cleaner ............249, 252
Block Heater ...........145, 148 Break-In Recommendations . .153, 154
Compartment . . . .243, 246, 247, 248
Compartment
Identification
........243, 244, 245
Coolant (Antifreeze) . . . .280, 283, 285
Exhaust Gas Caution ..........134
Fuel Requirements ...........278
Identification ........246, 247, 248
Idling ...................151
Jump Starting ..............218
Oil ..........278, 280, 283, 285
Oil Filler Cap ..............243
Oil Selection ..............278
Overheating ...............220
Starting ..............139, 142
Enhanced Accident Response Feature ...............114, 227
Exhaust Gas Caution ............134
Exhaust System ...............134
Exterior Lighting ...............32
Exterior Lights .............32, 136
Filters Air Cleaner ...............249
Air Conditioning .............48
Engine Fuel ...........249, 253
Engine Oil .........280, 283, 285
INDEX
358
Page 362 of 372

AirBag ............76, 104, 135
Automatic Headlights..........33
Battery Saver ...............32
Brake Warning ..............76
Bulb Replacement ...........202
Cargo ....................34
Cruise .................83, 84
Daytime Running ............32
Dimmer Switch, Headlight .......32
Engine Temperature Warning .....77
Exterior ..................136
Fog .....................82
Hazard Warning Flasher ........202
Headlights .................32
Headlights On Reminder ........32
Headlight Switch .............32
High Beam ................32
High Beam/Low Beam Select .....32
Instrument Cluster ............32
Lights On Reminder ...........32
Low Fuel ..................81
Malfunction Indicator (Check Engine) .78
Park ....................83
Passing ..................32
Seat Belt Reminder ...........76
Security Alarm ..............77
Service ..................202 Tire Pressure Monitoring (TPMS) .79, 88
Turn Signal
.......32, 33, 83, 136
Warning (Instrument Cluster
Description) .............77, 83
Loading Vehicle Tires ...................261
Low Tire Pressure System ..........88
Lug Nuts ...................276
Maintenance Plan ..........235, 239
Maintenance Schedule .......230, 234, 237, 239
Malfunction Indicator Light (Check Engine) ...............78
Manual, Service ...............355
Manual Transmission Lubricant Selection ..........282
Memory Feature (Memory Seat) ......22
Memory Seat ..................22
Memory Seats And Radio ..........22
Mirrors .....................31
Memory ..................22
Monitor, Tire Pressure System .......88
Mopar .....................287
Mopar
Accessories .............287
Multi-Function Control Lever ........32Navigation
...........327, 329, 330
Navigation System (Uconnect GPS) . . .179
New Vehicle Break-In Period . . . .153, 154
Occupant Restraints .............93
Oil Change Indicator ............238
Oil, Engine ...........280, 283, 285
Capacity ..............278, 279
Filter ............280, 283, 285
Pressure Warning Light .........77
Recommendation ...........278
Viscosity .................278
Oil Pressure Light ...............77
Onboard Diagnostic System .........84
Operating Precautions ............84
Overheating, Engine ............220
Owner's Manual (Operator Manual) . . .355
Panic Alarm ..................15
ParkSense System, Rear ..........179
Passive Entry .................19
Pedals, Adjustable ..............30
Perform Service Indicator, Reset .....239
Personalized Menu Bar ...........309
Pets ......................133
Phone, Hands-Free (Uconnect) ......332
Phone (Pairing) ...............334
INDEX
360