mirror Ram 3500 2020 User Guide
[x] Cancel search | Manufacturer: RAM, Model Year: 2020, Model line: 3500, Model: Ram 3500 2020Pages: 568
Page 51 of 568
GETTING TO KNOW YOUR VEHICLE49
Rotate the headlight switch clockwise to the first
detent for parking light and instrument panel
light operation. Rotate the headlight switch to the
second detent for headlight, parking light, and
instrument panel light operation.
DAYTIME RUNNING LIGHTS (DRLS) — IF
E
QUIPPED
The headlights on your vehicle will illuminate
when the engine is started and the
transmission is in any gear except PARK. This
provides a constant "lights on" condition until
the ignition is placed in the OFF position. The
lights illuminate at less than half of normal
intensity. If the parking brake is applied, the
Daytime Running Lights (DRLs) will turn off.
Also, if a turn signal is activated, the DRL lamp
on the same side of the vehicle may turn off for
the duration of the turn signal activation. Once
the turn signal is no longer active, the DRL lamp
will illuminate.
NOTE:
If allowed by law in the country in which the
vehicle was purchased, the Daytime Running
Lights can be turned on and off using the Ucon -
nect system, refer to “Uconnect Settings” in
“Multimedia” for further information.
HIGH/LOW BEAM SWITCH
Push the multifunction lever toward the
instrument panel to switch the headlights to
high beam. Pulling the multifunction lever back
toward the steering wheel will turn the low
beams back on, or shut the high beams off.
AUTOMATIC HIGH BEAM HEADLAMP
C
ONTROL — IF EQUIPPED
The Automatic High Beam Headlamp Control
system provides increased forward lighting at
night by automating high beam control through
the use of a digital camera mounted on the inside
rearview mirror or forward facing camera. This
camera detects vehicle specific light and
automatically switches from high beams to low
beams until the approaching vehicle is out of view.
NOTE:
The Automatic High Beam Headlamp Control
can be turned on or off by selecting “ON”
under “Auto Dim High Beams” within your
Uconnect settings, as well as turning the
headlight switch to the AUTO position. Refer
to “Uconnect Settings” in “Multimedia” for
further information.
Broken, muddy, or obstructed headlights
and taillights of vehicles in the field of view
will cause headlights to remain on longer
(closer to the vehicle). Also, dirt, film, and
other obstructions on the windshield or
camera lens will cause the system to func -
tion improperly.
To opt out of the Advanced Auto High Beam
Sensitivity Control (default) and enter
Reduced High Beam Sensitivity Control (not
recommended), on vehicles equipped with
mirror controlled automatic high beams and
without the forward facing camera, toggle the
high beam lever six full on/off cycles within
10 seconds of placing the ignition in the ON
position. The system will return to the default
setting when the ignition is OFF.
If the windshield or Automatic High Beam
Headlamp Control mirror is replaced, the mirror
must be re-aimed to ensure proper
performance. See a local authorized dealer.
2
20_DJD2_OM_EN_USC_t.book Page 49
Page 55 of 568
GETTING TO KNOW YOUR VEHICLE53
NOTE:
For vehicles shipped to or sold in the states of
California or Mississippi, the cargo, bed, and
mirror spotter lights will not work while the
vehicle is in motion. In every other state, the
cargo and mirror spotter lights will turn off when
the vehicle is in motion, but the bed light will
remain on. In all states, including California and
Mississippi, if a bed camera is deactivated, the
bed lights will turn back on.
BATTERY SAVER
To protect the life of your vehicle’s battery, load
shedding is provided for both the interior and
exterior lights.
If the ignition is OFF, the interior lights will
automatically turn off when:
Any door is left ajar for 10 minutes.
The Dome Defeat button is pushed.
The cargo, bed, and spotter lights are manu -
ally activated by either the headlight switch
or the truck bed switch. NOTE:
Battery saver mode is canceled if the ignition is
ON.
If the headlights remain on while the ignition is
placed in the OFF position, the exterior lights will
automatically turn off after eight minutes. If the
headlights are turned on and left on for eight
minutes while the ignition is OFF, the exterior
lights will automatically turn off.
INTERIOR LIGHTS
COURTESY LIGHTS
The courtesy, dome, cargo, and bed lights are
turned on when any door is opened. The
courtesy and dome lights are turned on when
the Dome On button is pushed on the overhead
console. Also, if your vehicle is equipped with
Remote Keyless Entry, and the unlock button is
pushed on the key fob, the courtesy, dome,
cargo, and bed lights will turn on.
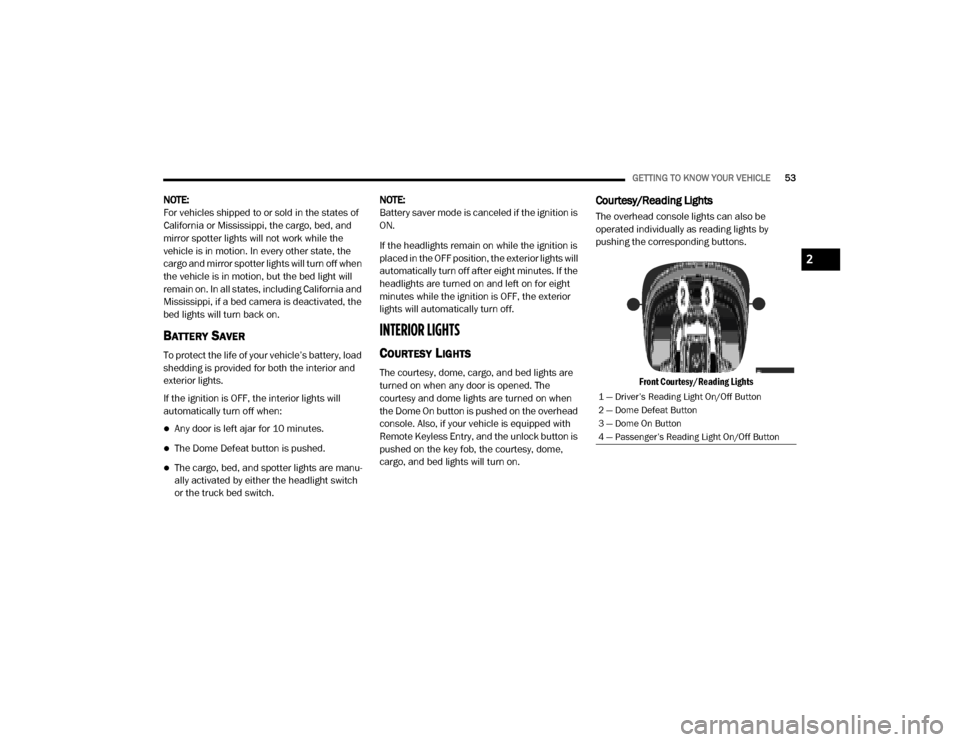
Courtesy/Reading Lights
The overhead console lights can also be
operated individually as reading lights by
pushing the corresponding buttons.
Front Courtesy/Reading Lights
1 — Driver’s Reading Light On/Off Button
2 — Dome Defeat Button
3 — Dome On Button
4 — Passenger’s Reading Light On/Off Button
2
20_DJD2_OM_EN_USC_t.book Page 53
Page 56 of 568

54GETTING TO KNOW YOUR VEHICLE
NOTE:
On vehicles equipped with an LED overhead
console, if both the Dome On and Dome Defeat
buttons are pushed, the Illuminated Entry with
door ajar feature will be disabled, but the Dome
Lights inside the vehicle will turn on.
Three types of Rear Courtesy/Reading Lights
are available for your vehicle:
Push button on/off
Push lens on/off
No on/off button, only Courtesy Light.
Push Lens On/Off Rear Courtesy Light
NOTE:
The Rear Courtesy/Reading Lights will remain
on until the switch is pushed a second time, so
be sure they have been turned off before exiting
the vehicle. If the interior lights are left on after
the ignition is turned off, they will automatically
turn off after 10 minutes.
Dimmer Control
The dimmer controls are part of the headlight
switch and are located on the left side of the
instrument panel.
Dimmer Controls
With the parking lights or headlights on, rotating
the right dimmer control upward will increase
the brightness of the instrument panel lights.
Rotating the left dimmer control will adjust the
interior and ambient light levels.
NOTE:
The ambient lights are only active when the
headlights or parking lights are on.ILLUMINATED ENTRY
The courtesy lights will turn on when you use the
key fob to unlock the doors or open any door.
This feature also turns on the puddle lamps
located beneath the outside mirrors (if
equipped).
The lights will fade to off after approximately
30 seconds, or they will immediately fade to off
once the ignition switch is placed in the ON/
RUN position from the OFF position.
The front courtesy overhead console and door
courtesy lights will not turn off if the Dome On
button on the overhead console is pushed.
The illuminated entry system will not operate if
the Dome Defeat button on the overhead
console is pushed.
1 — Ambient Light Control
2 — Instrument Panel Dimmer Control
20_DJD2_OM_EN_USC_t.book Page 54
Page 57 of 568
GETTING TO KNOW YOUR VEHICLE55
NOTE:
If your vehicle is equipped with Illuminated
Approach lights under the outside mirrors, they
can also be turned off by pushing the Dome
Defeat button.
WINDSHIELD WIPERS AND WASHERS
WINDSHIELD WIPERS
The wipers and washers are operated by a
switch in the multifunction lever, and can only
be operated with the ignition in the ACC or ON/
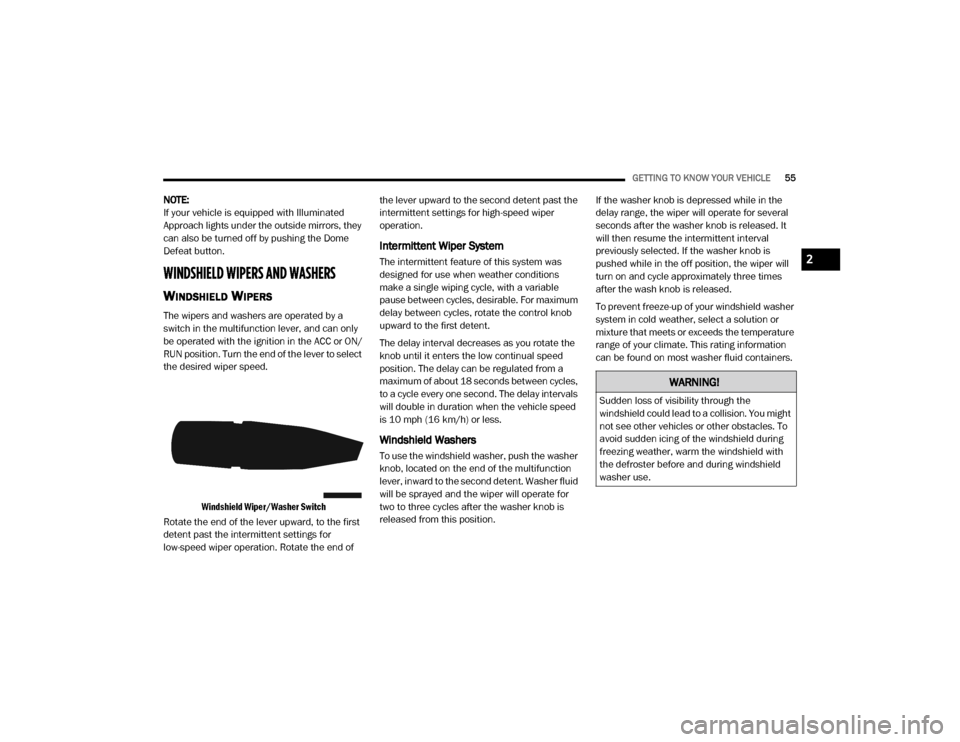
RUN position. Turn the end of the lever to select
the desired wiper speed.
Windshield Wiper/Washer Switch
Rotate the end of the lever upward, to the first
detent past the intermittent settings for
low-speed wiper operation. Rotate the end of the lever upward to the second detent past the
intermittent settings for high-speed wiper
operation.
Intermittent Wiper System
The intermittent feature of this system was
designed for use when weather conditions
make a single wiping cycle, with a variable
pause between cycles, desirable. For maximum
delay between cycles, rotate the control knob
upward to the first detent.
The delay interval decreases as you rotate the
knob until it enters the low continual speed
position. The delay can be regulated from a
maximum of about 18 seconds between cycles,
to a cycle every one second. The delay intervals
will double in duration when the vehicle speed
is 10 mph (16 km/h) or less.
Windshield Washers
To use the windshield washer, push the washer
knob, located on the end of the multifunction
lever, inward to the second detent. Washer fluid
will be sprayed and the wiper will operate for
two to three cycles after the washer knob is
released from this position.
If the washer knob is depressed while in the
delay range, the wiper will operate for several
seconds after the washer knob is released. It
will then resume the intermittent interval
previously selected. If the washer knob is
pushed while in the off position, the wiper will
turn on and cycle approximately three times
after the wash knob is released.
To prevent freeze-up of your windshield washer
system in cold weather, select a solution or
mixture that meets or exceeds the temperature
range of your climate. This rating information
can be found on most washer fluid containers.
WARNING!
Sudden loss of visibility through the
windshield could lead to a collision. You might
not see other vehicles or other obstacles. To
avoid sudden icing of the windshield during
freezing weather, warm the windshield with
the defroster before and during windshield
washer use.
2
20_DJD2_OM_EN_USC_t.book Page 55
Page 62 of 568

60GETTING TO KNOW YOUR VEHICLE
Floor Mode
Floor Mode
Air comes from the floor outlets. A slight amount of air is directed through the defrost and side window demister outlets.
Mix Mode Mix Mode
Air is directed through the floor, defrost, and side window demister outlets. This setting works best in cold or snowy
conditions that require extra heat to the windshield. This setting is good for maintaining comfort while reducing moisture on
the windshield.
Front Defrost Setting
Turn the Mode Control knob to the Front Defrost mode setting. Air comes from the windshield and side window demist
outlets. When the defrost button is selected, the blower level may increase. Use Defrost mode with maximum temperature
settings for best windshield and side window defrosting and defogging.
Rear Defrost Button
Push and release the Rear Defrost button to turn on the rear window defroster and the heated outside mirrors (if
equipped). The Rear Defrost indicator illuminates when the rear window defroster is on. The rear window defroster
automatically turns off after 15 minutes.
Climate Control OFF
To turn the Climate Controls off, turn the Blower Control knob to the O (off) position.
Icon Description
20_DJD2_OM_EN_USC_t.book Page 60
Page 65 of 568

GETTING TO KNOW YOUR VEHICLE63
Faceplate Auto Button
Touchscreen Auto Button AUTO
Set your desired temperature and press AUTO. AUTO will achieve and maintain your desired temperature by automatically
adjusting the blower speed and air distribution. AUTO mode is highly recommended for efficiency. You can press and
release this button on the touchscreen, or push the button on the faceplate, to turn AUTO on. The AUTO indicator
illuminates when AUTO is on. Toggling this function will cause the system to switch between manual mode and automatic
modes. Refer to “Automatic Operation” within this section for more information.
Front Defrost Button
Press and release the Front Defrost button on the touchscreen, or push and release the button on the faceplate, to change
the current airflow setting to Defrost mode. The Front Defrost indicator illuminates when Front Defrost is on. Air comes from
the windshield and side window demist outlets. When the defrost button is selected, the blower level may increase. Use
Defrost mode with maximum temperature settings for best windshield and side window defrosting and defogging. When
toggling the front defrost mode button, the climate system will return to previous setting.
Rear Defrost Button
Press and release the Rear Defrost button on the touchscreen, or push and release the button on the faceplate, to turn on
the rear window defroster and the heated outside mirrors (if equipped). The Rear Defrost indicator illuminates when the
rear window defroster is on. The rear window defroster automatically turns off after 15 minutes.
Icon
Description
2
20_DJD2_OM_EN_USC_t.book Page 63
Page 123 of 568
GETTING TO KNOW YOUR INSTRUMENT PANEL121
Settings — If Equipped
Personal Settings allows the driver to set and
recall features when the transmission is in
PARK.
Push and release the up and down button until
Settings displays in the instrument cluster
display.
Follow the prompts to display and set any of the
following Vehicle Settings. NOTE:
Your vehicle may be equipped with the following
settings.
If equipped with a base radio (Non-Touch
-
screen) Vehicle Settings will be included in
the instrument cluster display.
If equipped with a Touchscreen radio, the
Vehicle Settings will be included in the radio
head unit.
Setting Names Setting Names Abbreviated
(Left Submenu Layer) Sub-Menus (Right Submenu Layer)
Language Select
LanguageEnglish, Spanish, French, Italian, German,
Dutch, Arabic
Units UnitsU.S.; Metric
ParkSense ParkSense
Front Volume — Low; Medium; High
Rear Volume — Low; Medium; High
Tilt Mirror in Reverse Tilt Mirror in ROn; Off
Rain Sensing Wipers Auto WipersOn; Off
Hill Start Assist Hill Start AssistOn; Off
Headlights Off Delay Lights Off Delay0 seconds; 30 seconds; 60 seconds;
90 seconds
Illuminated Approach Lights w/ Unlock0 seconds; 30 seconds; 60 seconds;
90 seconds
3
20_DJD2_OM_EN_USC_t.book Page 121
Page 131 of 568

GETTING TO KNOW YOUR INSTRUMENT PANEL129
demanding hot or high altitude conditions. If the
instrument cluster display displays the
message “Active Airbox Service Required See
Dealer”, vehicle performance may be reduced
until service is performed by an authorized RAM
dealer.
BATTERY SAVER ON/BATTERY SAVER
M
ODE MESSAGE — ELECTRICAL LOAD
R
EDUCTION ACTIONS — IF EQUIPPED
This vehicle is equipped with an Intelligent
Battery Sensor (IBS) to perform additional
monitoring of the electrical system and status
of the vehicle battery.
In cases when the IBS detects charging system
failure, or the vehicle battery conditions are
deteriorating, electrical load reduction actions
will take place to extend the driving time and
distance of the vehicle. This is done by reducing
power to or turning off non-essential electrical
loads.
Load reduction is only active when the engine is
running. It will display a message if there is a
risk of battery depletion to the point where the
vehicle may stall due to lack of electrical supply,
or will not restart after the current drive cycle. When load reduction is activated, the message
“Battery Saver On Some Systems May Have
Reduced Power” will appear in the instrument
cluster.
These messages indicate the vehicle battery
has a low state of charge and continues to lose
electrical charge at a rate that the charging
system cannot sustain.
NOTE:The charging system is independent from
load reduction. The charging system
performs a diagnostic on the charging
system continuously.
If the Battery Charge Warning Light is on it
may indicate a problem with the charging
system. Refer to “Warning Lights And
Messages” in “Getting To Know Your Instru
-
ment Panel” for further information.
The electrical loads that may be switched off (if
equipped), and vehicle functions which can be
affected by load reduction:
Heated Seats/Vented Seats/Heated Wheel
Rear Defroster And Heated Mirrors
HVAC System
115 Volts AC Power Inverter System
Audio and Telematics System
Loss of the battery charge may indicate one or
more of the following conditions:
The charging system cannot deliver enough
electrical power to the vehicle system
because the electrical loads are larger than
the capability of charging system. The
charging system is still functioning properly.
Turning on all possible vehicle electrical
loads (e.g. HVAC to max settings, exterior and
interior lights, overloaded power outlets
+12 Volts, 115 Volts AC, USB ports) during
certain driving conditions (city driving,
towing, frequent stopping).
Installing options like additional lights,
upfitter electrical accessories, audio
systems, alarms and similar devices.
Unusual driving cycles (short trips separated
by long parking periods).
The vehicle was parked for an extended
period of time (weeks, months).
3
20_DJD2_OM_EN_USC_t.book Page 129
Page 155 of 568
SAFETY153
Traction Control System (TCS)
This system monitors the amount of wheel spin
of each of the driven wheels. If wheel spin is
detected, the Traction Control System (TCS)
may apply brake pressure to the spinning
wheel(s) and/or reduce engine power to provide
enhanced acceleration and stability. A feature
of the TCS, Brake Limited Differential (BLD),
functions similar to a limited slip differential
and controls the wheel spin across a driven
axle. If one wheel on a driven axle is spinning
faster than the other, the system will apply the
brake of the spinning wheel. This will allow more
engine power to be applied to the wheel that is
not spinning. BLD may remain enabled even if
TCS and Electronic Stability Control (ESC) are in
a reduced mode.
Trailer Sway Control (TSC)
Trailer Sway Control (TSC) uses sensors in the
vehicle to recognize an excessively swaying
trailer and will take the appropriate actions to
attempt to stop the sway. TSC will become active automatically once an excessively
swaying trailer is recognized.
NOTE:
TSC cannot stop all trailers from swaying.
Always use caution when towing a trailer and
follow the trailer tongue weight recommenda
-
tions. Refer to “Trailer Towing” in “Starting And
Operating” for further information.
When TSC is functioning, the “ESC Activation/
Malfunction Indicator Light” will flash, the
engine power may be reduced and you may feel
the brakes being applied to individual wheels to
attempt to stop the trailer from swaying. TSC is
disabled when the ESC system is in the “Partial
Off” or “Full Off” modes.
AUXILIARY DRIVING SYSTEMS
BLIND SPOT MONITORING (BSM) — IF
E
QUIPPED
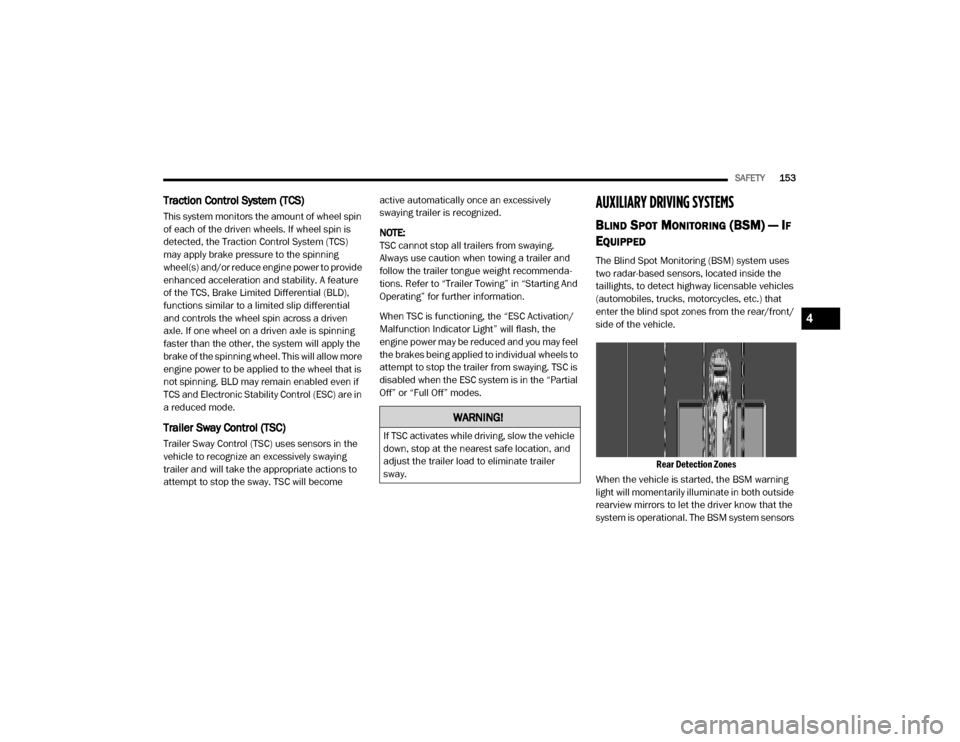
The Blind Spot Monitoring (BSM) system uses
two radar-based sensors, located inside the
taillights, to detect highway licensable vehicles
(automobiles, trucks, motorcycles, etc.) that
enter the blind spot zones from the rear/front/
side of the vehicle.
Rear Detection Zones
When the vehicle is started, the BSM warning
light will momentarily illuminate in both outside
rearview mirrors to let the driver know that the
system is operational. The BSM system sensors
WARNING!
If TSC activates while driving, slow the vehicle
down, stop at the nearest safe location, and
adjust the trailer load to eliminate trailer
sway.
4
20_DJD2_OM_EN_USC_t.book Page 153
Page 156 of 568
154SAFETY
operate when the vehicle is in any forward gear
or REVERSE and enters standby mode when the
vehicle is in PARK.
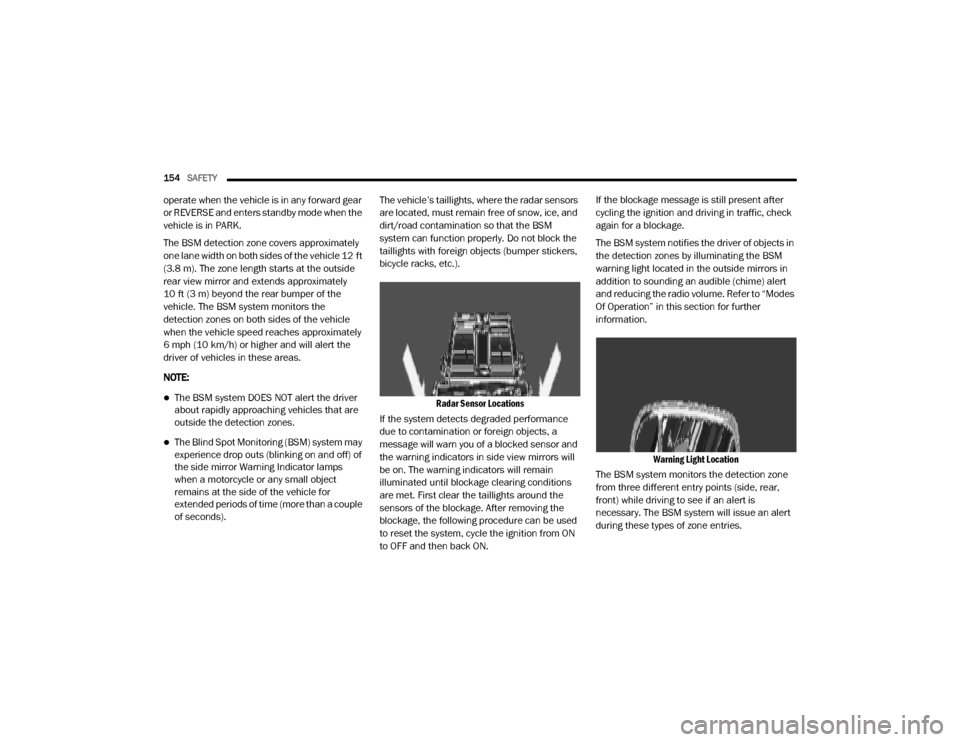
The BSM detection zone covers approximately
one lane width on both sides of the vehicle 12 ft
(3.8 m). The zone length starts at the outside
rear view mirror and extends approximately
10 ft (3 m) beyond the rear bumper of the
vehicle. The BSM system monitors the
detection zones on both sides of the vehicle
when the vehicle speed reaches approximately
6 mph (10 km/h) or higher and will alert the
driver of vehicles in these areas.
NOTE:
The BSM system DOES NOT alert the driver
about rapidly approaching vehicles that are
outside the detection zones.
The Blind Spot Monitoring (BSM) system may
experience drop outs (blinking on and off) of
the side mirror Warning Indicator lamps
when a motorcycle or any small object
remains at the side of the vehicle for
extended periods of time (more than a couple
of seconds). The vehicle’s taillights, where the radar sensors
are located, must remain free of snow, ice, and
dirt/road contamination so that the BSM
system can function properly. Do not block the
taillights with foreign objects (bumper stickers,
bicycle racks, etc.).
Radar Sensor Locations
If the system detects degraded performance
due to contamination or foreign objects, a
message will warn you of a blocked sensor and
the warning indicators in side view mirrors will
be on. The warning indicators will remain
illuminated until blockage clearing conditions
are met. First clear the taillights around the
sensors of the blockage. After removing the
blockage, the following procedure can be used
to reset the system, cycle the ignition from ON
to OFF and then back ON. If the blockage message is still present after
cycling the ignition and driving in traffic, check
again for a blockage.
The BSM system notifies the driver of objects in
the detection zones by illuminating the BSM
warning light located in the outside mirrors in
addition to sounding an audible (chime) alert
and reducing the radio volume. Refer to “Modes
Of Operation” in this section for further
information.
Warning Light Location
The BSM system monitors the detection zone
from three different entry points (side, rear,
front) while driving to see if an alert is
necessary. The BSM system will issue an alert
during these types of zone entries.
20_DJD2_OM_EN_USC_t.book Page 154