lock Ram 3500 2020 Workshop Manual
[x] Cancel search | Manufacturer: RAM, Model Year: 2020, Model line: 3500, Model: Ram 3500 2020Pages: 568
Page 123 of 568
GETTING TO KNOW YOUR INSTRUMENT PANEL121
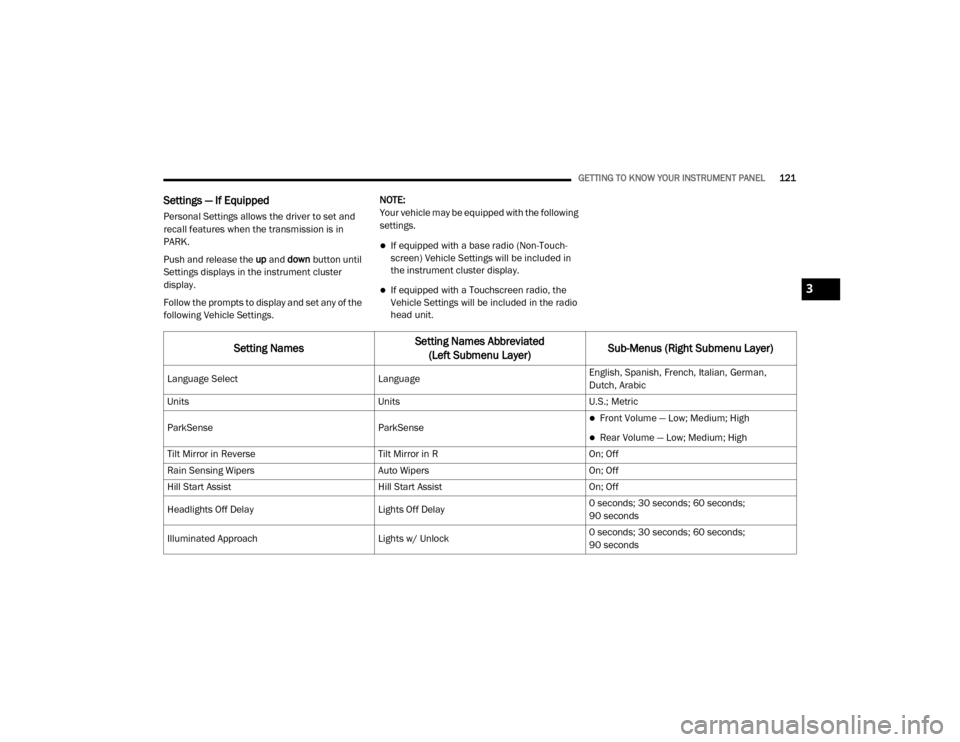
Settings — If Equipped
Personal Settings allows the driver to set and
recall features when the transmission is in
PARK.
Push and release the up and down button until
Settings displays in the instrument cluster
display.
Follow the prompts to display and set any of the
following Vehicle Settings. NOTE:
Your vehicle may be equipped with the following
settings.
If equipped with a base radio (Non-Touch
-
screen) Vehicle Settings will be included in
the instrument cluster display.
If equipped with a Touchscreen radio, the
Vehicle Settings will be included in the radio
head unit.
Setting Names Setting Names Abbreviated
(Left Submenu Layer) Sub-Menus (Right Submenu Layer)
Language Select
LanguageEnglish, Spanish, French, Italian, German,
Dutch, Arabic
Units UnitsU.S.; Metric
ParkSense ParkSense
Front Volume — Low; Medium; High
Rear Volume — Low; Medium; High
Tilt Mirror in Reverse Tilt Mirror in ROn; Off
Rain Sensing Wipers Auto WipersOn; Off
Hill Start Assist Hill Start AssistOn; Off
Headlights Off Delay Lights Off Delay0 seconds; 30 seconds; 60 seconds;
90 seconds
Illuminated Approach Lights w/ Unlock0 seconds; 30 seconds; 60 seconds;
90 seconds
3
20_DJD2_OM_EN_USC_t.book Page 121
Page 124 of 568

122GETTING TO KNOW YOUR INSTRUMENT PANEL
Headlights On with Wipers Lights w/ WipersOn; Off
Automatic Highbeams Auto HighbeamsOn; Off
Daytime Running Lights Daytime LightsOn; Off
Flash Lights with Lock Lights w/ LockOn; Off
Auto Lock Doors Auto Lock DoorsOn; Off
Auto Unlock Doors Auto Unlock DoorsOn; Off
Sound Horn with Remote Start Horn w/ Remote StartOn; Off
Sound Horn with Remote Lock Horn w/ Remote LockOff; 1st Press; 2nd Press
Remote Unlock Sequence Remote UnlockDriver Door; All Doors
Key Fob Linked to Memory Key in MemoryOn; Off
Passive Entry Passive EntryOn; Off
Remote Start Comfort System Remote Start ComfortOff; Remote Start; All starts
Easy Exit Seat Easy Exit SeatOn; Off
Key-off Power Delay Power Off DelayOff; 45 seconds; 5 minutes; 10 minutes
Setting NamesSetting Names Abbreviated
(Left Submenu Layer) Sub-Menus (Right Submenu Layer)
20_DJD2_OM_EN_USC_t.book Page 122
Page 133 of 568
GETTING TO KNOW YOUR INSTRUMENT PANEL131
on, or turns on while driving, have the system
inspected at an authorized dealer as soon as
possible.
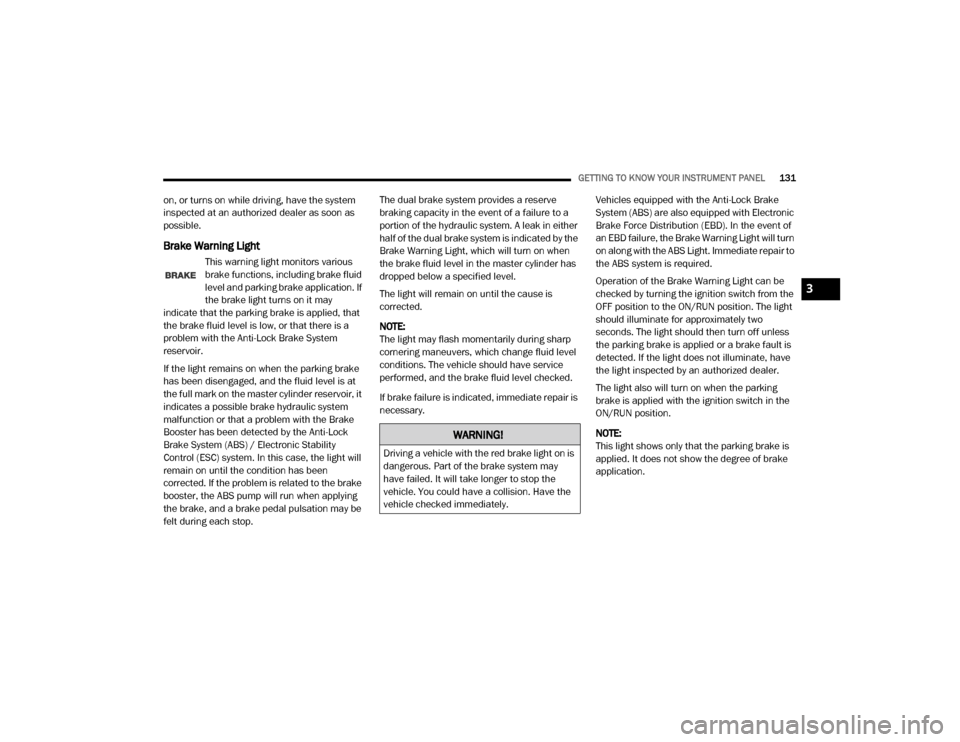
Brake Warning Light
This warning light monitors various
brake functions, including brake fluid
level and parking brake application. If
the brake light turns on it may
indicate that the parking brake is applied, that
the brake fluid level is low, or that there is a
problem with the Anti-Lock Brake System
reservoir.
If the light remains on when the parking brake
has been disengaged, and the fluid level is at
the full mark on the master cylinder reservoir, it
indicates a possible brake hydraulic system
malfunction or that a problem with the Brake
Booster has been detected by the Anti-Lock
Brake System (ABS) / Electronic Stability
Control (ESC) system. In this case, the light will
remain on until the condition has been
corrected. If the problem is related to the brake
booster, the ABS pump will run when applying
the brake, and a brake pedal pulsation may be
felt during each stop. The dual brake system provides a reserve
braking capacity in the event of a failure to a
portion of the hydraulic system. A leak in either
half of the dual brake system is indicated by the
Brake Warning Light, which will turn on when
the brake fluid level in the master cylinder has
dropped below a specified level.
The light will remain on until the cause is
corrected.
NOTE:
The light may flash momentarily during sharp
cornering maneuvers, which change fluid level
conditions. The vehicle should have service
performed, and the brake fluid level checked.
If brake failure is indicated, immediate repair is
necessary.
Vehicles equipped with the Anti-Lock Brake
System (ABS) are also equipped with Electronic
Brake Force Distribution (EBD). In the event of
an EBD failure, the Brake Warning Light will turn
on along with the ABS Light. Immediate repair to
the ABS system is required.
Operation of the Brake Warning Light can be
checked by turning the ignition switch from the
OFF position to the ON/RUN position. The light
should illuminate for approximately two
seconds. The light should then turn off unless
the parking brake is applied or a brake fault is
detected. If the light does not illuminate, have
the light inspected by an authorized dealer.
The light also will turn on when the parking
brake is applied with the ignition switch in the
ON/RUN position.
NOTE:
This light shows only that the parking brake is
applied. It does not show the degree of brake
application.
WARNING!
Driving a vehicle with the red brake light on is
dangerous. Part of the brake system may
have failed. It will take longer to stop the
vehicle. You could have a collision. Have the
vehicle checked immediately.
3
20_DJD2_OM_EN_USC_t.book Page 131
Page 139 of 568
GETTING TO KNOW YOUR INSTRUMENT PANEL137
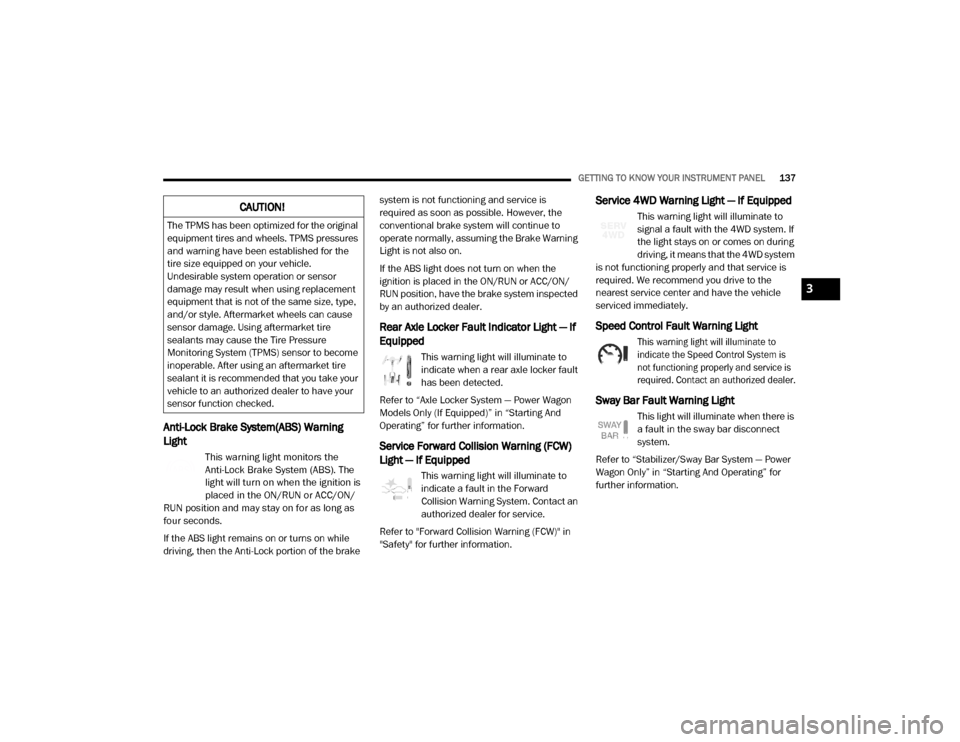
Anti-Lock Brake System(ABS) Warning
Light
This warning light monitors the
Anti-Lock Brake System (ABS). The
light will turn on when the ignition is
placed in the ON/RUN or ACC/ON/
RUN position and may stay on for as long as
four seconds.
If the ABS light remains on or turns on while
driving, then the Anti-Lock portion of the brake system is not functioning and service is
required as soon as possible. However, the
conventional brake system will continue to
operate normally, assuming the Brake Warning
Light is not also on.
If the ABS light does not turn on when the
ignition is placed in the ON/RUN or ACC/ON/
RUN position, have the brake system inspected
by an authorized dealer.
Rear Axle Locker Fault Indicator Light — If
Equipped
This warning light will illuminate to
indicate when a rear axle locker fault
has been detected.
Refer to “Axle Locker System — Power Wagon
Models Only (If Equipped)” in “Starting And
Operating” for further information.
Service Forward Collision Warning (FCW)
Light — If Equipped
This warning light will illuminate to
indicate a fault in the Forward
Collision Warning System. Contact an
authorized dealer for service.
Refer to "Forward Collision Warning (FCW)" in
"Safety" for further information.
Service 4WD Warning Light — If Equipped
This warning light will illuminate to
signal a fault with the 4WD system. If
the light stays on or comes on during
driving, it means that the 4WD system
is not functioning properly and that service is
required. We recommend you drive to the
nearest service center and have the vehicle
serviced immediately.
Speed Control Fault Warning Light
This warning light will illuminate to
indicate the Speed Control System is
not functioning properly and service is
required. Contact an authorized dealer.
Sway Bar Fault Warning Light
This light will illuminate when there is
a fault in the sway bar disconnect
system.
Refer to “Stabilizer/Sway Bar System — Power
Wagon Only” in “Starting And Operating” for
further information.
CAUTION!
The TPMS has been optimized for the original
equipment tires and wheels. TPMS pressures
and warning have been established for the
tire size equipped on your vehicle.
Undesirable system operation or sensor
damage may result when using replacement
equipment that is not of the same size, type,
and/or style. Aftermarket wheels can cause
sensor damage. Using aftermarket tire
sealants may cause the Tire Pressure
Monitoring System (TPMS) sensor to become
inoperable. After using an aftermarket tire
sealant it is recommended that you take your
vehicle to an authorized dealer to have your
sensor function checked.
3
20_DJD2_OM_EN_USC_t.book Page 137
Page 141 of 568
GETTING TO KNOW YOUR INSTRUMENT PANEL139
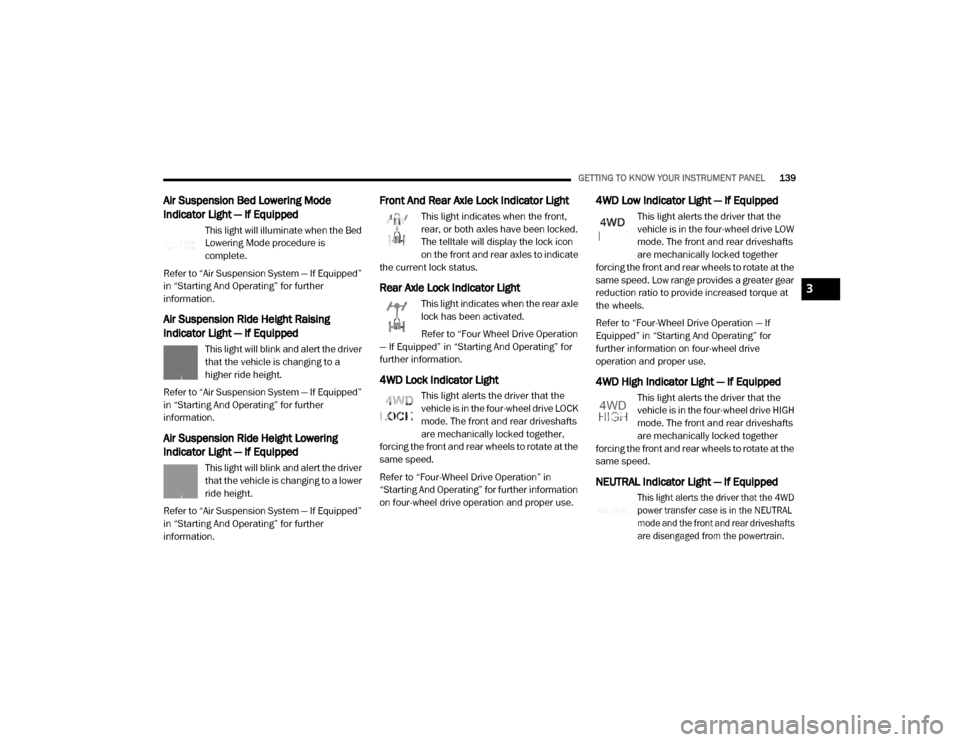
Air Suspension Bed Lowering Mode
Indicator Light — If Equipped
This light will illuminate when the Bed
Lowering Mode procedure is
complete.
Refer to “Air Suspension System — If Equipped”
in “Starting And Operating” for further
information.
Air Suspension Ride Height Raising
Indicator Light — If Equipped
This light will blink and alert the driver
that the vehicle is changing to a
higher ride height.
Refer to “Air Suspension System — If Equipped”
in “Starting And Operating” for further
information.
Air Suspension Ride Height Lowering
Indicator Light — If Equipped
This light will blink and alert the driver
that the vehicle is changing to a lower
ride height.
Refer to “Air Suspension System — If Equipped”
in “Starting And Operating” for further
information.
Front And Rear Axle Lock Indicator Light
This light indicates when the front,
rear, or both axles have been locked.
The telltale will display the lock icon
on the front and rear axles to indicate
the current lock status.
Rear Axle Lock Indicator Light
This light indicates when the rear axle
lock has been activated.
Refer to “Four Wheel Drive Operation
— If Equipped” in “Starting And Operating” for
further information.
4WD Lock Indicator Light
This light alerts the driver that the
vehicle is in the four-wheel drive LOCK
mode. The front and rear driveshafts
are mechanically locked together,
forcing the front and rear wheels to rotate at the
same speed.
Refer to “Four-Wheel Drive Operation” in
“Starting And Operating” for further information
on four-wheel drive operation and proper use.
4WD Low Indicator Light — If Equipped
This light alerts the driver that the
vehicle is in the four-wheel drive LOW
mode. The front and rear driveshafts
are mechanically locked together
forcing the front and rear wheels to rotate at the
same speed. Low range provides a greater gear
reduction ratio to provide increased torque at
the wheels.
Refer to “Four-Wheel Drive Operation — If
Equipped” in “Starting And Operating” for
further information on four-wheel drive
operation and proper use.
4WD High Indicator Light — If Equipped
This light alerts the driver that the
vehicle is in the four-wheel drive HIGH
mode. The front and rear driveshafts
are mechanically locked together
forcing the front and rear wheels to rotate at the
same speed.
NEUTRAL Indicator Light — If Equipped
This light alerts the driver that the 4WD
power transfer case is in the NEUTRAL
mode and the front and rear driveshafts
are disengaged from the powertrain.
3
20_DJD2_OM_EN_USC_t.book Page 139
Page 146 of 568
144 (Continued)
SAFETY
SAFETY FEATURES
ANTI-LOCK BRAKE SYSTEM (ABS)
The Anti-Lock Brake System (ABS) provides
increased vehicle stability and brake
performance under most braking conditions.
The system automatically prevents wheel lock,
and enhances vehicle control during braking.
The ABS performs a self-check cycle to ensure
that the ABS is working properly each time the
vehicle is started and driven. During this
self-check, you may hear a slight clicking sound
as well as some related motor noises.
ABS is activated during braking when the
system detects one or more wheels begin to
lock. Road conditions such as ice, snow, gravel,
bumps, railroad tracks, loose debris, or panic
stops may increase the likelihood of ABS
activation(s).You also may experience the following when
ABS activates:
The ABS motor noise (it may continue to run
for a short time after the stop)
The clicking sound of solenoid valves
Brake pedal pulsations
A slight drop of the brake pedal at the end of
the stop
These are all normal characteristics of ABS.
WARNING!
The ABS contains sophisticated electronic
equipment that may be susceptible to inter -
ference caused by improperly installed or
high output radio transmitting equipment.
This interference can cause possible loss of
anti-lock braking capability. Installation of
such equipment should be performed by
qualified professionals.
Pumping of the Anti-Lock Brakes will
diminish their effectiveness and may lead
to a collision. Pumping makes the stopping
distance longer. Just press firmly on your
brake pedal when you need to slow down or
stop.
The ABS cannot prevent the natural laws of
physics from acting on the vehicle, nor can
it increase braking or steering efficiency
beyond that afforded by the condition of the
vehicle brakes and tires or the traction
afforded.
The ABS cannot prevent collisions,
including those resulting from excessive
speed in turns, following another vehicle
too closely, or hydroplaning.
The capabilities of an ABS equipped vehicle
must never be exploited in a reckless or
dangerous manner that could jeopardize
the user’s safety or the safety of others.
WARNING! (Continued)
20_DJD2_OM_EN_USC_t.book Page 144
Page 147 of 568
SAFETY145
ABS is designed to function with the Original
Equipment Manufacturer (OEM) tires.
Modification may result in degraded ABS
performance.
Anti-Lock Brake Warning Light
The yellow “Anti-Lock Brake Warning Light” will
turn on when the ignition is placed in the ON/
RUN mode and may stay on for as long as four
seconds.
If the “Anti-Lock Brake Warning Light” remains
on or comes on while driving, it indicates that
the anti-lock portion of the brake system is not
functioning and that service is required.
However, the conventional brake system will
continue to operate normally if the “Anti-Lock
Brake Warning Light” is on.
If the “Anti-Lock Brake Warning Light” is on, the
brake system should be serviced as soon as
possible to restore the benefits of anti-lock
brakes. If the “Anti-Lock Brake Warning Light”
does not come on when the ignition is placed in
the ON/RUN mode, have the light repaired as
soon as possible.
ELECTRONIC BRAKE CONTROL (EBC)
S
YSTEM
Your vehicle is equipped with an advanced
Electronic Brake Control (EBC) system . This
system includes Electronic Brake Force
Distribution (EBD), Anti-Lock Brake System
(ABS), Brake Assist System (BAS), Hill Start
Assist (HSA), Traction Control System (TCS),
Electronic Stability Control (ESC), and Electronic
Roll Mitigation (ERM). These systems work
together to enhance both vehicle stability and
control in various driving conditions.
Your vehicle may also be equipped with Trailer
Sway Control (TSC) and Hill Descent Control
(HDC).
Brake Assist System (BAS)
The Brake Assist System (BAS) is designed to
optimize the vehicle’s braking capability during
emergency braking maneuvers. The system
detects an emergency braking situation by
sensing the rate and amount of brake
application and then applies optimum pressure
to the brakes. This can help reduce braking
distances. The BAS complements the Anti-Lock
Brake System (ABS). Applying the brakes very
quickly results in the best BAS assistance. To receive the benefit of the system, you must
apply continuous braking pressure during the
stopping sequence (do not “pump” the brakes).
Do not reduce brake pedal pressure unless
braking is no longer desired. Once the brake
pedal is released, the BAS is deactivated.
Brake System Warning Light
The red “Brake System Warning Light” will turn
on when the ignition is placed in the ON/RUN
mode and may stay on for as long as four
seconds.
WARNING!
The Brake Assist System (BAS) cannot
prevent the natural laws of physics from
acting on the vehicle, nor can it increase the
traction afforded by prevailing road
conditions. BAS cannot prevent collisions,
including those resulting from excessive
speed in turns, driving on very slippery
surfaces, or hydroplaning. The capabilities of
a BAS-equipped vehicle must never be
exploited in a reckless or dangerous manner,
which could jeopardize the user's safety or
the safety of others.
4
20_DJD2_OM_EN_USC_t.book Page 145
Page 148 of 568
146SAFETY
(Continued)
If the “Brake System Warning Light” remains on
or comes on while driving, it indicates that the
brake system is not functioning properly and
that immediate service is required. If the “Brake
System Warning Light” does not come on when
the ignition is placed in the ON/RUN mode,
have the light repaired as soon as possible.
Electronic Brake Force Distribution (EBD)
This function manages the distribution of the
braking torque between the front and rear axles
by limiting braking pressure to the rear axle.
This is done to prevent overslip of the rear
wheels to avoid vehicle instability, and to
prevent the rear axle from entering Anti-Lock
Brake System (ABS) before the front axle.
Electronic Stability Control (ESC)
This system enhances directional control and
stability of the vehicle under various driving
conditions. Electronic Stability Control (ESC)
corrects for oversteering or understeering of the
vehicle by applying the brake of the appropriate
wheel(s) to assist in counteracting the oversteer
or understeer condition. Engine power may also
be reduced to help the vehicle maintain the
desired path.ESC uses sensors in the vehicle to determine
the vehicle path intended by the driver and
compares it to the actual path of the vehicle.
When the actual path does not match the
intended path, ESC applies the brake of the
appropriate wheel to assist in counteracting the
oversteer or understeer condition.
Oversteer — when the vehicle is turning
more than appropriate for the steering
wheel position.
Understeer — when the vehicle is turning
less than appropriate for the steering wheel
position.
The “ESC Activation/Malfunction Indicator
Light” located in the instrument cluster will start
to flash as soon as the ESC system becomes
active. The “ESC Activation/Malfunction
Indicator Light” also flashes when the TCS is
active. If the “ESC Activation/Malfunction
Indicator Light” begins to flash during
acceleration, ease up on the accelerator and
apply as little throttle as possible. Be sure to
adapt your speed and driving to the prevailing
road conditions.
WARNING!
Electronic Stability Control (ESC) cannot
prevent the natural laws of physics from
acting on the vehicle, nor can it increase
the traction afforded by prevailing road
conditions. ESC cannot prevent accidents,
including those resulting from excessive
speed in turns, driving on very slippery
surfaces, or hydroplaning. ESC also cannot
prevent accidents resulting from loss of
vehicle control due to inappropriate driver
input for the conditions. Only a safe, atten -
tive, and skillful driver can prevent acci -
dents. The capabilities of an ESC equipped
vehicle must never be exploited in a reck -
less or dangerous manner which could
jeopardize the user’s safety or the safety of
others.
20_DJD2_OM_EN_USC_t.book Page 146
Page 156 of 568
154SAFETY
operate when the vehicle is in any forward gear
or REVERSE and enters standby mode when the
vehicle is in PARK.
The BSM detection zone covers approximately
one lane width on both sides of the vehicle 12 ft
(3.8 m). The zone length starts at the outside
rear view mirror and extends approximately
10 ft (3 m) beyond the rear bumper of the
vehicle. The BSM system monitors the
detection zones on both sides of the vehicle
when the vehicle speed reaches approximately
6 mph (10 km/h) or higher and will alert the
driver of vehicles in these areas.
NOTE:
The BSM system DOES NOT alert the driver
about rapidly approaching vehicles that are
outside the detection zones.
The Blind Spot Monitoring (BSM) system may
experience drop outs (blinking on and off) of
the side mirror Warning Indicator lamps
when a motorcycle or any small object
remains at the side of the vehicle for
extended periods of time (more than a couple
of seconds). The vehicle’s taillights, where the radar sensors
are located, must remain free of snow, ice, and
dirt/road contamination so that the BSM
system can function properly. Do not block the
taillights with foreign objects (bumper stickers,
bicycle racks, etc.).
Radar Sensor Locations
If the system detects degraded performance
due to contamination or foreign objects, a
message will warn you of a blocked sensor and
the warning indicators in side view mirrors will
be on. The warning indicators will remain
illuminated until blockage clearing conditions
are met. First clear the taillights around the
sensors of the blockage. After removing the
blockage, the following procedure can be used
to reset the system, cycle the ignition from ON
to OFF and then back ON. If the blockage message is still present after
cycling the ignition and driving in traffic, check
again for a blockage.
The BSM system notifies the driver of objects in
the detection zones by illuminating the BSM
warning light located in the outside mirrors in
addition to sounding an audible (chime) alert
and reducing the radio volume. Refer to “Modes
Of Operation” in this section for further
information.
Warning Light Location
The BSM system monitors the detection zone
from three different entry points (side, rear,
front) while driving to see if an alert is
necessary. The BSM system will issue an alert
during these types of zone entries.
20_DJD2_OM_EN_USC_t.book Page 154
Page 158 of 568

156SAFETY
The BSM system is designed not to issue an
alert on stationary objects such as guardrails,
posts, walls, foliage, berms, snow banks, car
washes etc. However, occasionally the system
may alert on such objects. This is normal
operation and your vehicle does not require
service.
The BSM system will not alert you of objects that
are traveling in the opposite direction of the
vehicle in adjacent lanes.
Opposing Traffic
Rear Cross Path (RCP)
The Rear Cross Path (RCP) feature is intended
to aid the driver when backing out of parking
spaces where their vision of oncoming vehicles
may be blocked. Proceed slowly and cautiously
out of the parking space until the rear end of the
vehicle is exposed. The RCP system will then
have a clear view of the cross traffic and if an
oncoming vehicle is detected, alert the driver.
RCP Detection Zones
RCP monitors the rear detection zones on both
sides of the vehicle, for objects that are moving
toward the side of the vehicle with a minimum
speed of approximately 3 mph (5 km/h), to
objects moving a maximum of approximately
20 mph (32 km/h), such as in parking lot
situations.
NOTE:
In a parking lot situation, oncoming vehicles can
be obscured by vehicles parked on either side.
If the sensors are blocked by other structures or
vehicles, the system will not be able to alert the
driver.
WARNING!
The Blind Spot Monitoring system is only an
aid to help detect objects in the blind spot
zones. The BSM system is not designed to
detect pedestrians, bicyclists, or animals.
Even if your vehicle is equipped with the BSM
system, always check your vehicle’s mirrors,
glance over your shoulder, and use your turn
signal before changing lanes. Failure to do so
can result in serious injury or death.
20_DJD2_OM_EN_USC_t.book Page 156