check engine Ram 3500 2020 Owner's Manual
[x] Cancel search | Manufacturer: RAM, Model Year: 2020, Model line: 3500, Model: Ram 3500 2020Pages: 568
Page 7 of 568
5
SAFETY
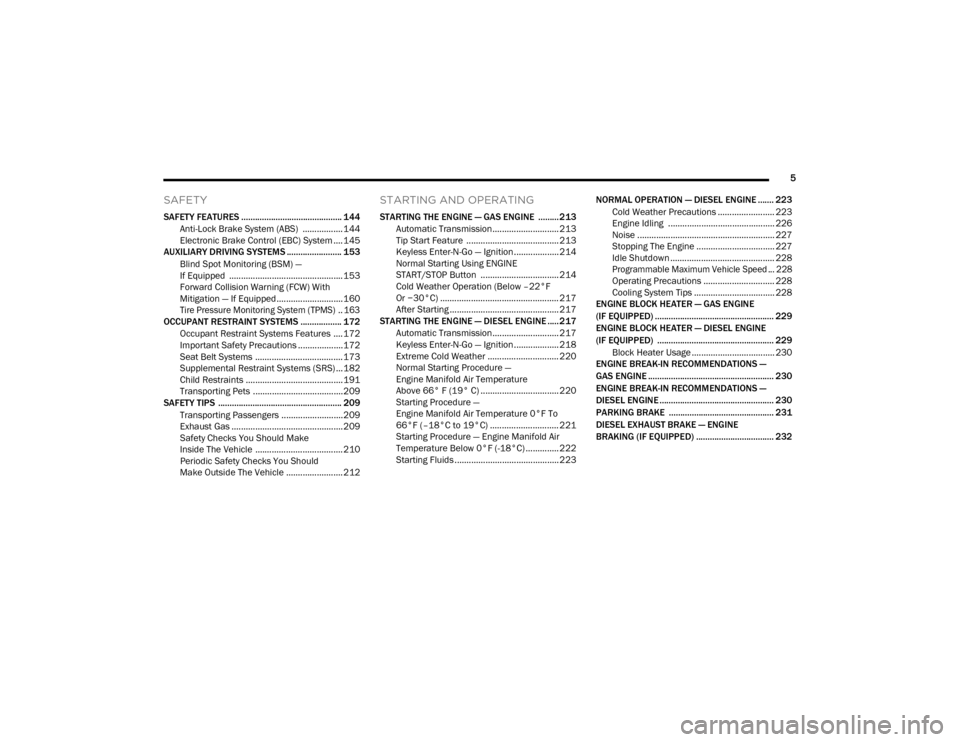
SAFETY FEATURES ............................................ 144Anti-Lock Brake System (ABS) ................. 144
Electronic Brake Control (EBC) System ....145
AUXILIARY DRIVING SYSTEMS ........................ 153
Blind Spot Monitoring (BSM) —
If Equipped ................................................153 Forward Collision Warning (FCW) With
Mitigation — If Equipped............................160
Tire Pressure Monitoring System (TPMS) .. 163
OCCUPANT RESTRAINT SYSTEMS .................. 172
Occupant Restraint Systems Features ....172
Important Safety Precautions ...................172Seat Belt Systems ..................................... 173Supplemental Restraint Systems (SRS) ...182Child Restraints .........................................191
Transporting Pets ......................................209
SAFETY TIPS ...................................................... 209
Transporting Passengers ..........................209
Exhaust Gas ...............................................209Safety Checks You Should Make
Inside The Vehicle ..................................... 210 Periodic Safety Checks You Should
Make Outside The Vehicle ........................ 212
STARTING AND OPERATING
STARTING THE ENGINE — GAS ENGINE .........213
Automatic Transmission............................ 213
Tip Start Feature ....................................... 213Keyless Enter-N-Go — Ignition ................... 214
Normal Starting Using ENGINE
START/STOP Button ................................. 214 Cold Weather Operation (Below –22°F
Or −30°C) .................................................. 217 After Starting .............................................. 217
STARTING THE ENGINE — DIESEL ENGINE ..... 217
Automatic Transmission............................ 217
Keyless Enter-N-Go — Ignition ................... 218
Extreme Cold Weather .............................. 220
Normal Starting Procedure —
Engine Manifold Air Temperature
Above 66° F (19° C) ................................. 220 Starting Procedure —
Engine Manifold Air Temperature 0°F To
66°F (–18°C to 19°C) ............................. 221 Starting Procedure — Engine Manifold Air
Temperature Below 0°F (-18°C) .............. 222 Starting Fluids ............................................ 223 NORMAL OPERATION — DIESEL ENGINE ....... 223
Cold Weather Precautions ........................ 223
Engine Idling ............................................. 226
Noise .......................................................... 227
Stopping The Engine ................................. 227Idle Shutdown ............................................ 228
Programmable Maximum Vehicle Speed ... 228
Operating Precautions .............................. 228
Cooling System Tips .................................. 228
ENGINE BLOCK HEATER — GAS ENGINE
(IF EQUIPPED) .................................................... 229
ENGINE BLOCK HEATER — DIESEL ENGINE
(IF EQUIPPED) ................................................... 229
Block Heater Usage ................................... 230
ENGINE BREAK-IN RECOMMENDATIONS —
GAS ENGINE ....................................................... 230
ENGINE BREAK-IN RECOMMENDATIONS —
DIESEL ENGINE .................................................. 230
PARKING BRAKE .............................................. 231
DIESEL EXHAUST BRAKE — ENGINE
BRAKING (IF EQUIPPED) .................................. 232
20_DJD2_OM_EN_USC_t.book Page 5
Page 10 of 568

8
BULB REPLACEMENT ....................................... 351 Replacement Bulbs ..................................351Replacing Exterior Bulbs ...........................353
FUSES .................................................................. 358
Power Distribution Center .........................358
JACKING AND TIRE CHANGING ...................... 365
Jack Location .............................................365Removal Of Jack And Tools .......................365
Removing The Spare Tire ..........................367
Preparations For Jacking...........................368
Jacking Instructions ...................................368
To Stow The Flat Or Spare ........................ 372Reinstalling The Jack And Tools ...............373
Hub Caps/Wheel Covers — If Equipped ...374
JUMP STARTING ................................................ 375
Preparations For Jump Start .....................375Jump Starting Procedure...........................376
GEAR SELECTOR OVERRIDE — 6–SPEED
TRANSMISSION ................................................ 377
MANUAL PARK RELEASE — 8 – SPEED
TRANSMISSION ................................................ 378
IF YOUR ENGINE OVERHEATS ......................... 379
FREEING A STUCK VEHICLE ............................ 380 TOWING A DISABLED VEHICLE .......................381
Two-Wheel Drive Models ........................... 382
Four-Wheel Drive Models .......................... 383Emergency Tow Hooks — If Equipped ...... 384
ENHANCED ACCIDENT RESPONSE
SYSTEM (EARS) ................................................. 384
EVENT DATA RECORDER (EDR) .......................384
SERVICING AND MAINTENANCE
SCHEDULED SERVICING — GAS ENGINE .......385
Maintenance Plan — Gasoline Engine...... 386
Heavy Duty Use Of The Vehicle................. 389
SCHEDULED SERVICING— DIESEL ENGINE .... 389
Oil Change Indicator System —
Cummins Diesel......................................... 390 Perform Service Indicator —
Cummins Diesel ........................................ 390 Maintenance Plan — Cummins Diesel
Engine ........................................................ 391
ENGINE COMPARTMENT .................................. 396
6.4L Engine ................................................ 396
6.7L Diesel Engine — Six-Speed 68RFE ... 397
6.7L Diesel Engine — Six-Speed AISIN
(AS69RC HD) .............................................. 398 Checking Oil Level — Gas Engine ............. 399
Checking Oil Level — Diesel Engine .......... 399
Adding Washer Fluid ................................. 399Maintenance-Free Battery ....................... 400Pressure Washing...................................... 400
DEALER SERVICE .............................................. 401
Engine Oil .................................................. 401
Engine Oil Filter ......................................... 403Engine Air Cleaner Filter ........................... 403
Air Conditioner Maintenance ................... 405
Accessory Drive Belt Inspection ............... 408Draining Fuel/Water Separator Filter —
Diesel Engine ............................................ 409 Engine Mounted Fuel Filter
Replacement — Diesel Engine .................. 410 Underbody Mounted Fuel Filter
Replacement — Diesel Engine .................. 412 Priming If The Engine Has Run Out Of
Fuel — Diesel Engine ................................. 412 Intervention Regeneration Strategy —
Message Process Flow ............................. 413 Diesel Exhaust Fluid .................................. 414
Body Lubrication ........................................ 414
20_DJD2_OM_EN_USC_t.book Page 8
Page 25 of 568
GETTING TO KNOW YOUR VEHICLE23
TO EXIT REMOTE START MODE
W
ITHOUT DRIVING THE VEHICLE
Push and release the Remote Start button one
time or allow the engine to run for the entire
15 minute cycle.
NOTE:
To avoid unintentional shut downs, the system
will disable for two seconds after receiving a
valid Remote Start request.
TO EXIT REMOTE START MODE AND
D
RIVE THE VEHICLE
To exit Remote Start Mode and drive the vehicle
before the end of the 15 minute cycle, push and
release the unlock button on the key fob to
unlock the door and disarm the vehicle security
alarm System (if equipped). Then, prior to the
end of the 15 minute cycle, place the ignition in
the ON/RUN position. NOTE:
The ignition switch must be in the ON/RUN posi
-
tion in order to drive the vehicle.
REMOTE START COMFORT SYSTEMS —
I
F EQUIPPED
When remote start is activated, the heated
steering wheel, and driver heated seat features
will automatically turn on in cold weather. In
warm weather, the driver vented seat feature
will automatically turn on when the remote start
is activated. These features will stay on through
the duration of remote start or until the ignition
switch is placed in the ON/RUN position.
NOTE:
The Remote Start Comfort system can be acti -
vated and deactivated through the Uconnect
system under “Auto-On Comfort And Remote
Start”. Refer to “Uconnect Settings” in “Multi -
media” for further information on Remote Start
Comfort system operation.
SENTRY KEY
The Sentry Key Immobilizer system prevents
unauthorized vehicle operation by disabling the
engine. The system does not need to be armed
or activated. Operation is automatic, regardless
of whether the vehicle is locked or unlocked.
The system uses a key fob, keyless push button
ignition and a Radio Frequency (RF) receiver to
prevent unauthorized vehicle operation.
Therefore, only key fobs that are programmed
to the vehicle can be used to start and operate
the vehicle. The system cannot reprogram a key
fob obtained from another vehicle.
After placing the ignition switch in the ON/RUN
position, the vehicle security light will turn on for
three seconds for a bulb check. If the light
remains on after the bulb check, it indicates
that there is a problem with the electronics. In
addition, if the light begins to flash after the
bulb check, it indicates that someone
attempted to start the engine with an invalid key
fob. In the event that a valid key fob is used to
start the engine but there is an issue with the
vehicle electronics, the engine will start and
shut off after two seconds.
2
20_DJD2_OM_EN_USC_t.book Page 23
Page 132 of 568
130GETTING TO KNOW YOUR INSTRUMENT PANEL
The battery was recently replaced and was
not charged completely.
The battery was discharged by an electrical
load left on when the vehicle was parked.
The battery was used for an extended period
with the engine not running to supply radio,
lights, chargers, +12 Volts portable appli-
ances like vacuum cleaners, game consoles
and similar devices.
What to do when an electrical load reduction
action message is present (“Battery Saver On”
or “Battery Saver Mode”)
During a trip:
Reduce power to unnecessary loads if
possible:
Turn off redundant lights (interior or
exterior).
Check what may be plugged in to power
outlets +12 Volts, 115 Volts AC, USB
ports.
Check HVAC settings (blower, tempera -
ture).
Check the audio settings (volume). After a trip:
Check if any aftermarket equipment was
installed (additional lights, upfitter electrical
accessories, audio systems, alarms) and
review specifications if any (load and Ignition
Off Draw currents).
Evaluate the latest driving cycles (distance,
driving time and parking time).
The vehicle should have service performed if
the message is still present during consecu
-
tive trips and the evaluation of the vehicle
and driving pattern did not help to identify the
cause.
WARNING LIGHTS AND MESSAGES
The warning/indicator lights will illuminate in
the instrument panel together with a dedicated
message and/or acoustic signal when
applicable. These indications are indicative and
precautionary and as such must not be
considered as exhaustive. Always refer to the
information in this chapter in the event of a
failure indication. All active telltales will display
first if applicable. The system check menu may
appear different based upon equipment
options and current vehicle status. Some
telltales are optional and may not appear.
RED WARNING LIGHTS
Seat Belt Reminder Warning Light
This warning light indicates when the
driver or passenger seat belt is
unbuckled. When the ignition is first
placed in the ON/RUN or ACC/ON/
RUN position and if the driver’s seat belt is
unbuckled, a chime will sound and the light will
turn on. When driving, if the driver or front
passenger seat belt remains unbuckled, the
Seat Belt Reminder Light will flash or remain on
continuously and a chime will sound.
Refer to “Occupant Restraint Systems” in
“Safety” for further information.
Air Bag Warning Light
This warning light will illuminate to
indicate a fault with the air bag, and
will turn on for four to eight seconds
as a bulb check when the ignition is
placed in the ON/RUN or ACC/ON/RUN
position. This light will illuminate with a single
chime when a fault with the air bag has been
detected, it will stay on until the fault is cleared.
If the light is either not on during startup, stays
20_DJD2_OM_EN_USC_t.book Page 130
Page 134 of 568
132GETTING TO KNOW YOUR INSTRUMENT PANEL
Hood Open Warning Light
This warning light will illuminate when
the hood is ajar/open and not fully
closed.
NOTE:
If the vehicle is moving, there will also be a
single chime.
Vehicle Security Warning Light — If
Equipped
This light will flash at a fast rate for
approximately 15 seconds when the
vehicle security alarm is arming, and
then will flash slowly until the vehicle
is disarmed.
Engine Coolant Temperature Warning
Light
This warning light warns of an
overheated engine condition. If the
engine coolant temperature is too
high, this indicator will illuminate and
a single chime will sound. If the temperature
reaches the upper limit, a continuous chime will
sound for four minutes or until the engine is
able to cool; whichever comes first. If the light turns on while driving, safely pull over
and stop the vehicle. If the Air Conditioning
(A/C) system is on, turn it off. Also, shift the
transmission into NEUTRAL and idle the vehicle.
If the temperature reading does not return to
normal, turn the engine off immediately and call
for service.
Refer to “If Your Engine Overheats” in “In Case
Of Emergency” for further information.
Battery Charge Warning Light
This warning light will illuminate when
the battery is not charging properly. If
it stays on while the engine is running,
there may be a malfunction with the
charging system. Contact an authorized dealer
as soon as possible.
This indicates a possible problem with the
electrical system or a related component.
Oil Pressure Warning Light
This warning light will illuminate to
indicate low engine oil pressure. If the
light turns on while driving, stop the
vehicle, shut off the engine as soon as
possible, and contact an authorized dealer. A
chime will sound when this light turns on. Do not operate the vehicle until the cause is
corrected. This light does not indicate how
much oil is in the engine. The engine oil level
must be checked under the hood.
Oil Temperature Warning Light
This warning light will illuminate to
indicate the engine oil temperature is
high. If the light turns on while driving,
stop the vehicle and shut off the
engine as soon as possible. Wait for oil
temperature to return to normal levels.
Electronic Throttle Control (ETC) Warning
Light
This warning light will illuminate to
indicate a problem with the Electronic
Throttle Control (ETC) system. If a
problem is detected while the vehicle
is running, the light will either stay on or flash
depending on the nature of the problem. Cycle
the ignition when the vehicle is safely and
completely stopped and the transmission is
placed in the PARK (P) position. The light should
turn off. If the light remains on with the vehicle
running, your vehicle will usually be drivable;
however, see an authorized dealer for service
as soon as possible.
20_DJD2_OM_EN_USC_t.book Page 132
Page 135 of 568
GETTING TO KNOW YOUR INSTRUMENT PANEL133
NOTE:
This light may turn on if the accelerator and
brake pedals are pressed at the same time.
If the light continues to flash when the vehicle is
running, immediate service is required and you
may experience reduced performance, an
elevated/rough idle, or engine stall and your
vehicle may require towing. The light will come
on when the ignition is placed in the ON/RUN or
ACC/ON/RUN position and remain on briefly as
a bulb check. If the light does not come on
during starting, have the system checked by an
authorized dealer.
Trailer Brake Disconnected Warning Light
This warning light will illuminate when
the Trailer Brake has been
disconnected.
Refer to “Trailer Towing” in “Starting And
Operating” for further information.
Transmission Temperature Warning Light
— If Equipped
This warning light will illuminate to
warn of a high transmission fluid
temperature. This may occur with
strenuous usage such as trailer towing. If this light turns on, stop the vehicle and
run the engine at idle or slightly faster, with the
transmission in PARK (P) or NEUTRAL (N), until
the light turns off. Once the light turns off, you
may continue to drive normally.
Door Open Warning Light
This indicator will illuminate when a
door is ajar/open and not fully closed.
NOTE:
If the vehicle is moving there will also be a single
chime.
YELLOW WARNING LIGHTS
Adaptive Cruise Control (ACC) Fault
Warning Light — If Equipped
This warning light will illuminate to
indicate a fault in the ACC system.
Contact a local authorized dealer for
service.
For further information, refer to “Adaptive
Cruise Control (ACC)” in “Starting And
Operating.”
Air Suspension Fault Warning Light — If
Equipped
This light will illuminate when a fault is
detected with the air suspension
system.
Refer to “Air Suspension System — If Equipped”
in “Starting And Operating” for further
information.
Engine Check/Malfunction Indicator
Warning Light (MIL)
The Engine Check/Malfunction
Indicator Light (MIL) is a part of an
Onboard Diagnostic System called
OBD II that monitors engine and
WARNING!
If you continue operating the vehicle when
the Transmission Temperature Warning Light
is illuminated you could cause the fluid to boil
over, come in contact with hot engine or
exhaust components and cause a fire.
CAUTION!
Continuous driving with the Transmission
Temperature Warning Light illuminated will
eventually cause severe transmission
damage or transmission failure.
3
20_DJD2_OM_EN_USC_t.book Page 133
Page 136 of 568
134GETTING TO KNOW YOUR INSTRUMENT PANEL
automatic transmission control systems. This
warning light will illuminate when the ignition is
in the ON/RUN position before engine start. If
the bulb does not come on when turning the
ignition switch from OFF to ON/RUN, have the
condition checked promptly.
Certain conditions, such as a loose or missing
gas cap, poor quality fuel, etc., may illuminate
the light after engine start. The vehicle should
be serviced if the light stays on through several
typical driving styles. In most situations, the
vehicle will drive normally and will not require
towing.
When the engine is running, the MIL may flash
to alert serious conditions that could lead to
immediate loss of power or severe catalytic
converter damage. The vehicle should be
serviced by an authorized dealer as soon as
possible if this occurs.Electronic Stability Control (ESC) Active
Warning Light — If Equipped
This warning light will indicate when
the Electronic Stability Control system
is Active. The “ESC Indicator Light” in
the instrument cluster will come on
when the ignition is placed in the ON/RUN or
ACC/ON/RUN position, and when ESC is
activated. It should go out with the engine
running. If the “ESC Indicator Light” comes on
continuously with the engine running, a
malfunction has been detected in the ESC
system. If this warning light remains on after
several ignition cycles, and the vehicle has been
driven several miles (kilometers) at speeds
greater than 30 mph (48 km/h), see an
authorized dealer as soon as possible to have
the problem diagnosed and corrected.
The “ESC OFF Indicator Light” and the “ESC
Indicator Light” come on momentarily each
time the ignition is placed in the ON/RUN or
ACC/ON/RUN position.
WARNING!
A malfunctioning catalytic converter, as
referenced above, can reach higher
temperatures than in normal operating
conditions. This can cause a fire if you drive
slowly or park over flammable substances
such as dry plants, wood, cardboard, etc. This
could result in death or serious injury to the
driver, occupants or others.
CAUTION!
Prolonged driving with the Malfunction
Indicator Light (MIL) on could cause damage
to the vehicle control system. It also could
affect fuel economy and driveability. If the
MIL is flashing, severe catalytic converter
damage and power loss will soon occur.
Immediate service is required.
20_DJD2_OM_EN_USC_t.book Page 134
Page 145 of 568
GETTING TO KNOW YOUR INSTRUMENT PANEL143
EMISSIONS INSPECTION AND
MAINTENANCE PROGRAMS
In some localities, it may be a legal requirement
to pass an inspection of your vehicle's
emissions control system. Failure to pass could
prevent vehicle registration.
For states that require an Inspection
and Maintenance (I/M), this check
verifies the “Malfunction Indicator
Light (MIL)” is functioning and is not
on when the engine is running, and that the
OBD II system is ready for testing.
Normally, the OBD II system will be ready. The
OBD II system may not be ready if your vehicle
was recently serviced, recently had a depleted
battery or a battery replacement. If the OBD II
system should be determined not ready for the
I/M test, your vehicle may fail the test.
Your vehicle has a simple ignition actuated test,
which you can use prior to going to the test
station. To check if your vehicle's OBD II system
is ready, you must do the following:
1. Cycle the ignition switch to the ON position,
but do not crank or start the engine.
NOTE:
If you crank or start the engine, you will have to
start this test over.
2. As soon as you cycle the ignition switch to the ON position, you will see the
“Malfunction Indicator Light (MIL)” symbol
come on as part of a normal bulb check.
3. Approximately 15 seconds later, one of two things will happen:
The MIL will flash for about 10 seconds and then return to being fully illuminated
until you turn OFF the ignition or start the
engine. This means that your vehicle's
OBD II system is not ready and you
should not proceed to the I/M station.
The MIL will not flash at all and will remain
fully illuminated until you place the ignition in
the off position or start the engine. This
means that your vehicle's OBD II system is
ready and you can proceed to the I/M station. If your OBD II system is not ready,
you should
see an authorized dealer or repair facility. If your
vehicle was recently serviced or had a battery
failure or replacement, you may need to do
nothing more than drive your vehicle as you
normally would in order for your OBD II system
to update. A recheck with the above test routine
may then indicate that the system is now ready.
Regardless of whether your vehicle's OBD II
system is ready or not, if the MIL is illuminated
during normal vehicle operation you should
have your vehicle serviced before going to the
I/M station. The I/M station can fail your vehicle
because the MIL is on with the engine running.
3
20_DJD2_OM_EN_USC_t.book Page 143
Page 185 of 568
SAFETY183
(Continued)
The Air Bag Warning Light remains on after
the four to eight-second interval.
The Air Bag Warning Light comes on intermit -
tently or remains on while driving.
NOTE:
If the speedometer, tachometer, or any engine
related gauges are not working, the Occupant
Restraint Controller (ORC) may also be
disabled. In this condition the air bags may not
be ready to inflate for your protection. Have an
authorized dealer service the air bag system
immediately.
Redundant Air Bag Warning Light
If a fault with the Air Bag Warning
Light is detected, which could affect
the Supplemental Restraint System
(SRS), the Redundant Air Bag Warning
Light will illuminate on the instrument panel.
The Redundant Air Bag Warning Light will stay
on until the fault is cleared. In addition, a single
chime will sound to alert you that the
Redundant Air Bag Warning Light has come on
and a fault has been detected. If the Redundant
Air Bag Warning Light comes on intermittently or
remains on while driving have an authorized
dealer service the vehicle immediately.
For additional information regarding the
Redundant Air Bag Warning Light refer to
“Getting To Know Your Instrument Panel”
section of this manual.
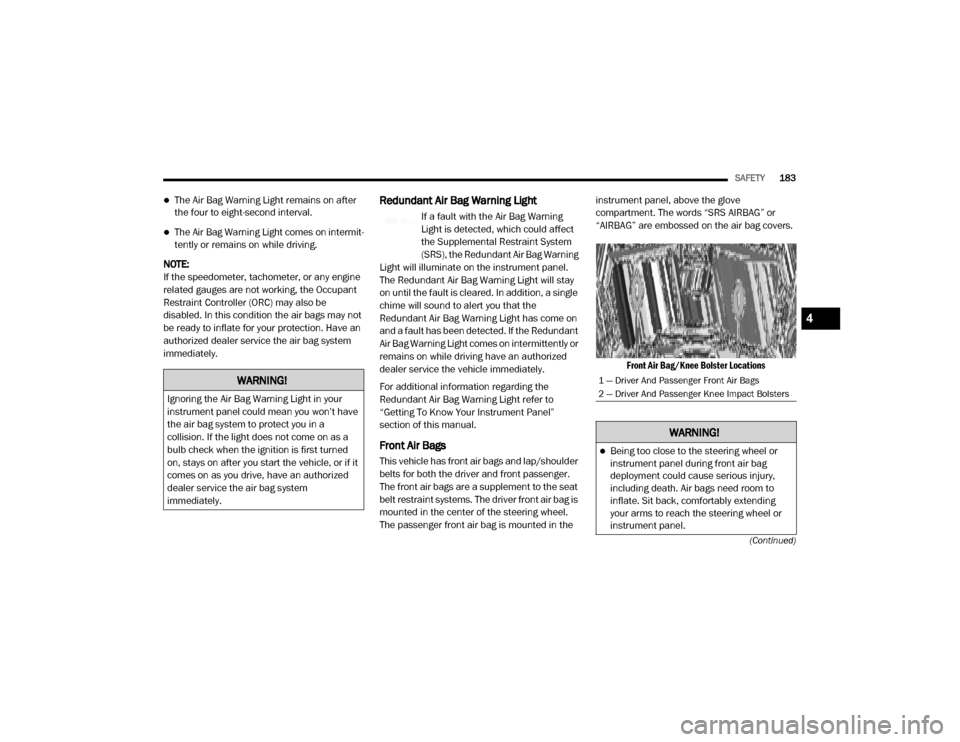
Front Air Bags
This vehicle has front air bags and lap/shoulder
belts for both the driver and front passenger.
The front air bags are a supplement to the seat
belt restraint systems. The driver front air bag is
mounted in the center of the steering wheel.
The passenger front air bag is mounted in the instrument panel, above the glove
compartment. The words “SRS AIRBAG” or
“AIRBAG” are embossed on the air bag covers.
Front Air Bag/Knee Bolster Locations
WARNING!
Ignoring the Air Bag Warning Light in your
instrument panel could mean you won’t have
the air bag system to protect you in a
collision. If the light does not come on as a
bulb check when the ignition is first turned
on, stays on after you start the vehicle, or if it
comes on as you drive, have an authorized
dealer service the air bag system
immediately.
1 — Driver And Passenger Front Air Bags
2 — Driver And Passenger Knee Impact Bolsters
WARNING!
Being too close to the steering wheel or
instrument panel during front air bag
deployment could cause serious injury,
including death. Air bags need room to
inflate. Sit back, comfortably extending
your arms to reach the steering wheel or
instrument panel.
4
20_DJD2_OM_EN_USC_t.book Page 183
Page 191 of 568
SAFETY189
eye irritation, rinse the area with cool water.
For nose or throat irritation, move to fresh air.
If the irritation continues, see your doctor. If
these particles settle on your clothing, follow
the garment manufacturer’s instructions for
cleaning.
Do not drive your vehicle after the air bags have
deployed. If you are involved in another
collision, the air bags will not be in place to
protect you.
NOTE:
Air bag covers may not be obvious in the inte -
rior trim, but they will open during air bag
deployment.
After any collision, the vehicle should be
taken to an authorized dealer immediately.
Enhanced Accident Response System
In the event of an impact, if the communication
network remains intact, and the power remains
intact, depending on the nature of the event,
the Occupant Restraint Controller (ORC) will
determine whether to have the Enhanced
Accident Response System perform the
following functions:
Cut off fuel to the engine (if equipped)
Cut off battery power to the electric motor (if
equipped)
Flash hazard lights as long as the battery has
power
Turn on the interior lights, which remain on
as long as the battery has power or for
15 minutes from the intervention of the
Enhanced Accident Response System
Unlock the power door locks
Your vehicle may also be designed to perform
any of these other functions in response to the
Enhanced Accident Response System:
Turn off the Fuel Filter Heater, Turn off the
HVAC Blower Motor, Close the HVAC Circula -
tion Door
Cut off battery power to the:
Engine
Electric Motor (if equipped)
Electric power steering
Brake booster
Electric park brake
Automatic transmission gear selector
Horn
Front wiper
Headlamp washer pump
NOTE:
After an accident, remember to cycle the igni -
tion to the STOP (OFF/LOCK) position and
remove the key from the ignition switch to avoid
draining the battery. Carefully check the vehicle
for fuel leaks in the engine compartment and on
the ground near the engine compartment and
fuel tank before resetting the system and
starting the engine. If there are no fuel leaks or
damage to the vehicle electrical devices (e.g.
headlights) after an accident, reset the system
by following the procedure described below. If
you have any doubt, contact an authorized
dealer.
WARNING!
Deployed air bags and seat belt
pretensioners cannot protect you in another
collision. Have the air bags, seat belt
pretensioners, and the seat belt retractor
assemblies replaced by an authorized dealer
immediately. Also, have the Occupant
Restraint Controller System serviced as well.
4
20_DJD2_OM_EN_USC_t.book Page 189