check engine Ram 3500 2020 Owner's Guide
[x] Cancel search | Manufacturer: RAM, Model Year: 2020, Model line: 3500, Model: Ram 3500 2020Pages: 568
Page 238 of 568
236STARTING AND OPERATING
(Continued)
(Continued)
PARK (P)
This range supplements the parking brake by
locking the transmission. The engine can be
started in this range. Never attempt to use
PARK while the vehicle is in motion. Apply the
parking brake when exiting the vehicle in this
range.
When parking on a level surface, you may shift
the transmission into PARK first, and then apply
the parking brake.
When parking on a hill, apply the parking brake
before shifting the transmission to PARK. As an
added precaution, turn the front wheels toward
the curb on a downhill grade and away from the
curb on an uphill grade.
NOTE:
On four-wheel drive vehicles be sure that the
transfer case is in a drive position.
When exiting the vehicle, always:
Apply the parking brake.
Shift the transmission into PARK.
Turn the engine off.
Remove the key fob.
WARNING!
Never use the PARK position as a substi
-
tute for the parking brake. Always apply the
parking brake fully when exiting the vehicle
to guard against vehicle movement and
possible injury or damage.
Your vehicle could move and injure you and
others if it is not in PARK. Check by trying to
move the transmission gear selector out of
PARK with the brake pedal released. Make
sure the transmission is in PARK before
exiting the vehicle.
The transmission may not engage PARK if
the vehicle is moving. Always bring the
vehicle to a complete stop before shifting to
PARK, and verify that the transmission gear
position indicator solidly indicates PARK (P)
without blinking. Ensure that the vehicle is
completely stopped, and the PARK position
is properly indicated, before exiting the
vehicle.
It is dangerous to shift out of PARK or
NEUTRAL if the engine speed is higher than
idle speed. If your foot is not firmly pressing
the brake pedal, the vehicle could accel -
erate quickly forward or in reverse. You
could lose control of the vehicle and hit
someone or something. Only shift into gear
when the engine is idling normally and your
foot is firmly pressing the brake pedal.
Unintended movement of a vehicle could
injure those in or near the vehicle. As with all
vehicles, you should never exit a vehicle
while the engine is running. Before exiting a
vehicle, always come to a complete stop,
then apply the parking brake, shift the trans -
mission into PARK, and turn the ignition OFF.
When the ignition is in the OFF mode, the
transmission is locked in PARK, securing the
vehicle against unwanted movement.
When exiting the vehicle, always make sure
the ignition is in the OFF mode, remove the
key fob from the vehicle, and lock the
vehicle.
WARNING! (Continued)
20_DJD2_OM_EN_USC_t.book Page 236
Page 242 of 568
240STARTING AND OPERATING
(Continued)
The electronically-controlled transmission
provides a precise shift schedule. The
transmission electronics are self-calibrating;
therefore, the first few shifts on a new vehicle
may be somewhat abrupt. This is a normal
condition, and precision shifts will develop
within a few hundred miles (kilometers).
Only shift from DRIVE to PARK or REVERSE
when the accelerator pedal is released and the
vehicle is stopped. Be sure to keep your foot on
the brake pedal when shifting between these
gears.
The transmission gear selector has only PARK,
REVERSE, NEUTRAL, and DRIVE shift positions.
Manual downshifts can be made using the
Electronic Range Select (ERS) shift control.
Pressing the ERS (-/+) switches (on the steering
wheel) while in the DRIVE position will select the
highest available transmission gear, and will
display that gear limit in the instrument cluster
as 1, 2, 3, etc. Refer to "Electronic Range Select
(ERS) Operation" in this section for further
information. Some models will display both the
selected gear limit, and the actual current gear,
while in ERS mode.Gear Ranges
Do not depress the accelerator pedal when
shifting from PARK or NEUTRAL into another
gear range.
NOTE:
After selecting any gear range, wait a moment
to allow the selected gear to engage before
accelerating. This is especially important when
the engine is cold.
PARK (P)
This range supplements the parking brake by
locking the transmission. The engine can be
started in this range. Never attempt to use
PARK while the vehicle is in motion. Apply the
parking brake when exiting the vehicle in this
range.
When parking on a level surface, you may shift
the transmission into PARK first, and then apply
the parking brake.
When parking on a hill, apply the parking brake
before shifting the transmission to PARK,
otherwise the load on the transmission locking
mechanism may make it difficult to move the
gear selector out of PARK. As an added precaution, turn the front wheels toward the
curb on a downhill grade and away from the
curb on an uphill grade.
When exiting the vehicle, always:
Apply the parking brake.
Shift the transmission into PARK.
Turn the engine off.
Remove the key fob.
NOTE:
On four-wheel drive vehicles be sure that the
transfer case is in a drive position.
WARNING!
Never use the PARK position as a substi -
tute for the parking brake. Always apply the
parking brake fully when exiting the vehicle
to guard against vehicle movement and
possible injury or damage.
Your vehicle could move and injure you and
others if it is not in PARK. Check by trying to
move the gear selector out of PARK with the
brake pedal released. Make sure the trans -
mission is in PARK before exiting the
vehicle.
20_DJD2_OM_EN_USC_t.book Page 240
Page 268 of 568

266STARTING AND OPERATING
If You Stall Or Begin To Lose Headway – If you
stall or begin to lose headway while climbing
a steep hill, allow your vehicle to come to a
stop and immediately apply the brake.
Restart the engine and shift into REVERSE.
Back slowly down the hill allowing the
compression braking of the engine and trans -
mission to help regulate your speed. If the
brakes are required to control vehicle speed,
apply them lightly and avoid locking or skid-
ding the tires.DRIVING THROUGH WATER
Extreme care should be taken crossing any type
of water. Water crossings should be avoided if
possible and only be attempted when
necessary, in a safe responsible manner. You
should only drive through areas which are
designated and approved. You should tread
lightly and avoid damage to the environment.
You should know your vehicle's abilities and be
able to recover it if something goes wrong. You
should never stop or shut a vehicle off when
crossing deep water unless you ingested water
into the engine air intake. If the engine stalls do
not attempt to restart it. Determine if it has
ingested water first. The key to any crossing is
low and slow. You want to use FIRST gear in
4WD LOW and proceed very slowly with a
constant slow speed (3-5 mph [5–8 km/h]
maximum) and light throttle. Keep the vehicle
moving; do not try to accelerate through the
crossing. After crossing any water higher than
the bottom of the axle differentials, you should
inspect all of the vehicle fluids for signs of water
ingestion.
Before You Cross Any Type Of Water – As you
approach any type of water you need to
determine if you can cross it safely and
responsibly. If necessary, get out and walk
through the water or probe it with a stick. You
need to be sure of its depth, approach angle,
current and bottom condition. Be careful of
murky or muddy waters, check for hidden
obstacles. Make sure you will not be
intruding on any wildlife and you can recover
the vehicle if necessary. The key to a safe
crossing is the water depth, current and
bottom conditions. On soft bottoms the
vehicle will sink in, effectively increasing the
water level on the vehicle. Be sure to
consider this when determining the depth
and the ability to safely cross.
WARNING!
If the engine stalls or you lose headway or
cannot make it to the top of a steep hill or
grade, never attempt to turn around. To do so
may result in tipping and rolling the vehicle,
which may result in severe injury. Always back
carefully straight down a hill in REVERSE.
Never back down a hill in NEUTRAL using only
the vehicle brakes. Never drive diagonally
across a hill, always drive straight up or down.
CAUTION!
Water ingestion into the axles, transmission,
transfer case, engine or vehicle interior can
occur if you drive too fast or through too deep
of water. Water can cause permanent
damage to engine, driveline or other vehicle
components and your brakes will be less
effective once wet and/or muddy.
20_DJD2_OM_EN_USC_t.book Page 266
Page 272 of 568
270STARTING AND OPERATING
AFTER DRIVING OFF-ROAD
Off-road operation puts more stress on your
vehicle than does most on-road driving. After
going off-road, it is always a good idea to check
for damage. That way you can get any problems
taken care of right away and have your vehicle
ready when you need it.
Completely inspect the underbody of your
vehicle. Check tires, body structure, steering,
suspension, and exhaust system for damage.
Inspect the radiator for mud and debris and
clean as required.
Check threaded fasteners for looseness,
particularly on the chassis, drivetrain compo -
nents, steering, and suspension. Retighten them, if required, and torque to the values
specified in the Service Manual.
Check for accumulations of plants or brush.
These things could be a fire hazard. They
might hide damage to fuel lines, brake hoses,
axle pinion seals, and propeller shafts.
After extended operation in mud, sand,
water, or similar dirty conditions, have the
radiator, fan, brake rotors, wheels, brake
linings, and axle yokes inspected and
cleaned as soon as possible.
If you experience unusual vibration after
driving in mud, slush or similar conditions,
check the wheels for impacted material.
Impacted material can cause a wheel imbal-
ance and freeing the wheels of it will correct
the situation.
LIMITED-SLIP DIFFERENTIAL
The limited-slip differential provides additional
traction on snow, ice, mud, sand and gravel,
particularly when there is a difference between
the traction characteristics of the surface under
the right and left rear wheels. During normal
driving and cornering, the limited-slip unit
performs similarly to a conventional differential.
On slippery surfaces, however, the differential
delivers more of the driving effort to the rear
wheel having the better traction.
The limited-slip differential is especially helpful
during slippery driving conditions. With both rear
wheels on a slippery surface, a slight application
of the accelerator will supply maximum traction.
When starting with only one rear wheel on an
excessively slippery surface, slight momentary
application of the parking brake may be
necessary to gain maximum traction.
WARNING!
Winch cables are under high tension when in
use and can become a projectile if they fail.
Never stand over or straddle the winch cable.
Never jerk or overload the winch cable. Never
stand in front of the vehicle while winching.
Failure to follow these instructions can result
in serious or fatal injury.
WARNING!
Abrasive material in any part of the brakes
may cause excessive wear or unpredictable
braking. You might not have full braking
power when you need it to prevent a collision.
If you have been operating your vehicle in
dirty conditions, get your brakes checked and
cleaned as necessary.
WARNING!
On vehicles equipped with a limited-slip
differential never run the engine with one rear
wheel off the ground since the vehicle may
drive through the rear wheel remaining on the
ground. You could lose control of the vehicle.
20_DJD2_OM_EN_USC_t.book Page 270
Page 333 of 568
STARTING AND OPERATING331
(Continued)
Towing Requirements — Tires
Do not attempt to tow a trailer while using a
compact spare tire.
Do not drive more than 50 mph (80 km/h) when towing while using a full size spare tire.
Proper tire inflation pressures are essential
to the safe and satisfactory operation of your
vehicle. Refer to “Tires” in “Servicing And
Maintenance” for proper tire inflation proce -
dures.
Check the trailer tires for proper tire inflation
pressures before trailer usage.
Check for signs of tire wear or visible tire
damage before towing a trailer. Refer to
“Tires” in “Servicing And Maintenance” for
the proper inspection procedure.
When replacing tires, refer to “Tires” in
“Servicing And Maintenance” for the proper
tire replacement procedures. Replacing tires
with a higher load carrying capacity will not
increase the vehicle's GVWR and GAWR
limits.
Towing Requirements — Trailer Brakes
Do not interconnect the hydraulic brake
system or vacuum system of your vehicle
with that of the trailer. This could cause inad -
equate braking and possible personal injury.
An electronically actuated trailer brake
controller is required when towing a trailer
with electronically actuated brakes. When
towing a trailer equipped with a hydraulic
surge actuated brake system, an electronic
brake controller is not required.
Trailer brakes are recommended for trailers
over 1,000 lbs (453 kg) and required for
trailers in excess of 2,000 lbs (907 kg).
When hauling cargo or towing a trailer, do
not overload your vehicle or trailer. Over -
loading can cause a loss of control, poor
performance or damage to brakes, axle,
engine, transmission, steering, suspension,
chassis structure or tires.
Safety chains must always be used
between your vehicle and trailer. Always
connect the chains to the hook retainers of
the vehicle hitch. Cross the chains under
the trailer tongue and allow enough slack
for turning corners.
Vehicles with trailers should not be parked
on a grade. When parking, apply the
parking brake on the tow vehicle. Put the
tow vehicle transmission in PARK. For
four-wheel drive vehicles, make sure the
transfer case is not in NEUTRAL. Always,
block or "chock" the trailer wheels.
GCWR must not be exceeded.
WARNING! (Continued)
Total weight must be distributed between
the tow vehicle and the trailer such that the
following four ratings are not exceeded :
GVWR
GTW
GAWR
Tongue weight rating for the trailer
hitch utilized.
WARNING! (Continued)
5
20_DJD2_OM_EN_USC_t.book Page 331
Page 340 of 568

338STARTING AND OPERATING
NOTE:
Detach the snowplow when transporting
passengers.
Vehicle front end wheel alignment was set to
specifications at the factory without
consideration for the weight of the plow. Front
end toe-in should be checked and reset if
necessary at the beginning and end of the
snowplow season. This will help prevent uneven
tire wear.
The blade should be lowered whenever the
vehicle is parked.
Maintain and operate your vehicle and
snowplow equipment following the
recommendations provided by the specific
snowplow manufacturer.OVER THE ROAD OPERATION WITH
S
NOWPLOW ATTACHED
The blade restricts air flow to the radiator and
causes the engine to operate at higher than
normal temperatures. Therefore, when
transporting the plow, angle the blade
completely and position it as low as road or
surface conditions permit. Do not exceed
40 mph (64 km/h). The operator should always
maintain a safe stopping distance and allow
adequate passing clearance.
OPERATING TIPS
Under ideal snow plowing conditions, 20 mph
(32 km/h) should be maximum operating
speed. The operator should be familiar with the
area and surface to be cleaned. Reduce speed
and use extreme caution when plowing
unfamiliar areas or under poor visibility.
GENERAL MAINTENANCE
Snowplows should be maintained in
accordance with the plow manufacturer's
instructions.
Keep all snowplow electrical connections and
battery terminals clean and free of corrosion.
When plowing snow, to avoid transmission and
drivetrain damage, the following precautions
should be observed.
Operate with transfer case in 4LO when
plowing small or congested areas where
speeds are not likely to exceed 15 mph
(24 km/h). At higher speeds operate in 4HI.
Vehicles with automatic transmissions
should use 4LO range when plowing deep or
heavy snow for extended periods of time to
avoid transmission overheating.
Do not shift the transmission unless the
engine has returned to idle and wheels have
stopped. Make a practice of stepping on the
brake pedal while shifting the transmission.
20_DJD2_OM_EN_USC_t.book Page 338
Page 346 of 568

344STARTING AND OPERATING
(Continued)
OFF-ROAD DRIVING TIPS
Care should be taken when attempting to climb
steep hills or driving diagonally across a hill or
slope. If natural obstacles force you to travel
diagonally up or down a hill, choose a mild angle
and keep as little side tilt as possible. Keep the
vehicle moving and make turns slowly and
cautiously.
If you must back down a hill, back straight down
using REVERSE gear. Never back down in
NEUTRAL or diagonally across the hill.
When driving over sand, mud, and other soft
terrain, shift to low gear and drive steadily.
Apply the accelerator slowly to avoid spinning
the wheels.
Do not reduce the tire pressures for this type of
driving.Driving through standing water limits your
vehicle’s braking capabilities, which
increases stopping distances. Therefore,
after driving through standing water, drive
slowly and lightly press on the brake pedal
several times to dry the brakes.
Failure to follow these warnings may result
in injuries that are serious or fatal to you,
your passengers, and others around you.
CAUTION!
Always check the depth of the standing
water before driving through it. Never drive
through standing water that is deeper than
the bottom of the tire rims mounted on the
vehicle.
Determine the condition of the road or the
path that is under water and if there are any
obstacles in the way before driving through
the standing water.
WARNING! (Continued)
Do not exceed 5 mph (8 km/h) when
driving through standing water. This will
minimize wave effects.
Driving through standing water may cause
damage to your vehicle’s drivetrain compo -
nents. Always inspect your vehicle’s fluids
(i.e., engine oil, transmission, axle, etc.) for
signs of contamination (i.e., fluid that is
milky or foamy in appearance) after driving
through standing water. Do not continue to
operate the vehicle if any fluid appears
contaminated, as this may result in further
damage. Such damage is not covered by
the New Vehicle Limited Warranty.
Getting water inside your vehicle’s engine
can cause it to lock up and stall out, and
cause serious internal damage to the
engine. Such damage is not covered by the
New Vehicle Limited Warranty.
CAUTION! (Continued)
20_DJD2_OM_EN_USC_t.book Page 344
Page 387 of 568
385
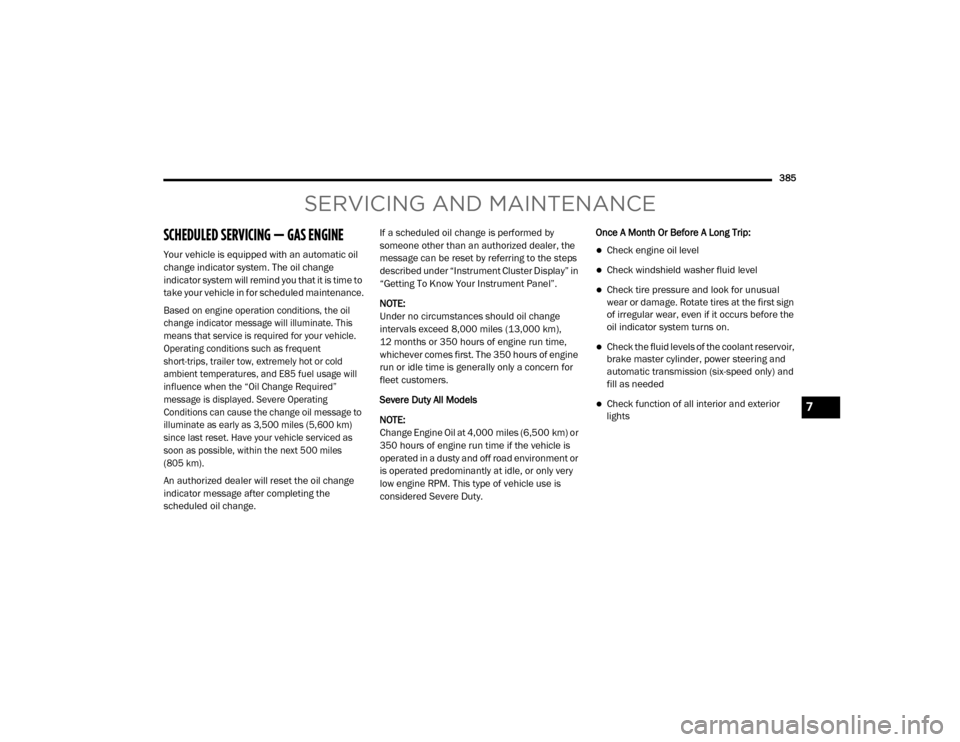
SERVICING AND MAINTENANCE
SCHEDULED SERVICING — GAS ENGINE
Your vehicle is equipped with an automatic oil
change indicator system. The oil change
indicator system will remind you that it is time to
take your vehicle in for scheduled maintenance.
Based on engine operation conditions, the oil
change indicator message will illuminate. This
means that service is required for your vehicle.
Operating conditions such as frequent
short-trips, trailer tow, extremely hot or cold
ambient temperatures, and E85 fuel usage will
influence when the “Oil Change Required”
message is displayed. Severe Operating
Conditions can cause the change oil message to
illuminate as early as 3,500 miles (5,600 km)
since last reset. Have your vehicle serviced as
soon as possible, within the next 500 miles
(805 km).
An authorized dealer will reset the oil change
indicator message after completing the
scheduled oil change.If a scheduled oil change is performed by
someone other than an authorized dealer, the
message can be reset by referring to the steps
described under “Instrument Cluster Display” in
“Getting To Know Your Instrument Panel”.
NOTE:
Under no circumstances should oil change
intervals exceed 8,000 miles (13,000 km),
12 months or 350 hours of engine run time,
whichever comes first. The 350 hours of engine
run or idle time is generally only a concern for
fleet customers.
Severe Duty All Models
NOTE:
Change Engine Oil at 4,000 miles (6,500 km) or
350 hours of engine run time if the vehicle is
operated in a dusty and off road environment or
is operated predominantly at idle, or only very
low engine RPM. This type of vehicle use is
considered Severe Duty.
Once A Month Or Before A Long Trip:Check engine oil level
Check windshield washer fluid level
Check tire pressure and look for unusual
wear or damage. Rotate tires at the first sign
of irregular wear, even if it occurs before the
oil indicator system turns on.
Check the fluid levels of the coolant reservoir,
brake master cylinder, power steering and
automatic transmission (six-speed only) and
fill as needed
Check function of all interior and exterior
lights7
20_DJD2_OM_EN_USC_t.book Page 385
Page 391 of 568

SERVICING AND MAINTENANCE389
HEAVY DUTY USE OF THE VEHICLE
Change engine oil at 4,000 miles (6,500 km) or
350 hours of engine run time if the vehicle is
operated in a dusty and off road environment or
is operated predominately at idle or only very
low engine RPM. This type of vehicle use is
considered Severe Duty.
SCHEDULED SERVICING— DIESEL ENGINE
Required Maintenance Intervals
Refer to the maintenance plan on the following
pages for the required maintenance intervals.
More frequent maintenance may be needed in
severe conditions, such as dusty areas and very
short trip driving. In some extreme conditions,
additional maintenance not specified in the
maintenance schedule may be required.
At Each Stop For Fuel
Check the engine oil level at least 30 minutes
after a fully warmed engine is shut off. Checking
the oil level while the vehicle is on level ground
will improve the accuracy of the oil level
reading. Add oil only when the level is at or
below the ADD or MIN mark. Once A Month
Inspect the batteries, and clean and tighten
the terminals as required.
Check the fluid levels of the coolant reservoir,
brake master cylinder, and automatic trans-
mission, and add as needed.
At Each Oil Change
Change the engine oil filter.
Inspect the exhaust system.
Inspect engine air filter. Replace the engine
air filter cleaner, if necessary.
Inspect the CV/Universal joints.
Check the coolant level, hoses, and clamps.
Inspect front end, and lubricate — If equipped
with serviceable fittings.
Inspect and replace the Evaporative System
Fresh Air Filter as necessary, replacement
may be more frequent if vehicle is operated
in extreme dusty conditions.
WARNING!
You can be badly injured working on or
around a motor vehicle. Do only service
work for which you have the knowledge and
the right equipment. If you have any doubt
about your ability to perform a service job,
take your vehicle to a competent mechanic.
Failure to properly inspect and maintain
your vehicle could result in a component
malfunction and effect vehicle handling
and performance. This could cause an acci -
dent.
CAUTION!
Failure to perform the required maintenance
items may result in damage to the vehicle.
7
20_DJD2_OM_EN_USC_t.book Page 389
Page 393 of 568

SERVICING AND MAINTENANCE391
MAINTENANCE PLAN — CUMMINS DIESEL ENGINE
Mileage or time passed
(whichever comes first):
7,500
15,000
22,500
30,000
37,500
45,000
52,500
60,000
67,500
75,000
82,500
90,000
97,500
105,000
112,500
120,000
127,500
135,000
142,500
150,000
Or Months:6
12
18
24
30
36
42
48
54
60
66
72
78
84
90
96
102
108
114
120
Or Kilometers:
12,000
24,000
36,000
48,000
60,000
72,000
84,000
96,000
108,000
120,000
132,000
144,000
156,000
168,000
180,000
192,000
204,000
216,000
228,000
240,000
Change engine oil every
15,000 miles (24,000 km) or
12 months or 500 Hours or sooner
if prompted by the oil change
indicator system, whichever comes
first.
1
X X X X X X X X X X
Additional Inspections
Check the Diesel Exhaust Fluid
(DEF) tank, refill if necessary. X X X X X X X X X X X X X X X X X X X X
Rotate the tires. X X X X X X X X X X X X X
X X X X X X X
In s
pect front end, and lubricate — If
equipped with serviceable fittings. X X X X X X X X X X X X X X X X X X X X
Inspect engine air filter, replace if
necessary.
2X X X X X X X X X X
Inspect the CV/Universal joints. X X X X X X X X X X X X X X X X X X X X
7
20_DJD2_OM_EN_USC_t.book Page 391