start stop button Ram 4500 Chassis Cab 2018 Owner's Manual
[x] Cancel search | Manufacturer: RAM, Model Year: 2018, Model line: 4500 Chassis Cab, Model: Ram 4500 Chassis Cab 2018Pages: 298, PDF Size: 5.88 MB
Page 152 of 298

NOTE:
With electronic shift transfer case:
• Steps 2 through 4 are requirements thatmust be met before pushing the NEUTRAL
(N) button, and must continue to be met
until the shift has been completed. If any of
these requirements are not met before
pushing the NEUTRAL (N) button or are no
longer met during the shift, the NEUTRAL
(N) indicator light will flash continuously
until all requirements are met or until the
NEUTRAL (N) button is released.
• The ignition must be in the ON/RUN mode for a shift to take place and for the position
indicator lights to be operable. If the igni-
tion is not in the ON/RUN mode, the shift
will not take place and no position indicator
lights will be on or flashing.
• A flashing NEUTRAL (N) position indicator light indicates that shift requirements have
not been met.Shifting Out Of NEUTRAL (N)
Use the following procedure to prepare your
vehicle for normal usage:
1. Bring the vehicle to a complete stop,
leaving it connected to the tow vehicle.
2. Firmly apply the parking brake.
3. Turn the ignition to the ON/RUN mode, but do not start the engine.
4. Press and hold the brake pedal.
5. Shift the transmission into NEUTRAL.
• With manual shift transfer case, shiftthe transfer case lever to the desired
position.
• With electronic shift transfer case with rotary selector switch, push and hold
the transfer case NEUTRAL (N) button
until the NEUTRAL (N) indicator light
turns off. After the NEUTRAL (N) indi-
cator light turns off, release the NEU-
TRAL (N) button. After the NEUTRAL
(N) button has been released, the
transfer case will shift to the position
indicated by the selector switch. • With electronic shift transfer case with
push-button selector switch, push and
hold the switch for the desired transfer
case position, until the NEUTRAL (N)
indicator light turns off and the desired
position indicator light turns on.
NOTE:
When shifting out of transfer case NEUTRAL
(N), the engine should remain OFF to avoid
gear clash.
6. Shift automatic transmission into PARK.
7. Release the brake pedal (and clutch pedal on a manual transmission).
8. Disconnect vehicle from the tow vehicle.
9. Start the engine.
10. Press and hold the brake pedal.
11. Release the parking brake.
12. Shift the transmission into gear, release the brake pedal (and clutch pedal on
manual transmissions), and check that
the vehicle operates normally.
STARTING AND OPERATING
150
Page 235 of 298

Seek Previous/Next Buttons
Seek Up
Press and release the “Seek Up”button
on the touchscreen to tune the radio to the
next listenable station or channel.
During a Seek Up function, if the radio
reaches the starting station after passing
through the entire band two times, the radio
will stop at the station where it began.
Fast Seek Up
Press and hold the “Seek Up”button on
the touchscreen to advance the radio through
the available stations or channels at a faster
rate, the radio stops at the next available
station or channel when the button on the
touchscreen is released.
Seek Down
Press and release the “Seek Down”but-
ton on the touchscreen to tune the radio to
the next listenable station or channel.
During a Seek Down function, if the radio
reaches the starting station after passing
through the entire band two times, the radio
will stop at the station where it began. Fast Seek Down
Press and hold the “Seek Down”button
on the touchscreen to advance the radio
through the available stations or channel at a
faster rate, the radio stops at the next avail-
able station or channel when the button on
the touchscreen is released.
Store Radio Presets
The Radio stores up to 12 presets in each of
the Radio modes. There are four visible pre-
sets at the top of the radio screen. Pressing
the “All” button on the touchscreen on the
radio home screen will display all of the
preset stations for that mode.
To store a radio preset manually, follow the
steps below:
1. Tune to the desired station.
2. Press and hold the desired numbered but- ton on the touchscreen for more than two
seconds or until you hear a confirmation
beep.
Media Mode
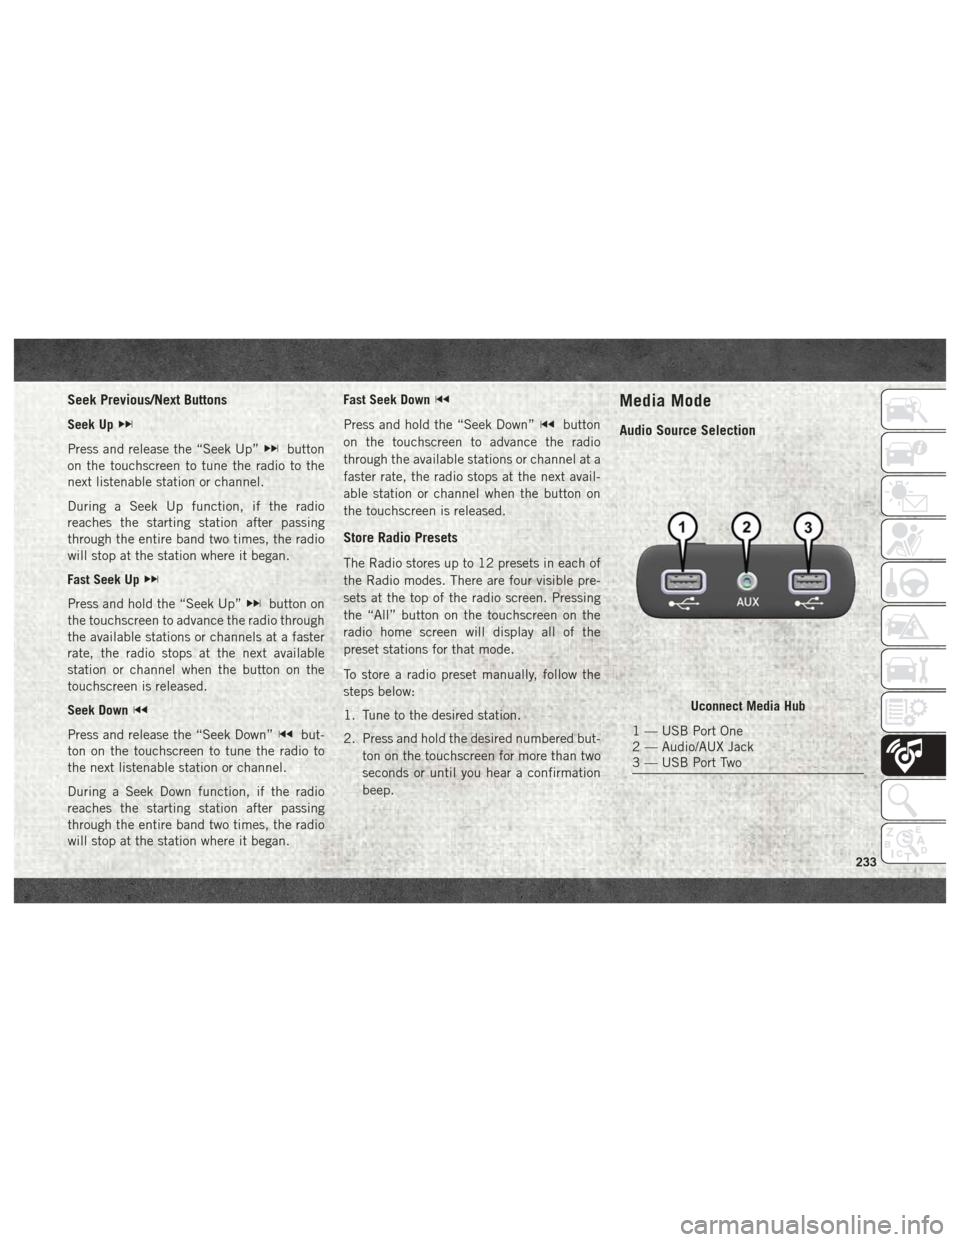
Audio Source Selection
Uconnect Media Hub
1 — USB Port One
2 — Audio/AUX Jack
3 — USB Port Two
233
Page 275 of 298

Get Started
1.U.S. residents can visitUconnectPhone.com
to check device and feature compatibility
and to find device pairing instructions.
2. Reduce background noise. Wind and pas- senger conversations are examples of
noise that may impact recognition.
3. Speak clearly at a normal pace and vol- ume while facing straight ahead. The mi-
crophone is positioned on the headliner
and aimed at the driver.
4. Each time you give a Voice Command, you must first push either the VR or Phone
button, wait until afterthe beep, then say
your Voice Command.
5. You can interrupt the help message or system prompts by pushing the VR or
Phone button and saying a Voice Com-
mand from current category.
All you need to control your Uconnect system
with your voice are the buttons on your steer-
ing wheel.
Basic Voice Commands
The basic Voice Commands below can be
given at any point while using your Uconnect
system.
Push the VR button
. After the beep,
say…
• Cancel to stop a current voice session •
Help to hear a list of suggested Voice Com-
mands
• Repeat to listen to the system prompts
again
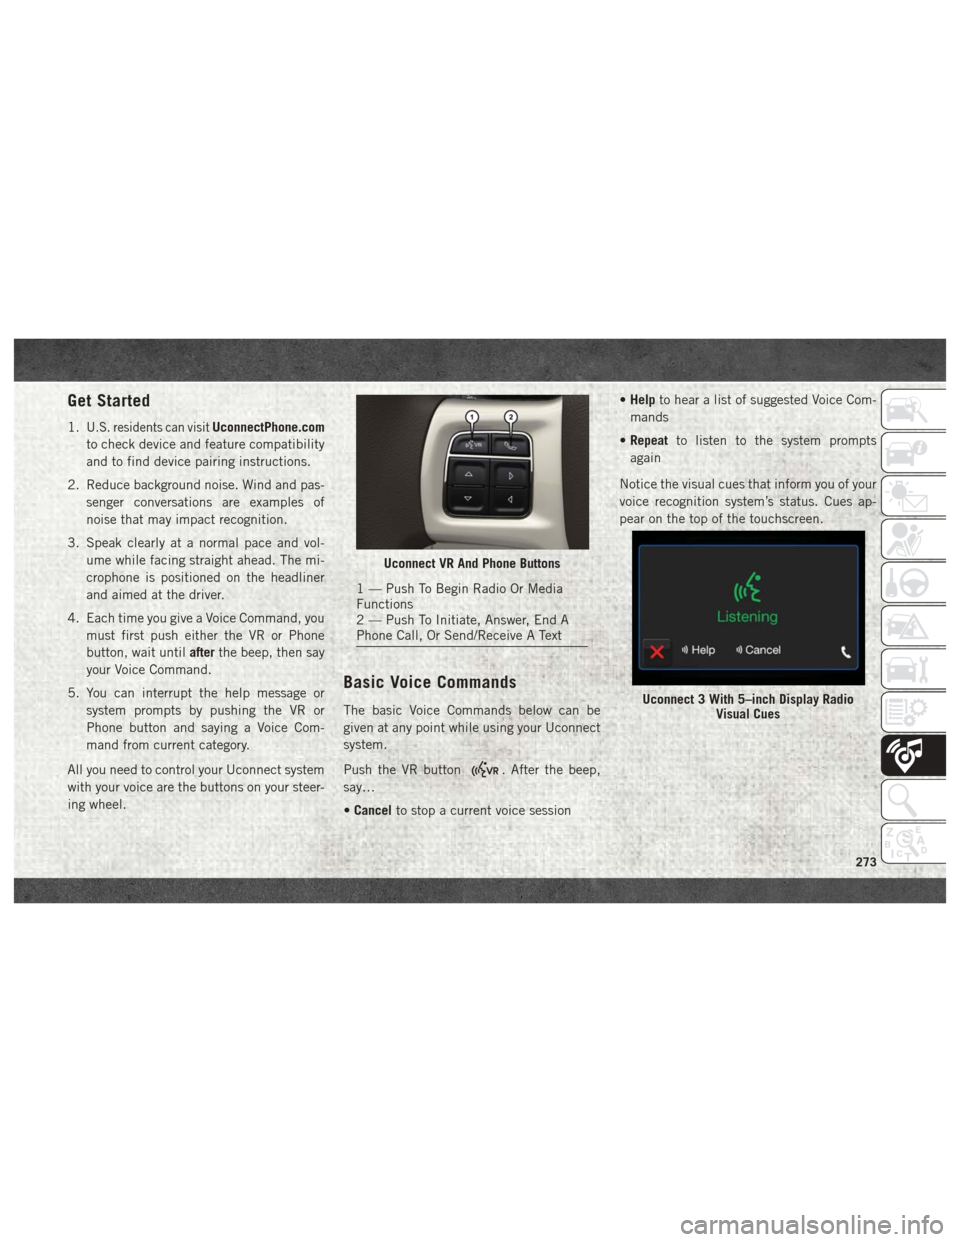
Notice the visual cues that inform you of your
voice recognition system’s status. Cues ap-
pear on the top of the touchscreen.
Uconnect VR And Phone Buttons
1 — Push To Begin Radio Or Media
Functions
2 — Push To Initiate, Answer, End A
Phone Call, Or Send/Receive A Text
Uconnect 3 With 5–inch Display Radio Visual Cues
273