battery replacement RAM CHASSIS CAB 2021 Owners Manual
[x] Cancel search | Manufacturer: RAM, Model Year: 2021, Model line: CHASSIS CAB, Model: RAM CHASSIS CAB 2021Pages: 463, PDF Size: 21.5 MB
Page 8 of 463
6
SAFETY
SAFETY FEATURES ............................................ 273
Anti-Lock Brake System (ABS) ................. 273
Electronic Brake Control (EBC) System ...274
AUXILIARY DRIVING SYSTEMS ........................ 281
Forward Collision Warning (FCW) With
Mitigation — If Equipped............................281 Tire Pressure Monitoring
System (TPMS) ..........................................284
OCCUPANT RESTRAINT SYSTEMS .................. 292
Occupant Restraint Systems Features ....292
Important Safety Precautions ...................293Seat Belt Systems ..................................... 293Supplemental Restraint Systems (SRS) ...302Child Restraints..........................................312
SAFETY TIPS ...................................................... 330
Transporting Passengers ..........................330
Transporting Pets ......................................330
Safety Checks You Should Make Inside
The Vehicle ................................................330 Periodic Safety Checks You Should Make
Outside The Vehicle ...................................332 Exhaust Gas ...............................................333Carbon Monoxide Warnings ......................333
IN CASE OF EMERGENCY
HAZARD WARNING FLASHERS .......................334
ASSIST AND SOS SYSTEM — IF EQUIPPED..... 335
JACKING AND TIRE CHANGING ........................339
4500/5500 Models .................................. 339Preparations For Jacking........................... 339
Jacking Instructions 4500 And
5500 Series ............................................... 340 To Stow The Flat Or Spare —
If Equipped ................................................ 343 Hub Caps/Wheel Covers — If Equipped ... 343
JUMP STARTING ................................................ 344
Preparations For Jump Start ..................... 344Jump Starting Procedure .......................... 345
IF YOUR ENGINE OVERHEATS .........................346
GEAR SELECTOR OVERRIDE — 6–SPEED
TRANSMISSION ................................................. 347
MANUAL PARK RELEASE — 8 – SPEED
TRANSMISSION ................................................. 348
FREEING A STUCK VEHICLE .............................349
TOWING A DISABLED VEHICLE ........................350 Two-Wheel Drive Models ........................... 351
Four-Wheel Drive Models .......................... 351Emergency Tow Hooks — If Equipped ...... 352
ENHANCED ACCIDENT RESPONSE
SYSTEM (EARS) ................................................. 352
EVENT DATA RECORDER (EDR) .......................352
SERVICING AND MAINTENANCE
SCHEDULED SERVICING — GASOLINE
ENGINE ................................................................ 353
Maintenance Plan ..................................... 354
SCHEDULED SERVICING — DIESEL ENGINE .. 357
Oil Change Indicator System — Cummins
Diesel.......................................................... 357 Perform Service Indicator — Cummins
Diesel ......................................................... 358 Maintenance Plan — Cummins Diesel
Engine ....................................................... 359
ENGINE COMPARTMENT .................................. 364
6.4L Engine ............................................... 364
6.7L Engine ................................................ 365
Checking Oil Level ..................................... 366
Adding Washer Fluid ................................. 366Maintenance-Free Battery ....................... 366Pressure Washing...................................... 367
VEHICLE MAINTENANCE .................................. 367
Engine Oil .................................................. 368
Engine Oil Filter.......................................... 369
Engine Air Cleaner Filter ........................... 369
Air Conditioner Maintenance ................... 371
Accessory Drive Belt Inspection ............... 374Draining Fuel/Water Separator Filter....... 375Engine Mounted Fuel Filter
Replacement.............................................. 376
21_DPF_OM_EN_USC_t.book Page 6
Page 18 of 463
16GETTING TO KNOW YOUR VEHICLE
When the doors are unlocked, the turn signals
will flash and the illuminated entry system will
be activated. When the doors are locked, the
turn signals will flash and the horn will chirp.
All doors can be programmed to unlock on the
first push of the unlock button. The horn chirp
when the lock button is pushed can be
programmed on/off within Uconnect Settings
Ú
page 228.
Replacing The Battery In The Key Fob
The replacement battery model is one CR2450
battery.
NOTE:
Customers are recommended to use a
battery obtained from Mopar. Aftermarket
coin battery dimensions may not meet the
original OEM coin battery dimensions.
Perchlorate Material — special handling
may apply. See
www.dtsc.ca.gov/hazard -
ouswaste/perchlorate
for further information.
Do not touch the battery terminals that are
on the back housing or the printed circuit
board.
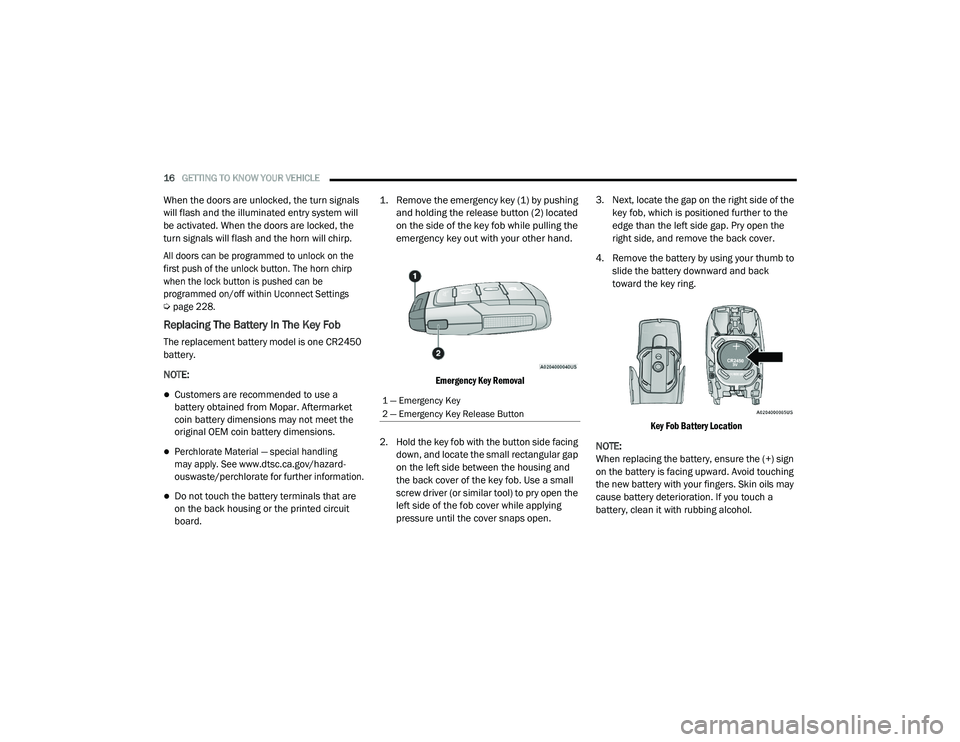
1. Remove the emergency key (1) by pushing
and holding the release button (2) located
on the side of the key fob while pulling the
emergency key out with your other hand.
Emergency Key Removal
2. Hold the key fob with the button side facing down, and locate the small rectangular gap
on the left side between the housing and
the back cover of the key fob. Use a small
screw driver (or similar tool) to pry open the
left side of the fob cover while applying
pressure until the cover snaps open. 3. Next, locate the gap on the right side of the
key fob, which is positioned further to the
edge than the left side gap. Pry open the
right side, and remove the back cover.
4. Remove the battery by using your thumb to slide the battery downward and back
toward the key ring.
Key Fob Battery Location
NOTE:
When replacing the battery, ensure the (+) sign
on the battery is facing upward. Avoid touching
the new battery with your fingers. Skin oils may
cause battery deterioration. If you touch a
battery, clean it with rubbing alcohol.
1 — Emergency Key
2 — Emergency Key Release Button
21_DPF_OM_EN_USC_t.book Page 16
Page 19 of 463
GETTING TO KNOW YOUR VEHICLE17
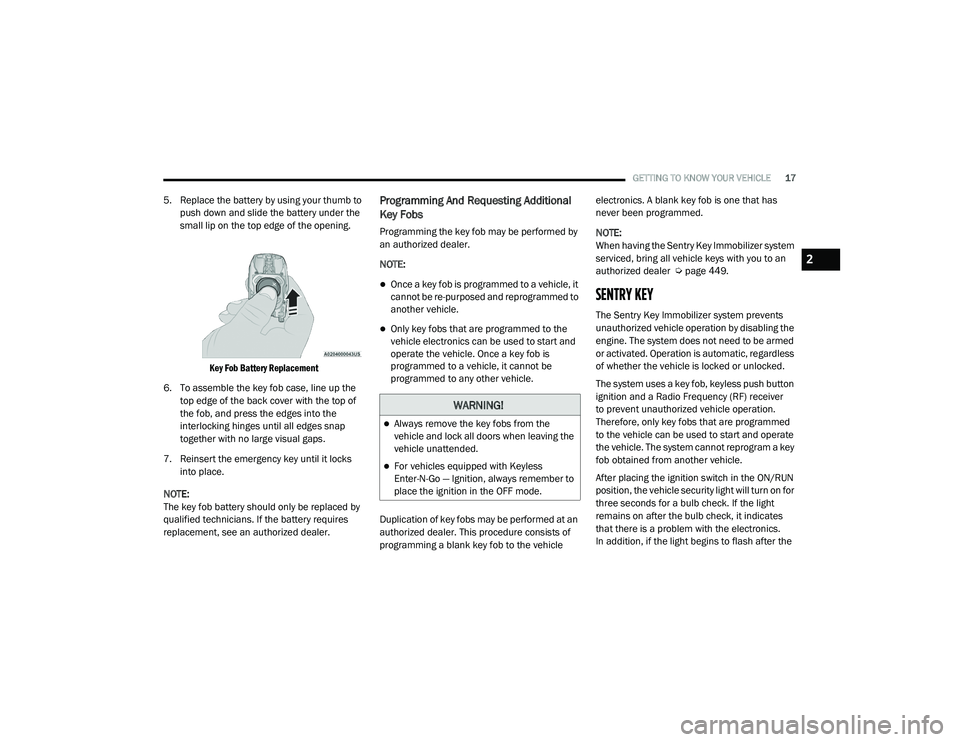
5. Replace the battery by using your thumb to
push down and slide the battery under the
small lip on the top edge of the opening.
Key Fob Battery Replacement
6. To assemble the key fob case, line up the top edge of the back cover with the top of
the fob, and press the edges into the
interlocking hinges until all edges snap
together with no large visual gaps.
7. Reinsert the emergency key until it locks into place.
NOTE:
The key fob battery should only be replaced by
qualified technicians. If the battery requires
replacement, see an authorized dealer.Programming And Requesting Additional
Key Fobs
Programming the key fob may be performed by
an authorized dealer.
NOTE:
Once a key fob is programmed to a vehicle, it
cannot be re-purposed and reprogrammed to
another vehicle.
Only key fobs that are programmed to the
vehicle electronics can be used to start and
operate the vehicle. Once a key fob is
programmed to a vehicle, it cannot be
programmed to any other vehicle.
Duplication of key fobs may be performed at an
authorized dealer. This procedure consists of
programming a blank key fob to the vehicle electronics. A blank key fob is one that has
never been programmed.
NOTE:
When having the Sentry Key Immobilizer system
serviced, bring all vehicle keys with you to an
authorized dealer Ú
page 449.
SENTRY KEY
The Sentry Key Immobilizer system prevents
unauthorized vehicle operation by disabling the
engine. The system does not need to be armed
or activated. Operation is automatic, regardless
of whether the vehicle is locked or unlocked.
The system uses a key fob, keyless push button
ignition and a Radio Frequency (RF) receiver
to prevent unauthorized vehicle operation.
Therefore, only key fobs that are programmed
to the vehicle can be used to start and operate
the vehicle. The system cannot reprogram a key
fob obtained from another vehicle.
After placing the ignition switch in the ON/RUN
position, the vehicle security light will turn on for
three seconds for a bulb check. If the light
remains on after the bulb check, it indicates
that there is a problem with the electronics.
In addition, if the light begins to flash after the
WARNING!
Always remove the key fobs from the
vehicle and lock all doors when leaving the
vehicle unattended.
For vehicles equipped with Keyless
Enter-N-Go — Ignition, always remember to
place the ignition in the OFF mode.
2
21_DPF_OM_EN_USC_t.book Page 17
Page 119 of 463

GETTING TO KNOW YOUR INSTRUMENT PANEL117
EMISSIONS INSPECTION AND
MAINTENANCE PROGRAMS
In some localities, it may be a legal requirement
to pass an inspection of your vehicle's
emissions control system. Failure to pass could
prevent vehicle registration.
For states that require an Inspection
and Maintenance (I/M), this check
verifies the Malfunction Indicator
Light (MIL) is functioning and is not on
when the engine is running, and that the OBD II
system is ready for testing.
Normally, the OBD II system will be ready. The
OBD II system may not be ready if your vehicle
was recently serviced, recently had a depleted
battery or a battery replacement. If the OBD II
system should be determined not ready for the
I/M test, your vehicle may fail the test.
Your vehicle has a simple ignition actuated test,
which you can use prior to going to the test
station. To check if your vehicle's OBD II system
is ready, you must do the following:
1. Cycle the ignition switch to the ON position, but do not crank or start the engine.
NOTE:
If you crank or start the engine, you will have to
start this test over.
2. As soon as you cycle the ignition switch
to the ON position, you will see the
Malfunction Indicator Light (MIL) symbol
come on as part of a normal bulb check.
3. Approximately 15 seconds later, one of two things will happen:
The MIL will flash for about 10 seconds
and then return to being fully illuminated
until you turn OFF the ignition or start the
engine. This means that your vehicle's
OBD II system is not ready and you
should not proceed to the I/M station.
The MIL will not flash at all and will
remain fully illuminated until you place
the ignition in the off position or start the
engine. This means that your vehicle's
OBD II system is ready and you can
proceed to the I/M station. If your OBD II system is not ready,
you should
see an authorized dealer or repair facility. If your
vehicle was recently serviced or had a battery
failure or replacement, you may need to do
nothing more than drive your vehicle as you
normally would in order for your OBD II system
to update. A recheck with the above test routine
may then indicate that the system is now ready.
Regardless of whether your vehicle's OBD II
system is ready or not, if the MIL is illuminated
during normal vehicle operation you should
have your vehicle serviced before going to the
I/M station. The I/M station can fail your vehicle
because the MIL is on with the engine running.
3
21_DPF_OM_EN_USC_t.book Page 117
Page 356 of 463
354SERVICING AND MAINTENANCE
MAINTENANCE PLAN
Refer to the maintenance plan on the following
pages for required maintenance. More frequent
maintenance may be needed in severe
conditions, such as dusty areas and very short
trip driving. In some extreme conditions,
additional maintenance not specified in the
maintenance schedule may be required.
NOTE:
Using white lithium grease, lubricate the door
hinge pivot joints twice a year to prevent prema-
ture wear.
At Every Oil Change Interval As Indicated By Oil Change Indicator System:
Change oil and filter.
Rotate the tires. Rotate at the first sign of
irregular wear, even if it occurs before the
oil indicator system turns on.
Inspect engine cooling system protection
and hoses.
Inspect exhaust system.
Inspect engine air cleaner filter if using in
dusty or off-road conditions. Replace the
engine air cleaner filter, if necessary.
Inspect battery and clean and tighten termi -
nals as required.
Inspect the CV/Universal joints.
Inspect automatic transmission fluid if
equipped with dipstick.
Inspect brake pads, shoes, rotors, drums,
hoses and parking brake.
At Every Oil Change Interval As Indicated
By Oil Change Indicator System:
Inspect front end, and lubricate — If
equipped with serviceable fittings.
Inspect and replace the Evaporative
System Fresh Air Filter as necessary,
replacement may be more frequent if
vehicle is operated in extreme dusty
conditions.
At Every Oil Change Interval As Indicated By Oil Change Indicator System:
21_DPF_OM_EN_USC_t.book Page 354
Page 369 of 463

SERVICING AND MAINTENANCE367
NOTE:
Replacement batteries should both be of equal
capacity to prevent damage to the vehicle's
charging system.
PRESSURE WASHING
Cleaning the engine compartment with a high
pressure washer is not recommended.
VEHICLE MAINTENANCE
An authorized dealer has the qualified service
personnel, special tools, and equipment to
perform all service operations in an expert
manner. Service Manuals are available which
include detailed service information for your
vehicle. Refer to these Service Manuals before
attempting any procedure yourself.
NOTE:
Intentional tampering with emissions control
systems may void your warranty and could
result in civil penalties being assessed against
you.
WARNING!
Battery fluid is a corrosive acid solution and
can burn or even blind you. Do not allow
battery fluid to contact your eyes, skin, or
clothing. Do not lean over a battery when
attaching clamps. If acid splashes in eyes
or on skin, flush the area immediately with
large amounts of water Úpage 345.
Battery gas is flammable and explosive.
Keep flame or sparks away from the
battery. Do not use a booster battery or any
other booster source with an output greater
than 12 Volts. Do not allow cable clamps to
touch each other.
Battery posts, terminals, and related acces -
sories contain lead and lead compounds.
Wash hands after handling.
CAUTION!
It is essential when replacing the cables
on the battery that the positive cable is
attached to the positive post and the nega -
tive cable is attached to the negative post.
Battery posts are marked positive (+) and
negative (-) and are identified on the battery
case. Cable clamps should be tight on the
terminal posts and free of corrosion.
If a “fast charger” is used while the battery
is in the vehicle, disconnect both vehicle
battery cables before connecting the
charger to the battery. Do not use a “fast
charger” to provide starting voltage.
CAUTION!
Precautions have been taken to safeguard
all parts and connections however, the
pressures generated by these machines is
such that complete protection against water
ingress cannot be guaranteed.
WARNING!
You can be badly injured working on or
around a motor vehicle. Only do service work
for which you have the knowledge and the
proper equipment. If you have any doubt
about your ability to perform a service job,
take your vehicle to a competent mechanic.
8
21_DPF_OM_EN_USC_t.book Page 367
Page 396 of 463

394SERVICING AND MAINTENANCE
(Continued)
FUSES
General Information The fuses protect electrical systems against
excessive current.
When a device does not work, you must check
the fuse element inside the blade fuse for a
break/melt.
Also, please be aware that when using power
outlets for extended periods of time with the
engine off may result in vehicle battery
discharge.
Blade Fuses
PERFORMED BY
PERFORMED AT
Noise Systems Maintenance Chart and Service Log — Insert Month, Day, Year under column mileage closest to the mileage at which
service was performed.
WARNING!
When replacing a blown fuse, always use
an appropriate replacement fuse with the
same amp rating as the original fuse. Never
replace a fuse with another fuse of higher
amp rating. Never replace a blown fuse with
metal wires or any other material. Do not
place a fuse inside a circuit breaker cavity
or vice versa. Failure to use proper fuses
may result in serious personal injury, fire
and/or property damage.
Before replacing a fuse, make sure that the
ignition is off and that all the other services
are switched off and/or disengaged.
If the replaced fuse blows again, contact an
authorized dealer.
If a general protection fuse for safety
systems (air bag system, braking system),
power unit systems (engine system, trans
-
mission system) or steering system blows,
contact an authorized dealer.
WARNING! (Continued)
1 — Fuse Element
2 — Blade Fuse with a good/functional fuse
element
3 — Blade fuse with a bad/not functional fuse
element (blown fuse)
21_DPF_OM_EN_USC_t.book Page 394
Page 405 of 463

SERVICING AND MAINTENANCE403
4. Reach through the access hole of the wheel
house splash shield and disengage the bulb
access cover by rotating counterclockwise.
Bulb Access Cover
5. Disconnect the internal lamp wiring harness connector from the low beam bulb. 6. Rotate the bulb counterclockwise a quarter
turn to unlock the bulb from the lamp.
7. Pull the bulb straight out from the housing.
8. Reverse the procedure for installation of new bulb and covers.
High Beam
See below steps to replace:
1. Open the hood.
2. Disconnect and isolate the negative battery cable.
Bulb Access Cover
3. Look under the hood and behind the headlamp to find the high beam bulb
access cover. 4. Reach behind the headlamp and disengage
the access cover by rotating counter -
clockwise.
5. Disconnect the internal lamp wiring harness connector from the high beam bulb.
6. Rotate the bulb counterclockwise a quarter turn to unlock the bulb from the lamp.
7. Pull the bulb straight out from the housing.
8. Reverse the procedure for installation of new bulb and covers.
CAUTION!
Do not contaminate the bulb glass by
touching it with your fingers or by allowing it
to contact other oily surfaces. Shortened
bulb life will result.
Always use the correct bulb size and type for
replacement. An incorrect bulb size or type
may overheat and cause damage to the
lamp, the bulb socket, or the lamp wiring.
CAUTION!
Do not contaminate the bulb glass by
touching it with your fingers or by allowing it
to contact other oily surfaces. Shortened
bulb life will result.
Always use the correct bulb size and type
for replacement. An incorrect bulb size or
type may overheat and cause damage to
the lamp, the bulb socket, or the lamp
wiring.
8
21_DPF_OM_EN_USC_t.book Page 403
Page 452 of 463
450
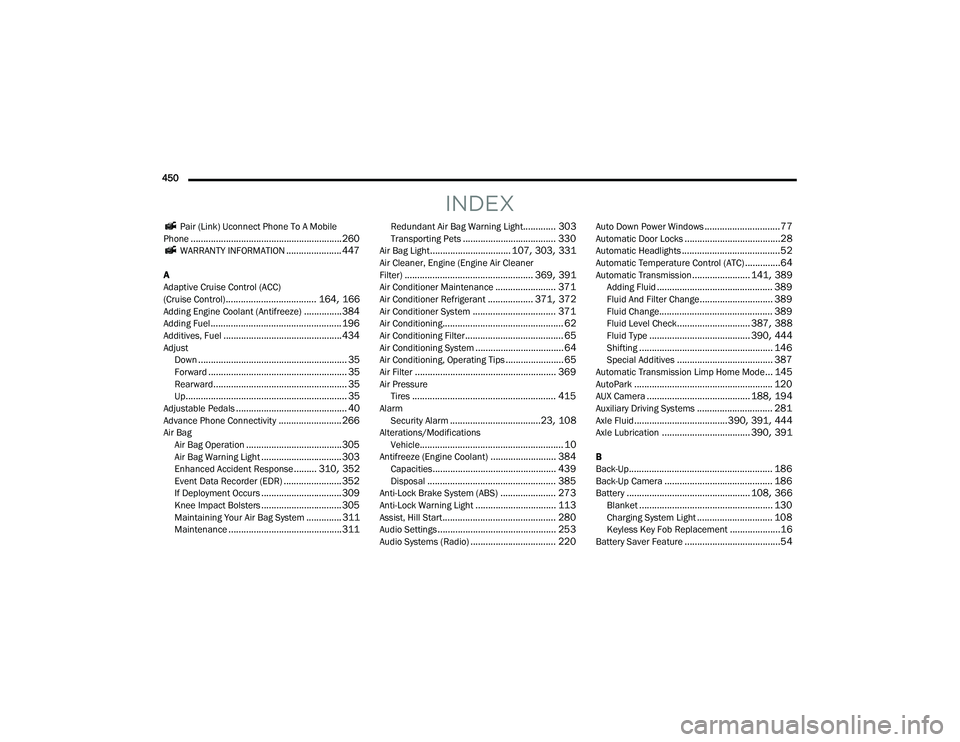
INDEX
Pair (Link) Uconnect Phone To A Mobile
Phone............................................................ 260 WARRANTY INFORMATION...................... 447
A
Adaptive Cruise Control (ACC)
(Cruise Control)
.................................... 164, 166Adding Engine Coolant (Antifreeze)............... 384Adding Fuel.................................................... 196Additives, Fuel............................................... 434Adjust Down........................................................... 35Forward....................................................... 35Rearward..................................................... 35Up................................................................ 35Adjustable Pedals............................................ 40Advance Phone Connectivity......................... 266Air BagAir Bag Operation...................................... 305Air Bag Warning Light................................ 303Enhanced Accident Response......... 310, 352Event Data Recorder (EDR)....................... 352If Deployment Occurs................................ 309Knee Impact Bolsters................................ 305Maintaining Your Air Bag System.............. 311Maintenance............................................. 311
Redundant Air Bag Warning Light............. 303Transporting Pets..................................... 330Air Bag Light................................ 107, 303, 331Air Cleaner, Engine (Engine Air Cleaner
Filter)................................................... 369, 391Air Conditioner Maintenance........................ 371Air Conditioner Refrigerant.................. 371, 372Air Conditioner System................................. 371Air Conditioning................................................ 62Air Conditioning Filter....................................... 65Air Conditioning System................................... 64Air Conditioning, Operating Tips....................... 65Air Filter........................................................ 369Air PressureTires......................................................... 415AlarmSecurity Alarm....................................23, 108Alterations/ModificationsVehicle......................................................... 10Antifreeze (Engine Coolant).......................... 384Capacities................................................. 439Disposal................................................... 385Anti-Lock Brake System (ABS)...................... 273Anti-Lock Warning Light................................ 113Assist, Hill Start............................................. 280Audio Settings............................................... 253Audio Systems (Radio).................................. 220
Auto Down Power Windows..............................77Automatic Door Locks......................................28Automatic Headlights.......................................52Automatic Temperature Control (ATC)..............64Automatic Transmission....................... 141, 389Adding Fluid.............................................. 389Fluid And Filter Change............................. 389Fluid Change............................................. 389Fluid Level Check............................. 387, 388Fluid Type........................................ 390, 444Shifting..................................................... 146Special Additives...................................... 387Automatic Transmission Limp Home Mode... 145AutoPark....................................................... 120AUX Camera......................................... 188, 194Auxiliary Driving Systems.............................. 281Axle Fluid.....................................390, 391, 444Axle Lubrication................................... 390, 391
B
Back-Up......................................................... 186Back-Up Camera........................................... 186Battery................................................. 108, 366Blanket..................................................... 130Charging System Light.............................. 108Keyless Key Fob Replacement....................16Battery Saver Feature......................................54
21_DPF_OM_EN_USC_t.book Page 450
Page 456 of 463
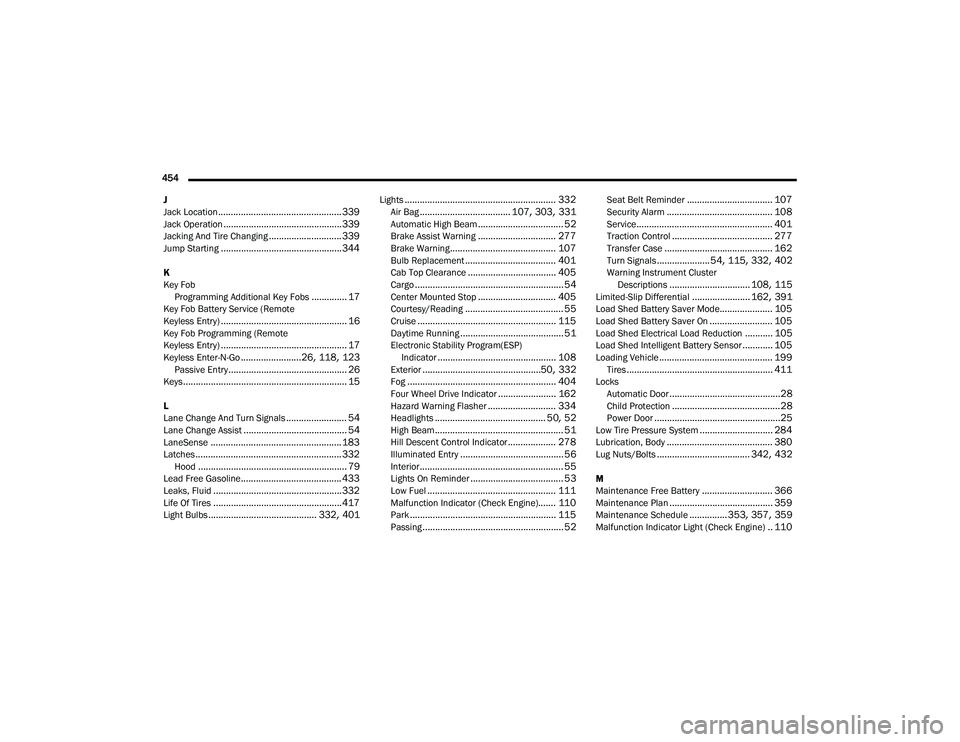
454 J
Jack Location
................................................. 339Jack Operation............................................... 339Jacking And Tire Changing............................. 339Jump Starting................................................ 344
K
Key Fob Programming Additional Key Fobs
.............. 17Key Fob Battery Service (Remote
Keyless Entry).................................................. 16Key Fob Programming (Remote
Keyless Entry).................................................. 17Keyless Enter-N-Go........................26, 118, 123Passive Entry............................................... 26Keys................................................................. 15
L
Lane Change And Turn Signals........................ 54Lane Change Assist......................................... 54LaneSense.................................................... 183Latches.......................................................... 332Hood........................................................... 79Lead Free Gasoline........................................ 433Leaks, Fluid................................................... 332Life Of Tires................................................... 417Light Bulbs........................................... 332, 401
Lights............................................................ 332Air Bag.................................... 107, 303, 331Automatic High Beam.................................. 52Brake Assist Warning............................... 277Brake Warning.......................................... 107Bulb Replacement.................................... 401Cab Top Clearance................................... 405Cargo........................................................... 54Center Mounted Stop............................... 405Courtesy/Reading....................................... 55Cruise....................................................... 115Daytime Running......................................... 51Electronic Stability Program(ESP) Indicator............................................... 108Exterior...............................................50, 332Fog........................................................... 404Four Wheel Drive Indicator....................... 162Hazard Warning Flasher........................... 334Headlights............................................ 50, 52High Beam................................................... 51Hill Descent Control Indicator................... 278Illuminated Entry......................................... 56Interior......................................................... 55Lights On Reminder..................................... 53Low Fuel................................................... 111Malfunction Indicator (Check Engine)....... 110Park.......................................................... 115Passing........................................................ 52
Seat Belt Reminder.................................. 107Security Alarm.......................................... 108Service...................................................... 401Traction Control........................................ 277Transfer Case........................................... 162Turn Signals..................... 54, 115, 332, 402Warning Instrument Cluster Descriptions................................ 108, 115Limited-Slip Differential....................... 162, 391Load Shed Battery Saver Mode..................... 105Load Shed Battery Saver On......................... 105Load Shed Electrical Load Reduction........... 105Load Shed Intelligent Battery Sensor............ 105Loading Vehicle............................................. 199Tires.......................................................... 411LocksAutomatic Door............................................28Child Protection...........................................28Power Door..................................................25Low Tire Pressure System............................. 284Lubrication, Body.......................................... 380Lug Nuts/Bolts..................................... 342, 432
M
Maintenance Free Battery............................ 366Maintenance Plan......................................... 359Maintenance Schedule............... 353, 357, 359Malfunction Indicator Light (Check Engine).. 110
21_DPF_OM_EN_USC_t.book Page 454