manual transmission RAM CHASSIS CAB 2021 Owners Manual
[x] Cancel search | Manufacturer: RAM, Model Year: 2021, Model line: CHASSIS CAB, Model: RAM CHASSIS CAB 2021Pages: 463, PDF Size: 21.5 MB
Page 6 of 463
4
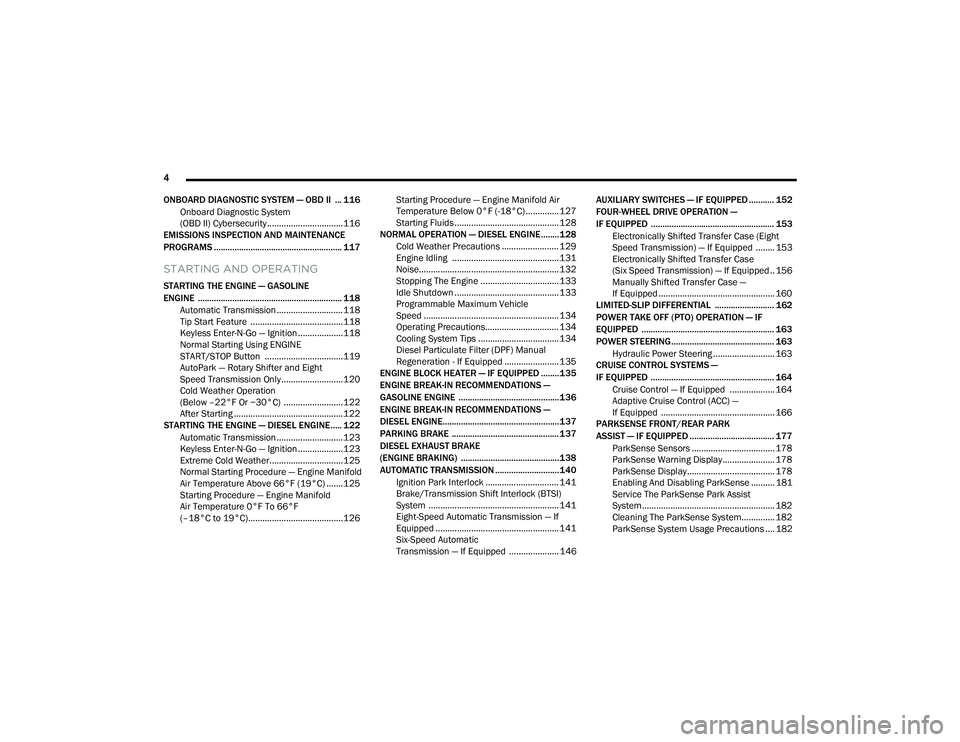
ONBOARD DIAGNOSTIC SYSTEM — OBD II ... 116 Onboard Diagnostic System
(OBD II) Cybersecurity ................................116
EMISSIONS INSPECTION AND MAINTENANCE
PROGRAMS ........................................................ 117
STARTING AND OPERATING
STARTING THE ENGINE — GASOLINE
ENGINE ............................................................... 118
Automatic Transmission ............................118
Tip Start Feature .......................................118
Keyless Enter-N-Go — Ignition ...................118Normal Starting Using ENGINE
START/STOP Button .................................119 AutoPark — Rotary Shifter and Eight
Speed Transmission Only ..........................120 Cold Weather Operation
(Below –22°F Or −30°C) .........................122 After Starting ..............................................122
STARTING THE ENGINE — DIESEL ENGINE..... 122
Automatic Transmission ............................123
Keyless Enter-N-Go — Ignition ...................123Extreme Cold Weather...............................125
Normal Starting Procedure — Engine Manifold
Air Temperature Above 66°F (19°C) .......125 Starting Procedure — Engine Manifold
Air Temperature 0°F To 66°F
(–18°C to 19°C)........................................126 Starting Procedure — Engine Manifold Air
Temperature Below 0°F (-18°C) .............. 127 Starting Fluids ............................................ 128
NORMAL OPERATION — DIESEL ENGINE ........128
Cold Weather Precautions ........................ 129
Engine Idling ............................................. 131
Noise........................................................... 132
Stopping The Engine ................................. 133
Idle Shutdown ............................................ 133Programmable Maximum Vehicle
Speed ......................................................... 134 Operating Precautions............................... 134Cooling System Tips .................................. 134Diesel Particulate Filter (DPF) Manual
Regeneration - If Equipped ....................... 135
ENGINE BLOCK HEATER — IF EQUIPPED ........135
ENGINE BREAK-IN RECOMMENDATIONS —
GASOLINE ENGINE ............................................136
ENGINE BREAK-IN RECOMMENDATIONS —
DIESEL ENGINE...................................................137
PARKING BRAKE ............................................... 137
DIESEL EXHAUST BRAKE
(ENGINE BRAKING) ...........................................138
AUTOMATIC TRANSMISSION ............................ 140 Ignition Park Interlock ............................... 141Brake/Transmission Shift Interlock (BTSI)
System ....................................................... 141 Eight-Speed Automatic Transmission — If
Equipped .................................................... 141 Six-Speed Automatic
Transmission — If Equipped ..................... 146 AUXILIARY SWITCHES — IF EQUIPPED ........... 152
FOUR-WHEEL DRIVE OPERATION —
IF EQUIPPED ...................................................... 153
Electronically Shifted Transfer Case (Eight
Speed Transmission) — If Equipped ........ 153 Electronically Shifted Transfer Case
(Six Speed Transmission) — If Equipped .. 156 Manually Shifted Transfer Case —
If Equipped ................................................. 160
LIMITED-SLIP DIFFERENTIAL .......................... 162
POWER TAKE OFF (PTO) OPERATION — IF
EQUIPPED .......................................................... 163
POWER STEERING............................................. 163
Hydraulic Power Steering .......................... 163
CRUISE CONTROL SYSTEMS —
IF EQUIPPED ...................................................... 164
Cruise Control — If Equipped ................... 164
Adaptive Cruise Control (ACC) —
If Equipped ................................................ 166
PARKSENSE FRONT/REAR PARK
ASSIST — IF EQUIPPED ..................................... 177
ParkSense Sensors ................................... 178
ParkSense Warning Display...................... 178
ParkSense Display..................................... 178
Enabling And Disabling ParkSense .......... 181Service The ParkSense Park Assist
System........................................................ 182 Cleaning The ParkSense System.............. 182
ParkSense System Usage Precautions .... 182
21_DPF_OM_EN_USC_t.book Page 4
Page 8 of 463
6
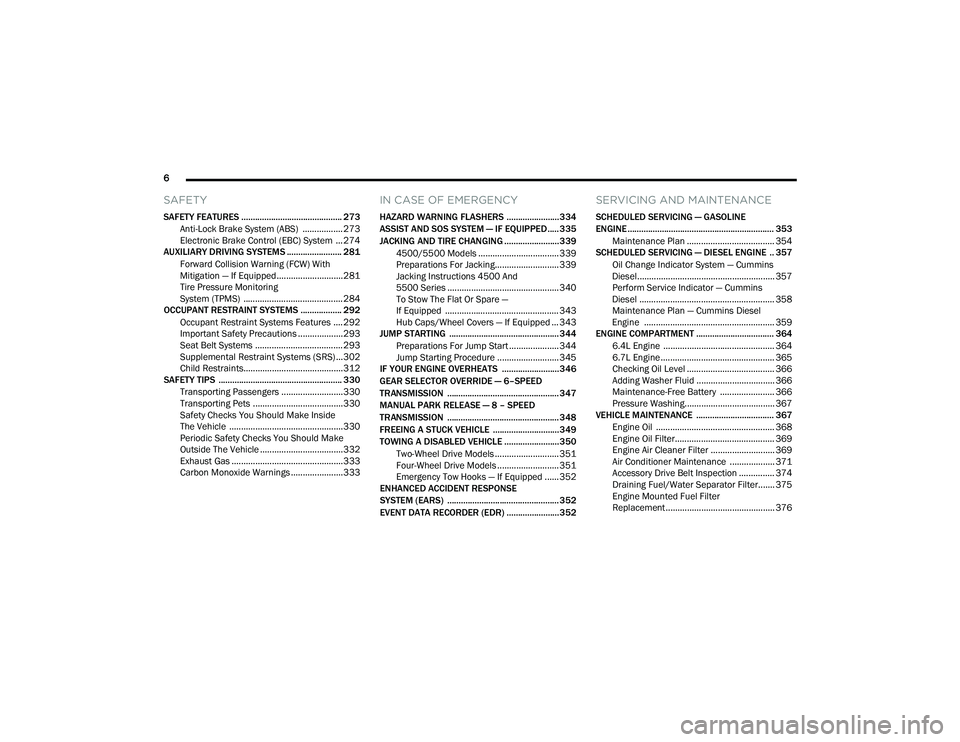
SAFETY
SAFETY FEATURES ............................................ 273
Anti-Lock Brake System (ABS) ................. 273
Electronic Brake Control (EBC) System ...274
AUXILIARY DRIVING SYSTEMS ........................ 281
Forward Collision Warning (FCW) With
Mitigation — If Equipped............................281 Tire Pressure Monitoring
System (TPMS) ..........................................284
OCCUPANT RESTRAINT SYSTEMS .................. 292
Occupant Restraint Systems Features ....292
Important Safety Precautions ...................293Seat Belt Systems ..................................... 293Supplemental Restraint Systems (SRS) ...302Child Restraints..........................................312
SAFETY TIPS ...................................................... 330
Transporting Passengers ..........................330
Transporting Pets ......................................330
Safety Checks You Should Make Inside
The Vehicle ................................................330 Periodic Safety Checks You Should Make
Outside The Vehicle ...................................332 Exhaust Gas ...............................................333Carbon Monoxide Warnings ......................333
IN CASE OF EMERGENCY
HAZARD WARNING FLASHERS .......................334
ASSIST AND SOS SYSTEM — IF EQUIPPED..... 335
JACKING AND TIRE CHANGING ........................339
4500/5500 Models .................................. 339Preparations For Jacking........................... 339
Jacking Instructions 4500 And
5500 Series ............................................... 340 To Stow The Flat Or Spare —
If Equipped ................................................ 343 Hub Caps/Wheel Covers — If Equipped ... 343
JUMP STARTING ................................................ 344
Preparations For Jump Start ..................... 344Jump Starting Procedure .......................... 345
IF YOUR ENGINE OVERHEATS .........................346
GEAR SELECTOR OVERRIDE — 6–SPEED
TRANSMISSION ................................................. 347
MANUAL PARK RELEASE — 8 – SPEED
TRANSMISSION ................................................. 348
FREEING A STUCK VEHICLE .............................349
TOWING A DISABLED VEHICLE ........................350 Two-Wheel Drive Models ........................... 351
Four-Wheel Drive Models .......................... 351Emergency Tow Hooks — If Equipped ...... 352
ENHANCED ACCIDENT RESPONSE
SYSTEM (EARS) ................................................. 352
EVENT DATA RECORDER (EDR) .......................352
SERVICING AND MAINTENANCE
SCHEDULED SERVICING — GASOLINE
ENGINE ................................................................ 353
Maintenance Plan ..................................... 354
SCHEDULED SERVICING — DIESEL ENGINE .. 357
Oil Change Indicator System — Cummins
Diesel.......................................................... 357 Perform Service Indicator — Cummins
Diesel ......................................................... 358 Maintenance Plan — Cummins Diesel
Engine ....................................................... 359
ENGINE COMPARTMENT .................................. 364
6.4L Engine ............................................... 364
6.7L Engine ................................................ 365
Checking Oil Level ..................................... 366
Adding Washer Fluid ................................. 366Maintenance-Free Battery ....................... 366Pressure Washing...................................... 367
VEHICLE MAINTENANCE .................................. 367
Engine Oil .................................................. 368
Engine Oil Filter.......................................... 369
Engine Air Cleaner Filter ........................... 369
Air Conditioner Maintenance ................... 371
Accessory Drive Belt Inspection ............... 374Draining Fuel/Water Separator Filter....... 375Engine Mounted Fuel Filter
Replacement.............................................. 376
21_DPF_OM_EN_USC_t.book Page 6
Page 11 of 463
9
INTRODUCTION
Dear Customer,
Congratulations on the purchase of your new Ram. Be assured that it represents precision workmanship, distinctive styling, and high quality.
This is a specialized utility vehicle. It can go places and perform tasks that are not intended for conventional passenger vehicles. It handles and
maneuvers differently from many passenger vehicles both on-road and off-road, so take time to become familiar with your vehicle. If equipped, the
two-wheel drive version of this vehicle was designed for on-road use only. It is not intended for off-road driving or use in other severe conditions suited
for a four-wheel drive vehicle. Before you start to drive this vehicle, read the Owner’s Manual. Be sure you are familiar with all vehicle controls,
particularly those used for braking, steering, transmission, and transfer case shifting. Learn how your vehicle handles on different road surfaces.
Your driving skills will improve with experience. When driving off-road, or working the vehicle, don’t overload the vehicle or expect the vehicle to
overcome the natural laws of physics. Always observe federal, state, provincial and local laws wherever you drive. As with other vehicles of this type,
failure to operate this vehicle correctly may result in loss of control or a collision Úpage 218.
This Owner's Manual has been prepared with the assistance of service and engineering specialists to acquaint you with the operation and maintenance
of your vehicle. It is supplemented by customer-oriented documents. Within this information, you will find a description of the services that FCA US LLC
offers to its customers as well as the details of the terms and conditions for maintaining its validity. Please take the time to read all of these publications
carefully before driving your vehicle for the first time. Following the instructions, recommendations, tips, and important warnings in this manual will help
ensure safe and enjoyable operation of your vehicle.
This Owner’s Manual describes all versions of this vehicle. Options and equipment dedicated to specific markets or versions are not expressly indicated
in the text. Therefore, you should only consider the information that is related to the trim level, engine, and version that you have purchased. Any content
introduced throughout the Owner’s Information, which may or may not be applicable to your vehicle, will be identified with the wording “If Equipped”.
All data contained in this publication are intended to help you use your vehicle in the best possible way. FCA US LLC aims at a constant improvement
of the vehicles produced. For this reason, it reserves the right to make changes to the model described for technical and/or commercial reasons.
For further information, contact an authorized dealer.
When it comes to service, remember that authorized dealers know your Ram best, have factory-trained technicians and genuine MOPAR® parts, and
care about your satisfaction.
1
21_DPF_OM_EN_USC_t.book Page 9
Page 56 of 463

54GETTING TO KNOW YOUR VEHICLE
TURN SIGNALS
Move the multifunction lever up or down to
activate the turn signals. The arrows on each
side of the instrument cluster flash to show
proper operation.
NOTE:
If either light remains on and does not flash, or
there is a very fast flash rate, check for a defec -
tive outside light bulb.
LANE CHANGE ASSIST — IF EQUIPPED
Lightly push the multifunction lever up or down,
without moving beyond the detent, and the turn
signal will flash three times then automatically
turn off.
CARGO LIGHTS/TRAILER SPOTTER
L
IGHTS — IF EQUIPPED
The cargo lights (if equipped) and trailer spotter
lights (if equipped) are turned on by pushing the
cargo lights button located on the lower half of
the headlight switch.
Cargo Lights Button On Headlight Switch
The cargo lights will turn on for approximately
60 seconds when a key fob unlock button is
pushed, as part of the Illuminated Entry feature.
When these lights are activated using the
button on the headlight switch, the trailer
spotter lights will remain illuminated when
the vehicle transmission is in PARK, NEUTRAL,
or REVERSE. The trailer spotter lights will turn
off when the vehicle transmission is placed in
DRIVE.
BATTERY SAVER
Timers are set to both the interior and exterior
lights to protect the life of your vehicle’s battery.
If the ignition is OFF, the interior lights will
automatically turn off when:
Any door is left ajar for 10 minutes.
The Dome Off button is pushed.
The cargo and spotter lights are manually
activated by the headlight switch.
NOTE:
Battery saver mode is canceled if the ignition is
ON.
If the headlights remain on while the ignition is
placed in the OFF position, the exterior lights will
automatically turn off after eight minutes. If the
headlights are turned on and left on for eight
minutes while the ignition is OFF, the exterior
lights will automatically turn off.
21_DPF_OM_EN_USC_t.book Page 54
Page 120 of 463

118 (Continued)
STARTING AND OPERATING
STARTING THE ENGINE — GASOLINE
ENGINE
Before starting your vehicle, adjust your seat,
adjust both inside and outside mirrors, and
fasten your seat belt.
The starter should not be operated for more
than 10-second intervals. Waiting a few
seconds between such intervals will protect the
starter from overheating.
AUTOMATIC TRANSMISSION
Start the engine with the transmission in the
PARK position. Apply the brake before shifting
into any driving range. NOTE:
This vehicle is equipped with a transmission
shift interlocking system. The brake pedal
must be pressed to shift out of PARK.
If equipped with an eight-speed transmis
-
sion, starting the vehicle in NEUTRAL is not
possible unless the Manual Park Release has
been activated. For the Manual Park Release
operation information Ú page 348.
TIP START FEATURE
Do not press the accelerator. Place the ignition
switch briefly to the START position and release
it. The starter motor will continue to run and will
automatically disengage when the engine is
running.
KEYLESS ENTER-N-GO — IGNITION
This feature allows the driver to operate the
ignition switch with the push of a button, as long
as the Remote Start/Keyless Enter-N-Go key
fob is in the passenger compartment.
WARNING!
When leaving the vehicle, always make
sure the keyless ignition node is in the OFF
mode, remove the key fob from the vehicle
and lock the vehicle.
Never leave children alone in a vehicle, or with
access to an unlocked vehicle. Allowing chil -
dren to be in a vehicle unattended is dangerous
for a number of reasons. A child or others could
be seriously or fatally injured. Children should
be warned not to touch the parking brake,
brake pedal or the gear selector.
Do not leave the key fob in or near the
vehicle, or in a location accessible to chil-
dren, and do not leave the ignition of a
vehicle equipped with Keyless Enter-N-Go
in the ACC or ON/RUN mode. A child could
operate power windows, other controls, or
move the vehicle.
Do not leave children or animals inside
parked vehicles in hot weather. Interior
heat build-up may cause serious injury or
death.
WARNING! (Continued)
21_DPF_OM_EN_USC_t.book Page 118
Page 144 of 463

142STARTING AND OPERATING
(Continued)
Only shift from DRIVE to PARK or REVERSE
when the accelerator pedal is released and the
vehicle is stopped. Be sure to keep your foot on
the brake pedal when shifting between these
gears.
The transmission gear selector has only PARK,
REVERSE, NEUTRAL, and DRIVE positions.
Manual downshifts can be made using the
Electronic Range Select (ERS) shift control.
Pressing the GEAR -/GEAR + switches (on the
steering wheel) while in the DRIVE position will
select the highest available transmission gear,
and will display that gear limit in the instrument
cluster as 1, 2, 3, etc Úpage 145. Some
models will display both the selected gear limit,
and the actual current gear, while in ERS mode.
Electronic Transmission Gear Selector
Gear Ranges
Do not press the accelerator pedal when
shifting from PARK or NEUTRAL into another
gear range.
NOTE:
After selecting any gear range, wait a moment
to allow the selected gear to engage before
accelerating. This is especially important when
the engine is cold.
PARK (P)
This range supplements the parking brake by
locking the transmission. The engine can be
started in this range. Never attempt to use
PARK while the vehicle is in motion. Apply the
parking brake when exiting the vehicle in this
range.
When parking on a hill, apply the parking brake
before shifting the transmission to PARK. As an
added precaution, turn the front wheels toward
the curb on a downhill grade and away from the
curb on an uphill grade. NOTE:
On four-wheel drive vehicles be sure that the
transfer case is in a drive position.
When exiting the vehicle, always:
Apply the parking brake.
Shift the transmission into PARK.
Turn the engine off.
Remove the key fob.
WARNING!
Never use the PARK position as a substi
-
tute for the parking brake. Always apply the
parking brake fully when exiting the vehicle
to guard against vehicle movement and
possible injury or damage.
Your vehicle could move and injure you and
others if it is not in PARK. Check by trying to
move the transmission gear selector out of
PARK with the brake pedal released. Make
sure the transmission is in PARK before
exiting the vehicle.
21_DPF_OM_EN_USC_t.book Page 142
Page 149 of 463
STARTING AND OPERATING147
(Continued)
The electronically-controlled transmission
provides a precise shift schedule. The
transmission electronics are self-calibrating;
therefore, the first few shifts on a new vehicle
may be somewhat abrupt. This is a normal
condition, and precision shifts will develop
within a few hundred miles (kilometers).
Only shift from DRIVE to PARK or REVERSE
when the accelerator pedal is released and the
vehicle is stopped. Be sure to keep your foot on
the brake pedal when shifting between these
gears.
The transmission gear selector has only PARK,
REVERSE, NEUTRAL, and DRIVE shift positions.
Manual downshifts can be made using the
Electronic Range Select (ERS) shift control.
Pushing the ERS (-/+) switches (on the steering
wheel) while in the DRIVE position will select the
highest available transmission gear, and will
display that gear limit in the instrument cluster
as 1, 2, 3, etc Ú page 150. Some models will
display both the selected gear limit, and the
actual current gear, while in ERS mode.Gear Ranges
Do not press the accelerator pedal when
shifting from PARK or NEUTRAL into another
gear range.
NOTE:
After selecting any gear range, wait a moment
to allow the selected gear to engage before
accelerating. This is especially important when
the engine is cold.
PARK (P)
This range supplements the parking brake by
locking the transmission. The engine can be
started in this range. Never attempt to use
PARK while the vehicle is in motion. Apply the
parking brake when exiting the vehicle in this
range.
When parking on a hill, apply the parking brake
before shifting the transmission to PARK,
otherwise the load on the transmission locking
mechanism may make it difficult to move the
gear selector out of PARK. As an added
precaution, turn the front wheels toward the
curb on a downhill grade and away from the
curb on an uphill grade. NOTE:
On four-wheel drive vehicles be sure that the
transfer case is in a drive position.
When exiting the vehicle, always:
Apply the parking brake.
Shift the transmission into PARK.
Turn the engine off.
Remove the key fob.
WARNING!
Never use the PARK position as a substi
-
tute for the parking brake. Always apply the
parking brake fully when exiting the vehicle
to guard against vehicle movement and
possible injury or damage.
Your vehicle could move and injure you and
others if it is not in PARK. Check by trying to
move the gear selector out of PARK with the
brake pedal released. Make sure the trans -
mission is in PARK before exiting the vehicle.
4
21_DPF_OM_EN_USC_t.book Page 147
Page 155 of 463
STARTING AND OPERATING153
(Continued)
FOUR-WHEEL DRIVE OPERATION — IF
EQUIPPED
Four-wheel drive trucks are equipped with
either a manually shifted transfer case or an
electronically shifted transfer case.
ELECTRONICALLY SHIFTED TRANSFER
C
ASE (EIGHT SPEED TRANSMISSION) —
I
F EQUIPPED
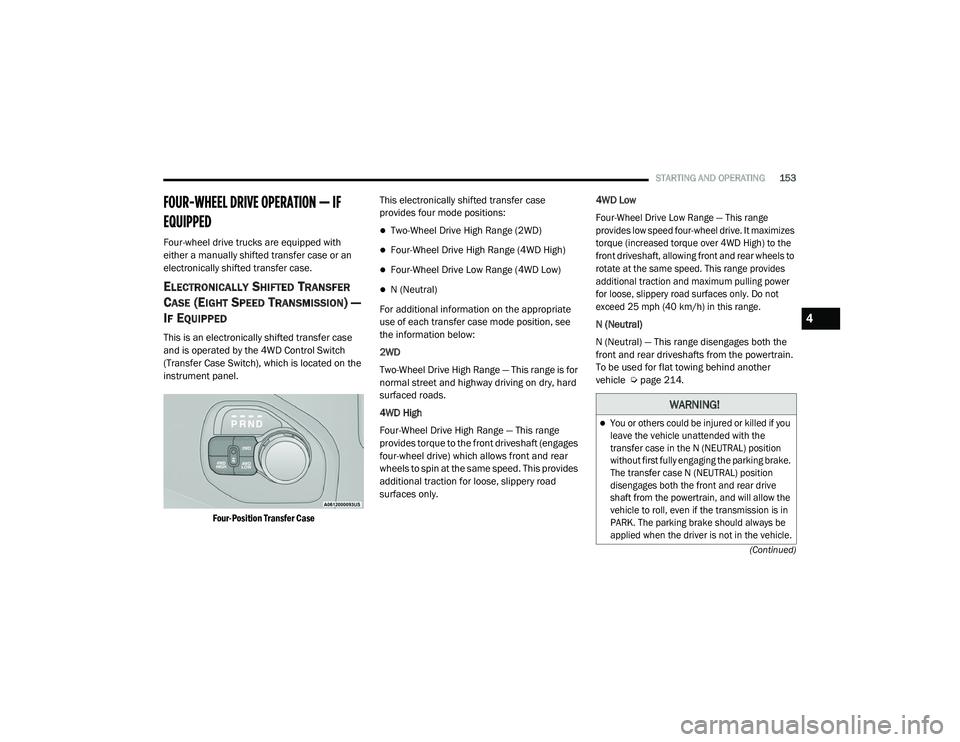
This is an electronically shifted transfer case
and is operated by the 4WD Control Switch
(Transfer Case Switch), which is located on the
instrument panel.
Four-Position Transfer Case
This electronically shifted transfer case
provides four mode positions:
Two-Wheel Drive High Range (2WD)
Four-Wheel Drive High Range (4WD High)
Four-Wheel Drive Low Range (4WD Low)
N (Neutral)
For additional information on the appropriate
use of each transfer case mode position, see
the information below:
2WD
Two-Wheel Drive High Range — This range is for
normal street and highway driving on dry, hard
surfaced roads.
4WD High
Four-Wheel Drive High Range — This range
provides torque to the front driveshaft (engages
four-wheel drive) which allows front and rear
wheels to spin at the same speed. This provides
additional traction for loose, slippery road
surfaces only. 4WD Low
Four-Wheel Drive Low Range — This range
provides low speed four-wheel drive. It maximizes
torque (increased torque over 4WD High) to the
front driveshaft, allowing front and rear wheels to
rotate at the same speed. This range provides
additional traction and maximum pulling power
for loose, slippery road surfaces only. Do not
exceed 25 mph (40 km/h) in this range.
N (Neutral)
N (Neutral) — This range disengages both the
front and rear driveshafts from the powertrain.
To be used for flat towing behind another
vehicle Ú
page 214.
WARNING!
You or others could be injured or killed if you
leave the vehicle unattended with the
transfer case in the N (NEUTRAL) position
without first fully engaging the parking brake.
The transfer case N (NEUTRAL) position
disengages both the front and rear drive
shaft from the powertrain, and will allow the
vehicle to roll, even if the transmission is in
PARK. The parking brake should always be
applied when the driver is not in the vehicle.
4
21_DPF_OM_EN_USC_t.book Page 153
Page 162 of 463

160STARTING AND OPERATING
Alternate Procedure
1. Bring the vehicle to a complete stop.
2. With the ignition switch in the ON position
and the engine running, shift the
transmission into NEUTRAL.
3. Push the desired position on the transfer case control switch.
4. After the desired position indicator light is on (not flashing), shift the transmission
back into gear.
NOTE:
If Steps 1 or 2 of either the Preferred or Alter -
nate Procedure are not satisfied prior to
attempting the shift, then the desired posi -
tion indicator light will flash continuously
while the original position indicator light is
on, until all requirements have been met.
The ignition switch must be in the ON position
for a shift to take place and for the position
indicator lights to be operable. If the ignition
switch is not in the ON position, the shift will
not take place and no position indicator lights
will be on or flashing.
MANUALLY SHIFTED TRANSFER CASE —
I
F EQUIPPED
The transfer case provides four mode positions:
Two-Wheel Drive High Range (2H)
Four-Wheel Drive Lock High Range (4H)
N (Neutral)
Four-Wheel Drive Low Range (4L)
For additional information on the appropriate
use of each transfer case mode position, see
the information below:
2H
Two-Wheel Drive High Range — This range is for
normal street and highway driving on dry, hard
surfaced roads.
4H
Four-Wheel Drive Lock High Range — This range
locks the front and rear driveshafts together
forcing the front and rear wheels to rotate at
the same speed. Additional traction for loose,
slippery road surfaces only. N (Neutral)
N (Neutral) — This range disengages both the
front and rear driveshafts from the powertrain.
To be used for flat towing behind another
vehicle Ú
page 214.
4L
Four-Wheel Drive Low Range — This range locks
the front and rear driveshafts together forcing
the front and rear wheels to rotate at the same
speed. Additional traction and maximum pulling
power for loose, slippery road surfaces only.
Do not exceed 25 mph (40 km/h).
This transfer case is intended to be driven in
the 2H position for normal street and highway
conditions such as dry, hard surfaced roads.
When additional traction is required, the 4H and
4L positions can be used to lock the front and
rear driveshafts together and force the front
and rear wheels to rotate at the same speed.
This is accomplished by simply moving the gear
selector to the desired positions once the
appropriate speed and gear requirements are
met Ú page 159.
21_DPF_OM_EN_USC_t.book Page 160
Page 163 of 463

STARTING AND OPERATING161
The 4H and 4L positions are intended for loose,
slippery road surfaces only. Driving in the 4H
and 4L positions on dry, hard surfaced roads
may cause increased tire wear and damage to
the driveline components.
The “Transfer Case Position Indicator Light” in
the instrument cluster will alert the driver that
the vehicle is in four-wheel drive and that the
front and rear driveshafts are locked together.
This light will illuminate when the transfer case
is shifted into either the 4H or 4L position. There
is no light for the 2H or N (Neutral) positions on
some models.
When operating your vehicle in 4L, the engine
speed is approximately three times that of the
4H or 4L positions at a given road speed. Take
care not to overspeed the engine and do not
exceed 25 mph (40 km/h).
Proper operation of four-wheel drive vehicles
depends on tires of equal size, type and
circumference on each wheel. Any difference
will adversely affect shifting and can cause
damage to the drivetrain. NOTE:
Do not attempt to make a shift while only the
front or rear wheels are spinning, as this can
cause damage to driveline components.
Because four-wheel drive provides improved
traction, there is a tendency to exceed safe
turning and stopping speeds. Do not go faster
than road conditions permit.
NOTE:
Delayed shifts out of four-wheel drive may be
experienced due to uneven tire wear, low or
uneven tire pressures, excessive vehicle
loading, or cold temperatures.Shifting Procedure — Manually Shifted
Transfer Case
2H To 4H
Shifting between 2H and 4H can be made with
the vehicle stopped or in motion. If the vehicle
is in motion, shifts can be made up to 55 mph
(88 km/h). With the vehicle in motion, the
transfer case will engage/disengage faster if
you momentarily release the accelerator pedal
after completing the shift. Apply a constant
force when shifting the transfer case lever.
2WD High Or 4WD High To 4WD Low
NOTE:
When shifting into or out of 4L some gear noise
may be heard. This noise is normal and is not
detrimental to the vehicle or occupants.
With the vehicle rolling at 2 to 3 mph (3 to
5 km/h), shift the transmission into NEUTRAL.
While the vehicle is coasting at 2 to 3 mph (3 to
5 km/h), shift the transfer case lever firmly to
the desired position. Do not pause in transfer
case Neutral.
WARNING!
You or others could be injured or killed if you
leave the vehicle unattended with the transfer
case in the N (NEUTRAL) position without first
fully engaging the parking brake. The transfer
case N (NEUTRAL) position disengages both the
front and rear drive shafts from the powertrain
and will allow the vehicle to roll, even if the
transmission is in PARK. The parking brake
should always be applied when the driver is
not in the vehicle.
4
21_DPF_OM_EN_USC_t.book Page 161