weight Ram ProMaster 2018 User Guide
[x] Cancel search | Manufacturer: RAM, Model Year: 2018, Model line: ProMaster, Model: Ram ProMaster 2018Pages: 204, PDF Size: 4 MB
Page 67 of 204
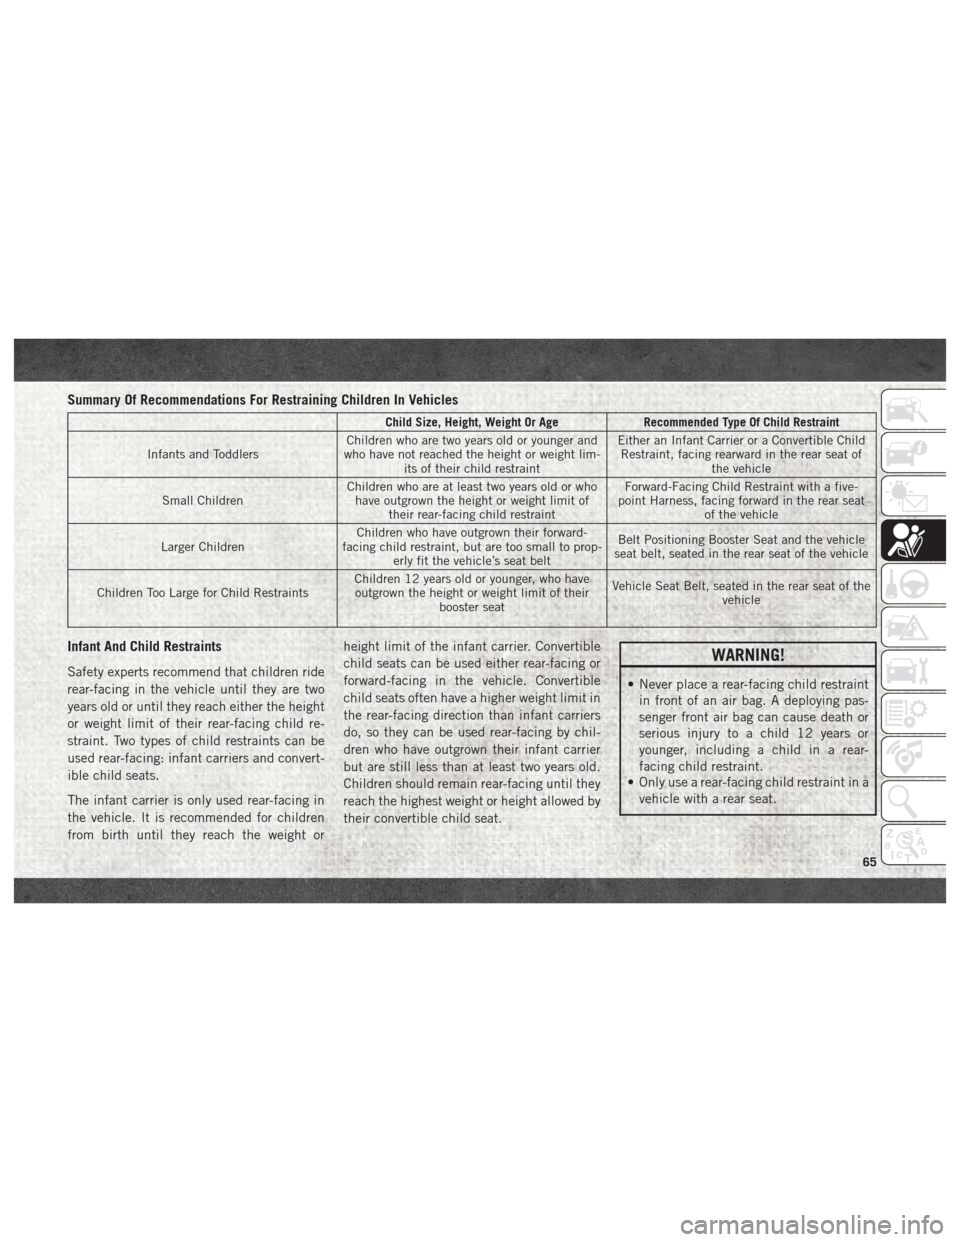
Summary Of Recommendations For Restraining Children In Vehicles
Child Size, Height, Weight Or AgeRecommended Type Of Child Restraint
Infants and Toddlers Children who are two years old or younger and
who have not reached the height or weight lim- its of their child restraint Either an Infant Carrier or a Convertible Child
Restraint, facing rearward in the rear seat of the vehicle
Small Children Children who are at least two years old or who
have outgrown the height or weight limit of their rear-facing child restraint Forward-Facing Child Restraint with a five-
point Harness, facing forward in the rear seat of the vehicle
Larger Children Children who have outgrown their forward-
facing child restraint, but are too small to prop- erly fit the vehicle’s seat belt Belt Positioning Booster Seat and the vehicle
seat belt, seated in the rear seat of the vehicle
Children Too Large for Child Restraints Children 12 years old or younger, who have
outgrown the height or weight limit of their booster seat Vehicle Seat Belt, seated in the rear seat of the
vehicle
Infant And Child Restraints
Safety experts recommend that children ride
rear-facing in the vehicle until they are two
years old or until they reach either the height
or weight limit of their rear-facing child re-
straint. Two types of child restraints can be
used rear-facing: infant carriers and convert-
ible child seats.
The infant carrier is only used rear-facing in
the vehicle. It is recommended for children
from birth until they reach the weight or height limit of the infant carrier. Convertible
child seats can be used either rear-facing or
forward-facing in the vehicle. Convertible
child seats often have a higher weight limit in
the rear-facing direction than infant carriers
do, so they can be used rear-facing by chil-
dren who have outgrown their infant carrier
but are still less than at least two years old.
Children should remain rear-facing until they
reach the highest weight or height allowed by
their convertible child seat.WARNING!
• Never place a rear-facing child restraint
in front of an air bag. A deploying pas-
senger front air bag can cause death or
serious injury to a child 12 years or
younger, including a child in a rear-
facing child restraint.
• Only use a rear-facing child restraint in a
vehicle with a rear seat.
65
Page 68 of 204
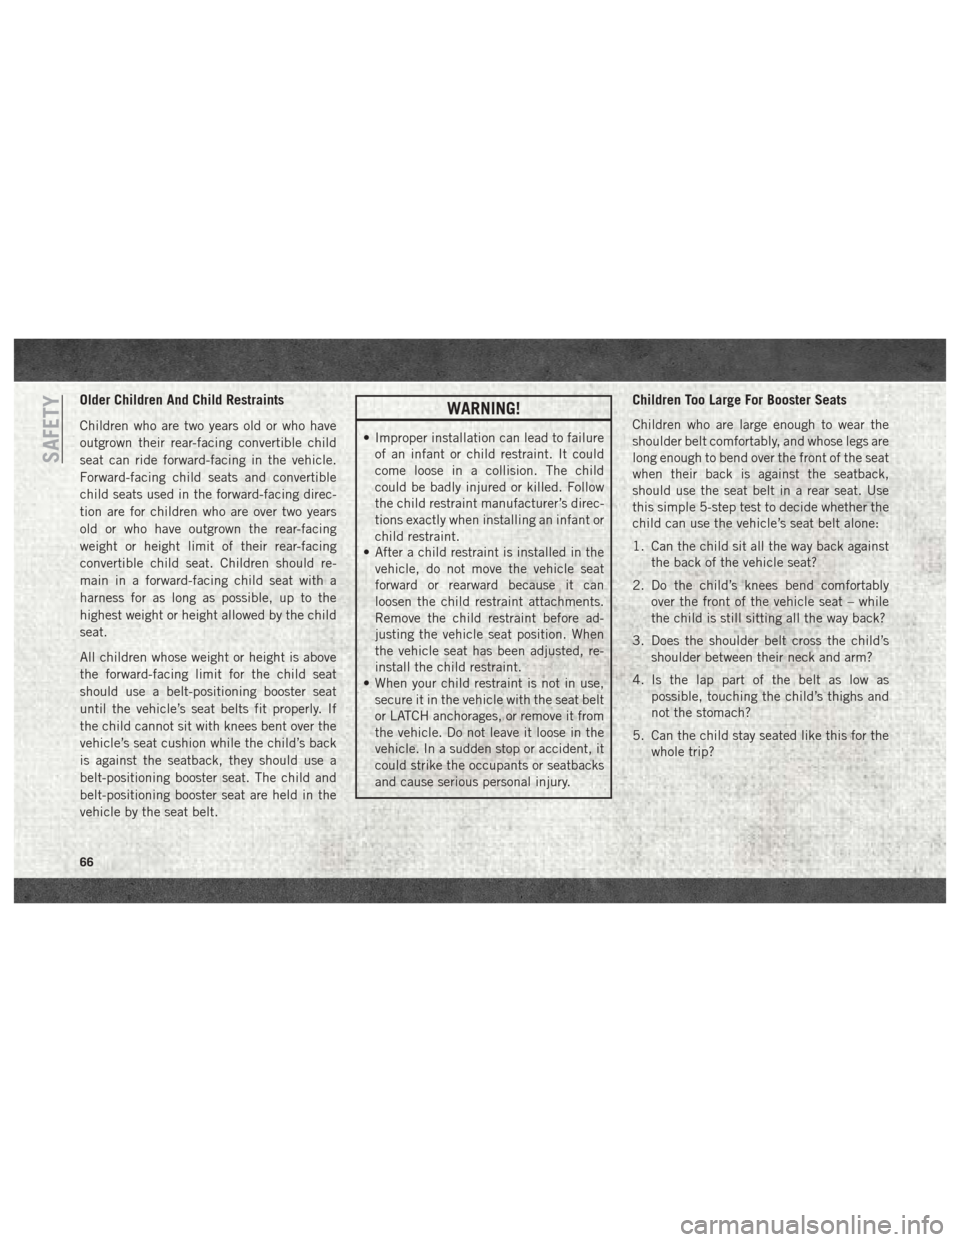
Older Children And Child Restraints
Children who are two years old or who have
outgrown their rear-facing convertible child
seat can ride forward-facing in the vehicle.
Forward-facing child seats and convertible
child seats used in the forward-facing direc-
tion are for children who are over two years
old or who have outgrown the rear-facing
weight or height limit of their rear-facing
convertible child seat. Children should re-
main in a forward-facing child seat with a
harness for as long as possible, up to the
highest weight or height allowed by the child
seat.
All children whose weight or height is above
the forward-facing limit for the child seat
should use a belt-positioning booster seat
until the vehicle’s seat belts fit properly. If
the child cannot sit with knees bent over the
vehicle’s seat cushion while the child’s back
is against the seatback, they should use a
belt-positioning booster seat. The child and
belt-positioning booster seat are held in the
vehicle by the seat belt.WARNING!
• Improper installation can lead to failureof an infant or child restraint. It could
come loose in a collision. The child
could be badly injured or killed. Follow
the child restraint manufacturer’s direc-
tions exactly when installing an infant or
child restraint.
• After a child restraint is installed in the
vehicle, do not move the vehicle seat
forward or rearward because it can
loosen the child restraint attachments.
Remove the child restraint before ad-
justing the vehicle seat position. When
the vehicle seat has been adjusted, re-
install the child restraint.
• When your child restraint is not in use,
secure it in the vehicle with the seat belt
or LATCH anchorages, or remove it from
the vehicle. Do not leave it loose in the
vehicle. In a sudden stop or accident, it
could strike the occupants or seatbacks
and cause serious personal injury.
Children Too Large For Booster Seats
Children who are large enough to wear the
shoulder belt comfortably, and whose legs are
long enough to bend over the front of the seat
when their back is against the seatback,
should use the seat belt in a rear seat. Use
this simple 5-step test to decide whether the
child can use the vehicle’s seat belt alone:
1. Can the child sit all the way back against the back of the vehicle seat?
2. Do the child’s knees bend comfortably over the front of the vehicle seat – while
the child is still sitting all the way back?
3. Does the shoulder belt cross the child’s shoulder between their neck and arm?
4. Is the lap part of the belt as low as possible, touching the child’s thighs and
not the stomach?
5. Can the child stay seated like this for the whole trip?
SAFETY
66
Page 69 of 204
If the answer to any of these questions was
“no,” then the child still needs to use a
booster seat in this vehicle. If the child is
using the lap/shoulder belt, check seat belt
fit periodically and make sure the seat belt
buckle is latched. A child’s squirming or
slouching can move the belt out of position. If
the shoulder belt contacts the face or neck,
move the child closer to the center of the
vehicle, or use a booster seat to position the
seat belt on the child correctly.
WARNING!
Never allow a child to put the shoulder belt
under an arm or behind their back. In a
crash, the shoulder belt will not protect a
child properly, which may result in serious
injury or death. A child must always wear
both the lap and shoulder portions of the
seat belt correctly.
Installing Child Restraints In Commercial
Vehicles
This commercial vehicle is not designed for
use as a family vehicle and is not intended for
carrying children in the front passenger
seat(s). Never install rear-facing child re-
straints in this vehicle. Although the seat belt
can be locked to secure a child restraint,
there are no tether anchorages to complete
the proper installation of a forward-facing
child restraint. If you must carry a child in a
forward-facing child restraint, the passenger
seat should be moved to the full rearward
position and the child must be in a proper
restraint system based on its age, size and
weight. Follow the instructions below to se-
cure the child restraint using the seat belt.
WARNING!
Rear-facing infant restraints must never be
secured in the passenger seat of a vehicle
with a passenger air bag. In a collision, a
passenger air bag may deploy causing se-
vere injury or death to infants riding in
rear-facing infant restraints.
Installing Child Restraints Using The Ve-
hicle Seat Belt
Child restraint systems are designed to be
secured in vehicle seats by lap belts or the lap
belt portion of a lap/shoulder belt.
WARNING!
• Improper installation or failure to prop-erly secure a child restraint can lead to
failure of the restraint. The child could
be badly injured or killed.
• Follow the child restraint manufacturer’s
directions exactly when installing an in-
fant or child restraint.
The seat belts in the passenger seating posi-
tions are equipped with a Switchable Auto-
matic Locking Retractor (ALR). This seat belt
is designed to keep the lap portion of the seat
belt tight around the child restraint so that it
is not necessary to use a locking clip. The
ALR retractor can be “switched” into a
locked mode by pulling all of the webbing out
of the retractor and then letting the webbing
retract back into the retractor. If it is locked,
the ALR will make a clicking noise while the
67
Page 75 of 204

STARTING AND OPERATING
STARTING THE ENGINE —
GAS ENGINE..................74
Normal Starting ................74
STARTING THE ENGINE —
DIESEL ENGINE................74
Normal Starting Procedure .........75
Extreme Cold Weather ............76
NORMAL OPERATION.............76
Stopping The Diesel Engine ........76
ENGINE BREAK-IN RECOMMENDATIONS —
GASOLINE ENGINE..............77
ENGINE BREAK-IN RECOMMENDATIONS –
DIESEL ENGINE ................77
ELECTRIC PARK BRAKE (EPB) —
DIESEL ONLY (IF EQUIPPED) ........78
Loss Of Electric Power............80
AUTOMATED MANUAL TRANSMISSION —
DIESEL ONLY..................81
Gear Ranges ..................82
Parking The Vehicle ..............84 Instrument Cluster Messages
........86
Towing The Vehicle ..............88
SPEED CONTROL...............89
To Activate...................89
To Set A Desired Speed ...........89
To Vary The Speed Setting ..........89
To Accelerate For Passing ..........90
To Resume Speed ...............91
To Deactivate ..................91
PARKSENSE REAR PARK ASSIST .....91
PARKVIEW REAR BACK-UP CAMERA . . .91
REFUELING THE VEHICLE —
GAS ENGINE ..................91
Materials Added To Fuel ..........92
REFUELING THE VEHICLE —
DIESEL ENGINE................92
Diesel Exhaust Fluid .............93
Adding Diesel Exhaust Fluid ........94
TRAILER TOWING..............95
Trailer Towing Weights (Maximum Trailer
Weight Ratings)................95
RECREATIONAL TOWING (BEHIND
MOTORHOME, ETC.) .............96
Towing This Vehicle Behind
Another Vehicle................96
Recreational Towing — Gasoline Engine
All Models ...................97
STARTING AND OPERATING
73
Page 80 of 204

• Vary accelerator pedal position at highwayspeeds when carrying or towing significant
weight.
NOTE:
Light duty operation such as light trailer
towing or no load operation will extend the
time before the engine is at full efficiency.
Reduced fuel economy and power may be
seen at this time.
The engine oil installed in the engine at the
factory is a high-quality energy conserving
type lubricant. Oil changes should be consis-
tent with anticipated climate conditions un-
der which vehicle operations will occur. The
recommended viscosity and quality grades
are shown under “Fluids And Lubricants” in
the “Technical Specifications” chapter in
this manual. NON-DETERGENT OR
STRAIGHT MINERAL OILS MUST NEVER
BE USED.ELECTRIC PARK BRAKE (EPB) —
DIESEL ONLY (IF EQUIPPED)
Your vehicle is equipped with an Electric
Park Brake System (EPB) that offers simple
operation, and some additional features that
make the park brake more convenient and
useful.
The park brake is primarily intended to pre-
vent the vehicle from rolling while parked.
Before leaving the vehicle, make sure that
the park brake is applied.
You can engage the park brake in two ways;
• Manually, by applying the park brake switch.
• Automatically, by the Auto Park Brake fea- ture whenever the vehicle speed is below
1.25 mph (2 km/h) and the ignition switch
is in the STOP/OFF position.
The park brake switch is located on the in-
strument panel to the right of the instrument
cluster. To apply the parking brake manually, pull and
tilt the top of the switch away from the
instrument panel momentarily. You may hear
a mechanical sound while the parking brake
operates; this is normal operating noise.
Once the parking brake is fully engaged, the
BRAKE warning lamp in the instrument clus-
ter and an indicator on the switch will illumi-
nate. The park brake can be applied even
Electric Park Brake SwitchSTARTING AND OPERATING
78
Page 81 of 204

when the ignition switch is OFF however, it
can only be released when the ignition switch
is in the ON/RUN position.
NOTE:
The EPB fault lamp will illuminate if the EPB
switch is held for longer than 20 seconds if
vehicle speed is less than 1.25 mph (2 kph),
or 60 seconds if vehicle speed is greater than
1.25 mph (2 kph), in either the released or
applied position. The light will extinguish
upon releasing the switch.
The park brake will automatically engage
whenever the ignition switch is turned OFF
and the vehicle speed is below 1.25 mph
(2 km/h) via the Auto Park Brake feature.
The electric park brake will automatically
release if the engine is on and all following
conditions are met:
1. Driver's weight is detected on the driver'sseat.
2. Driver's seat is locked in forward direction (if equipped with swivel seat).
3. Transmission is in forward or reverse gears. 4. The accelerator pedal is pressed.
Or
1. Driver’s weight is detected on the driver’s
seat.
2. Driver’s seat is locked in forward direction (if equipped with swivel seat).
3. Transmission is moved from NEUTRAL to DRIVE or REVERSE gears.
4. Brake pedal is pressed.
5. Vehicle is on a slope less than 5 percent.
To release the park brake manually, the igni-
tion switch must be in the ON/RUN position.
Put your foot on the brake pedal, then push
the parking brake switch down momentarily.
Once the park brake is fully disengaged, the
BRAKE warning lamp in the instrument clus-
ter and the LED indicator on the switch will
extinguish.
If during drive away the driver pulls the EPB
switch (apply position) the drive away is
halted and EPB will be reapplied.WARNING!
To prevent SERIOUS INJURY or DEATH:
• NEVER install a driver seat cover or any other accessory on your driver seat.
• NEVER make any modifications to the
driver seat components, assembly, or
factory installed seat cover.
• NEVER place objects under the driver
seat.
If your driver seat needs service for any
reason, take your vehicle to your autho-
rized dealer immediately.
NOTE:
• When parking on a hill, it is important to turn the front wheels toward the curb on a
downhill grade and away from the curb on
an uphill grade. The parking brake should
always be applied whenever the driver is not
in the vehicle.
• The Electronic Park Brake system commu- nicates with the Driver Presence Detection
sensor installed in the driver seat. The use
of seat covers or seat accessories could
79
Page 97 of 204

CAUTION!
• When DEF is spilled, clean the areaimmediately with water and use an ab-
sorbent material to soak up the spills on
the ground.
• Do not attempt to start your engine if DEF is accidentally added to the diesel
fuel tank as it can result in severe dam-
age to your engine, including but not
limited to failure of the fuel pump and
injectors.
• Never add anything other than DEF to the tank – especially any form of hydro-
carbon such as diesel fuel, fuel system
additives, gasoline, or any other
petroleum-based product. Even a very
small amount of these, less than
100 parts per million or less than 1 oz.
per 78 gallons (295 liters) will contami-
nate the entire DEF system and will
require replacement. If owners use a
container, funnel or nozzle when refilling
the tank, it should either be new or one
that is has only been used for adding
DEF. Mopar provides an attachable
nozzle with its DEF for this purpose. 3. Stop filling the DEF tank immediately
when any of the following happen:
• DEF stops flowing from the fill bottle into the DEF tank.
• DEF splashes out the filler neck.
• DEF pump nozzle automatically shuts off.
4. Reinstall cap onto DEF filler neck.
Filling The Def Tank In Cold Climates
Since DEF will begin to freeze at 12°F
(-11°C), your vehicle is equipped with an
automatic DEF heating system. This allows
the DEF injection system to operate properly
at temperatures below 12°F (-11°C). If your
vehicle is not in operation for an extended
period of time with temperatures below 12°F
(-11°C), the DEF in the tank may freeze. If
the tank is overfilled and freezes, it could be
damaged. Therefore, do not overfill the DEF
tank.
Extra care should be taken when filling with
portable containers to avoid overfilling.
TRAILER TOWING
Trailer Towing Weights (Maximum
Trailer Weight Ratings)
NOTE:
For trailer towing information (maximum
trailer weight ratings) refer to the following
website addresses:
• ramtrucks.com/en/towing_guide/
• ramtruck.ca (Canada)
• rambodybuilder.com
95
Page 141 of 204
Tire Loading And Tire Pressure
NOTE:
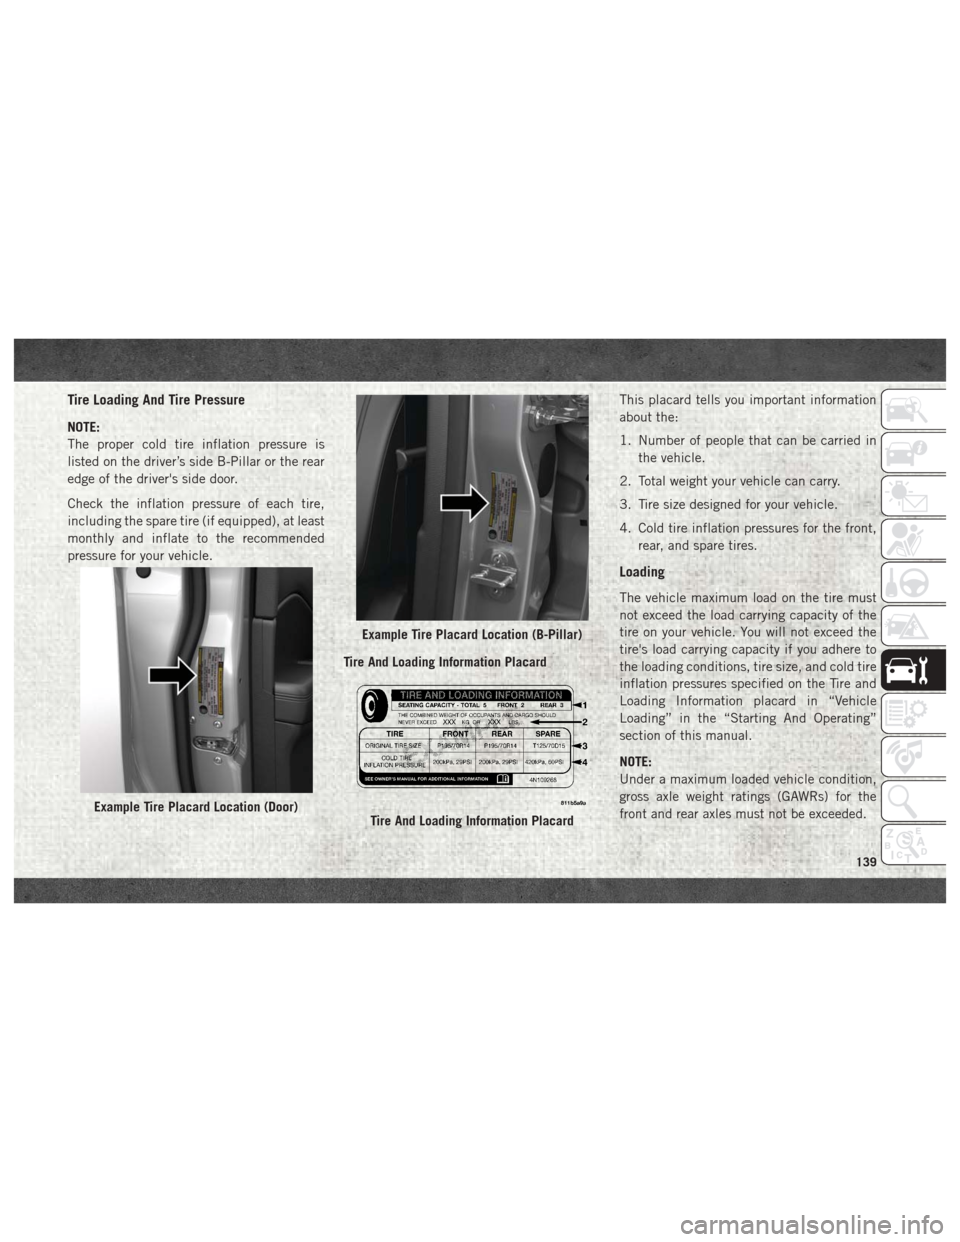
The proper cold tire inflation pressure is
listed on the driver’s side B-Pillar or the rear
edge of the driver's side door.
Check the inflation pressure of each tire,
including the spare tire (if equipped), at least
monthly and inflate to the recommended
pressure for your vehicle.Tire And Loading Information PlacardThis placard tells you important information
about the:
1. Number of people that can be carried in
the vehicle.
2. Total weight your vehicle can carry.
3. Tire size designed for your vehicle.
4. Cold tire inflation pressures for the front, rear, and spare tires.
Loading
The vehicle maximum load on the tire must
not exceed the load carrying capacity of the
tire on your vehicle. You will not exceed the
tire's load carrying capacity if you adhere to
the loading conditions, tire size, and cold tire
inflation pressures specified on the Tire and
Loading Information placard in “Vehicle
Loading” in the “Starting And Operating”
section of this manual.
NOTE:
Under a maximum loaded vehicle condition,
gross axle weight ratings (GAWRs) for the
front and rear axles must not be exceeded.
Example Tire Placard Location (Door)
Example Tire Placard Location (B-Pillar)
Tire And Loading Information Placard
139
Page 142 of 204
To determine the maximum loading condi-
tions of your vehicle, locate the statement
“The combined weight of occupants and
cargo should never exceed XXX kg or XXX lbs”
on the Tire and Loading Information placard.
The combined weight of occupants, cargo/
luggage and trailer tongue weight (if appli-
cable) should never exceed the weight refer-
enced here.
Steps For Determining Correct Load
Limit—
(1) Locate the statement “The com-
bined weight of occupants and cargo
should never exceed XXX kg or
XXX lbs.” on your vehicle's placard.
(2) Determine the combined weight of
the driver and passengers that will be
riding in your vehicle.
(3) Subtract the combined weight of
the driver and passengers from XXX kg
or XXX lbs.(4) The resulting figure equals the
available amount of cargo and luggage
load capacity. For example, if “XXX”
amount equals 1400 lbs. and there
will be five 150 lb passengers in your
vehicle, the amount of available cargo
and luggage load capacity is 650 lbs.
(1400-750 (5x150) = 650 lbs.)
(5) Determine the combined weight of
luggage and cargo being loaded on the
vehicle. That weight may not safely
exceed the available cargo and lug-
gage load capacity calculated in Step
4.
(6) If your vehicle will be towing a
trailer, load from your trailer will be
transferred to your vehicle. Consult
this manual to determine how this
reduces the available cargo and lug-
gage load capacity of your vehicle.
Metric Example For Load Limit
For example, if “XXX” amount equals 635 kg
and there will be five 68 kg passengers in
your vehicle, the amount of available cargo
and luggage load capacity is 295 kg (635-
340 (5x68) = 295 kg) as shown in step 4.
NOTE:
• If your vehicle will be towing a trailer, load
from your trailer will be transferred to your
vehicle. The following table shows ex-
amples on how to calculate total load,
cargo/luggage, and towing capacities of
your vehicle with varying seating configura-
tions and number and size of occupants.
This table is for illustration purposes only
and may not be accurate for the seating and
load carry capacity of your vehicle.
SERVICING AND MAINTENANCE
140
Page 143 of 204

• For the following example, the combinedweight of occupants and cargo should never
exceed 865 lbs (392 kg).
141