audio Ram ProMaster 2020 Owner's Manual
[x] Cancel search | Manufacturer: RAM, Model Year: 2020, Model line: ProMaster, Model: Ram ProMaster 2020Pages: 264, PDF Size: 10.11 MB
Page 7 of 264

5
TIRES .....................................................................168
Tire Safety Information ....................................168
Tires — General Information ........................... 176
Tire Types .......................................................... 180
Spare Tires — If Equipped ............................... 181
Wheel And Wheel Trim Care ........................... 183
Tire Chains And Traction Devices ................... 184
Tire Rotation Recommendations..................... 185
DEPARTMENT OF TRANSPORTATION
UNIFORM TIRE QUALITY GRADES .....................185
Treadwear .........................................................186
Traction Grades ................................................ 186
Temperature Grades ........................................186
STORING THE VEHICLE ........................................186
BODYWORK ...........................................................187
Protection From Atmospheric Agents.............. 187
Body And Underbody Maintenance ................. 187
Preserving The Bodywork................................. 187
INTERIORS ............................................................188
Seats And Fabric Parts ..................................... 188
Plastic And Coated Parts..................................189
Leather Parts .................................................... 190Glass Surfaces ................................................. 190
Cleaning The Instrument Panel Cupholders ...190
TECHNICAL SPECIFICATIONS
IDENTIFICATION DATA ......................................... 191
Vehicle Identification Number ........................ 191
BRAKE SYSTEM .................................................... 191
WHEEL AND TIRE TORQUE SPECIFICATIONS ... 191
Torque Specifications ...................................... 191
FUEL REQUIREMENTS.......................................... 192
3.6L Engine....................................................... 192
Reformulated Gasoline ................................... 192
Materials Added To Fuel .................................. 193
Gasoline/Oxygenate Blends ............................ 193
Do Not Use E-85 In Non-Flex Fuel Vehicles .... 193
CNG And LP Fuel System Modifications ......... 193
MMT In Gasoline .............................................. 194Fuel System Cautions ...................................... 194
Carbon Monoxide Warnings ............................ 194
FLUID CAPACITIES................................................ 195
FLUIDS AND LUBRICANTS .................................. 195
Engine ............................................................... 195Chassis ............................................................. 197
MULTIMEDIA
CYBERSECURITY .................................................. 198
UCONNECT SETTINGS ......................................... 199
Uconnect 3/3 NAV Settings............................. 199
SAFETY AND GENERAL INFORMATION ............. 208
Safety Guidelines ............................................. 208
UCONNECT 3/3 NAV WITH 5-INCH DISPLAY ....209
Introduction To The Uconnect 3/3 NAV
With 5-Inch Display System ............................. 209 Radio Mode ...................................................... 211
Media Mode ..................................................... 214
Phone Mode ..................................................... 216
Navigation Mode — If Equipped ...................... 221
STEERING WHEEL AUDIO CONTROLS ............... 238
Radio Operation ............................................... 238
Player Operation............................................... 238
IPOD®/USB/MP3 CONTROL —
IF EQUIPPED ......................................................... 238
USB Charging Port............................................ 239
RAM TELEMATICS - IF EQUIPPED ....................... 239
Ram Telematics General Information............. 239
RADIO OPERATION AND MOBILE PHONES ......240
Regulatory And Safety Information ................. 240
UCONNECT VOICE RECOGNITION ......................241
Introducing Uconnect....................................... 241
Get Started ....................................................... 241
Basic Voice Commands ................................... 242
Radio ................................................................. 242
Media ................................................................ 243
Phone................................................................ 243
Voice Text Reply ............................................... 244
General Information......................................... 245
Additional Information ..................................... 245
20_VF_OM_EN_US_t.book Page 5
Page 110 of 264
108STARTING AND OPERATING
While audible signals are emitted, the audio
system is not muted.
The audible signal is turned off immediately if
the distance increases. The tone cycle remains
constant if the distance measured by the inner
sensors is constant. If this condition occurs for
the external sensors, the signal is turned off
after three seconds (stopping warnings during
maneuvers parallel to walls).
ParkSense Rear Park Assist Failure
Indications
A malfunction of the ParkSense Rear Park
Assist sensors or system is indicated, during
REVERSE gear engagement, by the instrument
panel warning icon.
The warning icon is illuminated and a
message is displayed in the instru -
ment cluster display (if equipped).
Refer to “Warning Lights And
Messages” in “Getting To Know Your Instru -
ment Panel” for further information.
The sensors and wiring are tested continuously
when the ignition is in the MAR (ACC/ON/RUN)
position. Failures are indicated immediately if
they occur when the system is on. Even if the system is able to identify that a
specific sensor is in failure condition, the instru
-
ment cluster display shall indicate that the Park-
Sense Rear Park Assist system is unavailable,
without reference to the sensor in failure condi -
tion. If even a single sensor fails, the entire
system must be disabled. The system is turned
off automatically.
Cleaning The ParkSense System
Clean the Rear Park Assist sensors with water,
car wash soap and a soft cloth. Do not use
rough or hard cloths. In washing stations, clean
sensors quickly keeping the vapor jet/high pres -
sure washing nozzles at least 4 inches (10 cm)
from the sensors. Do not scratch or poke the
sensors. Otherwise, you could damage the
sensors.
ParkSense Rear Park Assist System Usage
Precautions
NOTE:
Ensure that the outer surface and the under -
side of the rear bumper is clean and clear of
snow, ice, mud, dirt or other obstruction to
keep the Rear Park Assist system operating
properly.
Jackhammers, large trucks, and other vibra -
tions could affect the performance of Rear
Park Assist.
Clean the Rear Park Assist sensors regularly,
taking care not to scratch or damage them.
The sensors must not be covered with ice,
snow, slush, mud, dirt or debris. Failure to do
so can result in the system not working prop -
erly. The Rear Park Assist system might not
detect an obstacle behind the fascia/
bumper, or it could provide a false indication
that an obstacle is behind the fascia/
bumper.
Objects such as bicycle carriers, etc., must
not be placed within 12 inches (30 cm) from
the rear fascia/bumper while driving the
vehicle. Failure to do so can result in the
system misinterpreting a close object as a
sensor problem, causing a failure indication
to be displayed in the instrument cluster
display.
20_VF_OM_EN_US_t.book Page 108
Page 111 of 264
STARTING AND OPERATING109
If it’s necessary to keep the ball mount and
hitch ball assembly mounted for a long period,
it is possible to filter out the ball mount and
hitch ball assembly presence in sensor field of
view. The filtering operation must be performed
only by an authorized dealer.
PARKVIEW REAR BACK UP CAMERA
Your vehicle is equipped with the ParkView Rear
Back Up Camera that allows you to see an
on-screen image of the rear surroundings of
your vehicle whenever the gear selector is put
into REVERSE and/or when the rear doors are opened. The image will be displayed on the
touchscreen display along with a caution note
to “check entire surroundings” across the top of
the screen. After five seconds this note will
disappear. The ParkView Rear Back Up Camera
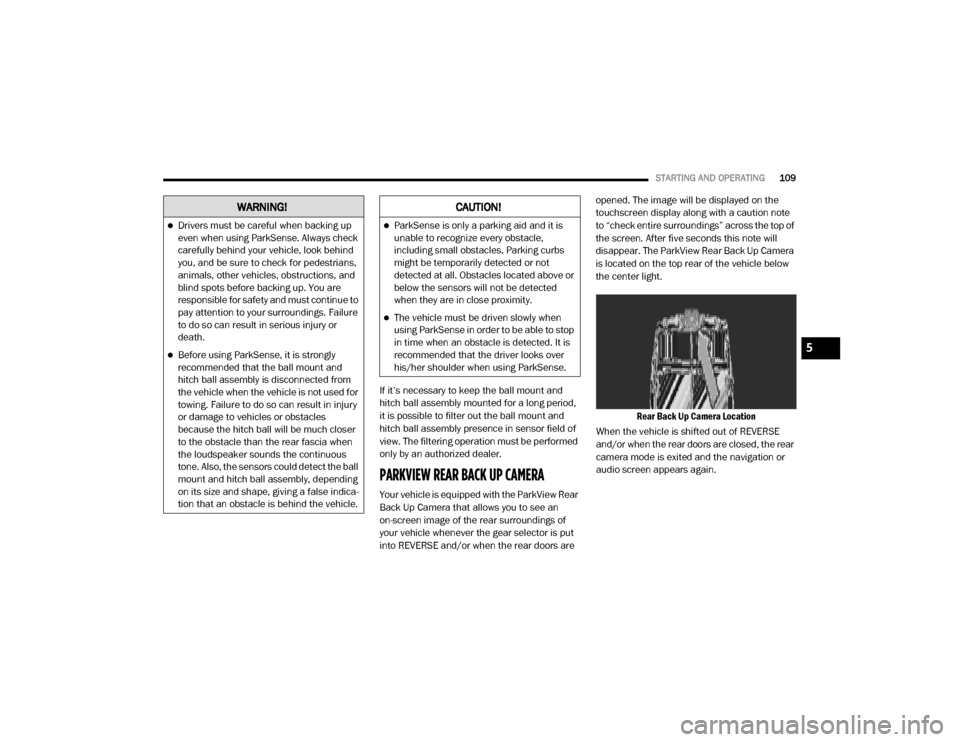
is located on the top rear of the vehicle below
the center light.
Rear Back Up Camera Location
When the vehicle is shifted out of REVERSE
and/or when the rear doors are closed, the rear
camera mode is exited and the navigation or
audio screen appears again.
WARNING!
Drivers must be careful when backing up
even when using ParkSense. Always check
carefully behind your vehicle, look behind
you, and be sure to check for pedestrians,
animals, other vehicles, obstructions, and
blind spots before backing up. You are
responsible for safety and must continue to
pay attention to your surroundings. Failure
to do so can result in serious injury or
death.
Before using ParkSense, it is strongly
recommended that the ball mount and
hitch ball assembly is disconnected from
the vehicle when the vehicle is not used for
towing. Failure to do so can result in injury
or damage to vehicles or obstacles
because the hitch ball will be much closer
to the obstacle than the rear fascia when
the loudspeaker sounds the continuous
tone. Also, the sensors could detect the ball
mount and hitch ball assembly, depending
on its size and shape, giving a false indica -
tion that an obstacle is behind the vehicle.
CAUTION!
ParkSense is only a parking aid and it is
unable to recognize every obstacle,
including small obstacles. Parking curbs
might be temporarily detected or not
detected at all. Obstacles located above or
below the sensors will not be detected
when they are in close proximity.
The vehicle must be driven slowly when
using ParkSense in order to be able to stop
in time when an obstacle is detected. It is
recommended that the driver looks over
his/her shoulder when using ParkSense.
5
20_VF_OM_EN_US_t.book Page 109
Page 201 of 264
MULTIMEDIA199
UCONNECT SETTINGS
The Uconnect system uses a combination of
buttons on the touchscreen and buttons on the
faceplate located on the center of the instru -
ment panel that allows you to access and
change the customer programmable features.
Many features can vary by vehicle.
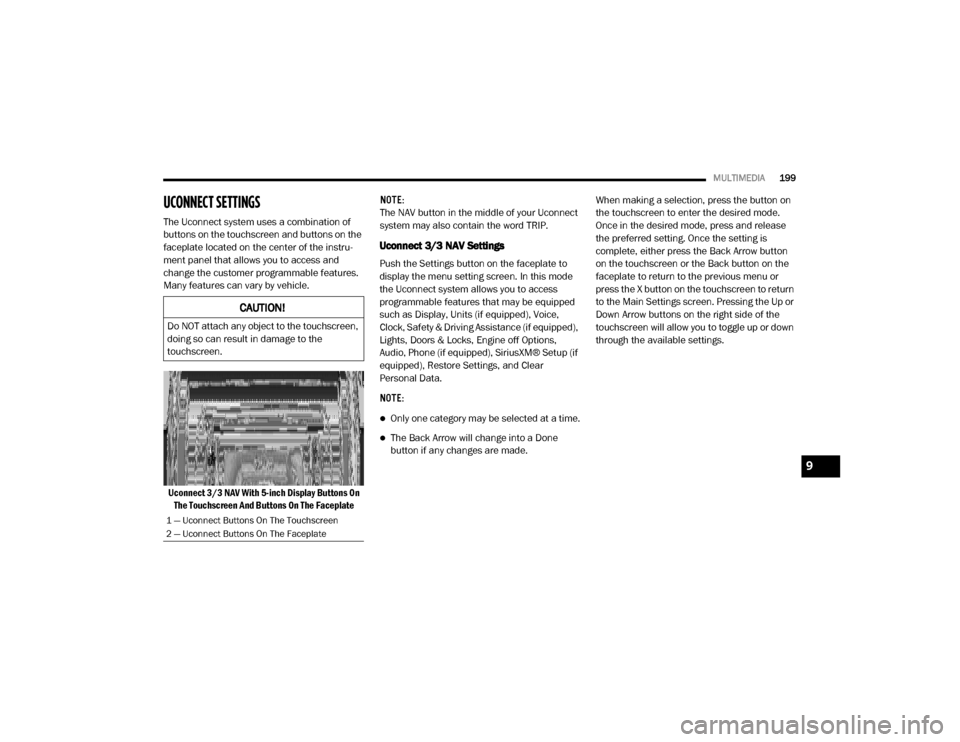
Uconnect 3/3 NAV With 5-inch Display Buttons On The Touchscreen And Buttons On The Faceplate NOTE:
The NAV button in the middle of your Uconnect
system may also contain the word TRIP.
Uconnect 3/3 NAV Settings
Push the Settings button on the faceplate to
display the menu setting screen. In this mode
the Uconnect system allows you to access
programmable features that may be equipped
such as Display, Units (if equipped), Voice,
Clock, Safety & Driving Assistance (if equipped),
Lights, Doors & Locks, Engine off Options,
Audio, Phone (if equipped), SiriusXM® Setup (if
equipped), Restore Settings, and Clear
Personal Data.
NOTE:
Only one category may be selected at a time.
The Back Arrow will change into a Done
button if any changes are made.
When making a selection, press the button on
the touchscreen to enter the desired mode.
Once in the desired mode, press and release
the preferred setting. Once the setting is
complete, either press the Back Arrow button
on the touchscreen or the Back button on the
faceplate to return to the previous menu or
press the X button on the touchscreen to return
to the Main Settings screen. Pressing the Up or
Down Arrow buttons on the right side of the
touchscreen will allow you to toggle up or down
through the available settings.
CAUTION!
Do NOT attach any object to the touchscreen,
doing so can result in damage to the
touchscreen.
1 — Uconnect Buttons On The Touchscreen
2 — Uconnect Buttons On The Faceplate
9
20_VF_OM_EN_US_t.book Page 199
Page 206 of 264

204MULTIMEDIA
Audio
After pressing the Audio button on the touchscreen, the following settings will be available:
Setting Name Selectable Options
Equalizer+ –
NOTE:
When in this display, you may adjust the “Bass”, “Mid”, and “Treble” settings. Adjust the settings with the + and – setting buttons on the touchscreen
or by selecting any point on the scale between the + and – buttons on the touchscreen. Bass/Mid/Treble also allow you to simply slide your finger up
or down to change the setting as well as press directly on the desired setting.
Balance — If Equipped Speaker Icon Arrow Buttons
NOTE:
When in this display, you may adjust the “Balance” (if equipped) of the audio by using the Arrow button on the touchscreen to adjust the sound level
of the right and left side speakers. Press the Speaker icon on the touchscreen to reset the balance to the factory setting.
Speed Adjusted Volume Off 12 3
NOTE:
The “Speed Adjusted Volume” feature increases or decreases volume relative to vehicle speed.
Surround Sound — If Equipped On Off
Loudness — If Equipped On Off
NOTE:
The “Loudness” feature improves sound quality at lower volumes when enabled.
Auto-On Radio — If Equipped On Off Recall Last
NOTE:
Press the Auto-On Radio button on the touchscreen to set how the radio behaves when the ignition is switched to ON/RUN.
20_VF_OM_EN_US_t.book Page 204
Page 207 of 264
MULTIMEDIA205
Phone/Bluetooth®
After pressing the Phone/Bluetooth® button on the touchscreen, the following settings will be available: AUX Volume Offset
+ –
NOTE:
This feature provides the ability to tune the audio level for portable devices connected through the AUX input.
Auto Play On Off
NOTE:
The Auto Play feature allows a media device to begin playing when the media device is plugged in. To make your selection, press the On or Off buttons
to activate or deactivate Auto Play.
Setting Name Selectable Options
Setting NameSelectable Options
Paired Phones/DevicesList of Paired Phones/Devices
NOTE:
This feature shows which phones are paired to the Phone system.
9
20_VF_OM_EN_US_t.book Page 205
Page 209 of 264
MULTIMEDIA207
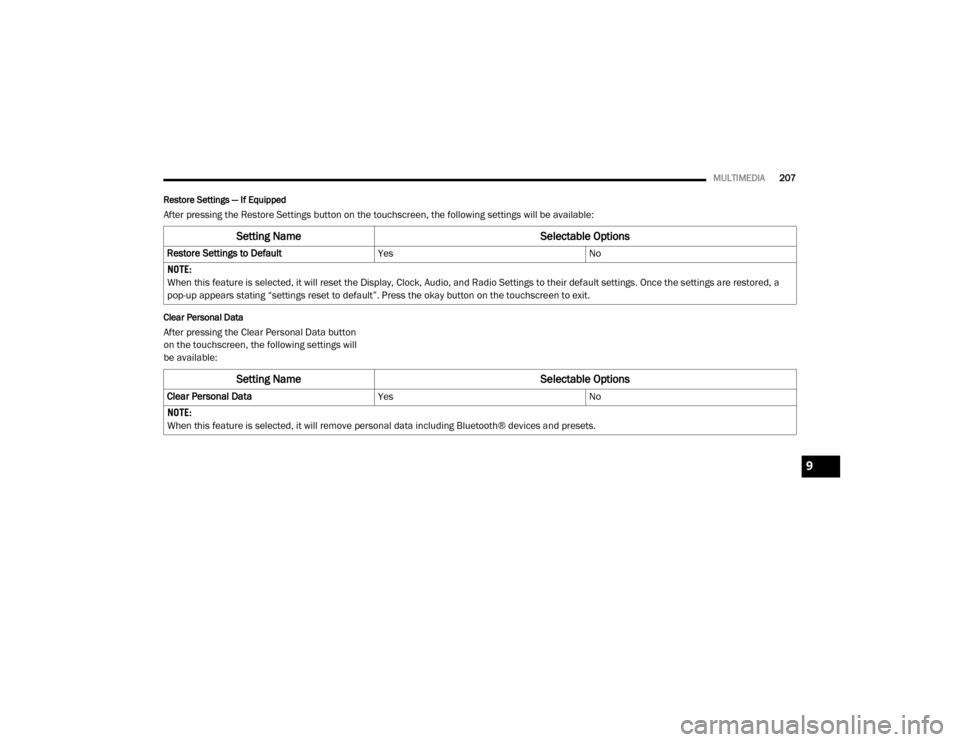
Restore Settings — If Equipped
After pressing the Restore Settings button on the touchscreen, the following settings will be available:
Clear Personal Data
After pressing the Clear Personal Data button
on the touchscreen, the following settings will
be available:
Setting Name Selectable Options
Restore Settings to DefaultYesNo
NOTE:
When this feature is selected, it will reset the Display, Clock, Audio, and Radio Settings to their default settings. Once the settings are restored, a
pop-up appears stating “settings reset to default”. Press the okay button on the touchscreen to exit.
Setting Name Selectable Options
Clear Personal DataYesNo
NOTE:
When this feature is selected, it will remove personal data including Bluetooth® devices and presets.
9
20_VF_OM_EN_US_t.book Page 207
Page 213 of 264
MULTIMEDIA211
Radio Mode
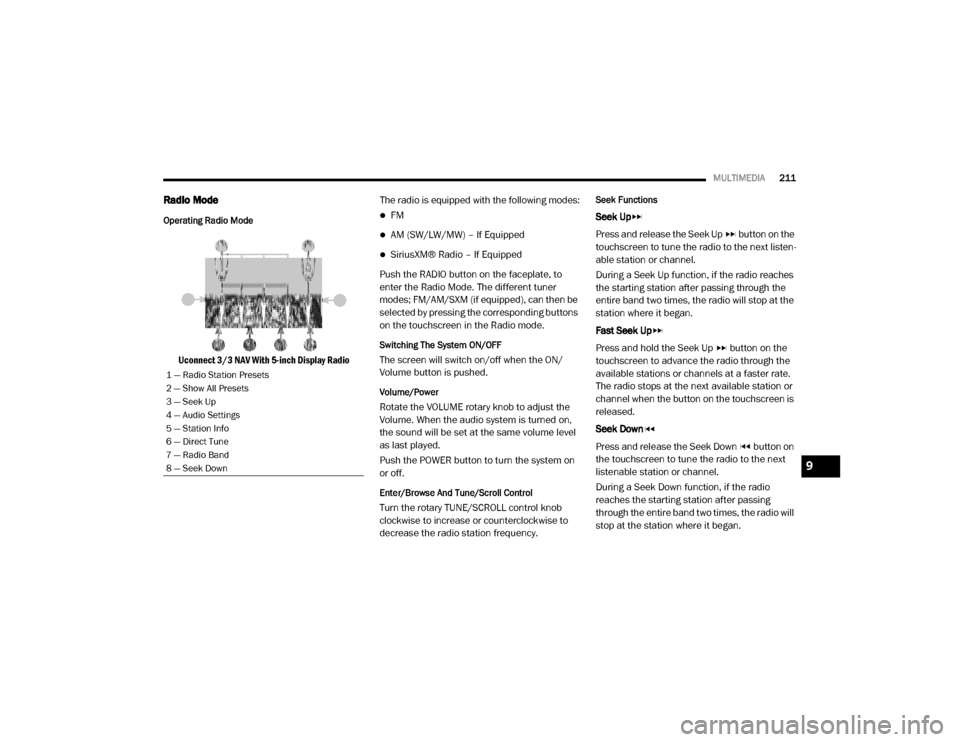
Operating Radio Mode
Uconnect 3/3 NAV With 5-inch Display Radio The radio is equipped with the following modes:
FM
AM (SW/LW/MW) – If Equipped
SiriusXM® Radio – If Equipped
Push the RADIO button on the faceplate, to
enter the Radio Mode. The different tuner
modes; FM/AM/SXM (if equipped), can then be
selected by pressing the corresponding buttons
on the touchscreen in the Radio mode.
Switching The System ON/OFF
The screen will switch on/off when the ON/
Volume button is pushed.
Volume/Power
Rotate the VOLUME rotary knob to adjust the
Volume. When the audio system is turned on,
the sound will be set at the same volume level
as last played.
Push the POWER button to turn the system on
or off.
Enter/Browse And Tune/Scroll Control
Turn the rotary TUNE/SCROLL control knob
clockwise to increase or counterclockwise to
decrease the radio station frequency.
Seek Functions
Seek Up
Press and release the Seek Up button on the
touchscreen to tune the radio to the next listen -
able station or channel.
During a Seek Up function, if the radio reaches
the starting station after passing through the
entire band two times, the radio will stop at the
station where it began.
Fast Seek Up
Press and hold the Seek Up button on the
touchscreen to advance the radio through the
available stations or channels at a faster rate.
The radio stops at the next available station or
channel when the button on the touchscreen is
released.
Seek Down
Press and release the Seek Down button on
the touchscreen to tune the radio to the next
listenable station or channel.
During a Seek Down function, if the radio
reaches the starting station after passing
through the entire band two times, the radio will
stop at the station where it began.
1 — Radio Station Presets
2 — Show All Presets
3 — Seek Up
4 — Audio Settings
5 — Station Info
6 — Direct Tune
7 — Radio Band
8 — Seek Down
9
20_VF_OM_EN_US_t.book Page 211
Page 215 of 264
MULTIMEDIA213
If the screen displays Acquiring Signal, you may
need to change the vehicle’s position to receive
a signal. In most cases, the satellite radio does
not receive a signal in underground parking
garages or tunnels.
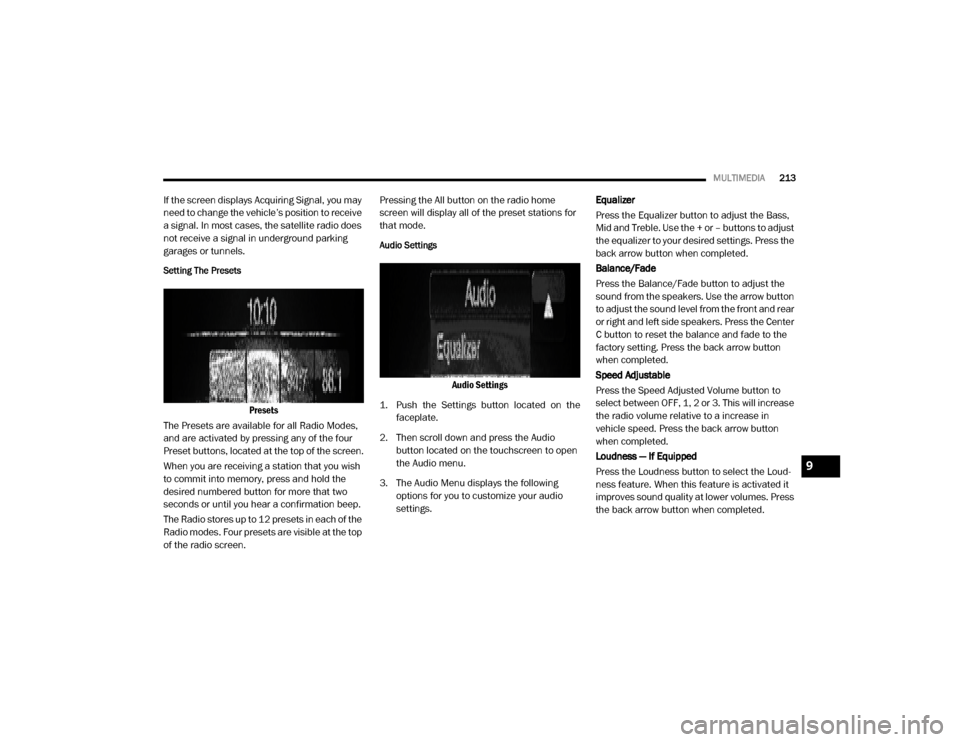
Setting The Presets
Presets
The Presets are available for all Radio Modes,
and are activated by pressing any of the four
Preset buttons, located at the top of the screen.
When you are receiving a station that you wish
to commit into memory, press and hold the
desired numbered button for more that two
seconds or until you hear a confirmation beep.
The Radio stores up to 12 presets in each of the
Radio modes. Four presets are visible at the top
of the radio screen. Pressing the All button on the radio home
screen will display all of the preset stations for
that mode.
Audio Settings
Audio Settings
1. Push the Settings button located on the faceplate.
2. Then scroll down and press the Audio button located on the touchscreen to open
the Audio menu.
3. The Audio Menu displays the following options for you to customize your audio
settings. Equalizer
Press the Equalizer button to adjust the Bass,
Mid and Treble. Use the + or – buttons to adjust
the equalizer to your desired settings. Press the
back arrow button when completed.
Balance/Fade
Press the Balance/Fade button to adjust the
sound from the speakers. Use the arrow button
to adjust the sound level from the front and rear
or right and left side speakers. Press the Center
C button to reset the balance and fade to the
factory setting. Press the back arrow button
when completed.
Speed Adjustable
Press the Speed Adjusted Volume button to
select between OFF, 1, 2 or 3. This will increase
the radio volume relative to a increase in
vehicle speed. Press the back arrow button
when completed.
Loudness — If Equipped
Press the Loudness button to select the Loud
-
ness feature. When this feature is activated it
improves sound quality at lower volumes. Press
the back arrow button when completed.
9
20_VF_OM_EN_US_t.book Page 213
Page 216 of 264
214MULTIMEDIA
Auto On Radio — If Equipped
Press the Auto On Radio button to set how the
radio behaves when the Ignition is switched to
ON. The options are: On, Off or Recall Last to the
last turned to stop condition. Press the back
arrow button when completed.
Radio Off Delay
Press the Radio Off Delay button to keep the
radio on for a preset amount of time after the
Ignition is switched OFF. Press the back arrow
button when completed.
AUX Volume Offset
Press the AUX Volume Offset button on the
touchscreen to activate the AUX Volume Offset
screen.
The AUX Volume Offset is adjusted by pressing
the + and - buttons. This alters the AUX input
audio volume. The level value, which spans
between plus or minus three, is displayed above
the adjustment bar.Media Mode
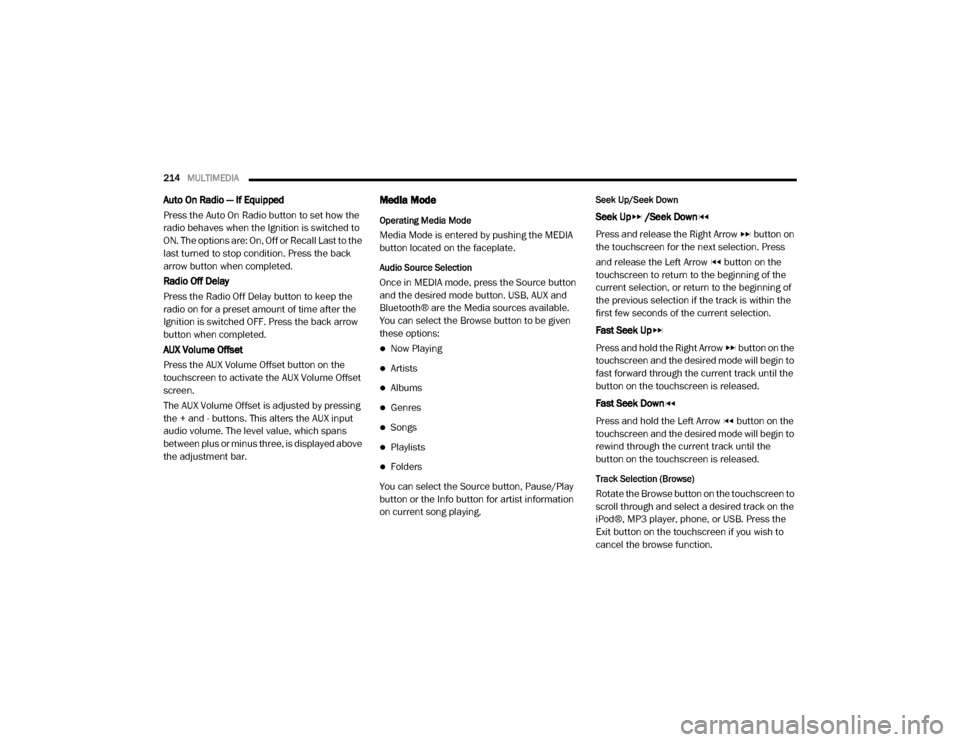
Operating Media Mode
Media Mode is entered by pushing the MEDIA
button located on the faceplate.
Audio Source Selection
Once in MEDIA mode, press the Source button
and the desired mode button. USB, AUX and
Bluetooth® are the Media sources available.
You can select the Browse button to be given
these options:
Now Playing
Artists
Albums
Genres
Songs
Playlists
Folders
You can select the Source button, Pause/Play
button or the Info button for artist information
on current song playing.
Seek Up/Seek Down
Seek Up /Seek Down
Press and release the Right Arrow button on
the touchscreen for the next selection. Press
and release the Left Arrow button on the
touchscreen to return to the beginning of the
current selection, or return to the beginning of
the previous selection if the track is within the
first few seconds of the current selection.
Fast Seek Up
Press and hold the Right Arrow button on the
touchscreen and the desired mode will begin to
fast forward through the current track until the
button on the touchscreen is released.
Fast Seek Down
Press and hold the Left Arrow button on the
touchscreen and the desired mode will begin to
rewind through the current track until the
button on the touchscreen is released.
Track Selection (Browse)
Rotate the Browse button on the touchscreen to
scroll through and select a desired track on the
iPod®, MP3 player, phone, or USB. Press the
Exit button on the touchscreen if you wish to
cancel the browse function.
20_VF_OM_EN_US_t.book Page 214