audio Ram ProMaster 2020 User Guide
[x] Cancel search | Manufacturer: RAM, Model Year: 2020, Model line: ProMaster, Model: Ram ProMaster 2020Pages: 264, PDF Size: 10.11 MB
Page 217 of 264
MULTIMEDIA215
Repeat
Press the Repeat button on the touchscreen to
repeat the song selection. To cancel repeat,
press the Repeat button on the touchscreen a
second time.
Shuffle
Press the Shuffle button on the touchscreen to
play the selections on the USB/iPod® or Blue -
tooth® device in random order to provide an
interesting change of pace. Press the Shuffle
button on the touchscreen a second time to
turn this feature off.
Audio
Refer to “Operating Radio Mode” in this section
for the adjustable audio settings.
Info
Press the Info button to display the current
track information. Press the X button to cancel
this feature.
USB Mode
USB Mode is entered by either inserting a USB
Jump Drive cable into the USB port, or by
pushing the MEDIA button located on the face -
plate. Once in “Media Mode”, press the Source
button on the touchscreen and select “USB”. NOTE:
The system supports only FAT32 or ExFAT
formatted USB devices. The system does not
support devices with a capacity higher than
64GB. The system does not support USB hubs
connected to the USB port of the vehicle.
Connect your multimedia device directly to the
USB port, using the specific connection cable
for the device if necessary.
Inserting USB Device
Gently insert the USB/device into the USB Port.
If you insert a USB device with the ignition ON,
the unit will switch to USB mode and begin to
play when you insert the device. The display will
show the track number and index time in
minutes and seconds. Play will begin at the start
of track 1.
Browse
Press the Browse button on the touchscreen to
select Artist, Albums, Genres, Songs, Playlists or
Folders from the USB device. Once the desired
selection is made you can chose from the avail
-
able media by pressing the button on the touch -
screen. Press the Exit button on the
touchscreen if you wish to cancel the browse
function.
Bluetooth® Mode
Bluetooth® Streaming Audio (BTSA) or Blue -
tooth® Mode is entered by pairing a Bluetooth®
device containing music to the Uconnect
system.
Before proceeding, the Bluetooth® device must
be paired with the Uconnect Phone to communi -
cate with the Uconnect system.
See the pairing procedure within this manual.
Once the Bluetooth® device is paired to the
Uconnect system, push the MEDIA button
located on the faceplate. Once in Media Mode,
press the Source button on the touchscreen
and select Bluetooth®.
NOTE:
For mobile phone compatibility and pairing
instructions, please visit UconnectPhone.com.
9
20_VF_OM_EN_US_t.book Page 215
Page 218 of 264
216MULTIMEDIA
AUX Mode
AUX Mode is entered by inserting a AUX device
using a stereo cable with a 3.5 mm audio jack
into the AUX port, or by pushing the MEDIA
button located on the faceplate. Once in Media
Mode, press the Source button on the touch -
screen and select AUX.
Inserting Auxiliary Device
Gently insert the Auxiliary device cable into the
AUX Port. If you insert a Auxiliary device with the
ignition ON, the unit will switch to AUX mode and
begin to play when you insert the device cable.
Controlling The Auxiliary Device
The control of the Auxiliary device (e.g.,
selecting playlists, play, fast forward, etc.)
cannot be provided by the radio; use the device
controls instead. Adjust the volume with the
VOLUME rotary knob, or with the volume of the
attached device.
The radio unit is acting as the amplifier for audio
output from the Auxiliary device. Therefore if the
volume control on the Auxiliary device is set too
low, there will be insufficient audio signal for the
radio unit to play the music on the device.
Phone Mode
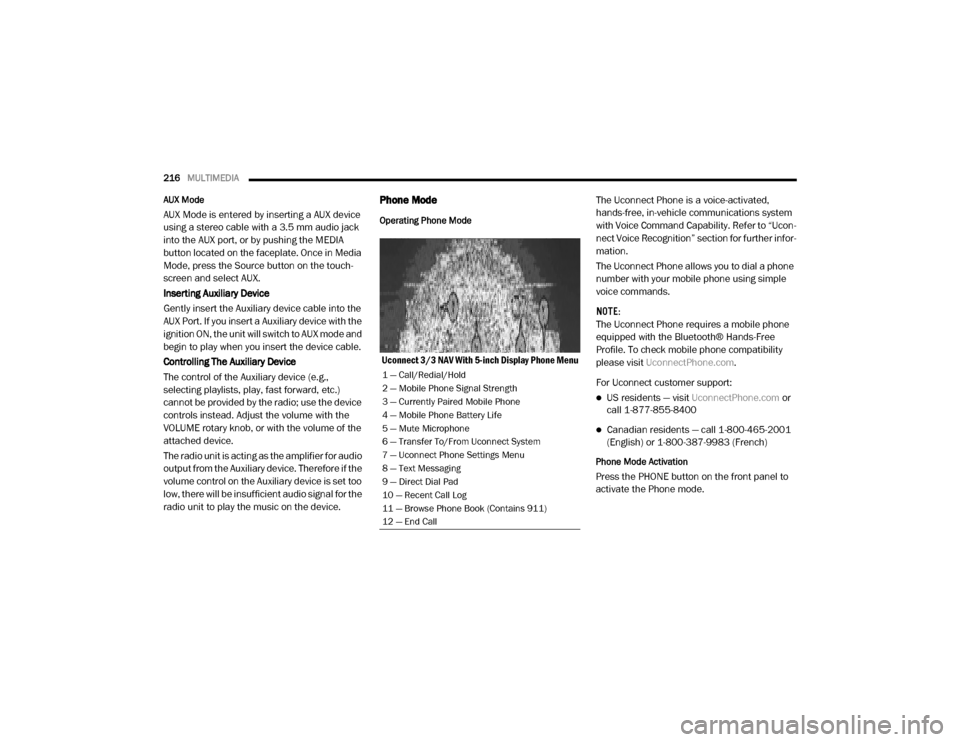
Operating Phone Mode
Uconnect 3/3 NAV With 5-inch Display Phone Menu The Uconnect Phone is a voice-activated,
hands-free, in-vehicle communications system
with Voice Command Capability. Refer to “Ucon
-
nect Voice Recognition” section for further infor -
mation.
The Uconnect Phone allows you to dial a phone
number with your mobile phone using simple
voice commands.
NOTE:
The Uconnect Phone requires a mobile phone
equipped with the Bluetooth® Hands-Free
Profile. To check mobile phone compatibility
please visit UconnectPhone.com .
For Uconnect customer support:
US residents — visit UconnectPhone.com or
call 1-877-855-8400
Canadian residents — call 1-800-465-2001
(English) or 1-800-387-9983 (French)
Phone Mode Activation
Press the PHONE button on the front panel to
activate the Phone mode.
1 — Call/Redial/Hold
2 — Mobile Phone Signal Strength
3 — Currently Paired Mobile Phone
4 — Mobile Phone Battery Life
5 — Mute Microphone
6 — Transfer To/From Uconnect System
7 — Uconnect Phone Settings Menu
8 — Text Messaging
9 — Direct Dial Pad
10 — Recent Call Log
11 — Browse Phone Book (Contains 911)
12 — End Call
20_VF_OM_EN_US_t.book Page 216
Page 219 of 264
MULTIMEDIA217
Main Functions
The buttons on the display can be used to:
Compose phone numbers (using the graphic
keypad on the display)
Display and call the contacts in the mobile
phone phonebook
Display and call contacts from the “recent
calls” menu
Pair phones/audio devices to make access
and connection easier and quicker
Transfer calls from the system to the mobile
phone and vice versa
Deactivate the microphone audio for private
conversations
The mobile phone audio is transmitted through
the vehicle’s audio system. The system auto -
matically mutes the radio when the Phone func -
tion is used.
Connecting/Disconnecting A Mobile Phone Or
Bluetooth® Device
Pairing A Phone
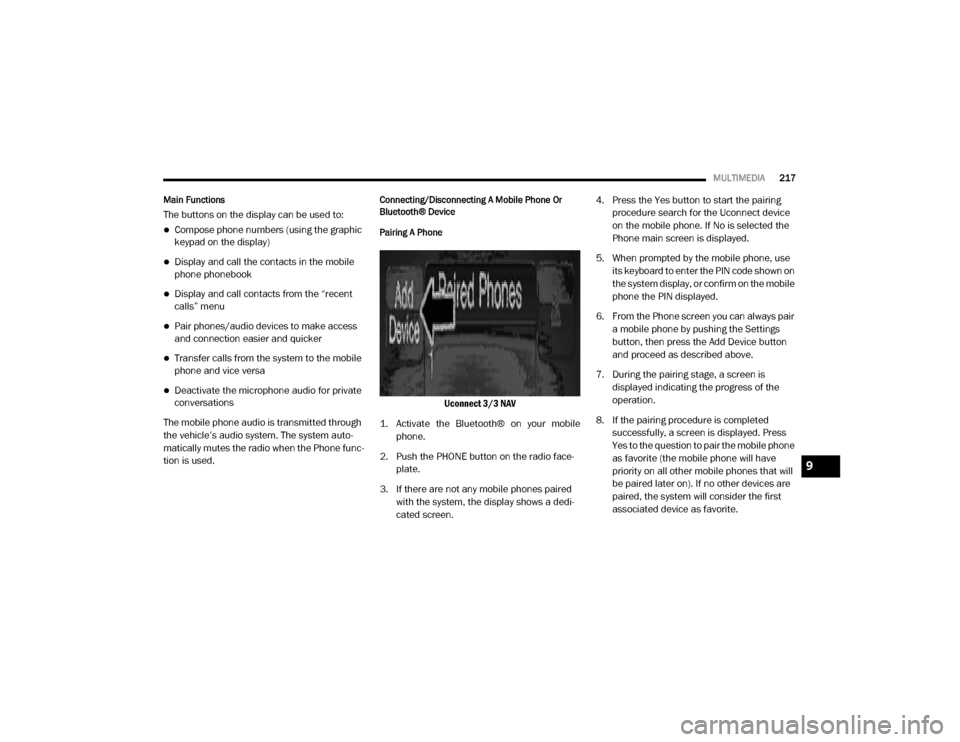
Uconnect 3/3 NAV
1. Activate the Bluetooth® on your mobile phone.
2. Push the PHONE button on the radio face -
plate.
3. If there are not any mobile phones paired with the system, the display shows a dedi -
cated screen. 4. Press the Yes button to start the pairing
procedure search for the Uconnect device
on the mobile phone. If No is selected the
Phone main screen is displayed.
5. When prompted by the mobile phone, use its keyboard to enter the PIN code shown on
the system display, or confirm on the mobile
phone the PIN displayed.
6. From the Phone screen you can always pair a mobile phone by pushing the Settings
button, then press the Add Device button
and proceed as described above.
7. During the pairing stage, a screen is displayed indicating the progress of the
operation.
8. If the pairing procedure is completed successfully, a screen is displayed. Press
Yes to the question to pair the mobile phone
as favorite (the mobile phone will have
priority on all other mobile phones that will
be paired later on). If no other devices are
paired, the system will consider the first
associated device as favorite.
9
20_VF_OM_EN_US_t.book Page 217
Page 220 of 264
218MULTIMEDIA
NOTE:
The priority is determined according to the
order of connection for mobile phones which
are not set as favorite. The last phone
connected will have the highest priority.
For more assistance on pairing your phone,
contact Uconnect customer support:
US residents — visit UconnectPhone.com
for phone compatibility, pairing instruc-
tions and details or call 1-877-855-8400
Canadian residents — visit Uconnect-
Phone.com for phone compatibility,
pairing instructions and details or call
1-800-465-2001 (English) or 1-800-387-9983 (French)
Storing Names/Numbers in The Mobile Phone
Before pairing your mobile phone, you must
make sure you have stored the names you want
to contact in the phonebook on your mobile
phone so that you can call them using the
vehicle's hands-free system.
If your phonebook does not contain any names,
enter new names for the most frequently used
numbers.
For further details, refer to your mobile phone
owner's handbook. NOTE:
The names in the phonebook which do not
contain phone numbers or where both fields
(name and surname) are empty will not be
displayed.
Connection
The system connects automatically to the
paired mobile phone with the highest priority.
To choose a specific mobile phone or Blue
-
tooth® audio device, proceed as follows:
Access the Settings menu
Select Phone/Bluetooth®
Select the Paired Phones or Paired Audio list
using the corresponding button on the
display
Select the specific device (mobile phone or
Bluetooth® device)
Press the Connect button
During the connection stage a screen is
displayed showing the progress of the opera -
tion
The device connected is highlighted in the list
Disconnection
To disconnect a specific mobile phone or Blue -
tooth® audio device, proceed as follows:
Access the Settings menu
Select Phone/Bluetooth®
Select the Paired Phones or Paired Audio list
using the corresponding button on the
display
Select the specific device (mobile phone or
Bluetooth® device)
Press the Disconnect button
Downloading A Phonebook From Your Mobile
Phone
If equipped and specifically supported by your
phone, Uconnect Phone asks you if you want to
download names (text names) and number
entries from your mobile phone’s phonebook.
Specific Bluetooth®-enabled phones with
Phone Book Access Profile may support this
feature. See UconnectPhone.com for supported
phones.
20_VF_OM_EN_US_t.book Page 218
Page 240 of 264
238MULTIMEDIA
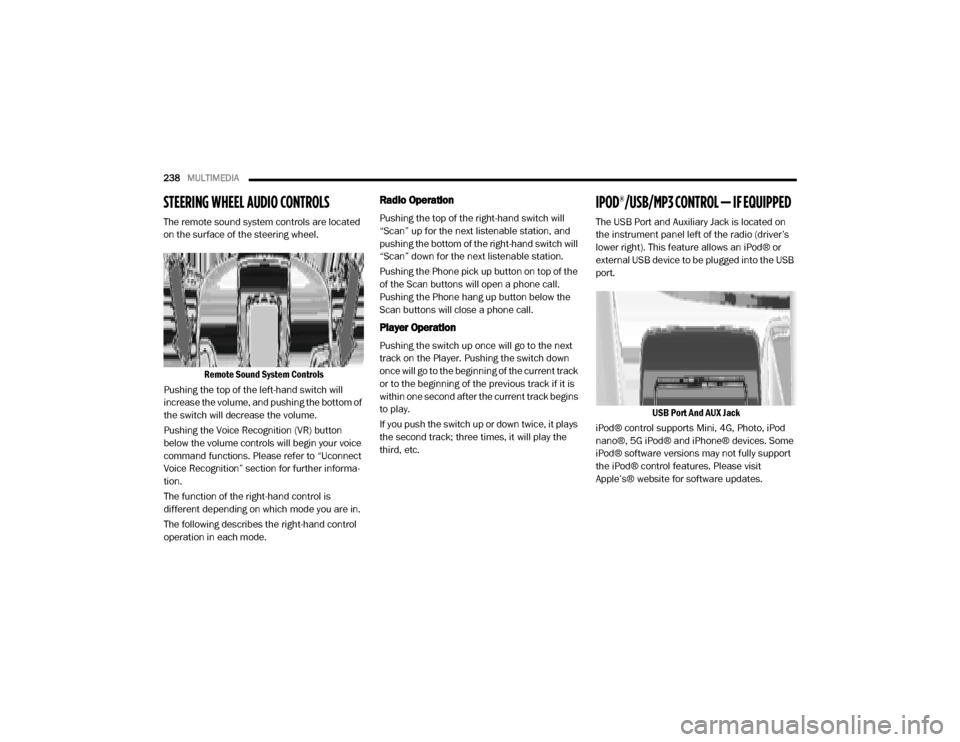
STEERING WHEEL AUDIO CONTROLS
The remote sound system controls are located
on the surface of the steering wheel.
Remote Sound System Controls
Pushing the top of the left-hand switch will
increase the volume, and pushing the bottom of
the switch will decrease the volume.
Pushing the Voice Recognition (VR) button
below the volume controls will begin your voice
command functions. Please refer to “Uconnect
Voice Recognition” section for further informa -
tion.
The function of the right-hand control is
different depending on which mode you are in.
The following describes the right-hand control
operation in each mode.
Radio Operation
Pushing the top of the right-hand switch will
“Scan” up for the next listenable station, and
pushing the bottom of the right-hand switch will
“Scan” down for the next listenable station.
Pushing the Phone pick up button on top of the
of the Scan buttons will open a phone call.
Pushing the Phone hang up button below the
Scan buttons will close a phone call.
Player Operation
Pushing the switch up once will go to the next
track on the Player. Pushing the switch down
once will go to the beginning of the current track
or to the beginning of the previous track if it is
within one second after the current track begins
to play.
If you push the switch up or down twice, it plays
the second track; three times, it will play the
third, etc.
IPOD®/USB/MP3 CONTROL — IF EQUIPPED
The USB Port and Auxiliary Jack is located on
the instrument panel left of the radio (driver’s
lower right). This feature allows an iPod® or
external USB device to be plugged into the USB
port.
USB Port And AUX Jack
iPod® control supports Mini, 4G, Photo, iPod
nano®, 5G iPod® and iPhone® devices. Some
iPod® software versions may not fully support
the iPod® control features. Please visit
Apple’s® website for software updates.
20_VF_OM_EN_US_t.book Page 238
Page 258 of 264

256
Sentry Key (Immobilizer)
............................. 12
Service Assistance
.................................. 246
Service Contract
.................................... 247
Service Manuals
.................................... 249
Settings
Personal......................................... 199
Shift Lever Override
................................. 148
Shoulder Belts
......................................... 67
Signals, Turn
.................................... 53, 91
Snow Chains (Tire Chains)
......................... 184
Snow Tires
........................................... 181
Spare Tires
.......................... 181, 182, 183
Spark Plugs
.......................................... 195
Speed Control (Cruise Control)
.................... 103
Starting
................................................ 92Automatic Transmission....................... 92Button............................................. 11Cold Weather..................................... 92Engine Fails To Start............................ 92
Steering
................................................ 21Column Lock..................................... 21Power.................................... 102, 103
Steering Wheel Audio Controls
.................... 238
Storage, Vehicle
............................... 33, 186
Storing Your Vehicle
................................ 186
Supplemental Restraint System – Air Bag
......... 74
Sway Control, Trailer
.................................. 61
Synthetic Engine Oil
................................ 159
T
Telescoping Steering Column
........................ 21
Tire And Loading Information Placard
............. 173
Tire Markings
........................................ 168
Tire Safety Information
............................. 168
Tire Service Kit
...... 139, 140, 142, 143, 144
Tires
............................ 91, 176, 181, 185Aging (Life Of Tires)........................... 179Air Pressure.....................................176Chains........................................... 184Changing................................ 133, 168Compact Spare................................ 181General Information.................. 176, 181High Speed.....................................177Inflation Pressure............................. 177Jacking................................... 133, 168Life Of Tires.....................................179Load Capacity.......................... 173, 174Pressure Monitoring System (TPMS).. 50, 61Quality Grading................................ 185Radial............................................ 178Replacement................................... 179Rotation......................................... 185Safety.................................... 168, 176
Sizes............................................. 169Snow Tires..................................... 181Spare Tires...................... 181, 182, 183Spinning........................................ 178Trailer Towing.................................. 117Tread Wear Indicators....................... 179Wheel Nut Torque............................ 191
To Open Hood
......................................... 36
Tongue Weight/Trailer Weight
.................... 115
Torque Converter Clutch
........................... 102
Towing
........................................113, 149Disabled Vehicle.............................. 149Guide............................................ 115Recreational................................... 120Weight........................................... 115
Towing Behind A Motorhome
...................... 120
Traction
.............................................. 121
Traction Control
...................................... 60
Trailer Sway Control (TSC)
........................... 61
Trailer Towing
....................................... 113Cooling System Tips.......................... 119Hitches.......................................... 114Minimum Requirements.................... 116Tips.............................................. 118Trailer And Tongue Weight.................. 115Wiring........................................... 118
Trailer Towing Guide
............................... 115
Trailer Weight
....................................... 115
20_VF_OM_EN_US_t.book Page 256