ESP Ram ProMaster 2020 User Guide
[x] Cancel search | Manufacturer: RAM, Model Year: 2020, Model line: ProMaster, Model: Ram ProMaster 2020Pages: 264, PDF Size: 10.11 MB
Page 66 of 264
64SAFETY
NOTE:
Your vehicle is equipped with a regular size
spare wheel.
1. The spare tire does not have a TPM sensor.
Therefore, the TPMS will not monitor the
pressure in the spare tire.
2. If a spare tire not equipped with the Tire Pressure Monitoring sensor is used, the
TPMS Warning Light will turn on, flashing for
75 seconds and then remaining solid for
each subsequent ignition key cycle.
3. Once you repair or replace the original road tire and reinstall it on the vehicle in place of
the spare tire, the TPMS will update auto -
matically and the Tire Pressure Monitoring
Light will extinguish once the updated tire
pressures have been received. The vehicle
may need to be driven for up to 20 minutes
above 15 mph (24 km/h) to receive this
information.
NOTE:
For correct Tire Pressure Monitoring behavior,
please wait for about 20 minutes in key-off
during each tire substitution.General Information
The following regulatory statement applies to all
Radio Frequency (RF) devices equipped in this
vehicle:
This device complies with Part 15 of the FCC
Rules and with Innovation, Science and
Economic Development Canada license-exempt
RSS standard(s). Operation is subject to the
following two conditions:
1. This device may not cause harmful interfer -
ence, and
2. This device must accept any interference received, including interference that may
cause undesired operation.
Le présent appareil est conforme aux CNR
d`Innovation, Science and Economic Develop -
ment applicables aux appareils radio exempts
de licence. L'exploitation est autorisée aux deux
conditions suivantes:
1. l'appareil ne doit pas produire de brouil -
lage, et
2. l'utilisateur de l'appareil doit accepter tout brouillage radioélectrique subi, même si le
brouillage est susceptible d'en comprom -
ettre le fonctionnement. La operación de este equipo está sujeta a las
siguientes dos condiciones:
1. es posible que este equipo o dispositivo no
cause interferencia perjudicial y
2. este equipo o dispositivo debe aceptar cual -
quier interferencia, incluyendo la que
pueda causar su operación no deseada.
NOTE:
Changes or modifications not expressly
approved by the party responsible for compli -
ance could void the user’s authority to operate
the equipment.
OCCUPANT RESTRAINT SYSTEMS
Some of the most important safety features in
your vehicle are the restraint systems:
Occupant Restraint Systems Features
Seat Belt Systems
Supplemental Restraint Systems (SRS) Air
Bags
Child Restraints
20_VF_OM_EN_US_t.book Page 64
Page 80 of 264
78SAFETY
(Continued)
Side Impacts
The Side Air Bags are designed to activate in
certain side impacts. The Occupant Restraint
Controller (ORC) determines whether the
deployment of the Side Air Bags in a particular
impact event is appropriate, based on the
severity and type of collision. The side impact
sensors aid the ORC in determining the appro -
priate response to impact events. The system is
calibrated to deploy the Side Air Bags on the
impact side of the vehicle during impacts that
require Side Air Bag occupant protection. In side
impacts, the Side Air Bags deploy inde -
pendently; a left side impact deploys the left
Side Air Bags only and a right-side impact
deploys the right Side Air Bags only. Vehicle
damage by itself is not a good indicator of
whether or not Side Air Bags should have
deployed. The Side Air Bags will not deploy in all side colli
-
sions, including some collisions at certain
angles, or some side collisions that do not
impact the area of the passenger compartment.
The Side Air Bags may deploy during angled or
offset frontal collisions where the front air bags
deploy.
Side Air Bags are a supplement to the seat belt
restraint system. Side Air Bags deploy in less
time than it takes to blink your eyes.
WARNING!
Occupants, including children, who are up
against or very close to Side Air Bags can be
seriously injured or killed. Occupants,
including children, should never lean on or
sleep against the door, side windows, or
area where the side air bags inflate, even if
they are in an infant or child restraint.
Seat belts (and child restraints where
appropriate) are necessary for your protec -
tion in all collisions. They also help keep
you in position, away from an inflating Side
Air Bag. To get the best protection from the
Side Air Bags, occupants must wear their
seat belts properly and sit upright with their
backs against the seats. Children must be
properly restrained in a child restraint or
booster seat that is appropriate for the size
of the child.
WARNING!
(Continued)
20_VF_OM_EN_US_t.book Page 78
Page 99 of 264
STARTING AND OPERATING97
(Continued)
Only shift from DRIVE to PARK or REVERSE
when the accelerator pedal is released and the
vehicle is stopped. Be sure to keep your foot on
the brake pedal when shifting between these
gears.
The transmission gear selector provides PARK,
REVERSE, NEUTRAL, DRIVE, and Electronic
Range Select (ERS) shift positions. Manual
downshifts can be made using the ERS shift
control. Moving the gear selector into the ERS
(-/+) position (beside the DRIVE position) acti -
vates ERS mode, displays the current gear in
the instrument cluster, and prevents automatic
upshifts beyond this gear. In ERS mode,
toggling the gear selector forward (-) or rear -
ward (+) will change the highest available gear.
Refer to "Electronic Range Select (ERS) Opera -
tion" in this section for further information.
NOTE:
If the gear selector cannot be moved to the
PARK, REVERSE, or NEUTRAL position (when
pushed forward) it is probably in the ERS (+/-)
position (beside the DRIVE position). In ERS
mode, the transmission gear limit (1, 2, 3, etc.)
is displayed in the instrument cluster. Move the gear selector to the right (into the DRIVE [D]
position) for access to PARK, REVERSE, and
NEUTRAL.
Gear Ranges
Do not depress the accelerator pedal when
shifting from PARK or NEUTRAL into another
gear range.
NOTE:
After selecting any gear range, wait a moment
to allow the selected gear to engage before
accelerating. This is especially important when
the engine is cold.
PARK (P)
This range supplements the parking brake by
locking the transmission. The engine can be
started in this range. Never attempt to use
PARK while the vehicle is in motion. Apply the
parking brake when exiting the vehicle in this
range.
When parking on a level surface, you may shift
the transmission into PARK first, and then apply
the parking brake. When parking on a hill, apply the parking brake
before shifting the transmission to PARK, other
-
wise the load on the transmission locking mech -
anism may make it difficult to move the gear
selector out of PARK. As an added precaution,
turn the front wheels toward the curb on a
downhill grade, and away from the curb on an
uphill grade.
When exiting the vehicle, always:
Apply the parking brake.
Shift the transmission into PARK.
Turn the engine OFF.
Remove the ignition key.
WARNING!
Never use the PARK position as a substi -
tute for the parking brake. Always apply the
parking brake fully when exiting the vehicle
to guard against vehicle movement and
possible injury or damage.
5
20_VF_OM_EN_US_t.book Page 97
Page 101 of 264
STARTING AND OPERATING99
REVERSE (R)
This range is for moving the vehicle backward.
Shift into REVERSE only after the vehicle has
come to a complete stop.
NEUTRAL (N)
Use this range when the vehicle is standing for
prolonged periods with the engine running. The
engine may be started in this range. Apply the
parking brake and shift the transmission into
PARK if you must exit the vehicle.
DRIVE (D)
This range should be used for most city and
highway driving. It provides the smoothest
upshifts and downshifts, and the best fuel
economy. The transmission automatically
upshifts through all forward gears. The DRIVE
position provides optimum driving characteris -
tics under all normal operating conditions. When frequent transmission shifting occurs
(such as when operating the vehicle under
heavy loading conditions, in hilly terrain, trav
-
eling into strong head winds, or while towing a
heavy trailer), select TOW/HAUL mode or use
the Electronic Range Select (ERS) shift control
(refer to “Electronic Range Select (ERS) Opera -
tion” in this section for further information) to
select a lower gear range. Under these condi -
tions, using a lower gear range will improve
performance and extend transmission life by
reducing excessive shifting and heat buildup.
During cold temperatures, transmission opera -
tion may be modified depending on engine and
transmission temperature as well as vehicle
speed. This feature improves warm up time of
the engine and transmission to achieve
maximum efficiency. Engagement of the torque
converter clutch is inhibited until the transmis -
sion fluid is warm refer to the “Note” under
“Torque Converter Clutch” in this section.
During extremely cold temperatures (-16°F
[-27°C] or below), operation may briefly be
limited to third gear only. Normal operation will
resume once the transmission temperature has
risen to a suitable level.WARNING!
Do not coast in NEUTRAL and never turn off
the ignition to coast down a hill. These are
unsafe practices that limit your response to
changing traffic or road conditions. You might
lose control of the vehicle and have a collision.
CAUTION!
Towing the vehicle, coasting, or driving for any
other reason with the transmission in
NEUTRAL can cause severe transmission
damage.
Refer to “Recreational Towing” in “Starting
And Operating” and “Towing A Disabled
Vehicle” in “In Case Of Emergency” for further
information.
5
20_VF_OM_EN_US_t.book Page 99
Page 104 of 264
102STARTING AND OPERATING
Torque Converter Clutch
A feature designed to improve fuel economy
has been included in the automatic transmis -
sion on your vehicle. A clutch within the torque
converter engages automatically at calibrated
speeds. This may result in a slightly different
feeling or response during normal operation in
the upper gears. When the vehicle speed drops
or during some accelerations, the clutch auto -
matically disengages.
NOTE:
The torque converter clutch will not engage
until the transmission fluid and engine
coolant are warm [usually after 1 to 3 miles
(2 to 5 km) of driving]. Because the engine
speed is higher when the torque converter
clutch is not engaged, it may seem as if the
transmission is not shifting into Overdrive
when cold. This is normal. Using the Elec -
tronic Range Select (ERS) shift control, when
the transmission is sufficiently warm, will
demonstrate that the transmission is able to
shift into and out of Overdrive.
If the vehicle has not been driven for several
days, the first few seconds of operation after
shifting the transmission into gear may seem
sluggish. This is due to the fluid partially
draining from the torque converter into the
transmission. This condition is normal and
will not cause damage to the transmission.
The torque converter will refill within five
seconds after starting the engine.
POWER STEERING
The standard power steering system will give
you good vehicle response and increased ease
of maneuverability in tight spaces. The system
will provide mechanical steering capability if
power assist is lost.
If for some reason the power assist is inter -
rupted, it will still be possible to steer your
vehicle. Under these conditions, you will
observe a substantial increase in steering
effort, especially at very low vehicle speeds and
during parking maneuvers. NOTE:
Increased noise levels at the end of the
steering wheel travel are considered normal
and do not indicate that there is a problem
with the power steering system.
Upon initial start-up in cold weather, the
power steering pump may make noise for a
short amount of time. This is due to the cold,
thick fluid in the steering system. This noise
should be considered normal, and it does not
in any way damage the steering system.
CAUTION!
Prolonged operation of the steering system at
the end of the steering wheel travel will
increase the steering fluid temperature and it
should be avoided when possible. Damage to
the power steering pump may occur.
20_VF_OM_EN_US_t.book Page 102
Page 108 of 264
106STARTING AND OPERATING
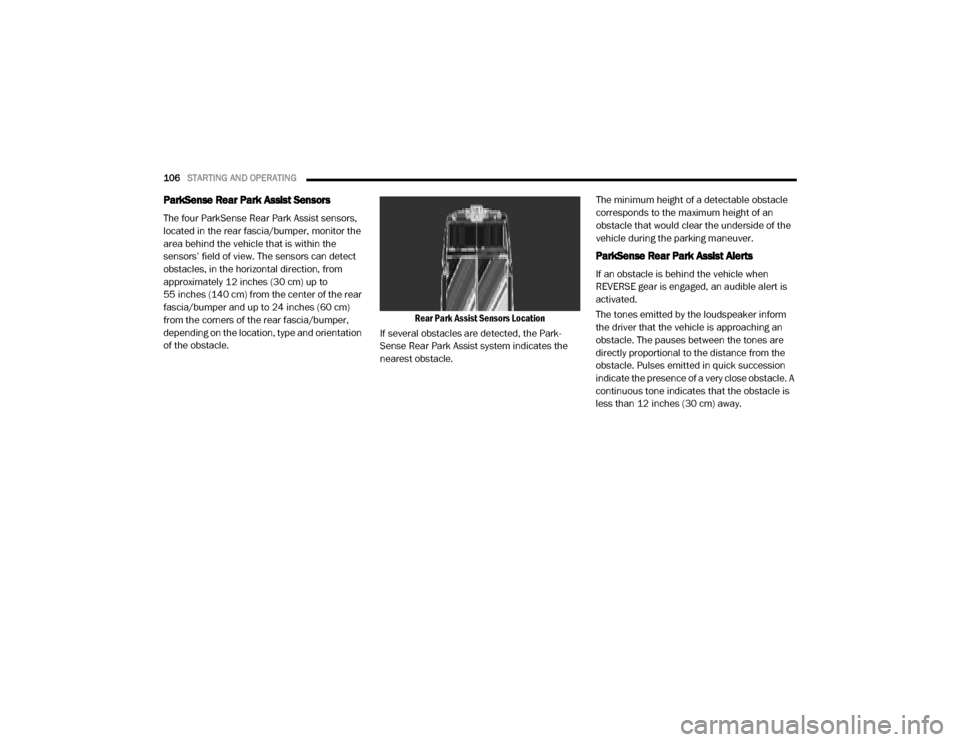
ParkSense Rear Park Assist Sensors
The four ParkSense Rear Park Assist sensors,
located in the rear fascia/bumper, monitor the
area behind the vehicle that is within the
sensors’ field of view. The sensors can detect
obstacles, in the horizontal direction, from
approximately 12 inches (30 cm) up to
55 inches (140 cm) from the center of the rear
fascia/bumper and up to 24 inches (60 cm)
from the corners of the rear fascia/bumper,
depending on the location, type and orientation
of the obstacle. Rear Park Assist Sensors Location
If several obstacles are detected, the Park -
Sense Rear Park Assist system indicates the
nearest obstacle. The minimum height of a detectable obstacle
corresponds to the maximum height of an
obstacle that would clear the underside of the
vehicle during the parking maneuver.
ParkSense Rear Park Assist Alerts
If an obstacle is behind the vehicle when
REVERSE gear is engaged, an audible alert is
activated.
The tones emitted by the loudspeaker inform
the driver that the vehicle is approaching an
obstacle. The pauses between the tones are
directly proportional to the distance from the
obstacle. Pulses emitted in quick succession
indicate the presence of a very close obstacle. A
continuous tone indicates that the obstacle is
less than 12 inches (30 cm) away.
20_VF_OM_EN_US_t.book Page 106
Page 111 of 264
STARTING AND OPERATING109
If it’s necessary to keep the ball mount and
hitch ball assembly mounted for a long period,
it is possible to filter out the ball mount and
hitch ball assembly presence in sensor field of
view. The filtering operation must be performed
only by an authorized dealer.
PARKVIEW REAR BACK UP CAMERA
Your vehicle is equipped with the ParkView Rear
Back Up Camera that allows you to see an
on-screen image of the rear surroundings of
your vehicle whenever the gear selector is put
into REVERSE and/or when the rear doors are opened. The image will be displayed on the
touchscreen display along with a caution note
to “check entire surroundings” across the top of
the screen. After five seconds this note will
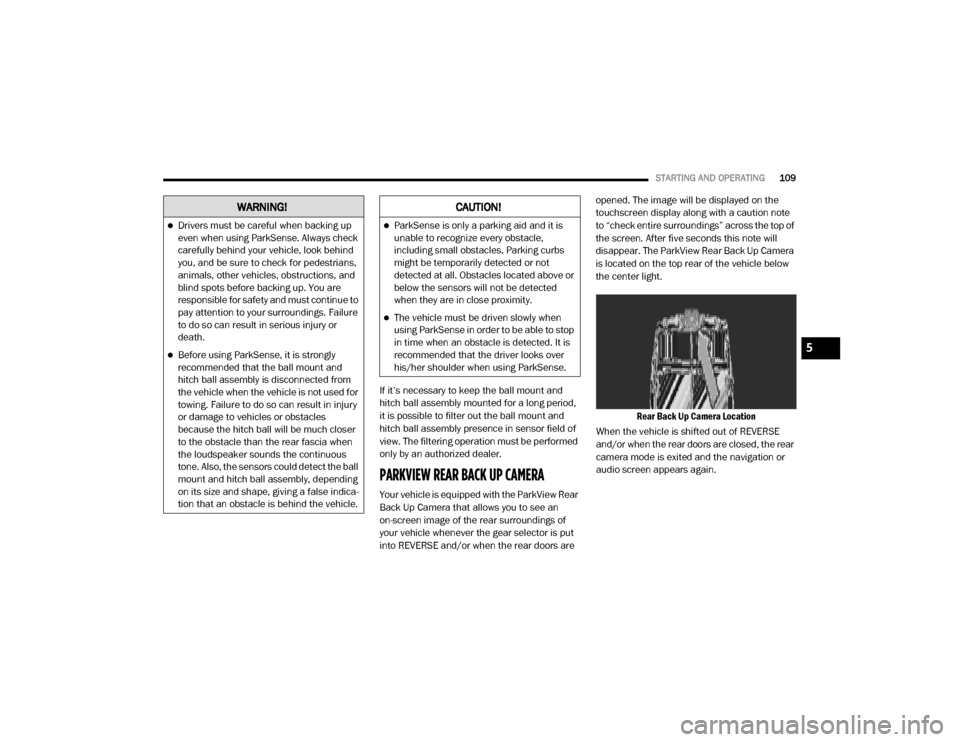
disappear. The ParkView Rear Back Up Camera
is located on the top rear of the vehicle below
the center light.
Rear Back Up Camera Location
When the vehicle is shifted out of REVERSE
and/or when the rear doors are closed, the rear
camera mode is exited and the navigation or
audio screen appears again.
WARNING!
Drivers must be careful when backing up
even when using ParkSense. Always check
carefully behind your vehicle, look behind
you, and be sure to check for pedestrians,
animals, other vehicles, obstructions, and
blind spots before backing up. You are
responsible for safety and must continue to
pay attention to your surroundings. Failure
to do so can result in serious injury or
death.
Before using ParkSense, it is strongly
recommended that the ball mount and
hitch ball assembly is disconnected from
the vehicle when the vehicle is not used for
towing. Failure to do so can result in injury
or damage to vehicles or obstacles
because the hitch ball will be much closer
to the obstacle than the rear fascia when
the loudspeaker sounds the continuous
tone. Also, the sensors could detect the ball
mount and hitch ball assembly, depending
on its size and shape, giving a false indica -
tion that an obstacle is behind the vehicle.
CAUTION!
ParkSense is only a parking aid and it is
unable to recognize every obstacle,
including small obstacles. Parking curbs
might be temporarily detected or not
detected at all. Obstacles located above or
below the sensors will not be detected
when they are in close proximity.
The vehicle must be driven slowly when
using ParkSense in order to be able to stop
in time when an obstacle is detected. It is
recommended that the driver looks over
his/her shoulder when using ParkSense.
5
20_VF_OM_EN_US_t.book Page 109
Page 112 of 264
110STARTING AND OPERATING
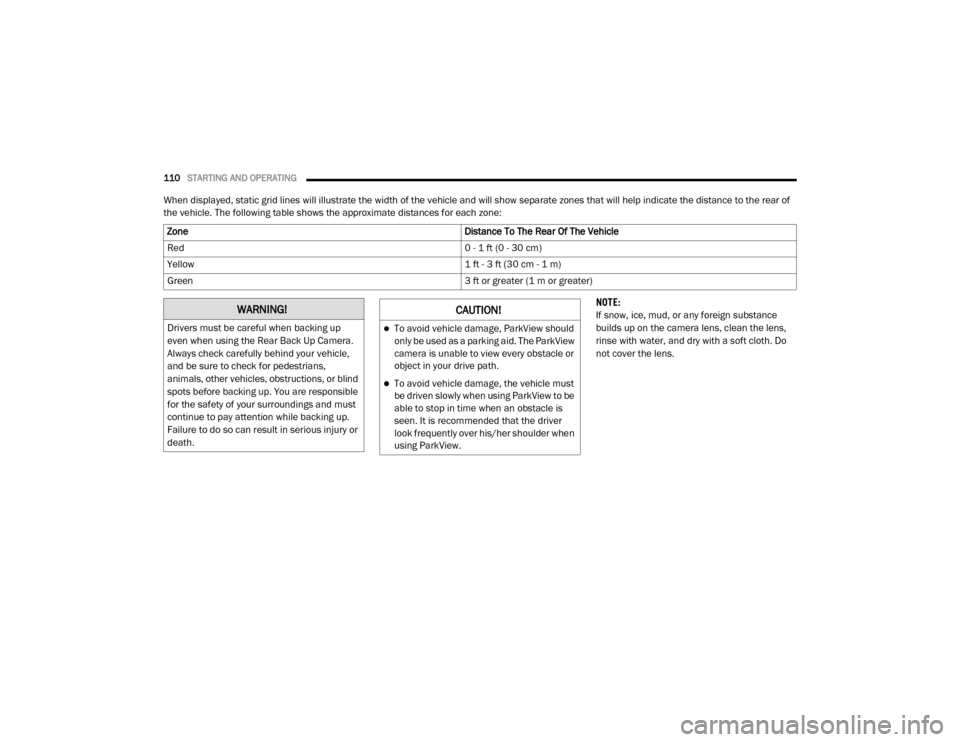
When displayed, static grid lines will illustrate the width of the vehicle and will show separate zones that will help indicate the distance to the rear of
the vehicle. The following table shows the approximate distances for each zone:
NOTE:
If snow, ice, mud, or any foreign substance
builds up on the camera lens, clean the lens,
rinse with water, and dry with a soft cloth. Do
not cover the lens.
Zone
Distance To The Rear Of The Vehicle
Red 0 - 1 ft (0 - 30 cm)
Yellow 1 ft - 3 ft (30 cm - 1 m)
Green 3 ft or greater (1 m or greater)
WARNING!
Drivers must be careful when backing up
even when using the Rear Back Up Camera.
Always check carefully behind your vehicle,
and be sure to check for pedestrians,
animals, other vehicles, obstructions, or blind
spots before backing up. You are responsible
for the safety of your surroundings and must
continue to pay attention while backing up.
Failure to do so can result in serious injury or
death.
CAUTION!
To avoid vehicle damage, ParkView should
only be used as a parking aid. The ParkView
camera is unable to view every obstacle or
object in your drive path.
To avoid vehicle damage, the vehicle must
be driven slowly when using ParkView to be
able to stop in time when an obstacle is
seen. It is recommended that the driver
look frequently over his/her shoulder when
using ParkView.
20_VF_OM_EN_US_t.book Page 110
Page 130 of 264
128IN CASE OF EMERGENCY
(Continued)
2. Using a suitable tool, flex the housing to lift
the light pod cover away from the unit.
Dome Lamp Light Pod Cover
3. Remove and replace the bulbs as needed.
Dome Lamp Light Bulbs 4. Close the housing cover making sure it
snaps together properly and connect the
lamp.
5. Install overhead console into place making sure to seat the assembly’s forward end
first and then snapping it flush so that the
tension spring is fully seating in the housing.
FUSESUnderhood Fuses
The Front Power Distribution Center is located
on the driver’s side of the engine compartment.
To access the fuses, remove the cover.
Front Power Distribution Center
The ID number of the electrical component
corresponding to each fuse can be found on the
back of the cover.WARNING!
When replacing a blown fuse, always use
an appropriate replacement fuse with the
same amp rating as the original fuse. Never
replace a fuse with another fuse of higher
amp rating. Never replace a blown fuse with
metal wires or any other material. Do not
place a fuse inside a circuit breaker cavity
or vice versa. Failure to use proper fuses
may result in serious personal injury, fire
and/or property damage.
Before replacing a fuse, make sure that the
ignition is off and that all the other services
are switched off and/or disengaged.
If the replaced fuse blows again, contact an
authorized dealer.
If a general protection fuse for safety
systems (air bag system, braking system),
power unit systems (engine system, trans -
mission system) or steering system blows,
contact an authorized dealer.
WARNING!
(Continued)
20_VF_OM_EN_US_t.book Page 128
Page 143 of 264
IN CASE OF EMERGENCY141
(Continued)
The Sealant Bottle (4) and Sealant Hose (3)
are a one tire application use and need to be
replaced after each use. Always replace
these components immediately at your orig -
inal equipment vehicle dealer.
When the Tire Service Kit sealant is in a liquid
form, clean water and a damp cloth will
remove the material from the vehicle or tire
and wheel components. Once the sealant
dries, it can easily be peeled off and properly
discarded.
For optimum performance, make sure the
valve stem on the wheel is free of debris
before connecting the Tire Service Kit.
You can use the Tire Service Kit air pump to
inflate bicycle tires. The kit also comes with
two needles, located in the Accessory Storage
Compartment (on the bottom of the air pump)
for inflating sport balls, rafts, or similar inflat -
able items. However, use only the Air Pump
Hose (5) and make sure the Mode Select
Knob (2) is in the Air Mode when inflating such
items to avoid injecting sealant into them. The
Tire Service Kit Sealant is only intended to
seal punctures less than 1/4 inch (6 mm)
diameter in the tread of your tire.
Do not lift or carry the Tire Service Kit by the
hoses.
WARNING!
Do not attempt to seal a tire on the side of
the vehicle closest to traffic. Pull far enough
off the road to avoid the danger of being hit
when using the Tire Service Kit.
Do not use Tire Service Kit or drive the
vehicle under the following circumstances:
If the puncture in the tire tread is
approximately 1/4 inch (6 mm) or
larger.
If the tire has any sidewall damage.
If the tire has any damage from driving
with extremely low tire pressure.
If the tire has any damage from driving
on a flat tire.
If the wheel has any damage.
If you are unsure of the condition of the
tire or the wheel.
Keep Tire Service Kit away from open
flames or heat source.
A loose Tire Service Kit thrown forward in a
collision or hard stop could endanger the
occupants of the vehicle. Always stow the
Tire Service Kit in the place provided.
Failure to follow these warnings can result
in injuries that are serious or fatal to you,
your passengers, and others around you.
Take care not to allow the contents of Tire
Service Kit to come in contact with hair,
eyes, or clothing. Tire Service Kit sealant is
harmful if inhaled, swallowed, or absorbed
through the skin. It causes skin, eye, and
respiratory irritation. Flush immediately
with plenty of water if there is any contact
with eyes or skin. Change clothing as soon
as possible, if there is any contact with
clothing.
Tire Service Kit Sealant solution contains
latex. In case of an allergic reaction or rash,
consult a physician immediately. Keep Tire
Service Kit out of reach of children. If swal -
lowed, rinse mouth immediately with plenty
of water and drink plenty of water. Do not
induce vomiting! Consult a physician imme -
diately.
WARNING!
(Continued)
6
20_VF_OM_EN_US_t.book Page 141