display Ram ProMaster 2020 Owner's Guide
[x] Cancel search | Manufacturer: RAM, Model Year: 2020, Model line: ProMaster, Model: Ram ProMaster 2020Pages: 264, PDF Size: 10.11 MB
Page 206 of 264
204MULTIMEDIA
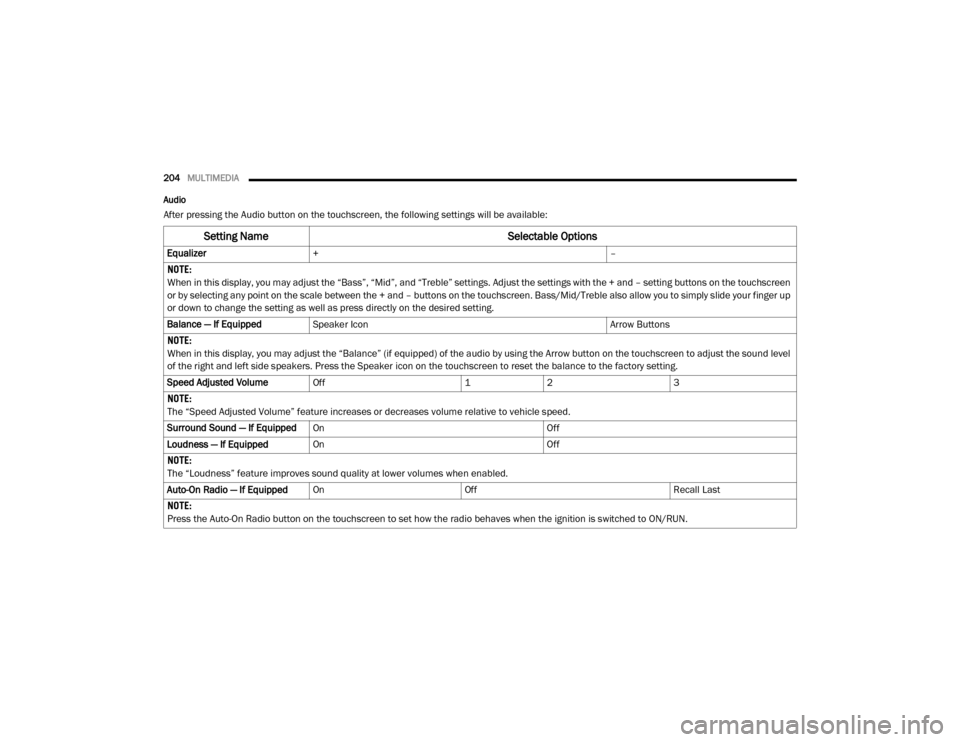
Audio
After pressing the Audio button on the touchscreen, the following settings will be available:
Setting Name Selectable Options
Equalizer+ –
NOTE:
When in this display, you may adjust the “Bass”, “Mid”, and “Treble” settings. Adjust the settings with the + and – setting buttons on the touchscreen
or by selecting any point on the scale between the + and – buttons on the touchscreen. Bass/Mid/Treble also allow you to simply slide your finger up
or down to change the setting as well as press directly on the desired setting.
Balance — If Equipped Speaker Icon Arrow Buttons
NOTE:
When in this display, you may adjust the “Balance” (if equipped) of the audio by using the Arrow button on the touchscreen to adjust the sound level
of the right and left side speakers. Press the Speaker icon on the touchscreen to reset the balance to the factory setting.
Speed Adjusted Volume Off 12 3
NOTE:
The “Speed Adjusted Volume” feature increases or decreases volume relative to vehicle speed.
Surround Sound — If Equipped On Off
Loudness — If Equipped On Off
NOTE:
The “Loudness” feature improves sound quality at lower volumes when enabled.
Auto-On Radio — If Equipped On Off Recall Last
NOTE:
Press the Auto-On Radio button on the touchscreen to set how the radio behaves when the ignition is switched to ON/RUN.
20_VF_OM_EN_US_t.book Page 204
Page 209 of 264
MULTIMEDIA207
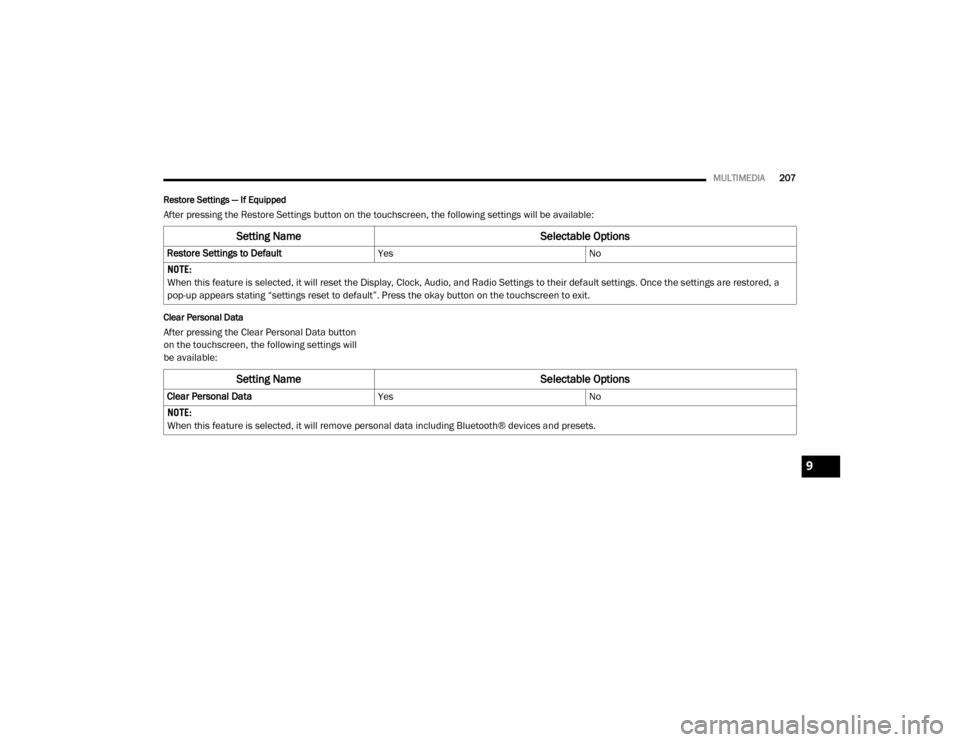
Restore Settings — If Equipped
After pressing the Restore Settings button on the touchscreen, the following settings will be available:
Clear Personal Data
After pressing the Clear Personal Data button
on the touchscreen, the following settings will
be available:
Setting Name Selectable Options
Restore Settings to DefaultYesNo
NOTE:
When this feature is selected, it will reset the Display, Clock, Audio, and Radio Settings to their default settings. Once the settings are restored, a
pop-up appears stating “settings reset to default”. Press the okay button on the touchscreen to exit.
Setting Name Selectable Options
Clear Personal DataYesNo
NOTE:
When this feature is selected, it will remove personal data including Bluetooth® devices and presets.
9
20_VF_OM_EN_US_t.book Page 207
Page 211 of 264
MULTIMEDIA209
Care And Maintenance
Touchscreen
Do not press the touchscreen with any hard
or sharp objects (pen, USB stick, jewelry,
etc.), which could scratch the touchscreen
surface!
Do not spray any liquid or caustic chemicals
directly on the screen! Use a clean and dry
microfiber lens cleaning cloth in order to
clean the touchscreen.
If necessary, use a lint-free cloth dampened
with a cleaning solution, such as isopropyl
alcohol or an isopropyl alcohol and water
solution ratio of 50:50. Be sure to follow the
solvent manufacturer's precautions and
directions.
UCONNECT 3/3 NAV WITH 5-INCH DISPLAY
Introduction To The Uconnect 3/3 NAV With
5-Inch Display System
There are a few quick ways for you to identify
your radio. For a more complete description,
please refer to the User Guide in your glove box
or visit DriveUconnect.com (US Residents) or
DriveUconnect.ca (Canadian Residents).
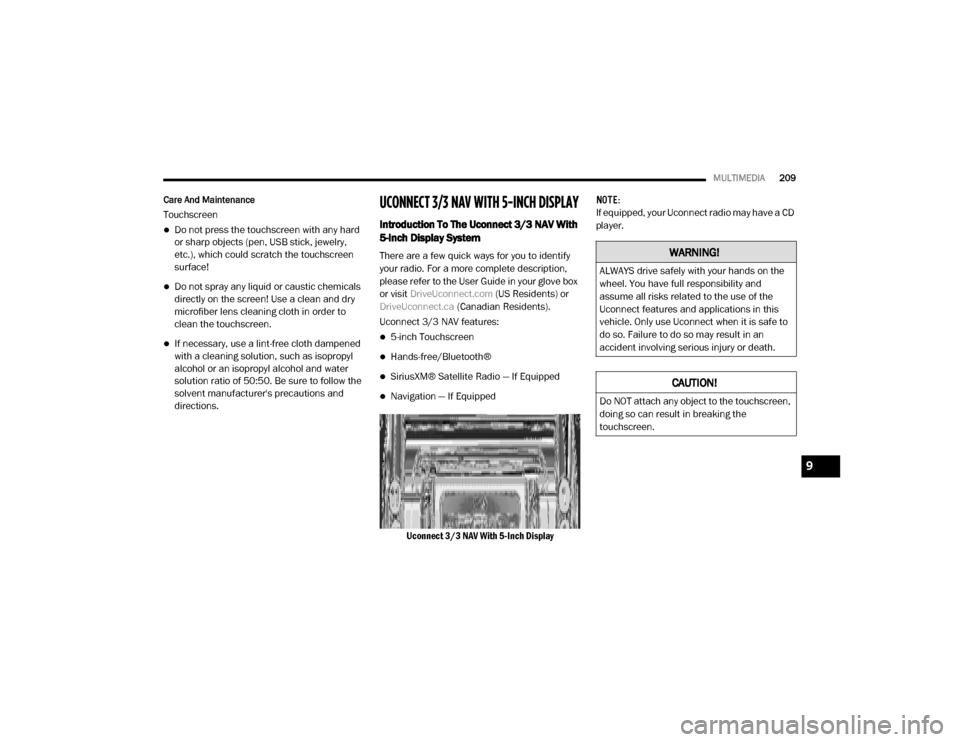
Uconnect 3/3 NAV features:
5-inch Touchscreen
Hands-free/Bluetooth®
SiriusXM® Satellite Radio — If Equipped
Navigation — If Equipped
Uconnect 3/3 NAV With 5-Inch Display NOTE:
If equipped, your Uconnect radio may have a CD
player.
WARNING!
ALWAYS drive safely with your hands on the
wheel. You have full responsibility and
assume all risks related to the use of the
Uconnect features and applications in this
vehicle. Only use Uconnect when it is safe to
do so. Failure to do so may result in an
accident involving serious injury or death.
CAUTION!
Do NOT attach any object to the touchscreen,
doing so can result in breaking the
touchscreen.
9
20_VF_OM_EN_US_t.book Page 209
Page 212 of 264
210MULTIMEDIA
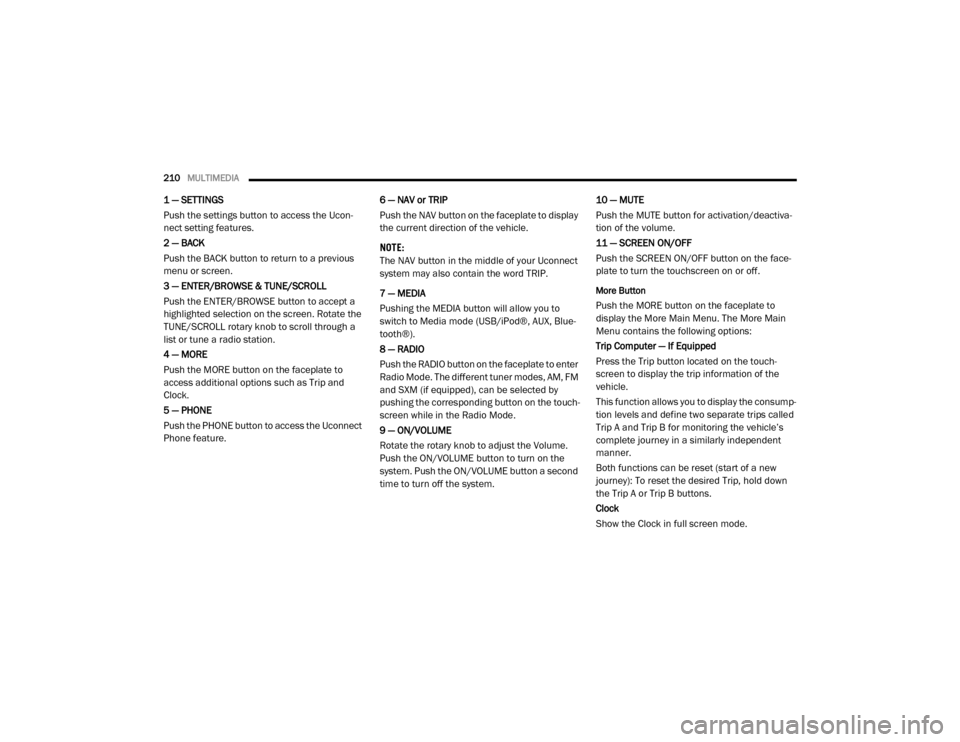
1 — SETTINGS
Push the settings button to access the Ucon -
nect setting features.
2 — BACK
Push the BACK button to return to a previous
menu or screen.
3 — ENTER/BROWSE & TUNE/SCROLL
Push the ENTER/BROWSE button to accept a
highlighted selection on the screen. Rotate the
TUNE/SCROLL rotary knob to scroll through a
list or tune a radio station.
4 — MORE
Push the MORE button on the faceplate to
access additional options such as Trip and
Clock.
5 — PHONE
Push the PHONE button to access the Uconnect
Phone feature. 6 — NAV or TRIP
Push the NAV button on the faceplate to display
the current direction of the vehicle.
NOTE:
The NAV button in the middle of your Uconnect
system may also contain the word TRIP.
7 — MEDIA
Pushing the MEDIA button will allow you to
switch to Media mode (USB/iPod®, AUX, Blue
-
tooth®).
8 — RADIO
Push the RADIO button on the faceplate to enter
Radio Mode. The different tuner modes, AM, FM
and SXM (if equipped), can be selected by
pushing the corresponding button on the touch -
screen while in the Radio Mode.
9 — ON/VOLUME
Rotate the rotary knob to adjust the Volume.
Push the ON/VOLUME button to turn on the
system. Push the ON/VOLUME button a second
time to turn off the system. 10 — MUTE
Push the MUTE button for activation/deactiva
-
tion of the volume.
11 — SCREEN ON/OFF
Push the SCREEN ON/OFF button on the face -
plate to turn the touchscreen on or off.
More Button
Push the MORE button on the faceplate to
display the More Main Menu. The More Main
Menu contains the following options:
Trip Computer — If Equipped
Press the Trip button located on the touch-
screen to display the trip information of the
vehicle.
This function allows you to display the consump -
tion levels and define two separate trips called
Trip A and Trip B for monitoring the vehicle’s
complete journey in a similarly independent
manner.
Both functions can be reset (start of a new
journey): To reset the desired Trip, hold down
the Trip A or Trip B buttons.
Clock
Show the Clock in full screen mode.
20_VF_OM_EN_US_t.book Page 210
Page 213 of 264
MULTIMEDIA211
Radio Mode
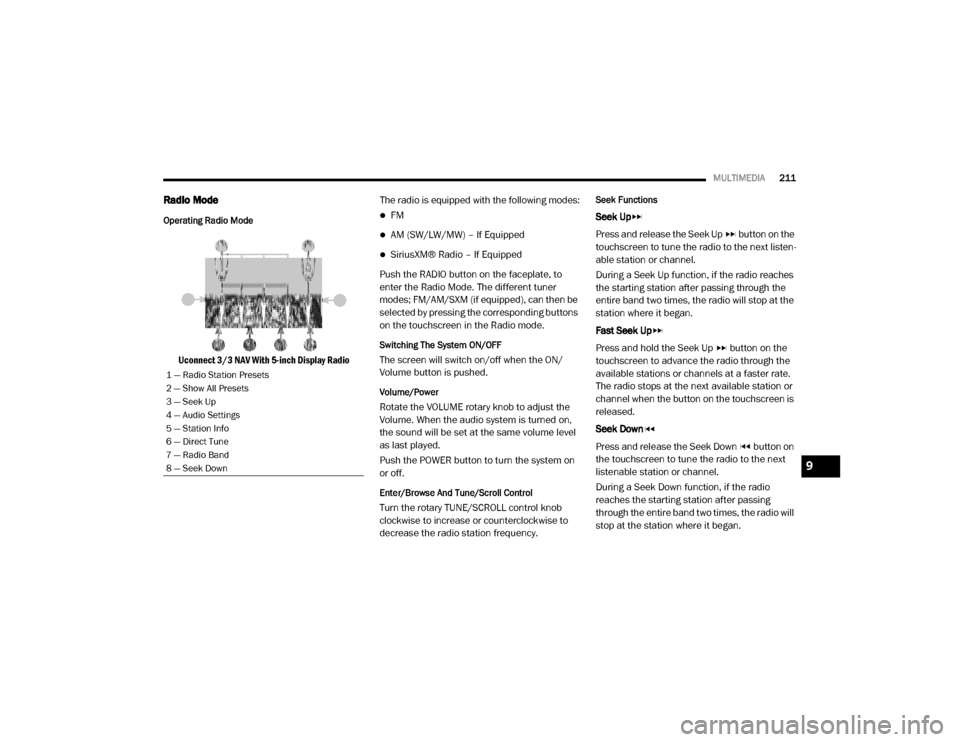
Operating Radio Mode
Uconnect 3/3 NAV With 5-inch Display Radio The radio is equipped with the following modes:
FM
AM (SW/LW/MW) – If Equipped
SiriusXM® Radio – If Equipped
Push the RADIO button on the faceplate, to
enter the Radio Mode. The different tuner
modes; FM/AM/SXM (if equipped), can then be
selected by pressing the corresponding buttons
on the touchscreen in the Radio mode.
Switching The System ON/OFF
The screen will switch on/off when the ON/
Volume button is pushed.
Volume/Power
Rotate the VOLUME rotary knob to adjust the
Volume. When the audio system is turned on,
the sound will be set at the same volume level
as last played.
Push the POWER button to turn the system on
or off.
Enter/Browse And Tune/Scroll Control
Turn the rotary TUNE/SCROLL control knob
clockwise to increase or counterclockwise to
decrease the radio station frequency.
Seek Functions
Seek Up
Press and release the Seek Up button on the
touchscreen to tune the radio to the next listen -
able station or channel.
During a Seek Up function, if the radio reaches
the starting station after passing through the
entire band two times, the radio will stop at the
station where it began.
Fast Seek Up
Press and hold the Seek Up button on the
touchscreen to advance the radio through the
available stations or channels at a faster rate.
The radio stops at the next available station or
channel when the button on the touchscreen is
released.
Seek Down
Press and release the Seek Down button on
the touchscreen to tune the radio to the next
listenable station or channel.
During a Seek Down function, if the radio
reaches the starting station after passing
through the entire band two times, the radio will
stop at the station where it began.
1 — Radio Station Presets
2 — Show All Presets
3 — Seek Up
4 — Audio Settings
5 — Station Info
6 — Direct Tune
7 — Radio Band
8 — Seek Down
9
20_VF_OM_EN_US_t.book Page 211
Page 214 of 264
212MULTIMEDIA
Fast Seek Down
Press and hold the Seek Down button on the
touchscreen to advance the radio through the
available stations or channel at a faster rate.
The radio stops at the next available station or
channel when the button on the touchscreen is
released.
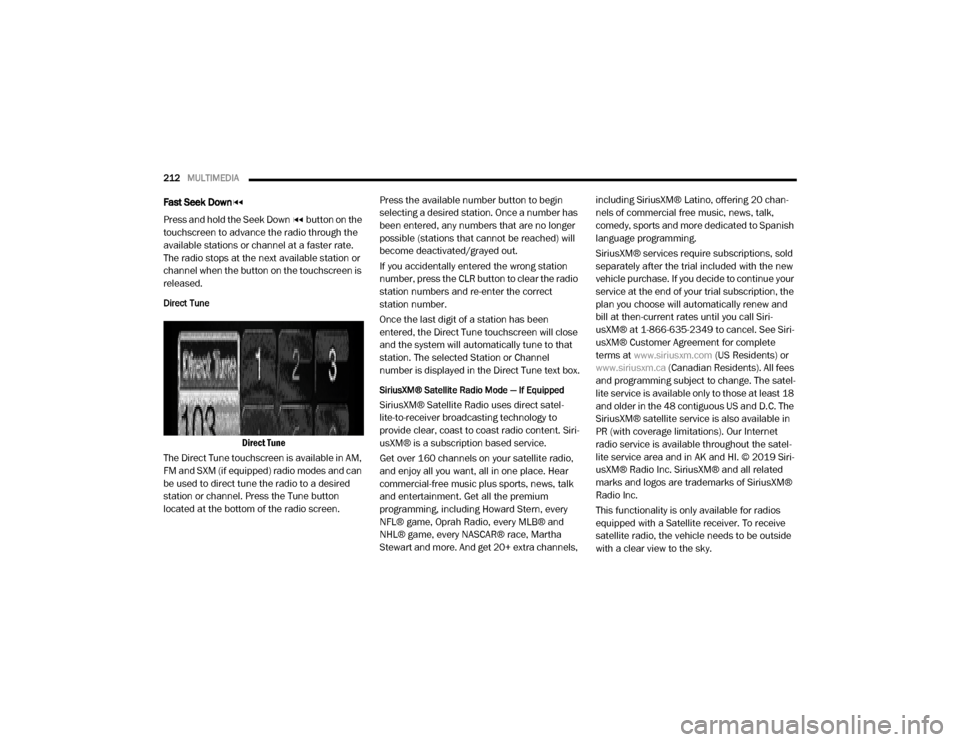
Direct Tune
Direct Tune
The Direct Tune touchscreen is available in AM,
FM and SXM (if equipped) radio modes and can
be used to direct tune the radio to a desired
station or channel. Press the Tune button
located at the bottom of the radio screen. Press the available number button to begin
selecting a desired station. Once a number has
been entered, any numbers that are no longer
possible (stations that cannot be reached) will
become deactivated/grayed out.
If you accidentally entered the wrong station
number, press the CLR button to clear the radio
station numbers and re-enter the correct
station number.
Once the last digit of a station has been
entered, the Direct Tune touchscreen will close
and the system will automatically tune to that
station. The selected Station or Channel
number is displayed in the Direct Tune text box.
SiriusXM® Satellite Radio Mode — If Equipped
SiriusXM® Satellite Radio uses direct satel
-
lite-to-receiver broadcasting technology to
provide clear, coast to coast radio content. Siri -
usXM® is a subscription based service.
Get over 160 channels on your satellite radio,
and enjoy all you want, all in one place. Hear
commercial-free music plus sports, news, talk
and entertainment. Get all the premium
programming, including Howard Stern, every
NFL® game, Oprah Radio, every MLB® and
NHL® game, every NASCAR® race, Martha
Stewart and more. And get 20+ extra channels, including SiriusXM® Latino, offering 20 chan
-
nels of commercial free music, news, talk,
comedy, sports and more dedicated to Spanish
language programming.
SiriusXM® services require subscriptions, sold
separately after the trial included with the new
vehicle purchase. If you decide to continue your
service at the end of your trial subscription, the
plan you choose will automatically renew and
bill at then-current rates until you call Siri -
usXM® at 1-866-635-2349 to cancel. See Siri -
usXM® Customer Agreement for complete
terms at www.siriusxm.com (US Residents) or
www.siriusxm.ca (Canadian Residents). All fees
and programming subject to change. The satel-
lite service is available only to those at least 18
and older in the 48 contiguous US and D.C. The
SiriusXM® satellite service is also available in
PR (with coverage limitations). Our Internet
radio service is available throughout the satel -
lite service area and in AK and HI. © 2019 Siri -
usXM® Radio Inc. SiriusXM® and all related
marks and logos are trademarks of SiriusXM®
Radio Inc.
This functionality is only available for radios
equipped with a Satellite receiver. To receive
satellite radio, the vehicle needs to be outside
with a clear view to the sky.
20_VF_OM_EN_US_t.book Page 212
Page 215 of 264
MULTIMEDIA213
If the screen displays Acquiring Signal, you may
need to change the vehicle’s position to receive
a signal. In most cases, the satellite radio does
not receive a signal in underground parking
garages or tunnels.
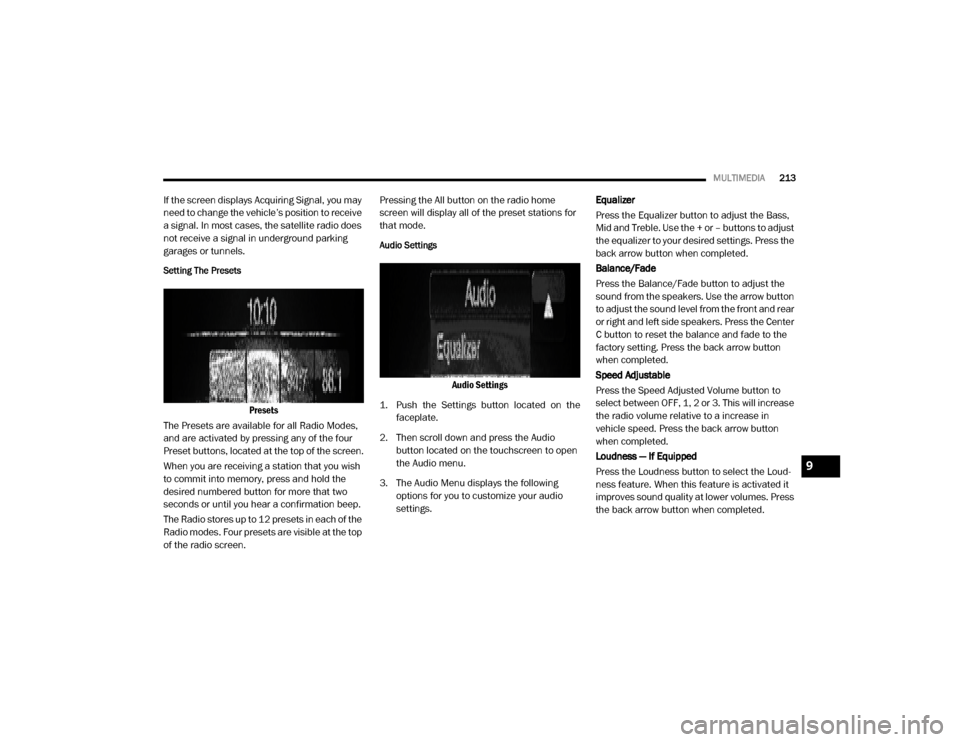
Setting The Presets
Presets
The Presets are available for all Radio Modes,
and are activated by pressing any of the four
Preset buttons, located at the top of the screen.
When you are receiving a station that you wish
to commit into memory, press and hold the
desired numbered button for more that two
seconds or until you hear a confirmation beep.
The Radio stores up to 12 presets in each of the
Radio modes. Four presets are visible at the top
of the radio screen. Pressing the All button on the radio home
screen will display all of the preset stations for
that mode.
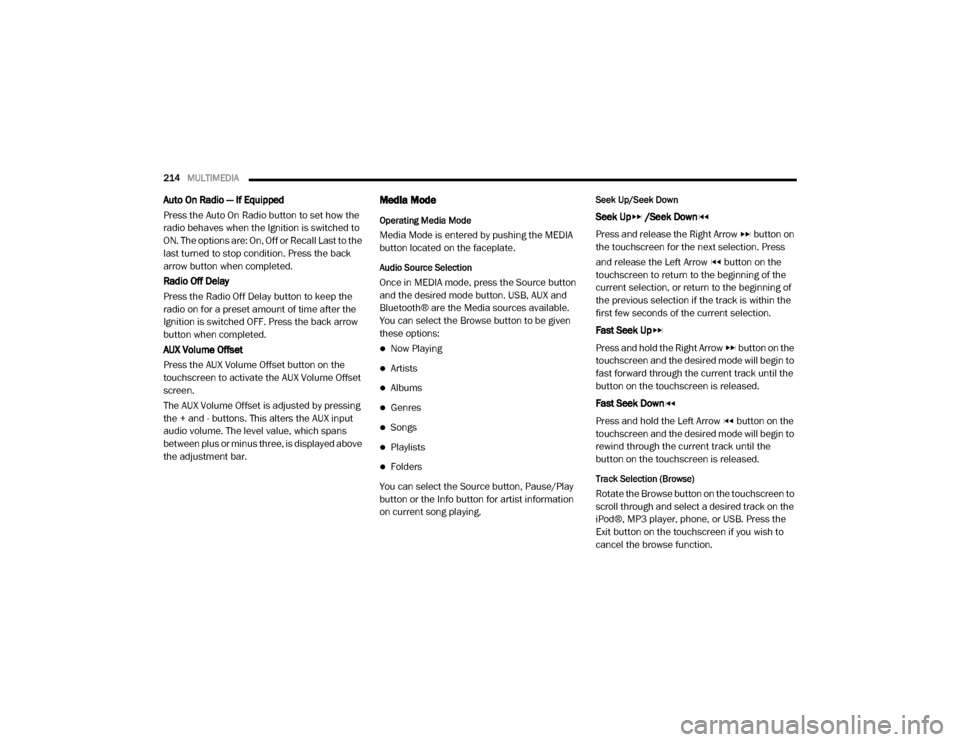
Audio Settings
Audio Settings
1. Push the Settings button located on the faceplate.
2. Then scroll down and press the Audio button located on the touchscreen to open
the Audio menu.
3. The Audio Menu displays the following options for you to customize your audio
settings. Equalizer
Press the Equalizer button to adjust the Bass,
Mid and Treble. Use the + or – buttons to adjust
the equalizer to your desired settings. Press the
back arrow button when completed.
Balance/Fade
Press the Balance/Fade button to adjust the
sound from the speakers. Use the arrow button
to adjust the sound level from the front and rear
or right and left side speakers. Press the Center
C button to reset the balance and fade to the
factory setting. Press the back arrow button
when completed.
Speed Adjustable
Press the Speed Adjusted Volume button to
select between OFF, 1, 2 or 3. This will increase
the radio volume relative to a increase in
vehicle speed. Press the back arrow button
when completed.
Loudness — If Equipped
Press the Loudness button to select the Loud
-
ness feature. When this feature is activated it
improves sound quality at lower volumes. Press
the back arrow button when completed.
9
20_VF_OM_EN_US_t.book Page 213
Page 216 of 264
214MULTIMEDIA
Auto On Radio — If Equipped
Press the Auto On Radio button to set how the
radio behaves when the Ignition is switched to
ON. The options are: On, Off or Recall Last to the
last turned to stop condition. Press the back
arrow button when completed.
Radio Off Delay
Press the Radio Off Delay button to keep the
radio on for a preset amount of time after the
Ignition is switched OFF. Press the back arrow
button when completed.
AUX Volume Offset
Press the AUX Volume Offset button on the
touchscreen to activate the AUX Volume Offset
screen.
The AUX Volume Offset is adjusted by pressing
the + and - buttons. This alters the AUX input
audio volume. The level value, which spans
between plus or minus three, is displayed above
the adjustment bar.Media Mode
Operating Media Mode
Media Mode is entered by pushing the MEDIA
button located on the faceplate.
Audio Source Selection
Once in MEDIA mode, press the Source button
and the desired mode button. USB, AUX and
Bluetooth® are the Media sources available.
You can select the Browse button to be given
these options:
Now Playing
Artists
Albums
Genres
Songs
Playlists
Folders
You can select the Source button, Pause/Play
button or the Info button for artist information
on current song playing.
Seek Up/Seek Down
Seek Up /Seek Down
Press and release the Right Arrow button on
the touchscreen for the next selection. Press
and release the Left Arrow button on the
touchscreen to return to the beginning of the
current selection, or return to the beginning of
the previous selection if the track is within the
first few seconds of the current selection.
Fast Seek Up
Press and hold the Right Arrow button on the
touchscreen and the desired mode will begin to
fast forward through the current track until the
button on the touchscreen is released.
Fast Seek Down
Press and hold the Left Arrow button on the
touchscreen and the desired mode will begin to
rewind through the current track until the
button on the touchscreen is released.
Track Selection (Browse)
Rotate the Browse button on the touchscreen to
scroll through and select a desired track on the
iPod®, MP3 player, phone, or USB. Press the
Exit button on the touchscreen if you wish to
cancel the browse function.
20_VF_OM_EN_US_t.book Page 214
Page 217 of 264
MULTIMEDIA215
Repeat
Press the Repeat button on the touchscreen to
repeat the song selection. To cancel repeat,
press the Repeat button on the touchscreen a
second time.
Shuffle
Press the Shuffle button on the touchscreen to
play the selections on the USB/iPod® or Blue -
tooth® device in random order to provide an
interesting change of pace. Press the Shuffle
button on the touchscreen a second time to
turn this feature off.
Audio
Refer to “Operating Radio Mode” in this section
for the adjustable audio settings.
Info
Press the Info button to display the current
track information. Press the X button to cancel
this feature.
USB Mode
USB Mode is entered by either inserting a USB
Jump Drive cable into the USB port, or by
pushing the MEDIA button located on the face -
plate. Once in “Media Mode”, press the Source
button on the touchscreen and select “USB”. NOTE:
The system supports only FAT32 or ExFAT
formatted USB devices. The system does not
support devices with a capacity higher than
64GB. The system does not support USB hubs
connected to the USB port of the vehicle.
Connect your multimedia device directly to the
USB port, using the specific connection cable
for the device if necessary.
Inserting USB Device
Gently insert the USB/device into the USB Port.
If you insert a USB device with the ignition ON,
the unit will switch to USB mode and begin to
play when you insert the device. The display will
show the track number and index time in
minutes and seconds. Play will begin at the start
of track 1.
Browse
Press the Browse button on the touchscreen to
select Artist, Albums, Genres, Songs, Playlists or
Folders from the USB device. Once the desired
selection is made you can chose from the avail
-
able media by pressing the button on the touch -
screen. Press the Exit button on the
touchscreen if you wish to cancel the browse
function.
Bluetooth® Mode
Bluetooth® Streaming Audio (BTSA) or Blue -
tooth® Mode is entered by pairing a Bluetooth®
device containing music to the Uconnect
system.
Before proceeding, the Bluetooth® device must
be paired with the Uconnect Phone to communi -
cate with the Uconnect system.
See the pairing procedure within this manual.
Once the Bluetooth® device is paired to the
Uconnect system, push the MEDIA button
located on the faceplate. Once in Media Mode,
press the Source button on the touchscreen
and select Bluetooth®.
NOTE:
For mobile phone compatibility and pairing
instructions, please visit UconnectPhone.com.
9
20_VF_OM_EN_US_t.book Page 215
Page 218 of 264
216MULTIMEDIA
AUX Mode
AUX Mode is entered by inserting a AUX device
using a stereo cable with a 3.5 mm audio jack
into the AUX port, or by pushing the MEDIA
button located on the faceplate. Once in Media
Mode, press the Source button on the touch -
screen and select AUX.
Inserting Auxiliary Device
Gently insert the Auxiliary device cable into the
AUX Port. If you insert a Auxiliary device with the
ignition ON, the unit will switch to AUX mode and
begin to play when you insert the device cable.
Controlling The Auxiliary Device
The control of the Auxiliary device (e.g.,
selecting playlists, play, fast forward, etc.)
cannot be provided by the radio; use the device
controls instead. Adjust the volume with the
VOLUME rotary knob, or with the volume of the
attached device.
The radio unit is acting as the amplifier for audio
output from the Auxiliary device. Therefore if the
volume control on the Auxiliary device is set too
low, there will be insufficient audio signal for the
radio unit to play the music on the device.
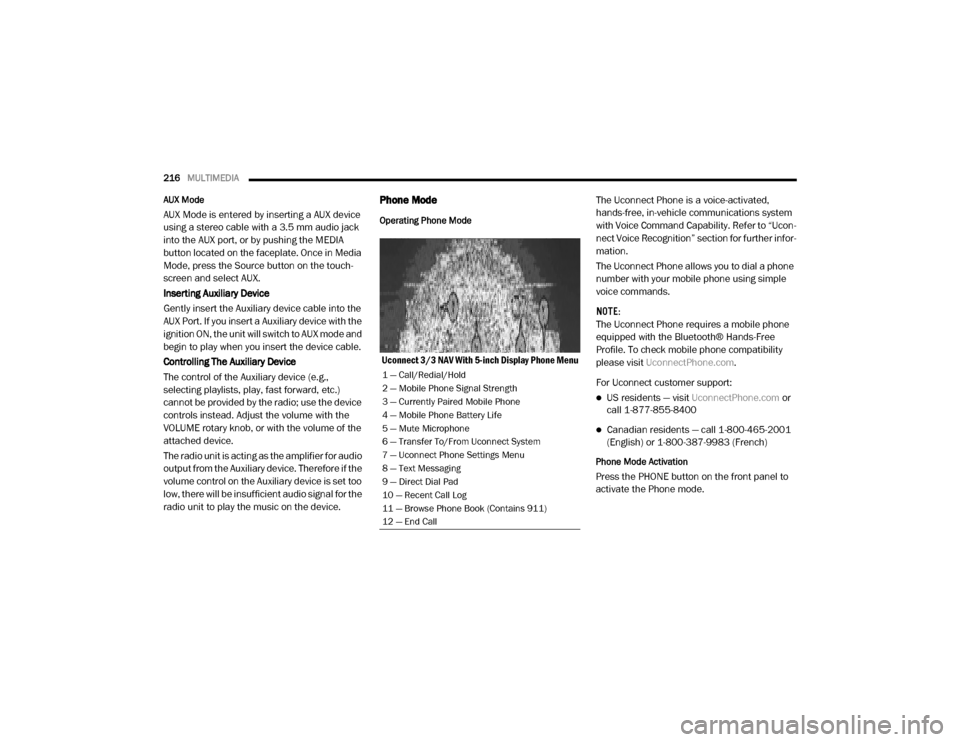
Phone Mode
Operating Phone Mode
Uconnect 3/3 NAV With 5-inch Display Phone Menu The Uconnect Phone is a voice-activated,
hands-free, in-vehicle communications system
with Voice Command Capability. Refer to “Ucon
-
nect Voice Recognition” section for further infor -
mation.
The Uconnect Phone allows you to dial a phone
number with your mobile phone using simple
voice commands.
NOTE:
The Uconnect Phone requires a mobile phone
equipped with the Bluetooth® Hands-Free
Profile. To check mobile phone compatibility
please visit UconnectPhone.com .
For Uconnect customer support:
US residents — visit UconnectPhone.com or
call 1-877-855-8400
Canadian residents — call 1-800-465-2001
(English) or 1-800-387-9983 (French)
Phone Mode Activation
Press the PHONE button on the front panel to
activate the Phone mode.
1 — Call/Redial/Hold
2 — Mobile Phone Signal Strength
3 — Currently Paired Mobile Phone
4 — Mobile Phone Battery Life
5 — Mute Microphone
6 — Transfer To/From Uconnect System
7 — Uconnect Phone Settings Menu
8 — Text Messaging
9 — Direct Dial Pad
10 — Recent Call Log
11 — Browse Phone Book (Contains 911)
12 — End Call
20_VF_OM_EN_US_t.book Page 216