service Ram ProMaster 2020 Owner's Manual
[x] Cancel search | Manufacturer: RAM, Model Year: 2020, Model line: ProMaster, Model: Ram ProMaster 2020Pages: 264, PDF Size: 10.11 MB
Page 2 of 264
WARNING: Operating, servicing and maintaining a passenger vehicle or off-highway
motor vehicle can expose you to chemicals including engine exhaust, carbon monoxide,
phthalates, and lead, which are known to the State of California to cause cancer and birth defects
or other reproductive harm. To minimize exposure, avoid breathing exhaust, do not idle the
engine except as necessary, service your vehicle in a well-ventilated area and wear gloves or wash
your hands frequently when servicing your vehicle. For more information go to
www.P65Warnings.ca.gov/passenger-vehicle.
This Owner’s Manual illustrates and describes the operation of features and equipment that are either standard or optional on this vehicle. This manual may
also include a description of features and equipment that are no longer available or were not ordered on this vehicle. Please disregard any features and
equipment that are no longer available or were not ordered on this vehicle. FCA US LLC reserves the right to make changes in design and specifications, and/or make additions to or improvements to its products without imposing any obligation upon itself to install them on products previously manufactured.
With respect to vehicles sold in Canada, the name FCA US LLC shall be deemed to be deleted and the name FCA Canada Inc. used in substitution therefore.
If you are the first registered retail owner of your vehicle, you may obtain a complimentary printed copy of the Warranty Booklet by calling
1-866-726-4636 (U.S.) or 1-800-387-1143 (Canada), or by contacting your dealer.
This Owner’s Manual is intended to familiarize you with the important features of your vehicle. Your most up-to-date Owner’s Manual, Navigation/Uconnect manuals and Warranty Booklet can be found by visiting the website on the back cover. U.S. residents can purchase replacement kits by visiting www.techauthority.com and Canadian residents can purchase replacement kits by calling 1-800-387-1143.
Page 6 of 264

4
VEHICLE LOADING ................................................112
Vehicle Certification Label ............................... 112
Gross Vehicle Weight Rating (GVWR) .............. 112
Gross Axle Weight Rating (GAWR) .................. 112
Tire Size .............................................................112
Rim Size ............................................................ 112
Inflation Pressure ............................................. 112
Curb Weight ...................................................... 112
Overloading ....................................................... 112
Loading .............................................................113
TRAILER TOWING ..................................................113
Common Towing Definitions ............................113
Trailer Hitch Classification ............................... 114
Trailer Towing Weights
(Maximum Trailer Weight Ratings) ................. 115 Trailer And Tongue Weight ..............................115Towing Requirements ..................................... 116
Towing Tips ...................................................... 118
RECREATIONAL TOWING
(BEHIND MOTORHOME, ETC.) ............................120
Towing This Vehicle Behind Another Vehicle .. 120
Recreational Towing ......................................... 120
DRIVING TIPS.........................................................121
Driving On Slippery Surfaces ..........................121
Driving Through Water ....................................121
IN CASE OF EMERGENCY
HAZARD WARNING FLASHERS ..........................123 BULB REPLACEMENT ........................................... 123
Replacement Bulbs .......................................... 123
Replacing Exterior Bulbs .................................. 125
Replacing Interior Bulbs .................................. 127
FUSES..................................................................... 128
Underhood Fuses ............................................. 128
Interior Fuses.................................................... 131
Right Central Pillar Fuses ................................ 132
JACKING AND TIRE CHANGING .......................... 133
Jack Location .................................................... 133
Spare Tire Removal .......................................... 134
Preparations For Jacking ................................. 135
Jacking Instructions ......................................... 136Wheel Covers .................................................... 139
TIRE SERVICE KIT — IF EQUIPPED ...................... 139
Tire Service Kit Storage ................................... 139
Tire Service Kit Components And Operation .. 140Tire Service Kit Usage Precautions ................. 140
Sealing A Tire With Tire Service Kit ................. 142
JUMP STARTING ................................................... 145
Preparations For Jump Start ........................... 145
Jump Starting Procedure ................................. 146
Battery Location ............................................... 147
IF YOUR ENGINE OVERHEATS ............................ 147
GEAR SELECTOR OVERRIDE .............................. 148FREEING A STUCK VEHICLE ............................... 149
TOWING A DISABLED VEHICLE........................... 149
Automatic Transmission .................................. 150
ENHANCED ACCIDENT RESPONSE SYSTEM
(EARS) ....................................................................151
EVENT DATA RECORDER (EDR) .......................... 151
SERVICING AND MAINTENANCE
SCHEDULED SERVICING .....................................152
Maintenance Plan ............................................ 152
Heavy Duty Use Of The Vehicle ....................... 155
ENGINE COMPARTMENT...................................... 156
3.6L Engine ..................................................... 156
Checking Oil Level — Gas Engine ................... 157
Adding Washer Fluid ........................................ 157Maintenance-Free Battery .............................. 157
Pressure Washing ............................................ 158
DEALER SERVICE ................................................. 158
Engine Oil ......................................................... 158Engine Oil Filter ................................................ 159
Engine Air Cleaner Filter ................................. 159
Air Conditioner Maintenance ......................... 160
Body Lubrication .............................................. 161
Windshield Wiper Blades ................................ 162
Exhaust System ............................................... 162
Cooling System................................................. 163
Brake System .................................................. 166
Automatic Transmission
(3.6L Gasoline Engine Only) ............................ 167
RAISING THE VEHICLE..........................................168
20_VF_OM_EN_US_t.book Page 4
Page 8 of 264

6
CUSTOMER ASSISTANCE
SUGGESTIONS FOR OBTAINING SERVICE
FOR YOUR VEHICLE .............................................246
Prepare For The Appointment ......................... 246Prepare A List.................................................... 246Be Reasonable With Requests ........................246
IF YOU NEED ASSISTANCE ................................. 246
FCA US LLC Customer Center.......................... 247
FCA Canada Inc. Customer Center.................. 247
In Mexico Contact............................................. 247
Puerto Rico And US Virgin Islands................... 247
Customer Assistance For The Hearing Or Speech
Impaired (TDD/TTY).......................................... 247 Service Contract .............................................. 247
WARRANTY INFORMATION ................................. 248
MOPAR PARTS ...................................................... 248
REPORTING SAFETY DEFECTS ...........................248
In The 50 United States And Washington, D.C.248
In Canada ......................................................... 248
PUBLICATION ORDER FORMS ...........................249
20_VF_OM_EN_US_t.book Page 6
Page 9 of 264
7
INTRODUCTION
INTRODUCTION
Dear Customer,
Congratulations on selecting your new vehicle.
Be assured that it represents precision work-
manship, distinctive styling, and high quality.
This Owner’s Manual has been prepared with
the assistance of service and engineering
specialists to acquaint you with the operation
and maintenance of your vehicle. It is supple -
mented by Warranty Information and customer
oriented documents available online. Within
this information, you will find a description of
the services that FCA US LLC offers to its
customers, the vehicle's warranty coverage,
and the details of the terms and conditions for
maintaining its validity. Please take the time to
read all of these publications carefully before driving your vehicle for the first time. Following
the instructions, recommendations, tips, and
important warnings in this manual will help
assure safe and enjoyable operation of your
vehicle. Be sure you are familiar with all vehicle
controls, particularly those used for braking,
steering, transmission, and transfer case
shifting (if equipped). Learn how your vehicle
handles on different road surfaces. Your driving
skills will improve with experience.
This Owner’s Manual describes all versions of
this vehicle. Options and equipment dedicated
to specific markets or versions are not expressly
indicated in the text. Therefore, you should only
consider the information which is related to the
trim level, engine, and version that you have
purchased. Any content introduced throughout
the Owner’s Information, that may or may not be
applicable to your vehicle, will be identified with the wording “If Equipped”. All data contained in
this publication are intended to help you use
your vehicle in the best possible way. FCA US
LLC aims at a constant improvement of the
vehicles produced. For this reason, it reserves
the right to make changes to the model
described for technical and/or commercial
reasons. For further information, contact an
authorized dealer.
When it comes to service, remember that an
authorized dealer knows your vehicle best, has
factory-trained technicians and genuine
MOPAR® parts, and cares about your satisfac
-
tion.
1
20_VF_OM_EN_US_t.book Page 7
Page 10 of 264
8INTRODUCTION
HOW TO USE THIS MANUAL
Essential Information
Consult the Table of Contents to determine
which section contains the information you
desire.
Since the specification of your vehicle depends
on the items of equipment ordered, certain
descriptions and illustrations may differ from
your vehicle's equipment.
The detailed Index at the back of this Owner's
Manual contains a complete listing of all
subjects.
Symbols
Some vehicle components have colored labels
whose symbols indicate precautions to be
observed when using this component. Refer to
“Warning Lights and Messages” in “Getting To
Know Your Instrument Panel” for further infor -
mation on the symbols used in your vehicle.
WARNINGS AND CAUTIONS
This Owner’s Manual contains WARNINGS
against operating procedures that could result
in a collision, bodily injury, and/or death. It also
contains CAUTIONS against procedures that
could result in damage to your vehicle. If you do
not read this entire Owner’s Manual, you may
miss important information. Observe all Warn -
ings and Cautions.
VAN CONVERSIONS/CAMPERS
The New Vehicle Limited Warranty does not
apply to body modifications or special equip -
ment installed by van conversion/camper
manufacturers/body builders. US residents
refer to the Warranty Information, Section
2.1.C. Canadian residents refer to the “What Is
Not Covered” section of the Warranty Informa -
tion. Such equipment includes video monitors,
VCRs, heaters, stoves, refrigerators, etc. For
warranty coverage and service on these items,
contact the applicable manufacturer. Operating instructions for the special equip
-
ment installed by the conversion/camper
manufacturer should also be supplied with your
vehicle. If these instructions are missing, please
contact an authorized dealer for assistance in
obtaining replacement documents from the
applicable manufacturer.
For information on the Body Builder’s Guide
refer to www.rambodybuilder.com . This website
contains dimensional and technical specifica -
tions for your vehicle. It is intended for Second
Stage Manufacturer's technical support. For
service issues, contact an authorized dealer.
VEHICLE MODIFICATIONS/ALTERATIONS
WARNING!
Any modifications or alterations to this vehicle
could seriously affect its roadworthiness and
safety and may lead to a collision resulting in
serious injury or death.
20_VF_OM_EN_US_t.book Page 8
Page 12 of 264
10GETTING TO KNOW YOUR VEHICLE
To Lock The Doors
Push and release the lock button on the key fob
to lock all doors. The turn signal lights will flash
once to acknowledge the signal. If a door is
open, the turn signal lights will flash at an
increased rate.
Locking Doors With A Key
1. Insert the key with either side up.
2. Turn the key to the right to lock the door.
3. Turn the key to the left to unlock the door.
Refer to “Dealer Service” in “Servicing And
Maintenance” for maintenance procedures.
Sound Horn With Lock
This feature will cause the horn to chirp when
the doors are locked with the key fob. This
feature can be turned on or turned off. To
change the current setting, refer to “Uconnect
Settings” in “Multimedia” for further informa -
tion.
Key Fob Battery Replacement
NOTE:
Perchlorate Material – special handling may
apply. See www.dtsc.ca.gov/hazardouswaste/
perchlorate . The recommended replacement battery is
CR2032.
1. Push the mechanical key release button
and release the mechanical key to access
the battery case screw located on the side
of the key fob.
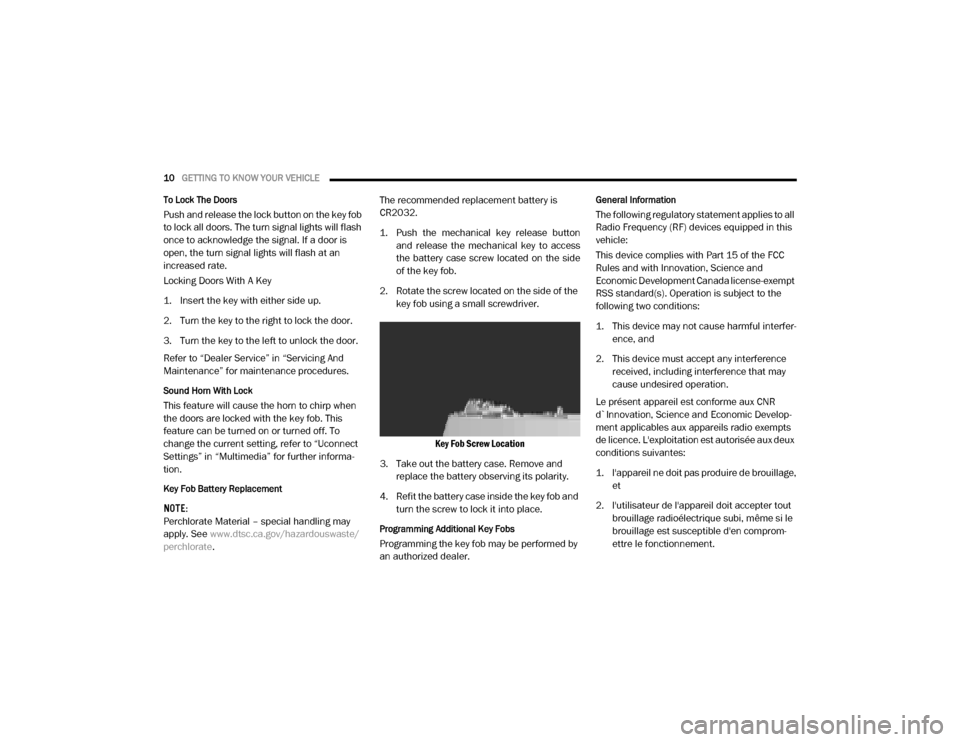
2. Rotate the screw located on the side of the key fob using a small screwdriver.
Key Fob Screw Location
3. Take out the battery case. Remove and replace the battery observing its polarity.
4. Refit the battery case inside the key fob and turn the screw to lock it into place.
Programming Additional Key Fobs
Programming the key fob may be performed by
an authorized dealer.
General Information
The following regulatory statement applies to all
Radio Frequency (RF) devices equipped in this
vehicle:
This device complies with Part 15 of the FCC
Rules and with Innovation, Science and
Economic Development Canada license-exempt
RSS standard(s). Operation is subject to the
following two conditions:
1. This device may not cause harmful interfer -
ence, and
2. This device must accept any interference received, including interference that may
cause undesired operation.
Le présent appareil est conforme aux CNR
d`Innovation, Science and Economic Develop -
ment applicables aux appareils radio exempts
de licence. L'exploitation est autorisée aux deux
conditions suivantes:
1. l'appareil ne doit pas produire de brouillage, et
2. l'utilisateur de l'appareil doit accepter tout brouillage radioélectrique subi, même si le
brouillage est susceptible d'en comprom -
ettre le fonctionnement.
20_VF_OM_EN_US_t.book Page 10
Page 14 of 264

12GETTING TO KNOW YOUR VEHICLE
Key-In-Ignition Reminder
Opening the driver's door when the key is in the
ignition and the ignition switch position is STOP
(OFF/LOCK) sounds a signal to remove the key.
SENTRY KEY
The Sentry Key Immobilizer System prevents
unauthorized vehicle operation by disabling the
engine. The system does not need to be armed
or activated. Operation is automatic, regardless
of whether the vehicle is locked or unlocked.
The system uses ignition keys which have an
embedded electronic chip (transponder) to
prevent unauthorized vehicle operation. There -
fore, only keys that are programmed to the
vehicle can be used to start and operate the
vehicle. NOTE:
A key which has not been programmed is also
considered an invalid key, even if it is cut to fit
the ignition switch lock cylinder for that vehicle.
If the vehicle security light is on after the key is
turned to the MAR (ACC/ON/RUN) position, it
indicates that there is a problem with the elec
-
tronics.
All of the keys provided with your new vehicle
have been programmed to the vehicle elec -
tronics.
Replacement Keys
NOTE:
Only keys that have been programmed to the
vehicle electronics can be used to start the
vehicle. Once a Sentry Key has been
programmed to a vehicle, it cannot be
programmed to any other vehicle. When having
the Sentry Key Immobilizer System serviced,
bring all vehicle keys with you to an authorized
dealer.
The VIN is required for authorized dealer
replacement of keys. Duplication of keys may
be performed at an authorized dealer.
General Information
The following regulatory statement applies to all
Radio Frequency (RF) devices equipped in this
vehicle:
CAUTION!
An unlocked vehicle is an invitation. Always
remove the key from the ignition and lock all
the doors when leaving the vehicle
unattended.
CAUTION!
Always remove the Sentry Key from the
vehicle and lock all doors when leaving the
vehicle unattended.
The Sentry Key Immobilizer system is not
compatible with some aftermarket remote
starting systems. Use of these systems may
result in vehicle starting problems and loss
of security protection.
20_VF_OM_EN_US_t.book Page 12
Page 35 of 264

GETTING TO KNOW YOUR VEHICLE33
Climate Control Functions
A/C (Air Conditioning)
The Air Conditioning (A/C) button allows the
operator to manually activate or deactivate the
air conditioning system. When the air condi -
tioning system is turned on, cool dehumidified
air will flow through the outlets into the cabin.
For improved fuel economy, press the A/C
button to turn off the air conditioning and manu -
ally adjust the blower and airflow mode settings.
Also, make sure to select only Panel, Bi-Level or
Floor modes.
NOTE:
For Manual Climate Controls, if the system is
in Mix, Floor or Defrost Mode, the A/C can be
turned off, but the A/C system shall remain
active to prevent fogging of the windows.
If fog or mist appears on the windshield or
side glass, select Defrost mode, and increase
blower speed if needed.
If your air conditioning performance seems
lower than expected, check the front of the
A/C condenser (located in front of the radi -
ator), for an accumulation of dirt or insects.
Clean with a gentle water spray from the front
of the radiator and through the condenser.
Recirculation
In cold weather, use of Recirculation mode may
lead to excessive window fogging. The Recircu -
lation feature may be unavailable if conditions
exist that could create fogging on the inside of
the windshield. On systems with Manual
Climate Controls, the Recirculation mode is not
allowed in Defrost mode to improve window
clearing operation. Recirculation is disabled
automatically if this mode is selected.
Attempting to use Recirculation while in this
mode causes the LED in the control button to
blink and then turns off.
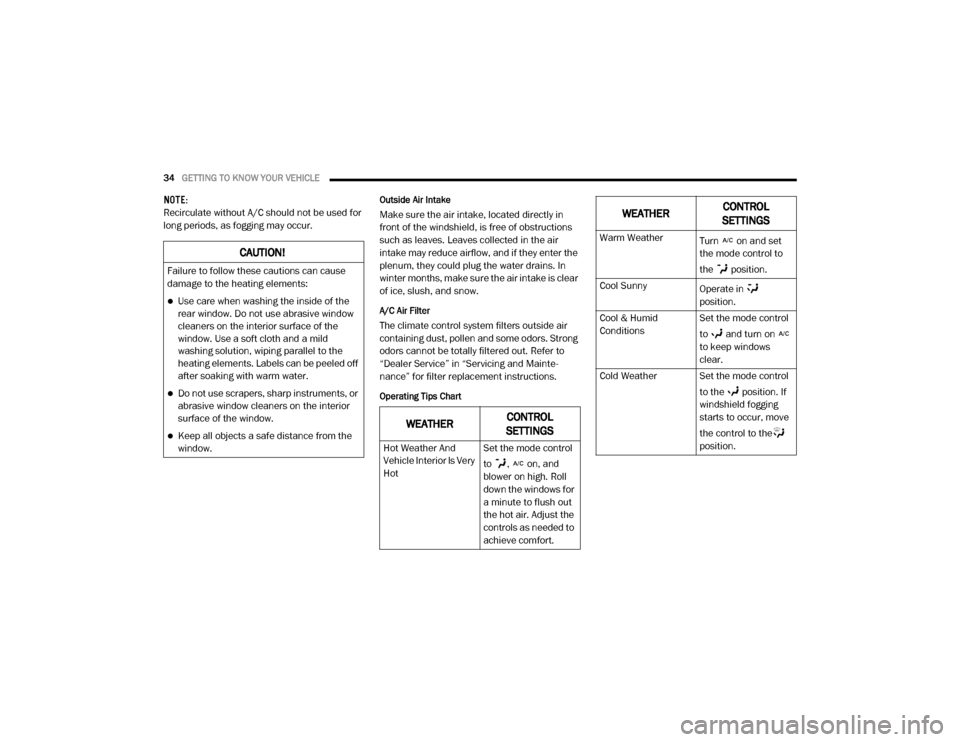
Operating Tips
NOTE:
Refer to the chart at the end of this section for
suggested control settings for various weather
conditions.
Summer Operation
The engine cooling system must be protected
with a high-quality antifreeze coolant to provide
proper corrosion protection and to protect
against engine overheating. A solution of 50%
OAT (Organic Additive Technology) coolant that
meets the requirements of FCA Material Stan -dard MS.90032 and 50% water is recom
-
mended. Refer to “Fluids And Lubricants” in
“Technical Specifications” for proper coolant
selection.
Winter Operation
Use of the air Recirculation mode during Winter
months is not recommended because it may
cause window fogging.
Vacation Storage
Any time you store your vehicle or keep it out of
service (i.e., vacation) for two weeks or more,
run the air conditioning system at idle for about
five minutes in the fresh air and high blower
setting. This will ensure adequate system lubri -
cation to minimize the possibility of compressor
damage when the system is started again.
Window Fogging
Interior fogging on the windshield can be quickly
removed by turning the mode selector to
Defrost. The Defrost/Floor mode can be used to
maintain a clear windshield and provide suffi -
cient heating. If side window fogging becomes a
problem increase blower speed. Vehicle
windows tend to fog on the inside in mild but
rainy or humid weather.
2
20_VF_OM_EN_US_t.book Page 33
Page 36 of 264
34GETTING TO KNOW YOUR VEHICLE
NOTE:
Recirculate without A/C should not be used for
long periods, as fogging may occur.Outside Air Intake
Make sure the air intake, located directly in
front of the windshield, is free of obstructions
such as leaves. Leaves collected in the air
intake may reduce airflow, and if they enter the
plenum, they could plug the water drains. In
winter months, make sure the air intake is clear
of ice, slush, and snow.
A/C Air Filter
The climate control system filters outside air
containing dust, pollen and some odors. Strong
odors cannot be totally filtered out. Refer to
“Dealer Service” in “Servicing and Mainte -
nance” for filter replacement instructions.
Operating Tips Chart
CAUTION!
Failure to follow these cautions can cause
damage to the heating elements:
Use care when washing the inside of the
rear window. Do not use abrasive window
cleaners on the interior surface of the
window. Use a soft cloth and a mild
washing solution, wiping parallel to the
heating elements. Labels can be peeled off
after soaking with warm water.
Do not use scrapers, sharp instruments, or
abrasive window cleaners on the interior
surface of the window.
Keep all objects a safe distance from the
window.WEATHER CONTROL
SETTINGS
Hot Weather And
Vehicle Interior Is Very
Hot Set the mode control
to , on, and
blower on high. Roll
down the windows for
a minute to flush out
the hot air. Adjust the
controls as needed to
achieve comfort.
Warm Weather
Turn on and set
the mode control to
the position.
Cool Sunny Operate in
position.
Cool & Humid
Conditions Set the mode control
to and turn on
to keep windows
clear.
Cold Weather Set the mode control to the position. If
windshield fogging
starts to occur, move
the control to the
position.
WEATHERCONTROL
SETTINGS
20_VF_OM_EN_US_t.book Page 34
Page 44 of 264
42GETTING TO KNOW YOUR INSTRUMENT PANEL
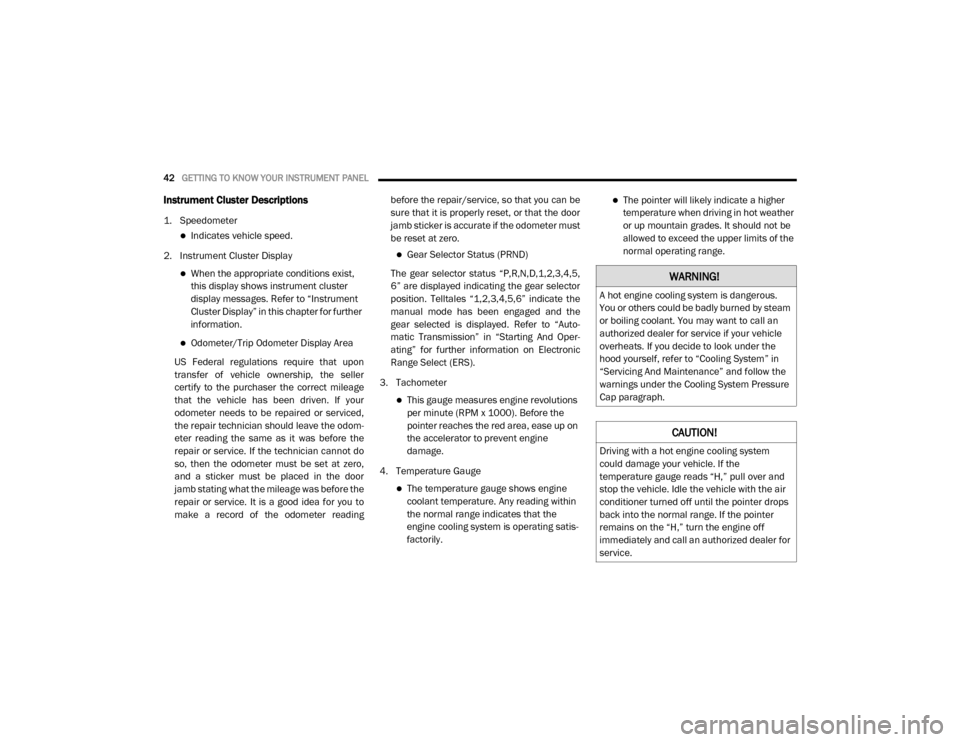
Instrument Cluster Descriptions
1. Speedometer
Indicates vehicle speed.
2. Instrument Cluster Display
When the appropriate conditions exist,
this display shows instrument cluster
display messages. Refer to “Instrument
Cluster Display” in this chapter for further
information.
Odometer/Trip Odometer Display Area
US Federal regulations require that upon
transfer of vehicle ownership, the seller
certify to the purchaser the correct mileage
that the vehicle has been driven. If your
odometer needs to be repaired or serviced,
the repair technician should leave the odom -
eter reading the same as it was before the
repair or service. If the technician cannot do
so, then the odometer must be set at zero,
and a sticker must be placed in the door
jamb stating what the mileage was before the
repair or service. It is a good idea for you to
make a record of the odometer reading before the repair/service, so that you can be
sure that it is properly reset, or that the door
jamb sticker is accurate if the odometer must
be reset at zero.
Gear Selector Status (PRND)
The gear selector status “P,R,N,D,1,2,3,4,5,
6” are displayed indicating the gear selector
position. Telltales “1,2,3,4,5,6” indicate the
manual mode has been engaged and the
gear selected is displayed. Refer to “Auto -
matic Transmission” in “Starting And Oper -
ating” for further information on Electronic
Range Select (ERS).
3. Tachometer
This gauge measures engine revolutions
per minute (RPM x 1000). Before the
pointer reaches the red area, ease up on
the accelerator to prevent engine
damage.
4. Temperature Gauge
The temperature gauge shows engine
coolant temperature. Any reading within
the normal range indicates that the
engine cooling system is operating satis-
factorily.
The pointer will likely indicate a higher
temperature when driving in hot weather
or up mountain grades. It should not be
allowed to exceed the upper limits of the
normal operating range.
WARNING!
A hot engine cooling system is dangerous.
You or others could be badly burned by steam
or boiling coolant. You may want to call an
authorized dealer for service if your vehicle
overheats. If you decide to look under the
hood yourself, refer to “Cooling System” in
“Servicing And Maintenance” and follow the
warnings under the Cooling System Pressure
Cap paragraph.
CAUTION!
Driving with a hot engine cooling system
could damage your vehicle. If the
temperature gauge reads “H,” pull over and
stop the vehicle. Idle the vehicle with the air
conditioner turned off until the pointer drops
back into the normal range. If the pointer
remains on the “H,” turn the engine off
immediately and call an authorized dealer for
service.
20_VF_OM_EN_US_t.book Page 42