lock RAM PROMASTER 2022 User Guide
[x] Cancel search | Manufacturer: RAM, Model Year: 2022, Model line: PROMASTER, Model: RAM PROMASTER 2022Pages: 268, PDF Size: 13.26 MB
Page 22 of 268

20GETTING TO KNOW YOUR VEHICLE
VEHICLE SECURITY SYSTEM — IF EQUIPPED
The Vehicle Security system monitors the vehicle
doors and ignition for unauthorized operation.
When the Vehicle Security system is activated,
interior switches for door locks are disabled. The
system provides both audible and visible signals.
For the first three minutes, the horn will sound, and
the turn signal lights will flash. For an additional
15 minutes, only the turn signal lights will flash.
TO ARM THE SYSTEM
Follow these steps to arm the Vehicle Security
system:
1. Make sure the vehicle’s ignition is placed in
the OFF position.
2. If any doors are open, close them.
3. Perform one of the following methods to lock the vehicle:
Push the lock button on the exterior Passive
Entry door handle with a valid key fob avail -
able in the same exterior zone Ú page 21.
Push the lock button on the key fob.
When the Vehicle Security system is armed, the
Vehicle Security Light (on the central lock\unlock
button in the dashboard) will begin to flash every
three seconds until it is disarmed.
NOTE:If a door or the hood is not properly shut, the
system will be armed.
TO DISARM THE SYSTEM
The Vehicle Security system can be disarmed using
any of the following methods:
Push the unlock button on the key fob.
Push the Passive Entry button next to the door
handle to unlock the door Ú page 21.
Cycle the ignition out of the OFF position to
disarm the system.
The Vehicle Security system is designed to protect
your vehicle. However, you can create conditions
where the system will give you a false alarm. If one
of the previously described arming sequences has
occurred, the Vehicle Security system will arm
regardless of whether you are in the vehicle or not.
If you remain in the vehicle and open a door, the
alarm will sound. If this occurs, disarm the Vehicle
Security system.
REARMING OF THE SYSTEM
If the system has not been disabled, the Vehicle
Security system will rearm itself after the
15 additional minutes of turn lamps flashing.
If the condition which initiated the alarm is still
present, the system will ignore that condition and
monitor the remaining doors and ignition.
SECURITY SYSTEM MANUAL OVERRIDE
The Vehicle Security system will not arm if you lock
the doors using the manual door lock. The Vehicle
Security system will not disarm if you unlock the
doors using the manual door unlock.
DOORS
POWER DOOR LOCKS
The central lock/unlock button has an LED that
indicates whether the doors are locked or unlocked.
Push the lock button on the instrument panel.
The indicator light will illuminate to show the doors
are locked.
Push the lock button on the instrument panel a
second time to unlock the doors.
Lock Button On Instrument Panel
22_VF_OM_EN_USC_t.book Page 20
Page 23 of 268
GETTING TO KNOW YOUR VEHICLE21
To unlock the front doors, pull the inside door
handle to the detent.
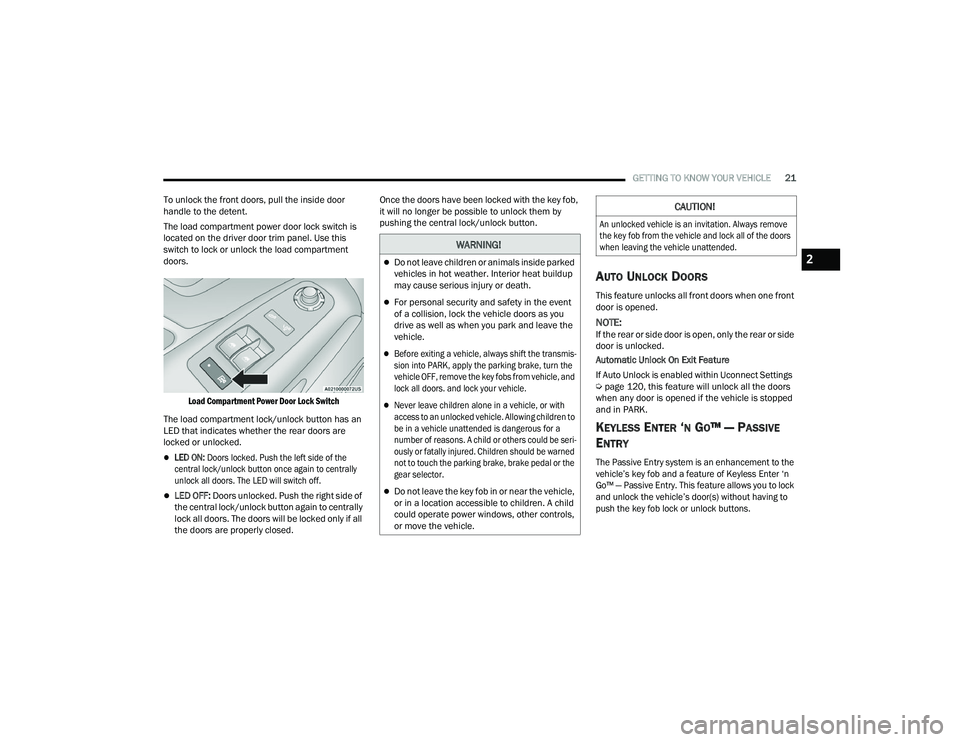
The load compartment power door lock switch is
located on the driver door trim panel. Use this
switch to lock or unlock the load compartment
doors.
Load Compartment Power Door Lock Switch
The load compartment lock/unlock button has an
LED that indicates whether the rear doors are
locked or unlocked.
LED ON: Doors locked. Push the left side of the
central lock/unlock button once again to centrally
unlock all doors. The LED will switch off.
LED OFF: Doors unlocked. Push the right side of
the central lock/unlock button again to centrally
lock all doors. The doors will be locked only if all
the doors are properly closed. Once the doors have been locked with the key fob,
it will no longer be possible to unlock them by
pushing the central lock/unlock button.
AUTO UNLOCK DOORS
This feature unlocks all front doors when one front
door is opened.
NOTE:If the rear or side door is open, only the rear or side
door is unlocked.
Automatic Unlock On Exit Feature
If Auto Unlock is enabled within Uconnect Settings
Ú
page 120, this feature will unlock all the doors
when any door is opened if the vehicle is stopped
and in PARK.
KEYLESS ENTER ‘N GO™ — PASSIVE
E
NTRY
The Passive Entry system is an enhancement to the
vehicle’s key fob and a feature of Keyless Enter ‘n
Go™ — Passive Entry. This feature allows you to lock
and unlock the vehicle’s door(s) without having to
push the key fob lock or unlock buttons.
WARNING!
Do not leave children or animals inside parked
vehicles in hot weather. Interior heat buildup
may cause serious injury or death.
For personal security and safety in the event
of a collision, lock the vehicle doors as you
drive as well as when you park and leave the
vehicle.
Before exiting a vehicle, always shift the transmis -
sion into PARK, apply the parking brake, turn the
vehicle OFF, remove the key fobs from vehicle, and
lock all doors. and lock your vehicle.
Never leave children alone in a vehicle, or with
access to an unlocked vehicle. Allowing children to
be in a vehicle unattended is dangerous for a
number of reasons. A child or others could be seri -
ously or fatally injured. Children should be warned
not to touch the parking brake, brake pedal or the
gear selector.
Do not leave the key fob in or near the vehicle,
or in a location accessible to children. A child
could operate power windows, other controls,
or move the vehicle.
CAUTION!
An unlocked vehicle is an invitation. Always remove
the key fob from the vehicle and lock all of the doors
when leaving the vehicle unattended.
2
22_VF_OM_EN_USC_t.book Page 21
Page 24 of 268
22GETTING TO KNOW YOUR VEHICLE
NOTE:
Passive Entry may be programmed on or off
within Uconnect Settings Úpage 120.
The key fob may not be detected by the vehicle
Passive Entry system if it is located next to a
mobile phone, laptop, or other electronic device;
these devices may block the key fob’s wireless
signal and prevent the Passive Entry system
from locking/unlocking the vehicle.
Passive Entry Unlock initiates illuminated
approach (low beams, license plate lamp, posi -
tion lamps) for whichever time duration is set
between 0, 30, 60 or 90 seconds. Passive Entry
Unlock also initiates two flashes of the turn
signal lamps.
If the vehicle is unlocked by Passive Entry and
no door is opened within 60 seconds, the
vehicle will relock and (if equipped) will arm the
Vehicle Security system.
To Unlock From The Driver, Passenger or Rear
Door
With a valid Passive Entry key fob within 5 ft
(1.5 m) of the door handle, push the Passive Entry
button next to the handle to unlock the vehicle.
Unlock the front doors only if the Uconnect
setting is set to "Approach" and you press the
button located next to the front handle.
Unlock the load compartment doors only if the
Uconnect setting is set to "Approach" and you
press the button located next to the rear handle.
The Passive Entry feature will be disabled if the
Uconnect setting is set to "Off".
NOTE:
Either the load compartment and cabin
compartment or all doors will unlock when you
press Passive Entry button, depending on the
selected setting in the Uconnect system
Ú page 120.
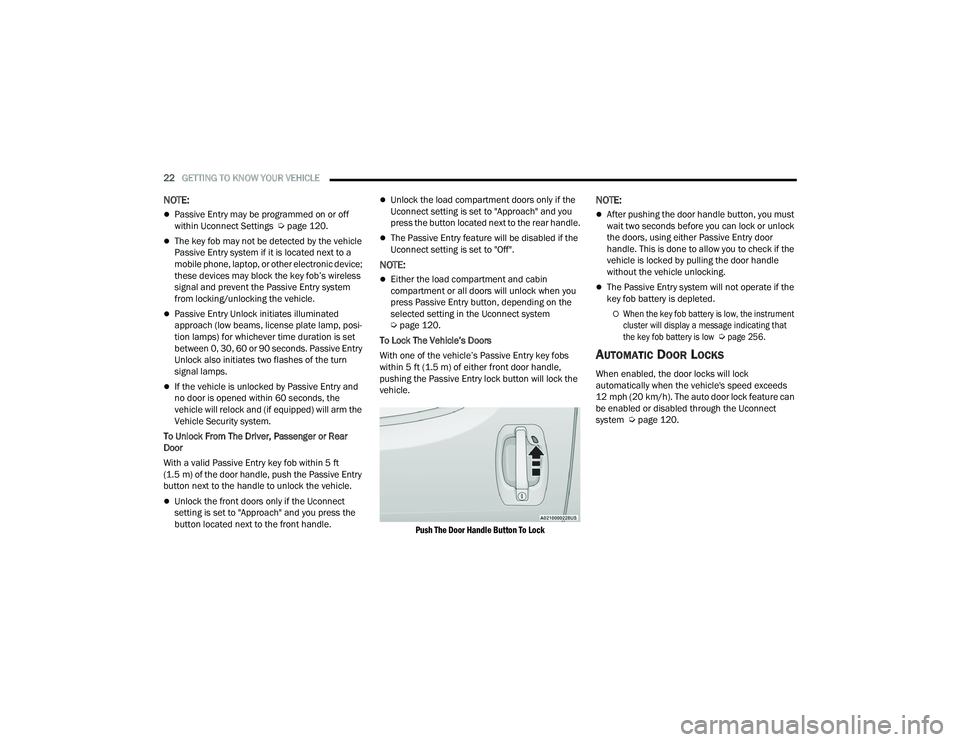
To Lock The Vehicle’s Doors
With one of the vehicle’s Passive Entry key fobs
within 5 ft (1.5 m) of either front door handle,
pushing the Passive Entry lock button will lock the
vehicle.
Push The Door Handle Button To Lock
NOTE:
After pushing the door handle button, you must
wait two seconds before you can lock or unlock
the doors, using either Passive Entry door
handle. This is done to allow you to check if the
vehicle is locked by pulling the door handle
without the vehicle unlocking.
The Passive Entry system will not operate if the
key fob battery is depleted.
When the key fob battery is low, the instrument
cluster will display a message indicating that
the key fob battery is low
Ú
page 256.
AUTOMATIC DOOR LOCKS
When enabled, the door locks will lock
automatically when the vehicle's speed exceeds
12 mph (20 km/h). The auto door lock feature can
be enabled or disabled through the Uconnect
system Ú page 120.
22_VF_OM_EN_USC_t.book Page 22
Page 25 of 268

GETTING TO KNOW YOUR VEHICLE23
STEERING WHEEL
TELESCOPING STEERING COLUMN
This feature allows you to lengthen or shorten the
steering column. The telescoping control handle is
located below the steering wheel at the end of the
steering column.
Telescoping Control Handle
To unlock the steering column, pull the control
handle up. To lengthen or shorten the steering
column, pull the steering wheel outward or push it
inward as desired. To lock the steering column in
position, push the control handle down until fully
engaged.
SEATS
Seats are a part of the Occupant Restraint system
of the vehicle.
MANUAL ADJUSTMENTS
The driver and passenger seats can be adjusted
forward/rearward and reclined. Front and rear height
and lumbar can also be adjusted (if equipped).
Seat Adjustment (Without Swivel Seat)
WARNING!
Do not adjust the steering column while driving.
Adjusting the steering column while driving or
driving with the steering column unlocked, could
cause the driver to lose control of the vehicle.
Failure to follow this warning may result in
serious injury or death.
WARNING!
It is dangerous to ride in a cargo area, inside
or outside of a vehicle. In a collision, people
riding in these areas are more likely to be seri -
ously injured or killed.
Do not allow people to ride in any area of your
vehicle that is not equipped with seats and
seat belts. In a collision, people riding in these
areas are more likely to be seriously injured or
killed.
Be sure everyone in your vehicle is in a seat
and using a seat belt properly.
1 — Forward/Rearward Adjustment Bar
2 — Front Height Adjustment Lever
3 — Rear Height Adjustment Lever
4 — Recliner Knob
5 — Lumbar Knob
2
22_VF_OM_EN_USC_t.book Page 23
Page 27 of 268
GETTING TO KNOW YOUR VEHICLE25
Lumbar Support — If Equipped
This feature allows you to increase or decrease the
amount of lumbar support. The lumbar control
knob is located on the rear upper outboard side of
the driver's seatback. Rotate the control forward to
increase and rearward to decrease the desired
amount of lumbar support.
Suspension Seat — If Equipped
The seat is equipped with a mechanical spring
system and hydraulic shock absorber to ensure
maximum comfort and safety. The system of
springs also effectively absorbs impact from
uneven road surfaces. Damper Weight Adjustment
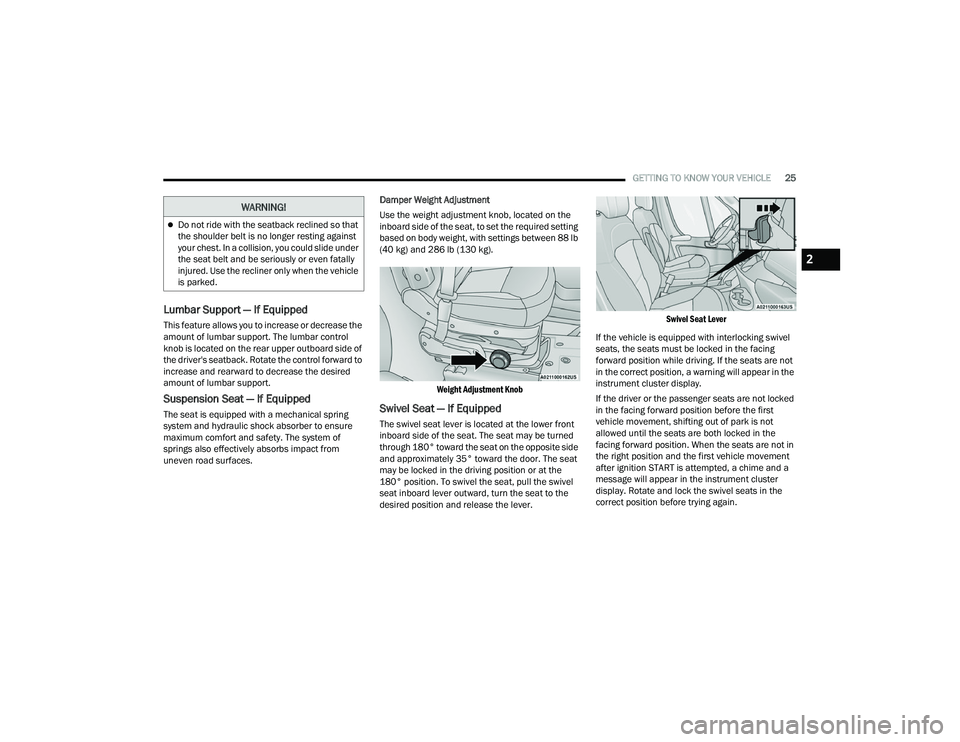
Use the weight adjustment knob, located on the
inboard side of the seat, to set the required setting
based on body weight, with settings between 88 lb
(40 kg) and 286 lb (130 kg).
Weight Adjustment Knob
Swivel Seat — If Equipped
The swivel seat lever is located at the lower front
inboard side of the seat. The seat may be turned
through 180° toward the seat on the opposite side
and approximately 35° toward the door. The seat
may be locked in the driving position or at the
180° position. To swivel the seat, pull the swivel
seat inboard lever outward, turn the seat to the
desired position and release the lever.
Swivel Seat Lever
If the vehicle is equipped with interlocking swivel
seats, the seats must be locked in the facing
forward position while driving. If the seats are not
in the correct position, a warning will appear in the
instrument cluster display.
If the driver or the passenger seats are not locked
in the facing forward position before the first
vehicle movement, shifting out of park is not
allowed until the seats are both locked in the
facing forward position. When the seats are not in
the right position and the first vehicle movement
after ignition START is attempted, a chime and a
message will appear in the instrument cluster
display. Rotate and lock the swivel seats in the
correct position before trying again.
Do not ride with the seatback reclined so that
the shoulder belt is no longer resting against
your chest. In a collision, you could slide under
the seat belt and be seriously or even fatally
injured. Use the recliner only when the vehicle
is parked.
WARNING!
2
22_VF_OM_EN_USC_t.book Page 25
Page 28 of 268
26GETTING TO KNOW YOUR VEHICLE
(Continued)
If the driver or the passenger seats are not locked
in the facing forward position during movement
of the vehicle, a message will appear in the
instrument cluster display and an intermittent
chime will sound until key-off or until the swivel
seats are locked in the facing forward position.
Stop and move the swivel seats in the correct
position before proceeding.
If a fault is present in the system and it is not
possible to check the correct position of the swivel
seats, a message and the generic warning light
appears in the instrument cluster display to inform
about the failure. In these conditions, check the
status of the swivel seats and do not drive the
vehicle until the swivel seats are locked in the
facing forward position.
HEATED SEATS — IF EQUIPPED
On some models, the front driver and
passenger seats may be equipped with
heaters in both the seat cushions and
seatbacks. The controls for the front
heated seats are located on the lower outboard
side of the seat.
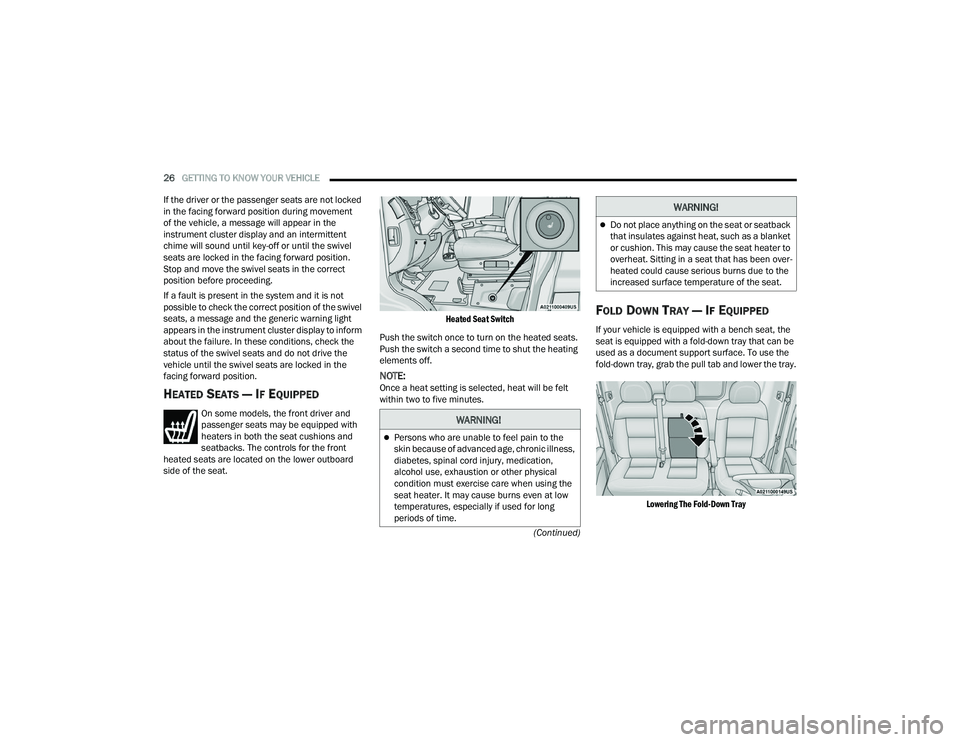
Heated Seat Switch
Push the switch once to turn on the heated seats.
Push the switch a second time to shut the heating
elements off.
NOTE:Once a heat setting is selected, heat will be felt
within two to five minutes.
FOLD DOWN TRAY — IF EQUIPPED
If your vehicle is equipped with a bench seat, the
seat is equipped with a fold-down tray that can be
used as a document support surface. To use the
fold-down tray, grab the pull tab and lower the tray.
Lowering The Fold-Down Tray
WARNING!
Persons who are unable to feel pain to the
skin because of advanced age, chronic illness,
diabetes, spinal cord injury, medication,
alcohol use, exhaustion or other physical
condition must exercise care when using the
seat heater. It may cause burns even at low
temperatures, especially if used for long
periods of time.
Do not place anything on the seat or seatback
that insulates against heat, such as a blanket
or cushion. This may cause the seat heater to
overheat. Sitting in a seat that has been over -
heated could cause serious burns due to the
increased surface temperature of the seat.
WARNING!
22_VF_OM_EN_USC_t.book Page 26
Page 39 of 268
GETTING TO KNOW YOUR VEHICLE37
Dimming Of The Uconnect Touchscreen
The brightness of the Uconnect touchscreen can be
dimmed using the instrument panel dimmer control
when the parking lights or headlights are on.
When Display Mode is set to Auto within the
Uconnect system, the brightness will automatically
adjust from daytime intensity to nighttime intensity
(and vice versa) based on ambient light levels
outside of the vehicle.
NOTE:The brightness of the Uconnect touchscreen
cannot be adjusted when the dimmer control is
at the maximum setting (interior lights on), even
when Display Mode is set to Auto within the
Uconnect Settings.
When Display Mode is set to Manual, the
brightness of the Uconnect touchscreen will adjust
to the set brightness (1 - 6) when the headlights
are either on or off. For more information on these
Uconnect Settings, see Ú page 120.
Ambient Light
The vehicle is equipped with ambient light on the
dome lamp. The ambient light will be on all the
time, with the option of dimming it with the dimmer
controls as long as the headlights are turned on.
Ambient LED Lighting — If Equipped
Your vehicle may be equipped with LED lighting in
the front footwells and center cup holders. The
brightness of the lights can be adjusted using the
dimmer controls, located on the left side of the
instrument panel, as long as the headlights are
turned on.
ILLUMINATED ENTRY
The courtesy lights will turn on when you use
the key fob to unlock the doors or open any door.
They also turn on when unlocking or opening
manually from the driver door cylinder.
The lights will fade to off after approximately
30 seconds, or they will immediately fade to off
once the ignition switch is changed to the ON/RUN
position from the OFF position.
The dome lights illuminate in the following ways:
When the doors are unlocked, the dome light
will illuminate for approximately 27 seconds.
When one of the front doors is opened, the front
dome light will illuminate for approximately
three minutes.
When one of the rear doors is opened, the rear
dome light will illuminate for approximately
three minutes.
When the front doors are closed, the front dome
light will automatically shut off after approxi -
mately 27 seconds.
When the rear doors are closed, the rear dome
light will automatically shut off after approxi -
mately 27 seconds. The timing stops once the
ignition is placed in the RUN or ON position.
The dome light will turn off under any of the
following conditions:
The dome light is disabled when the ignition is
placed in the RUN or ON position.
The dome lights will turn off automatically when
the doors are locked.
NOTE:
The front courtesy overhead console and door
courtesy lights will not turn off if the dimmer
control is in the “Dome ON” position.
The illuminated entry system will not operate if the
dimmer control is in the “Dome OFF” position.
2
22_VF_OM_EN_USC_t.book Page 37
Page 50 of 268
48GETTING TO KNOW YOUR VEHICLE
The wireless charging pad is equipped with an
anti-slip mat to hold your mobile phone in place,
and an LED indicator light.
LED Indicator Status:
NOTE:Using a phone case may interfere with wireless
charging.
No Light: Charging pad is idle or searching for a
device.
Blue Light: Device is detected, and is charging.
Red Light/Flashing: Internal error, or foreign
object is detected.
With a compatible mobile phone placed on the
charging pad, when the ignition is switched to the
OFF position, a phone reminder message will
appear on the instrument cluster to warn the
customer.
WINDOWS
POWER WINDOWS
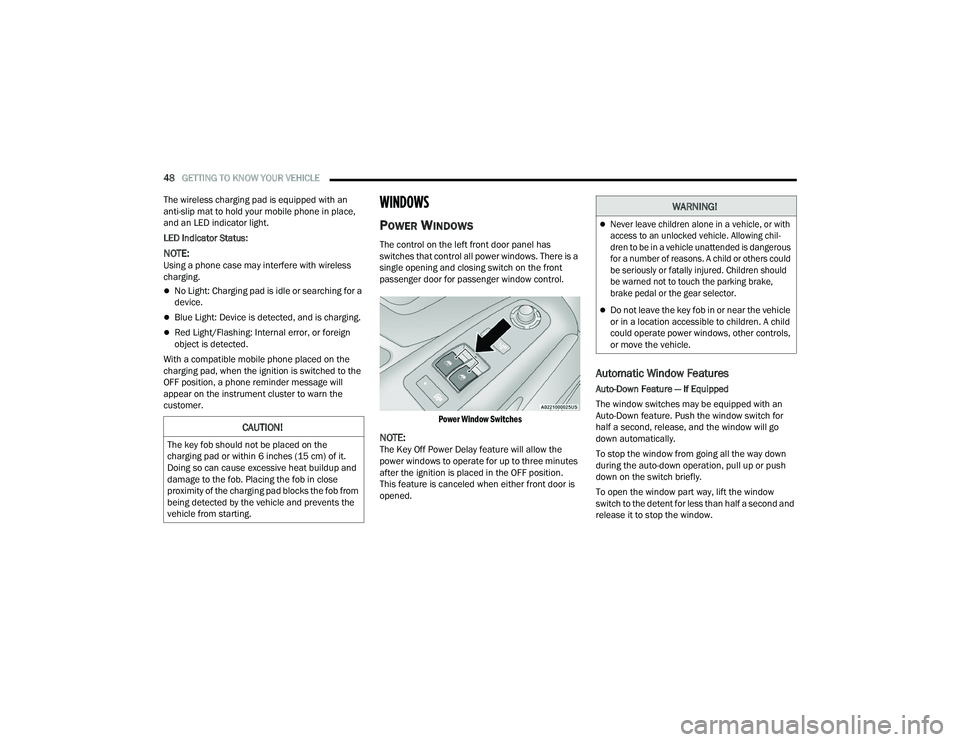
The control on the left front door panel has
switches that control all power windows. There is a
single opening and closing switch on the front
passenger door for passenger window control.
Power Window Switches
NOTE:The Key Off Power Delay feature will allow the
power windows to operate for up to three minutes
after the ignition is placed in the OFF position.
This feature is canceled when either front door is
opened.
Automatic Window Features
Auto-Down Feature — If Equipped
The window switches may be equipped with an
Auto-Down feature. Push the window switch for
half a second, release, and the window will go
down automatically.
To stop the window from going all the way down
during the auto-down operation, pull up or push
down on the switch briefly.
To open the window part way, lift the window
switch to the detent for less than half a second and
release it to stop the window.
CAUTION!
The key fob should not be placed on the
charging pad or within 6 inches (15 cm) of it.
Doing so can cause excessive heat buildup and
damage to the fob. Placing the fob in close
proximity of the charging pad blocks the fob from
being detected by the vehicle and prevents the
vehicle from starting.
WARNING!
Never leave children alone in a vehicle, or with
access to an unlocked vehicle. Allowing chil -
dren to be in a vehicle unattended is dangerous
for a number of reasons. A child or others could
be seriously or fatally injured. Children should
be warned not to touch the parking brake,
brake pedal or the gear selector.
Do not leave the key fob in or near the vehicle
or in a location accessible to children. A child
could operate power windows, other controls,
or move the vehicle.
22_VF_OM_EN_USC_t.book Page 48
Page 52 of 268
50GETTING TO KNOW YOUR VEHICLE
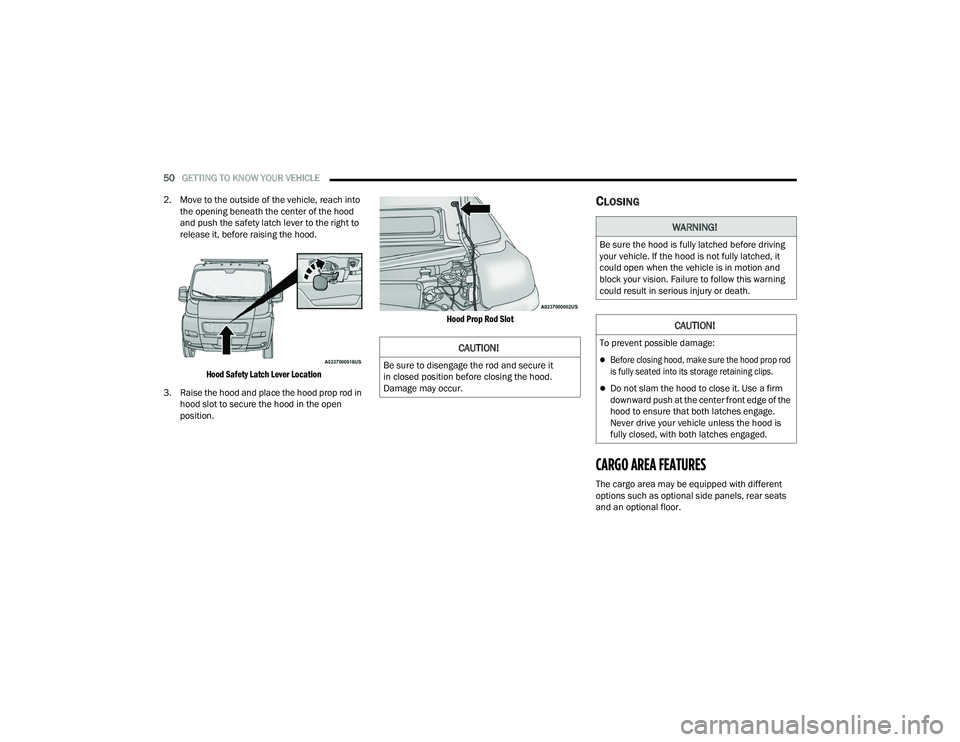
2. Move to the outside of the vehicle, reach into the opening beneath the center of the hood
and push the safety latch lever to the right to
release it, before raising the hood.
Hood Safety Latch Lever Location
3. Raise the hood and place the hood prop rod in hood slot to secure the hood in the open
position.
Hood Prop Rod Slot
CLOSING
CARGO AREA FEATURES
The cargo area may be equipped with different
options such as optional side panels, rear seats
and an optional floor.
CAUTION!
Be sure to disengage the rod and secure it
in closed position before closing the hood.
Damage may occur.
WARNING!
Be sure the hood is fully latched before driving
your vehicle. If the hood is not fully latched, it
could open when the vehicle is in motion and
block your vision. Failure to follow this warning
could result in serious injury or death.
CAUTION!
To prevent possible damage:
Before closing hood, make sure the hood prop rod
is fully seated into its storage retaining clips.
Do not slam the hood to close it. Use a firm
downward push at the center front edge of the
hood to ensure that both latches engage.
Never drive your vehicle unless the hood is
fully closed, with both latches engaged.
22_VF_OM_EN_USC_t.book Page 50
Page 61 of 268
GETTING TO KNOW YOUR INSTRUMENT PANEL59
WARNING LIGHTS AND MESSAGES
The warning/indicator lights will illuminate in the
instrument panel together with a dedicated message
and/or acoustic signal when applicable. These
indications are indicative and precautionary and as
such must not be considered as exhaustive and/or
alternative to the information contained in the Owner’s
Manual, which you are advised to read carefully in all
cases. Always refer to the information in this chapter in
the event of a failure indication. All active telltales will
display first if applicable. The system check menu may
appear different based upon equipment options and
current vehicle status. Some telltales are optional and
may not appear.
RED WARNING LIGHTS
Air Bag Warning Light
This light will turn on for four to eight seconds
as a bulb check when the ignition is placed in
the ON/RUN or MAR/ON/RUN position. If the
light is either not on during startup, stays on,
or turns on while driving, have the system inspected at
an authorized dealer as soon as possible. This light will
illuminate with a single chime when a fault with the
Air Bag Warning Light has been detected, it will stay
on until the fault is cleared. If the light comes on
intermittently or remains on while driving, have an
authorized dealer service the vehicle immediately.
Brake Warning Light
This warning light monitors various brake
functions, including brake fluid level and
parking brake application. If the brake
light turns on it may indicate that the
parking brake is applied, that the brake fluid level
is low, or that there is a problem with the Anti-Lock
Brake System reservoir.
If the light remains on when the parking brake has
been disengaged, and the fluid level is at the full
mark on the master cylinder reservoir, it indicates
a possible brake hydraulic system malfunction or
that a problem with the Brake Booster has been
detected by the Anti-Lock Brake System (ABS) /
Electronic Stability Control (ESC) system. In this
case, the light will remain on until the condition has
been corrected. If the problem is related to the
brake booster, the ABS pump will run when
applying the brake, and a brake pedal pulsation
may be felt during each stop.
The dual brake system provides a reserve braking
capacity in the event of a failure to a portion of the
hydraulic system. A leak in either half of the dual
brake system is indicated by the Brake Warning
Light, which will turn on when the brake fluid level
in the master cylinder has dropped below a
specified level.
The light will remain on until the cause is corrected.
NOTE:The light may flash momentarily during sharp
cornering maneuvers, which change fluid level
conditions. The vehicle should have service
performed, and the brake fluid level checked.
If brake failure is indicated, immediate repair is
necessary.
Vehicles equipped with the Anti-Lock Brake System
(ABS) are also equipped with Electronic Brake
Force Distribution (EBD). In the event of an EBD
failure, the Brake Warning Light will turn on along
with the ABS Light. Immediate repair to the ABS
system is required.
Operation of the Brake Warning Light can be
checked by turning the ignition switch from the OFF
position to the ON/RUN position. The light should
illuminate for approximately two seconds. The light
should then turn off unless the parking brake is
applied or a brake fault is detected. If the light does
not illuminate, have the light inspected by an
authorized dealer.
WARNING!
Driving a vehicle with the red brake light on is
dangerous. Part of the brake system may have
failed. It will take longer to stop the vehicle.
You could have a collision. Have the vehicle
checked immediately.
3
22_VF_OM_EN_USC_t.book Page 59